 Hlopes


Requirements
- Blender 4.1 or newer (needs the
layout.panel()API) - No external dependencies — everything it uses ships with Blender
Developed and tested on Blender 5.1. Other versions should work but have not been verified.
Install
- Download the add-on zip (or the standalone
.py— either works). - In Blender: Edit ▸ Preferences ▸ Add-ons.
- Click Install from Disk… (top-right dropdown in 4.2+, or the Install… button in 4.1).
- Pick the downloaded file.
- Tick the checkbox next to UV Scaler 9000 to enable it.
The panel appears in the 3D Viewport ▸ N-panel ▸ "9000 Toolkit" tab.
To update: install the new file over the old one, then restart Blender. The restart matters — Blender's viewport draw handlers can't be enumerated by the API, so an add-on reloaded in place can leave the old version's overlay still drawing. Reloading also resets the panel's settings to their defaults, so note your Target/Min TD before updating if you care about them.
Quick Start
- Select your mesh (or all the meshes of one model). Make sure it's UV unwrapped.
- Open the 9000 Toolkit tab in the N-panel (press
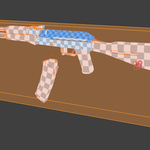
Nin the viewport). - Turn on Live Edit Mode — this shows the checker + density overlay and locks the tools to what you have selected.
- Set Texture size and UV Channel, then Target TD and Min TD (px/cm).
- Click Paint, then drag over the parts of the model that need full density. Right-click or
Escwhen done. - Click Pack. Selecting more than one mesh packs them together, sharing one tile, rather than each claiming the whole UV space.
If the densities you asked for don't fit the texture, a banner appears across the top of the viewport saying what was actually achieved and what to change.
The Density Model
| Setting | Meaning |
|---|---|
| Target TD | What Target-painted shells aim for. Nothing ever goes above it. |
| Falloff | How soft the transition is. 0 = sharp cutoff at the painted edge, 1 = smooth gradient across the whole model. |
| Min TD | The floor. Occluded shells pin here, and the falloff never drops below it. |
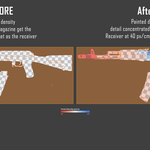
With nothing painted, every shell sits at Target TD. With Target painted somewhere, those shells hold Target TD and every other shell grades down toward Min TD with distance from the nearest painted area — freeing tile space so the painted areas can actually reach Target TD once packed.
The 75% / 50% / 25% brushes are different — they force a shell to that exact fraction of Target TD regardless of distance, for areas you want held at a set density.
Panel Reference
- Live Edit Mode — shows the overlay and locks the tools to the meshes selected right now.
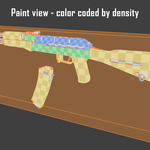
- Paint Density — brush Target/75%/50%/25% density onto shells, or erase; Show Paint Colors tints shells by density.
- Live UV Scaling — re-applies scaling automatically as density settings change, plus checker density, UV border, and cursor readout options.
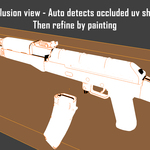
- Occlusion — pins hidden shells to Min TD via hemisphere ray-sampling, with a debug view and manual black/white brushes for hand-fixing.
- Lock Overlapping — merges islands whose UVs coincide exactly into one unit so intentional stacks can't drift apart.
- Pack — repacks UV islands into the tile at their assigned densities; a small badge shows progress while a pack is in flight.
Have questions about this product?
Login to message
| Published | about 2 months ago |
| Blender Version | 4.1 - 5.1 |
| Extension Type | N/A |
| License | GPL |
Discover more products like this
Asset Optimization uv mapping Texturing props weapons uv unwrapping texel density uv packing occlusion game assets