 Mega 3D
Mega 3D Vehicle Generator – User Manual
Version 1.1.0 · Published by Mega3D · Nov 17, 2026
1. Introduction
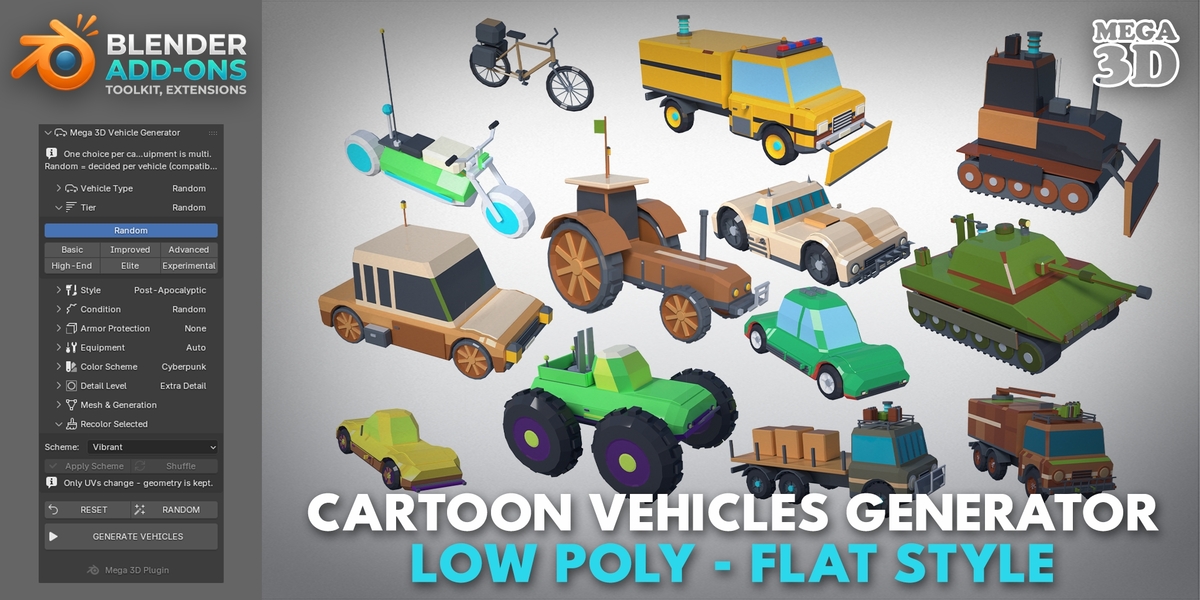
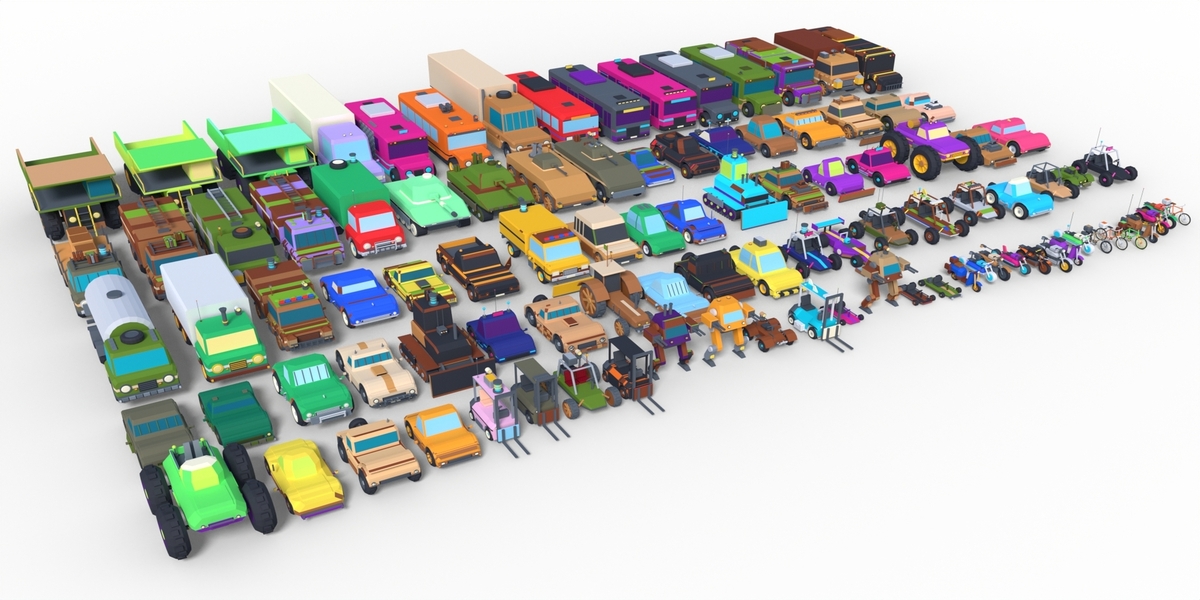
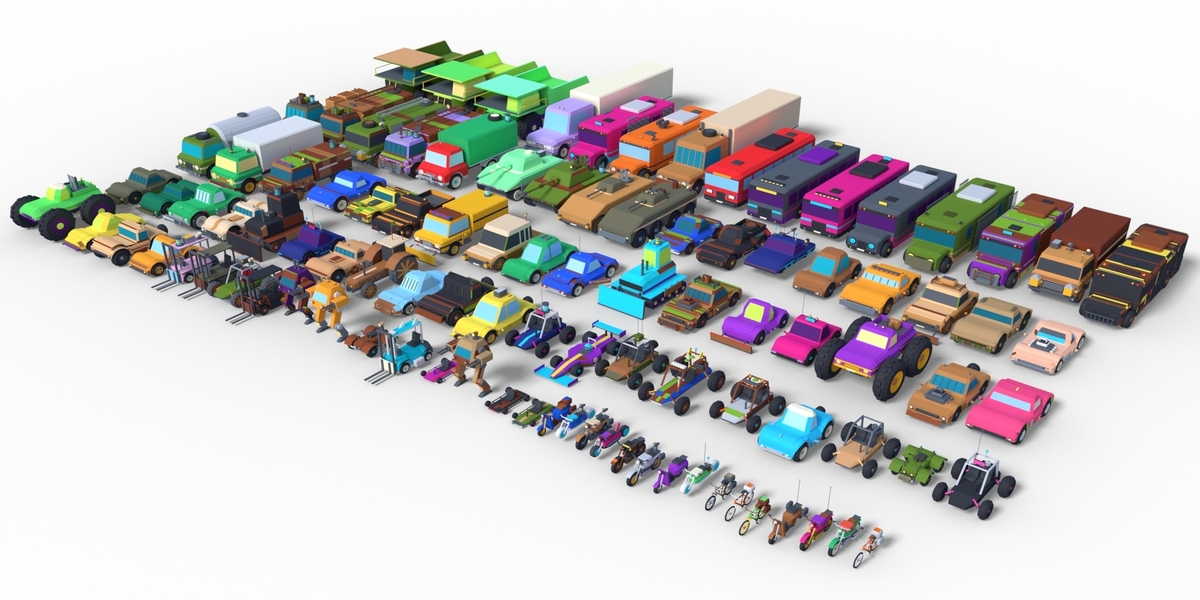
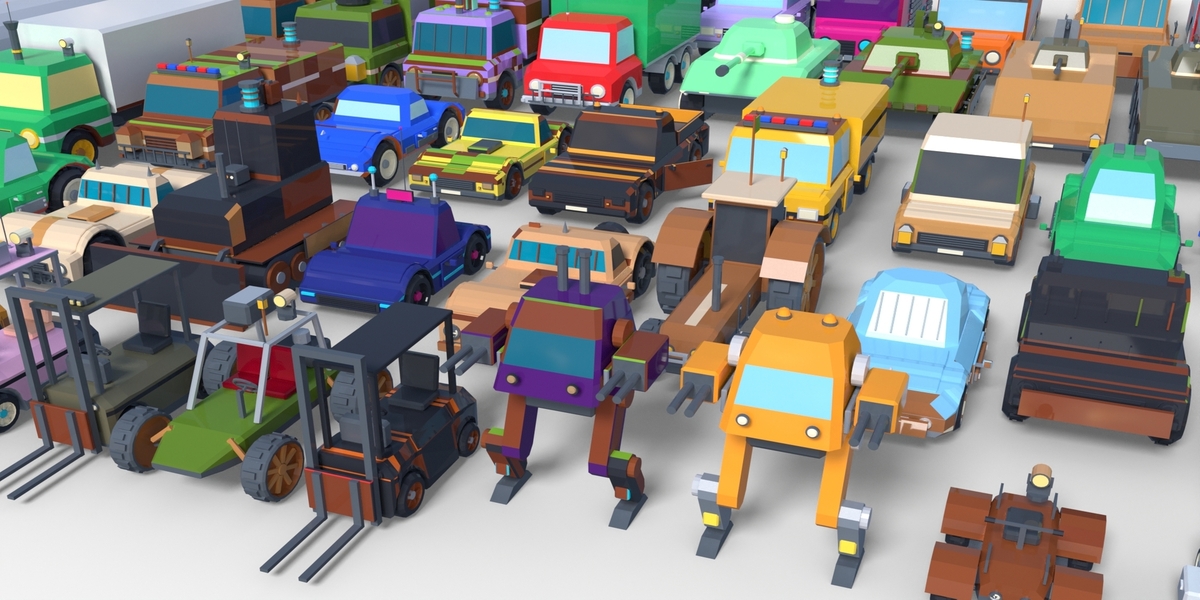
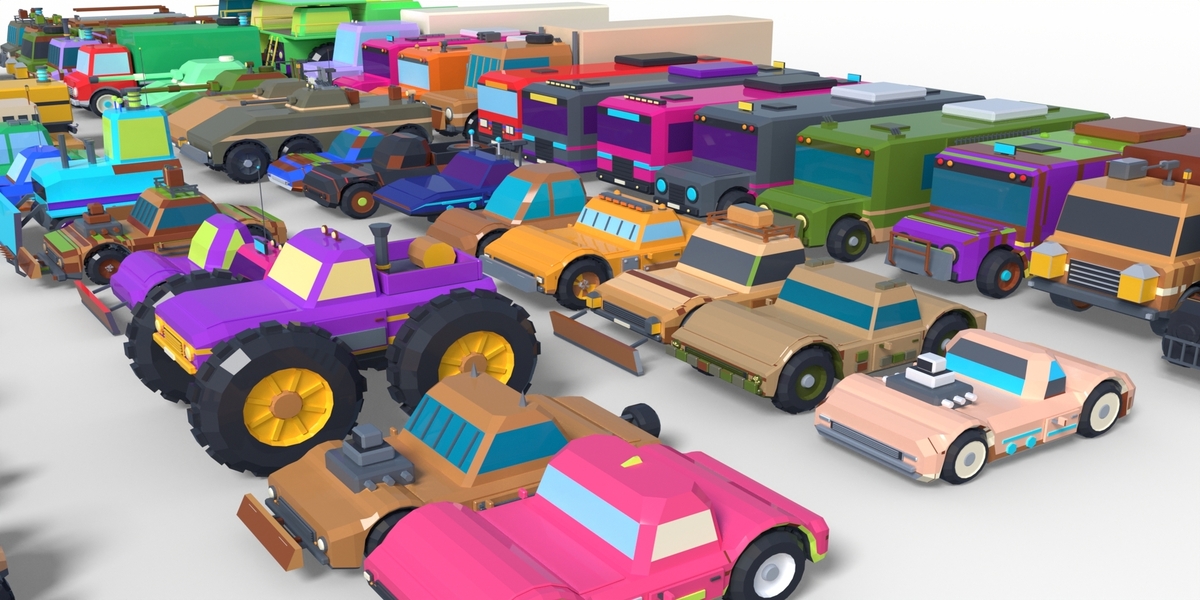
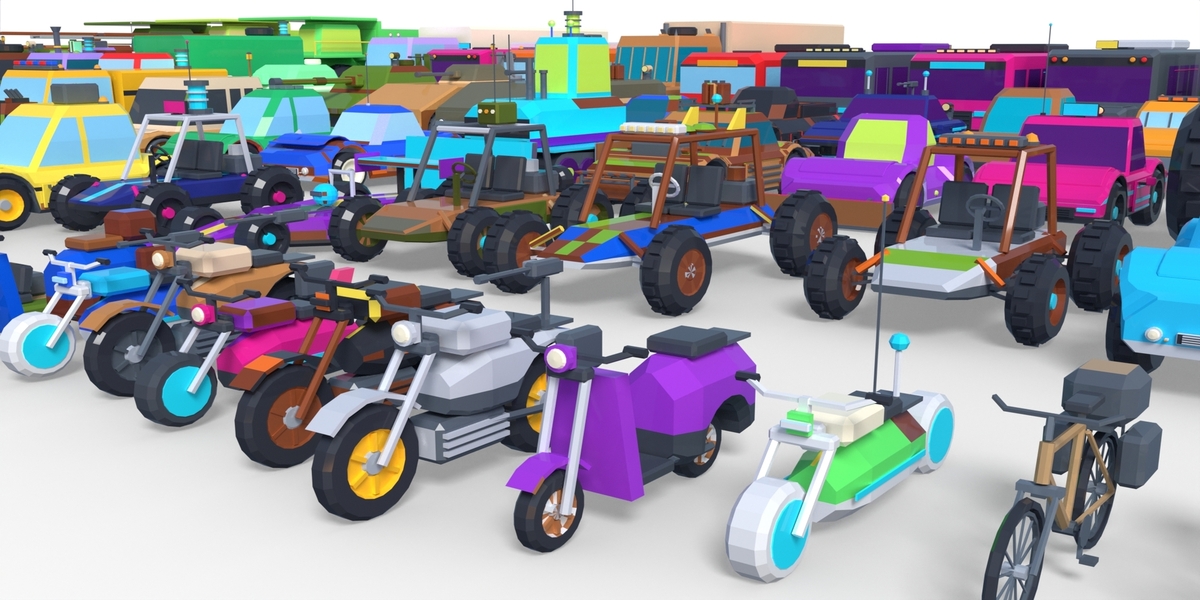
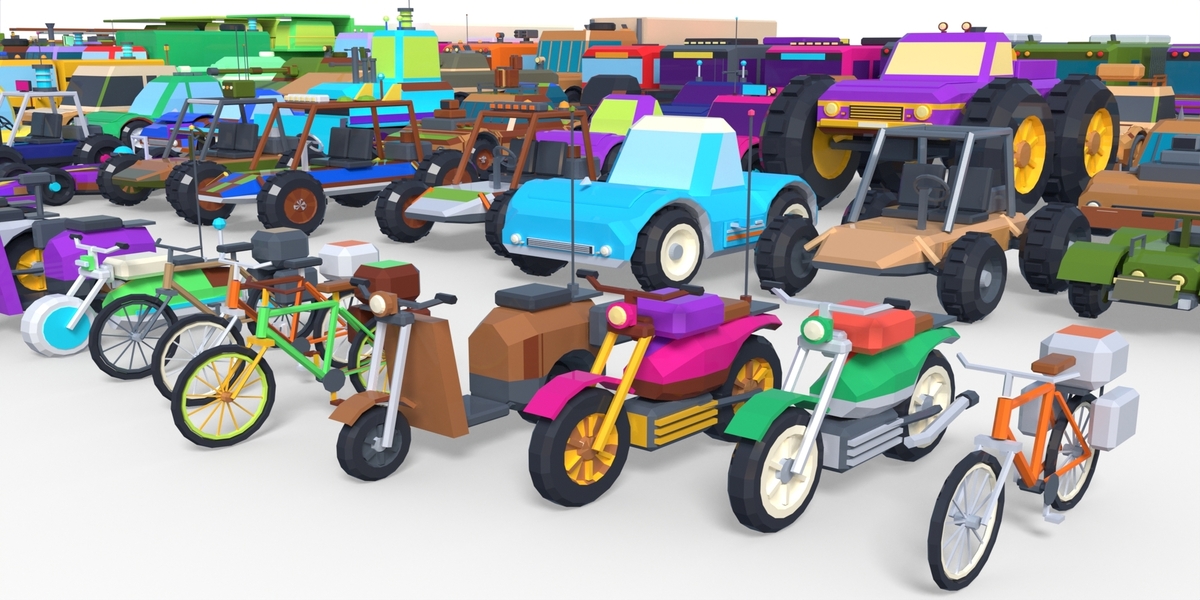
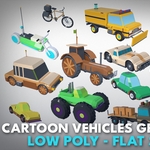
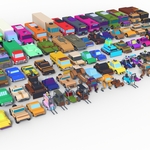
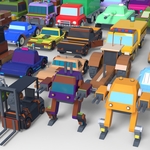
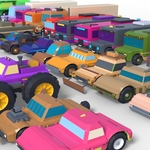
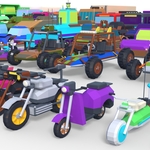
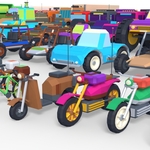
Mega 3D Vehicle Generator is a Blender add-on that builds complete, game-ready cartoon vehicles in seconds, from a family car to a tank, a forklift or a walking mech. You choose the attributes, press one button, and get real editable mesh objects. Every vehicle is organized for rigging and shares one texture atlas and one material.
Key features
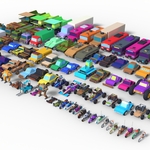
• 37 vehicle types across road, heavy, service, off-road, military, two-wheel and sci-fi groups.
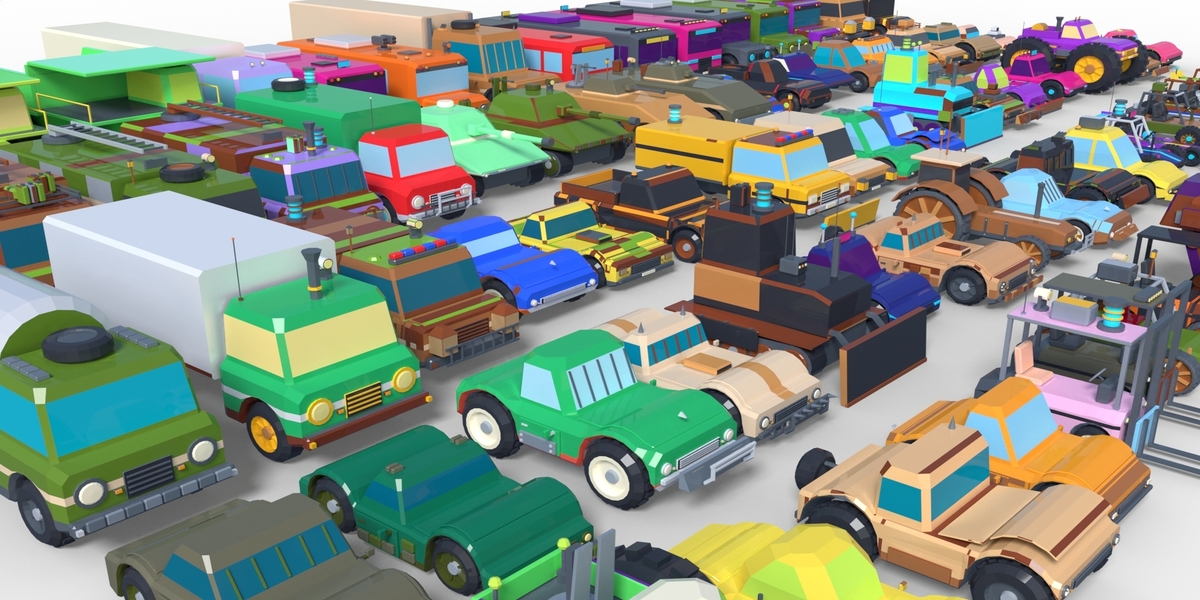
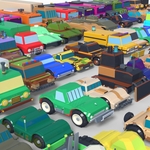
• A consistent cartoon art style: low-poly, flat-shaded, chunky proportions and bright, clearly separated colors.
• Attributes that change the shape, not only the color: Tier, Style, Condition, Armor Protection and 20 equipment items.
• One shared material and one 100-color texture atlas for every vehicle, ideal for draw-call batching on mobile.
• Animation-ready hierarchy: wheels, doors, hoods, turrets, gun barrels, booms and legs are separate objects with correct pivots.
• Quad or triangle topology, single or batch generation, and recoloring without rebuilding geometry.
• Clean geometry: separate parts are placed so that they touch but never pass through each other.
Who it is for: game artists, indie developers and studios who need many cohesive stylized vehicles for mobile, casual, isometric or third-person games.
2. System Requirements
|
Item |
Requirement |
|
Blender |
3.6 LTS or newer (4.2+ installs as an Extension) |
|
Operating system |
Windows, macOS or Linux, any system Blender supports |
|
Memory |
8 GB RAM recommended for batches of 50+ vehicles |
|
Add-ons or libraries |
None; the add-on is pure Python |
|
Package file |
mega3d_vehicle_generator_v1.1.0.zip |
3. Installation
Install the .zip file directly; do not unzip it first.
Blender 4.2 and newer
1. Open Edit > Preferences > Get Extensions.
2. Click the drop-down arrow at the top right and choose Install from Disk.
3. Select mega3d_vehicle_generator_v1.1.0.zip and confirm. The extension is enabled automatically.
Blender 3.6 to 4.1
1. Open Edit > Preferences > Add-ons.
2. Click Install, select mega3d_vehicle_generator_v1.1.0.zip and click Install Add-on.
3. Enable the checkbox next to Add Mesh: Mega 3D Vehicle Generator.
Opening the tool: in the 3D Viewport, press N to show the sidebar and select the Mega 3D tab.
Updating: install the new .zip over the old one, then restart Blender. Your scene settings are kept.
Uninstalling: in Preferences, find Mega 3D Vehicle Generator, then click Uninstall (4.2+) or Remove (older versions). Vehicles already generated stay in your files as normal Blender objects.
4. Quick Start
Your first vehicle takes four steps.
1. Place the 3D cursor where the vehicle should appear (Shift + right-click).
2. In the Mega 3D tab, open Vehicle Type and click a type, for example Pickup Truck.
3. Optionally pick a Style, Tier and Condition. The defaults (Improved, Modern, Clean) already give a good result.
4. Click GENERATE VEHICLES at the bottom of the panel.
To make a batch, set Generation Mode to Multiple Vehicles, enter a Vehicle Quantity and click GENERATE VEHICLES again. For surprise combinations, click RANDOM first, then GENERATE VEHICLES.
Tip: every generation is one undo step, so Ctrl + Z removes the whole batch.
5. Interface Overview
The Mega 3D sidebar tab contains one main panel with collapsible sections, read from top to bottom. Each section header shows its current choice, so you can check a configuration with all sections collapsed.
|
Section |
What you set |
Choice type |
|
Vehicle Type |
Which vehicle to build |
Single choice + Random |
|
Tier |
Design complexity and equipment level |
Single choice + Random |
|
Style |
Shape language and decoration theme |
Single choice + Random |
|
Condition |
Wear, dirt, damage or modification |
Single choice + Random |
|
Armor Protection |
Protective structures |
Single choice + Random |
|
Equipment |
Accessories mounted on the vehicle |
Multiple choice + mode |
|
Color Scheme |
How atlas colors are distributed |
Single choice + Match Style |
|
Detail Level |
Amount of geometry and small details |
Single choice + Random |
|
Mesh & Generation |
Topology, single or batch, seed, advanced options |
Settings |
|
Recolor Selected |
New colors for vehicles already in the scene |
Tools |
The three action buttons at the bottom are RESET (restore defaults), RANDOM (pick a random compatible configuration) and GENERATE VEHICLES. The Mega 3D Plugin brand line sits below them.
6. Vehicle Attributes
Vehicle Type, Tier, Style, Condition, Armor Protection, Color Scheme and Detail Level each take exactly one choice. A vehicle can only be one type and one style, so a single choice keeps every result coherent.
The Random option. Each of these categories starts with a Random button. Random is decided again for every vehicle, so a batch stays varied, and it only ever picks values that are compatible with that vehicle. Choosing a fixed value instead applies it to every vehicle in the batch.
6.1 Vehicle Type
The 37 types are grouped as follows.
|
Group |
Types |
|
Road |
Car, Sports Car, Muscle Car, Sedan, SUV, Pickup Truck, Van, Minivan, Racing Car |
|
Heavy |
Heavy Truck, Semi Truck, Bus, School Bus, Mining Truck, Tractor, Construction Vehicle, Forklift, Excavator |
|
Service |
Ambulance, Police Car, Fire Truck |
|
Off-Road |
Monster Truck, Jeep, Off-Road Vehicle, ATV, Buggy, Dune Buggy, Go-Kart |
|
Military |
Military Vehicle, Armored Vehicle, Tank |
|
Two-Wheel |
Motorcycle, Scooter, Bicycle |
|
Sci-Fi |
Hover Car, Hover Bike, Mech Vehicle |
With Random, a batch cycles through all 37 types before any type repeats.
6.2 Tier
Tier sets how sophisticated and well equipped the vehicle is.
|
Tier |
Effect |
|
Basic |
Plain steel wheels, simple trim, 0 to 1 equipment items |
|
Improved |
A few upgrades, 1 to 2 items |
|
Advanced |
Alloy rims, extra lights, 1 to 3 items |
|
High-End |
Chrome trim, fog lamps, 2 to 4 items |
|
Elite |
Body kit (side skirts, rear diffuser), 3 to 5 items |
|
Experimental |
Prototype tech: glowing energy core, energy strips and hubs, 3 to 5 items |
Item counts apply when Equipment is set to Auto or Random Subset.
6.3 Style
Style controls shape language, materials and decoration.
|
Style |
Look |
|
Modern |
Clean contemporary shapes, rectangular lights |
|
Classic |
Rounded retro forms, chrome, whitewall tires, round lights |
|
Medieval |
Wooden planks, iron straps, lanterns, banners, wooden spoked wheels, canvas tops |
|
Steampunk |
Brass pipes and gauges, chimneys, boilers, brass spoked wheels |
|
Futuristic |
Smooth bubbly forms, slit lights, energy light strips, fins |
|
Cyberpunk |
Sharp angular wedges, neon underglow, neon signs, dark tones |
|
Post-Apocalyptic |
Scrap plates, spikes, window bars, exposed engines, spare scrap tires |
|
Survival |
Snorkel, jerrycans, loaded racks, knobby tires |
|
Military |
Angular forms, roundel markings, jerrycans, small windows |
|
Industrial |
Hazard stripes, amber beacons, heavy bumpers |
|
Alien |
Very bulbous forms, glowing orbs, organic fins |
6.4 Condition
|
Condition |
Effect |
|
Clean |
Factory fresh |
|
Used |
Light scuffs on the lower body |
|
Dirty |
Mud and dirt on the lower body and rims |
|
Damaged |
Dents, rust spots, cracked glass, a door ajar |
|
Heavily Damaged |
Deeper dents, more rust, hood ajar, a missing bumper or spoiler |
|
Abandoned |
Faded paint, heavy rust, moss, flat tires |
|
Wrecked |
Burnt and crushed, missing hood and doors, dead lights |
|
Repaired |
Mismatched patch panels with bolts, taped glass |
|
Modified |
Lift kit, bigger and knobby tires, extra lights, decals |
Random condition favors drivable vehicles: Clean and Used appear most often, Wrecked and Abandoned least.
6.5 Armor Protection
|
Armor |
What is added |
|
None |
No added protection |
|
Light Armor |
Lower side skirts and a grille guard |
|
Heavy Armor |
Thick bolted side and door plates, a front plate, windshield bars |
|
Military Armor |
Angled appliqué plates, slat cages, smoke launchers |
|
Reactive Armor |
Rows of explosive reactive blocks on sides, front and roof |
|
Energy Shield |
Shield emitter pylons with glowing orbs and energy conduits |
Armor a vehicle cannot carry (for example any armor on a Bicycle) is disabled when that type is selected. With Vehicle Type set to Random, a vehicle that cannot carry the chosen armor receives None, and the status bar reports it. Random armor matches the vehicle: tanks and armored vehicles mostly get heavy, military or reactive armor, while Medieval, Steampunk and Classic styles never get energy shields.
6.6 Color Scheme
|
Scheme |
Colors |
|
Match Style (default) |
A scheme that suits each vehicle's style, for example Military colors for Military style |
|
Vibrant |
Bright, saturated, playful |
|
Pastel |
Soft and gentle |
|
Primary Colors |
Strong red, blue and yellow |
|
Complementary |
Contrasting pairs |
|
Analogous |
Neighbouring hues |
|
Monochrome |
Shades of one color |
|
Earth Tones |
Browns, greens, muted tones |
|
Military |
Olive, dark green, khaki |
|
Industrial |
Yellow, orange, gray, dark metal |
|
Cyberpunk |
Neon cyan, magenta, purple on dark |
|
Desert |
Sand, tan, beige, warm brown |
|
Random |
A balanced random palette |
The Random entry here builds a new balanced palette for each vehicle. It is a color scheme in its own right, not the per-vehicle Random used by other categories.
Keep Service Liveries (in Mesh & Generation) keeps school buses yellow and keeps ambulances, police cars and fire trucks recognizable. The chosen scheme still colors their accents.
6.7 Detail Level
|
Level |
Average faces per vehicle |
What changes |
|
Minimal |
about 1,200 |
Essential shapes, 8-sided wheels |
|
Low Detail |
about 1,600 |
Simple details |
|
Medium Detail |
about 1,800 |
Balanced; grille slats, mirrors, plates |
|
High Detail |
about 2,400 |
16-sided wheels, fog lamps, bolts, tread blocks |
|
Extra Detail |
about 2,800 |
Maximum detail, rivets, extra rack rails |
Face counts are averages across all vehicle types; large vehicles such as the Semi Truck reach about 7,000 faces at Extra Detail.
7. Equipment
Equipment is the only category with multiple choice, because a vehicle can carry several accessories at once. First choose an Equipment Mode, then check items if the mode uses them.
|
Mode |
Behavior |
Uses the checkboxes |
|
Auto (default) |
Each vehicle gets equipment that fits its type, style and tier, for example a light bar on a police car or a winch on an off-roader |
No |
|
Random Subset |
Each vehicle gets a random mix of the checked items, sized by its tier (at least one) |
Yes |
|
All Checked |
Each vehicle gets every checked item it can carry |
Yes |
|
None |
No equipment |
No |
Available items: Roof Rack, Cargo Box, Spare Tire, Front Bumper, Bull Bar, Winch, Light Bar, Searchlight, Antenna, Radio Equipment, Fuel Tank, Storage Box, Weapon Mount, Machine Gun, Rocket Launcher, Snow Plow, Tow Hook, Reinforced Doors, Exhaust Pipes, Spoiler.
• The All and None buttons check every compatible item or clear the list.
• Items the selected vehicle type cannot carry are dimmed and skipped during generation.
• If Random Subset or All Checked is active with nothing checked, a warning appears and vehicles are generated without equipment.
• Each item has a fixed mounting place: front (bumper, winch, bull bar, snow plow), rear (tow hook, spare tire, exhaust), roof or deck (rack, cargo box, light bar, weapons, antenna) or flat side panels (fuel tank, storage box). When there is no free space, the item is skipped rather than overlapping other parts, and the status bar names it.
• Weapons placed behind a cab are raised on a taller post so the barrel clears the roof.
• The Weapon Mount ring rotates; a Machine Gun on it is parented so it turns with the ring and pitches on its own pivot.
8. Mesh & Generation Settings
|
Setting |
Description |
Default |
|
Mesh Topology |
Quad Mesh (about 80% quads; small triangles at rounded corners and wheel centers) or Triangle Mesh (all triangles) |
Quad Mesh |
|
Generation Mode |
Single Vehicle or Multiple Vehicles |
Single Vehicle |
|
Vehicle Quantity |
Number of vehicles in a batch (1 to 200) |
6 |
|
Spacing |
Gap between vehicles in a batch, in meters |
1.5 m |
|
Seed |
The random seed used for the last or next generation |
1 |
|
New Seed Each Time |
When on, every click uses a fresh seed and writes it into Seed |
On |
|
Keep Service Liveries |
Keeps school bus, police, ambulance and fire truck colors |
On |
|
Forward Axis (Advanced) |
Direction the vehicles face: -Y, +Y, +X or -X |
-Y |
|
Scale (Advanced) |
Uniform size multiplier applied to the geometry |
1.0 |
|
Custom Atlas (Advanced) |
Optional replacement atlas image, see section 11 |
Empty |
Reproducing a result. Turn off New Seed Each Time, enter the seed shown in the status bar and generate again with the same settings. You get exactly the same vehicles.
Batches. Vehicles are laid out in a grid from the 3D cursor, spaced by their real size plus Spacing. Within a batch, duplicates are avoided. When every category is fixed, all vehicles share their attributes but still differ in proportions, color placement and small details.
Scale. At Scale 1.0 one Blender unit equals one meter; a compact car is about 3.5 m long.
RESET restores: Car, Improved, Modern, Clean, Armor None, Equipment Auto, Match Style, Medium Detail, Quad Mesh, Single Vehicle.
RANDOM fills every category with one concrete, mutually compatible value and checks a few matching equipment items. Review the result in the panel, then click GENERATE VEHICLES.
9. Recoloring Generated Vehicles
Recolor Selected changes the colors of vehicles already in your scene by rewriting their atlas UVs. Geometry, hierarchy and rigging stay untouched.
1. Select any part of one or more generated vehicles.
2. Open Recolor Selected and choose a Scheme.
3. Click Apply Scheme to use that scheme, or Shuffle to try a new color combination within the vehicle's current scheme.
You can recolor as often as you like; each step can be undone with Ctrl + Z.
10. Output Structure
Each vehicle is built as a tidy object hierarchy: one root empty, its static body, and group empties holding every movable part.

object hierarchy of a generated vehicle · typical groups
The hierarchy adapts to the vehicle: only groups and parts that exist are created, and other vehicles add groups such as Tracks, Thrusters, Legs or Trailer. Children of a moving part (a gun on a turret, a front wheel on a bike fork) are parented to it.
Naming and collections. The root is named M3D_<Type>_<number>, for example M3D_Car_001, and its parts carry the same prefix, for example Car_001_Wheel_FL. Each vehicle gets its own collection inside the Mega 3D Vehicles collection.
Pivots and motion properties. Every movable part has its origin at its real pivot, and a custom property names the axis it moves on.
|
Part |
Pivot |
Custom property |
|
Wheels, road wheels |
Wheel center |
m3d_spin_axis (front wheels also m3d_steer_axis) |
|
Side doors |
Hinge line at the front edge |
m3d_hinge_axis |
|
Rear barn doors (trucks) |
Outer edge |
m3d_hinge_axis |
|
Hood, Trunk, Tailgate, Dump_Bed, Stop_Arm |
Hinge edge |
m3d_hinge_axis |
|
Turret, Weapon_Mount, Upper_Body, Torso, Ladder_Turntable, Trailer_Body |
Rotation center |
m3d_yaw_axis |
|
Gun_Barrel, Machine_Gun, Rocket_Pod, Boom, Stick, Bucket, Ladder, legs, Blade |
Joint or trunnion |
m3d_pitch_axis |
|
Steering_Wheel, Pedal_Crank |
Hub |
m3d_spin_axis |
|
Fork_Handlebar (two-wheelers), Handlebar (ATV) |
Steering head |
m3d_steer_axis |
|
Mast (forklift) |
Mast base |
m3d_tilt_axis |
|
Fork_Carriage (forklift) |
Carriage base |
m3d_slide_axis |
|
Thrusters (hover vehicles) |
Mount point |
m3d_tilt_axis or m3d_spin_axis |
Vehicle information. The root object stores the generation settings as custom properties: m3d_type, m3d_tier, m3d_style, m3d_condition, m3d_armor, m3d_detail, m3d_scheme, m3d_seed and m3d_equipment. You can read them in Object Properties > Custom Properties.
11. Texture Atlas and Shared Material
Every vehicle uses one material, M3D_Vehicle_Atlas, and one image, the bundled 1024 x 1024 atlas of 100 colors in a 10 x 10 grid. A whole fleet can therefore render in very few draw calls.
• No color bleeding. Each face maps to a small UV polygon in the middle of one color cell. The nearest cell border is over 30 pixels away, so colors stay clean with texture filtering and mipmaps down to 64 x 64.
• Flat shading. All faces are flat-shaded and the image uses Closest interpolation, giving crisp low-poly color blocks.
• Color roles. Each face stores its role (body, glass, tire, rim, light and so on) in an integer face attribute named m3d_role. Recoloring reads this attribute, so it works on any generated vehicle at any time.
• Custom atlas. In Mesh & Generation > Advanced, set Custom Atlas to your own image. It must use the same 10 x 10 layout and cell positions as the bundled atlas. Vehicles generated afterwards use your image; the cell assignments stay the same.
• Editing the material. You may change the shader (for example roughness or an emission mask). Keep the image texture node named M3D_Atlas so the add-on can find it.
12. Exporting and Animation
Exporting to a game engine
1. Select the vehicle's root object (M3D_<Type>_<number>), then right-click > Select Hierarchy.
2. Choose File > Export > FBX (or glTF 2.0) and enable Selected Objects.
3. Keep the exporter's default axis settings unless your engine pipeline specifies otherwise. To change the direction vehicles face, use Forward Axis in the add-on's Advanced settings before generating.
4. Import the atlas image once in your engine and assign it to one shared material for all vehicles.
For a whole batch, select all roots and their hierarchies, or export the Mega 3D Vehicles collection.
Animating and rigging
• Wheels: rotate on the axis stored in the wheel's m3d_spin_axis property. Front wheels also carry m3d_steer_axis for steering.
• Doors and lids: rotate on m3d_hinge_axis. The origin already sits on the hinge line.
• Turrets, weapon mounts, excavator upper bodies and mech torsos: rotate on m3d_yaw_axis. Their barrels, booms and arms are children and follow automatically.
• Barrels, booms, sticks, buckets, legs: rotate on m3d_pitch_axis around their joint.
• Motorcycles and bicycles: the front wheel is a child of Fork_Handlebar, so steering the fork turns the wheel too.
You can drive these parts directly with keyframes, or attach them to bones with Child Of constraints. No parts need to be separated by hand.
13. Compatibility Reference
Types not listed below accept all 20 equipment items and all six armor options. Incompatible options are greyed out in the panel and skipped during generation.
|
Vehicle type |
Equipment allowed |
Armor allowed |
|
Bicycle |
Storage Box, Cargo Box, Antenna |
None |
|
Scooter |
Storage Box, Cargo Box, Antenna, Searchlight, Front Bumper, Exhaust Pipes |
None, Light |
|
Motorcycle |
Storage Box, Cargo Box, Antenna, Exhaust Pipes, Searchlight, Front Bumper, Machine Gun, Weapon Mount, Fuel Tank, Spoiler |
None, Light, Energy Shield |
|
Hover Bike |
Storage Box, Cargo Box, Antenna, Searchlight, Machine Gun, Weapon Mount, Rocket Launcher, Spoiler, Exhaust Pipes, Fuel Tank |
None, Light, Energy Shield |
|
Go-Kart |
Spoiler, Exhaust Pipes, Antenna, Front Bumper, Light Bar, Machine Gun, Weapon Mount |
None, Light, Energy Shield |
|
Forklift |
Light Bar, Searchlight, Antenna, Storage Box, Tow Hook, Exhaust Pipes, Front Bumper |
None, Light, Heavy |
|
Racing Car |
Spoiler, Exhaust Pipes, Antenna, Weapon Mount, Machine Gun, Rocket Launcher, Light Bar, Front Bumper |
All |
|
ATV |
All except Roof Rack, Spare Tire, Radio Equipment, Rocket Launcher, Reinforced Doors, Spoiler |
All |
|
Tank |
Weapon Mount, Machine Gun, Rocket Launcher, Searchlight, Antenna, Radio Equipment, Storage Box, Fuel Tank, Snow Plow, Tow Hook, Light Bar, Exhaust Pipes |
All |
|
Mech Vehicle |
Weapon Mount, Machine Gun, Rocket Launcher, Searchlight, Antenna, Radio Equipment, Storage Box, Fuel Tank, Light Bar, Exhaust Pipes |
All |
|
Excavator |
Light Bar, Searchlight, Antenna, Radio Equipment, Storage Box, Fuel Tank, Exhaust Pipes, Tow Hook, Machine Gun, Weapon Mount |
All |
|
Construction Vehicle |
As Excavator, plus Roof Rack |
All |
|
Sports Car |
All except Snow Plow, Winch, Bull Bar, Roof Rack |
All |
|
Muscle Car |
All except Snow Plow |
All |
|
Hover Car |
All except Snow Plow, Spare Tire, Winch, Tow Hook |
All |
|
Buggy, Dune Buggy |
All except Reinforced Doors, Snow Plow, Cargo Box |
All |
|
Tractor |
All except Spoiler, Reinforced Doors, Roof Rack, Cargo Box |
All |
|
Mining Truck |
All except Spoiler, Roof Rack, Cargo Box, Snow Plow |
All |
|
Bus, School Bus |
All except Spoiler, Snow Plow |
All |
Even an allowed item is skipped if the particular vehicle has no free place for it, for example a roof rack on a car whose roof is too short. The status bar lists skipped items after each generation.
14. Troubleshooting and FAQ
|
Problem |
Cause |
Solution |
|
The Mega 3D tab does not appear |
Add-on not enabled, or sidebar hidden |
Enable it in Preferences, then press N in the 3D Viewport |
|
Vehicles look gray or untextured |
Viewport is in Solid mode with default coloring |
Switch to Material Preview, or set Solid shading Color to Texture |
|
Vehicles appear pink |
The atlas image file cannot be found |
Reinstall the add-on, or set Custom Atlas to the image's location |
|
Some selected equipment is missing |
The item is incompatible with the type, or there is no free space |
Check the status bar message and section 13 |
|
My chosen armor was replaced by None |
The vehicle type cannot carry that armor |
Choose a compatible armor or another vehicle type |
|
Batches look too similar |
All categories are fixed |
Set one or more categories to Random |
|
Generation is slow |
Large batch at Extra Detail |
Lower Detail Level or Vehicle Quantity |
|
Object names end in .001 |
Another object with the same name already exists |
Normal Blender behavior; each vehicle also gets its own numbered prefix |
Can I edit a generated vehicle? Yes. Every part is a normal mesh object. If you add new faces, give them atlas UVs inside a color cell to keep the single-material workflow.
Do settings travel with my .blend file? Yes. All panel settings are stored in the scene.
Will two people get the same vehicle? Yes, if they use the same add-on version, settings and seed.
Can I use the vehicles in commercial games? See the license terms included with your purchase (section 15).
15. Support, License and Version History
Support. Contact Mega3D support through the store page where you purchased the product. Please include your Blender version, the add-on version, the seed and a screenshot of the panel settings.
License. The add-on code is distributed under the GNU General Public License v3.0 or later, as required for Blender add-ons. Terms for using generated models and the bundled texture atlas in your projects are given in the license agreement supplied with your purchase.
Version history
|
Version |
Changes |
|
1.1.0 |
Single-choice categories with a per-vehicle Random option; Match Style color scheme; four Equipment modes (Auto, Random Subset, All Checked, None); smarter random armor; doors stay closed when side armor is fitted |
|
1.0.0 |
First release: 37 vehicle types, tiers, styles, conditions, armor, 20 equipment items, shared atlas material, recoloring, animation-ready hierarchy |
© 2026 Mega3D. All rights reserved.
Have questions about this product?
Login to message
| Published | about 15 hours ago |
| Blender Version | 4.1 - 5.3 |
| Extension Type | N/A |
| Render Engine Used | Blender-Internal, Blender-Game-Engine, Cycles, Eevee |
| License | GPL |
