Vse MarkIt - Parametric Shape Annotations & Overlays for Blender's Video Editor
 FTW3DForge
in VSE


VSE MarkIt — User Documentation
**Version 1.3.0** | Blender 5.0+ | FTW 3D FORGE
Table of Contents
1. Installation
2. Getting Started
3. Shape Types
4. Shape Properties
5. Custom Shapes (Grease Pencil)
6. Shape Library
7. Animation
8. Preview Settings
9. Tips & Troubleshooting
1. Installation
1. Download the `.zip` extension file.
2. In Blender, go to **Edit → Preferences → Get Extensions** (or **Add-ons** in older versions).
3. Click **Install from Disk** and select the downloaded `.zip`.
4. Enable the addon if it doesn't activate automatically.
The MarkIt panel appears in the **Sequencer sidebar** (press `N` to open it).
2. Getting Started
Adding Your First Shape
1. Open a project in Blender and switch to the **Video Sequencer** workspace.
2. Add a video or image strip to your timeline.
3. Select the strip where you want the shape to appear.
4. Open the sidebar (`N`) and find the **VSE MarkIt** panel.
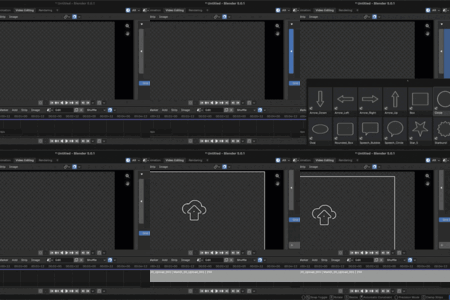
5. Choose a shape type from the dropdown (Rectangle, Ellipse, Line, etc.).
6. Click **Add Shape**.
A new scene strip is created on the channel above your selected strip. This scene strip contains a Grease Pencil object that renders as an overlay on your video.
How It Works
Each MarkIt shape lives in its own Blender scene. When you add a shape, the addon:
- Creates a new scene with a camera and transparent background.
- Adds a Grease Pencil object with the chosen shape.
- Places the scene as a strip on your VSE timeline.
Because shapes are scene strips, you can trim, move, duplicate, and cut them like any other strip.
Selecting and Editing Shapes
When you select a MarkIt scene strip on the timeline, the panel loads its settings automatically. Any changes you make in the panel update the shape in real time.
The **Edit Mode** toggle at the top of the panel activates handle dragging for interactive positioning (lines, arrows, and offset adjustments).
3. Shape Types
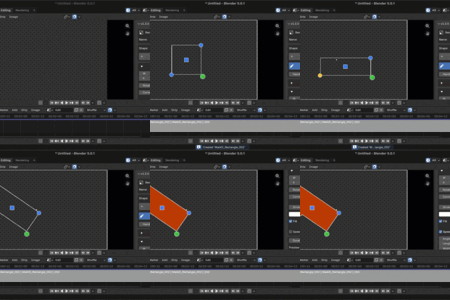
Rectangle
A rectangular shape with optional rounded corners.
- **Width / Height** — Dimensions in pixels.
- **Corner Radius** — Set to 0 for sharp corners, increase for rounded corners.
- **Offset X / Y** — Move the shape relative to the center of the frame.
- **Rotation** — Rotate in radians.
- **Speech Tail** — Enable to turn the rectangle into a speech bubble (see below).
Ellipse
A circular or oval shape.
- **Width / Height** — Equal values produce a circle; different values produce an oval.
- All other properties work the same as Rectangle.
- **Speech Tail** — Works on ellipses too, creating a round speech bubble.
Speech Bubble (Tail Option)
Available on both Rectangle and Ellipse shapes when you enable **Use Speech Tail**.
- **Tail Angle** — Direction the tail points (in degrees, 0 = right, 90 = up, 180 = left, 270 = down).
- **Tail Distance** — How far the tail tip extends from the shape.
- **Tail Width** — How wide the base of the tail is.
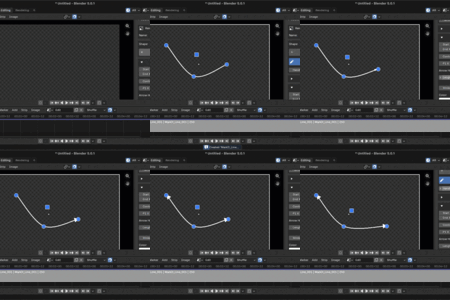
Line
A curved line with optional arrowheads and control points.
- **Inner Points** — Number of curve control points (0–3). More points allow more complex curves.
- **Arrow Mode** — None, End only, Start only, or Both ends.
- **Arrow Head Length / Width** — Size of the arrowhead.
In Edit Mode, you can drag the start, end, and curve control points directly in the preview.
Arrow (Thick Arrow)
A solid arrow shape (like the directional arrows you see on road signs).
- **Length** — Total length of the arrow.
- **Body Width** — Width of the arrow shaft.
- **Head Width** — Width of the arrowhead.
- **Head Length** — Length of the arrowhead portion.
- **Rotation** — Point the arrow in any direction.
Polygon
A regular polygon with a configurable number of sides.
- **Sides** — Number of sides (3 = triangle, 4 = square, 5 = pentagon, 6 = hexagon, etc.).
- **Radius** — Distance from center to vertex.
- **Rotation** — Rotate the shape.
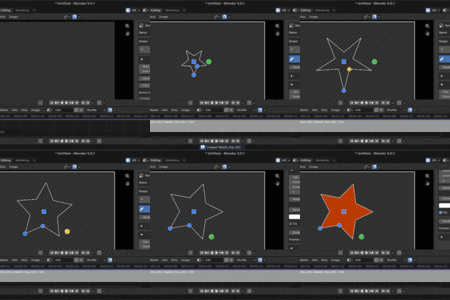
Star
A star shape with configurable tips and proportions.
- **Tips** — Number of star points.
- **Outer Radius** — Distance to the tip of each point.
- **Inner Radius** — Distance to the inner notch between points. Small values create spiky stars; larger values create chunky stars.
- **Rotation** — Rotate the star.
Custom
An empty Grease Pencil scene for freehand drawing. See Section 5 for details.
4. Shape Properties
These properties are shared across all parametric shapes.
Stroke
- **Stroke Width** — Thickness of the outline in pixels.
- **Stroke Color** — RGBA color picker for the outline. The alpha channel controls opacity.
Fill
- **Use Fill** — Toggle fill on or off.
- **Fill Color** — RGBA color picker for the interior. Supports semi-transparent fills.
Custom Scene Name
Optional. If set, the scene strip will be named `MarkIt_` instead of the auto-generated name like `MarkIt_Rectangle_001`.
Duration
Controls how many frames the shape strip spans. You can also trim the strip manually on the timeline.
Preview Mode
Controls how the VSE renders MarkIt shapes in the preview window.
- **Solid** — Fastest, but doesn't render Grease Pencil fills or gradients.
- **Material** — Good balance between speed and quality.
- **Rendered** — Full EEVEE render. Slowest, but shows everything correctly including gradients and custom GP materials.
For parametric shapes with simple stroke and fill, Solid mode is usually sufficient. For custom shapes with gradients or blend modes, use Rendered.
5. Custom Shapes (Grease Pencil)
Custom shapes let you draw anything using Blender's full Grease Pencil toolset.
Creating a Custom Shape
1. Set the shape type dropdown to **Custom**.
2. Click **Add Shape** (or add from a library preset).
3. Click **Edit Custom GP Scene** in the panel.
You are now in the Grease Pencil scene with a full drawing workspace.
Drawing
Use any Grease Pencil tools: draw freehand, use shapes, add fills with solid colors or gradients, work with multiple layers and materials. Everything that works in Grease Pencil works here.
The camera is pre-configured to match your project resolution. Draw within the camera frame area.
Returning to the VSE
Click **Return to VSE** in the 3D Viewport sidebar panel (or header). Your drawing now appears as an overlay on the timeline.
Important Notes
- Custom shapes render through EEVEE, so set Preview Mode to **Rendered** or **Material** to see fills and gradients in the VSE preview.
- The addon uses **Standard** color space (not AgX) so colors appear vibrant and accurate.
- Custom shape materials are never overwritten by the addon — your gradients, blend modes, and layer setup are preserved.
6. Shape Library
The library provides a visual browser for saving, organizing, and reusing shapes.
Browsing Presets
1. Expand the **Library** section in the MarkIt panel.
2. The large preview shows the currently selected preset.
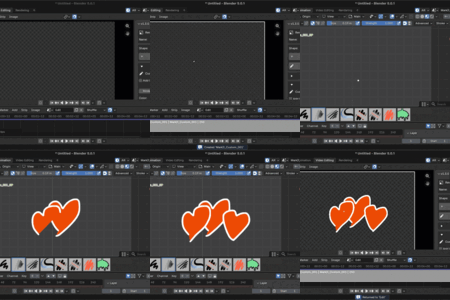
3. Click the preview image to open a **grid popup** showing all available presets.
4. Use the **left/right arrows** to navigate one preset at a time.
Bundled vs. User Presets
The addon ships with 40 presets (16 parametric shapes + 24 custom icons).
- **Parametric presets** have a small sliders icon (☰) in the bottom-left corner of their thumbnail. These are fully adjustable after you add them.
- **Custom presets** (emoji, social icons, logos) are Grease Pencil drawings. They appear as-is.
- **Bundled presets** are read-only and show a lock icon on their name.
- **User presets** can be renamed and deleted.
Adding a Preset to the Timeline
1. Select a preset in the library.
2. Click **Add Shape**.
3. The strip is named after the preset (e.g., `MarkIt_08_Bell`).
Saving Your Own Presets
1. Create and style a shape on the timeline.
2. With the shape strip selected, click **Save Current** in the library section.
3. Enter a name in the popup dialog.
For parametric shapes, the addon saves all parameters and generates a thumbnail with the sliders badge. For custom shapes, it saves the full Grease Pencil scene as a `.blend` file and renders a thumbnail.
Renaming Presets
Click the name field below the preview, type a new name, and press Enter. This works like any name field in Blender. Only user presets can be renamed.
Deleting Presets
Select a user preset and click **Delete**. A confirmation dialog appears. Bundled presets cannot be deleted.
Grid Size
The **Grid Size** slider controls how large the icons appear in the popup grid. Lower values show more columns (smaller icons), higher values show fewer columns (larger icons). Default is 5.0.
Export & Import
- **Export** — Bundles all user presets into a single `.zip` file. Useful for backup or sharing.
- **Import** — Extracts presets from a `.zip` into your library. Existing presets with the same name are skipped (no overwrites).
- **📁 Folder button** — Opens the user library folder in your file manager.
Library File Location
User presets are stored at:
- **macOS:** `~/Library/Application Support/Blender//config/markit_library/`
- **Windows:** `%APPDATA%\Blender Foundation\Blender\\config\markit_library\`
- **Linux:** `~/.config/blender//config/markit_library/`
Each preset consists of up to 3 files: `.json` (parameters), `.png` (thumbnail), and `.blend` (GP data for custom shapes).
Refreshing the Library
Click the **Refresh** button (🔄) to rescan the library folder and regenerate parametric thumbnails. Custom shape thumbnails are preserved.
7. Animation
MarkIt includes a keyframe-based animation system for animating shape properties over time.
Enabling Animation Mode
Toggle **Animation Mode** in the panel. When active, every parameter change you make creates a keyframe at the current frame.
Basic Animation Workflow
1. Enable Animation Mode.
2. Move the playhead to the frame where the animation should start.
3. Set your shape properties (position, size, etc.).
4. Move the playhead to the next keyframe position.
5. Change the properties to their new values.
6. Repeat as needed.
7. Disable Animation Mode when done.
Keyframe Navigation
- **◀ Previous Keyframe** — Jump to the previous keyframe.
- **▶ Next Keyframe** — Jump to the next keyframe.
Keyframe Management
- **Add Keyframe** — Manually insert a keyframe at the current frame with the current property values.
- **Remove Keyframe** — Delete the keyframe at the current frame.
- **Clear Animation** — Remove all keyframes and reset to a static shape.
Interpolation
**Interpolate Sequence** smooths the transitions between keyframes. This is useful after setting up keyframes to ensure fluid motion.
What Can Be Animated
All shape properties can be animated: position (offset X/Y), size (width/height), rotation, corner radius, line control points, and more.
8. Preview Settings
Preview Mode
Located in the Duration box of the MarkIt panel. Controls VSE preview rendering quality.
| Mode | Speed | GP Fills | Gradients | Best For |
| Solid | Fast | Yes | No | Parametric Shapes |
| Material | Medium | Yes | Partial | Parametric Shapes |
| Rendered | Slow | Yes | Yes | Custom Shapes |
Color Space
All MarkIt scenes use **Standard** color space instead of Blender's default AgX. This ensures colors appear vibrant and match what you set in the color picker. Existing scenes are automatically migrated on first edit.
9. Tips & Troubleshooting
Shape looks washed out or dull
Your scene may be using AgX color space. Select the MarkIt strip and change any property to trigger the automatic migration to Standard. Or set it manually: in the frame scene's Render Properties → Color Management → View Transform → Standard.
Custom shape fills don't appear in preview
Set Preview Mode to **Rendered** or **Material** in the MarkIt panel. The default Solid mode doesn't render Grease Pencil fills.
Library shows duplicates
This happens if you have user presets with the same names as bundled presets. Delete your user library folder (use the 📁 button to find it) and restart Blender.
Shape doesn't update when I change properties
Make sure the correct MarkIt scene strip is selected on the timeline. The panel only edits the active MarkIt strip.
Performance with many shapes
Each MarkIt shape is a separate scene. For complex timelines with many shapes, consider:
- Using Material preview mode instead of Rendered.
- Rendering final output rather than relying on real-time preview.
- Combining multiple elements into a single Custom shape where possible.
Transparent background
All MarkIt scenes render with a transparent background by default. They composite over whatever is below them on the timeline — no extra setup needed.
**© FTW 3D FORGE** — All rights reserved.
Have questions about this product?
Login to message
| Blender Extension Compatible | Yes |
| Dev Fund Contributor | |
| Published | 9 months ago |
| Blender Version | 5.0 |
| Extension Type | Add-on |
| License | GPL |
Discover more products like this
overlays Video editing tool vse speech bubbles parametric Grease Pencil sequencer Callout Animation annotation 2d-arrows