Yastg - Yet Another Stylized Terrain Generator
 Schirmer Labs
YASTerrain Documentation
YASTerrain – Yet Another Stylized Terrain Generator by SchirmerLabs, version 1.0.0
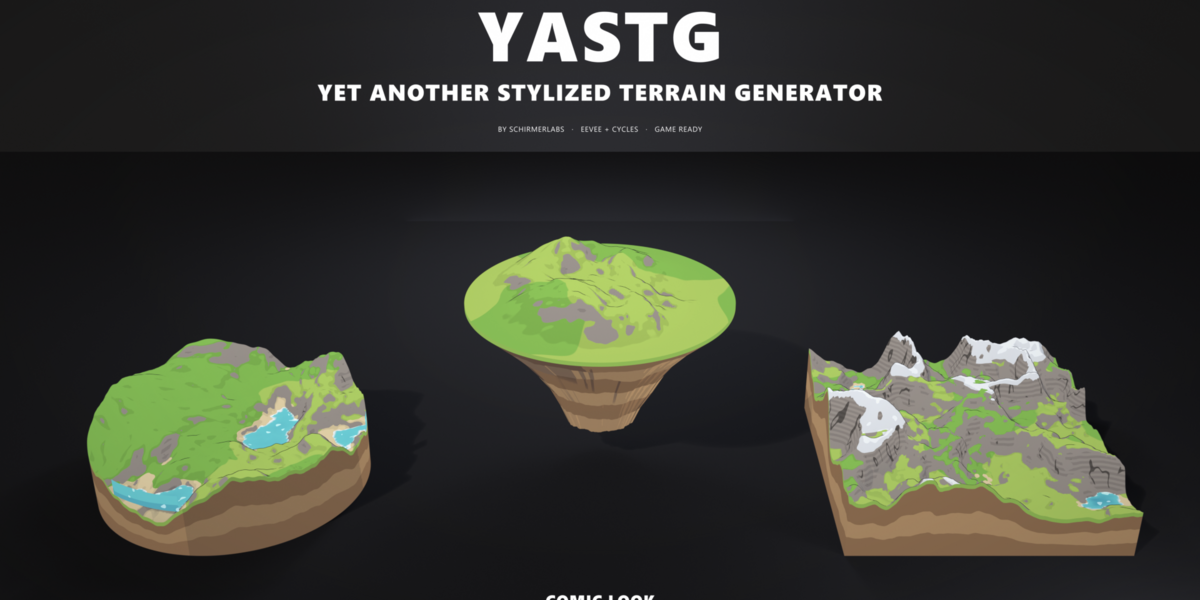
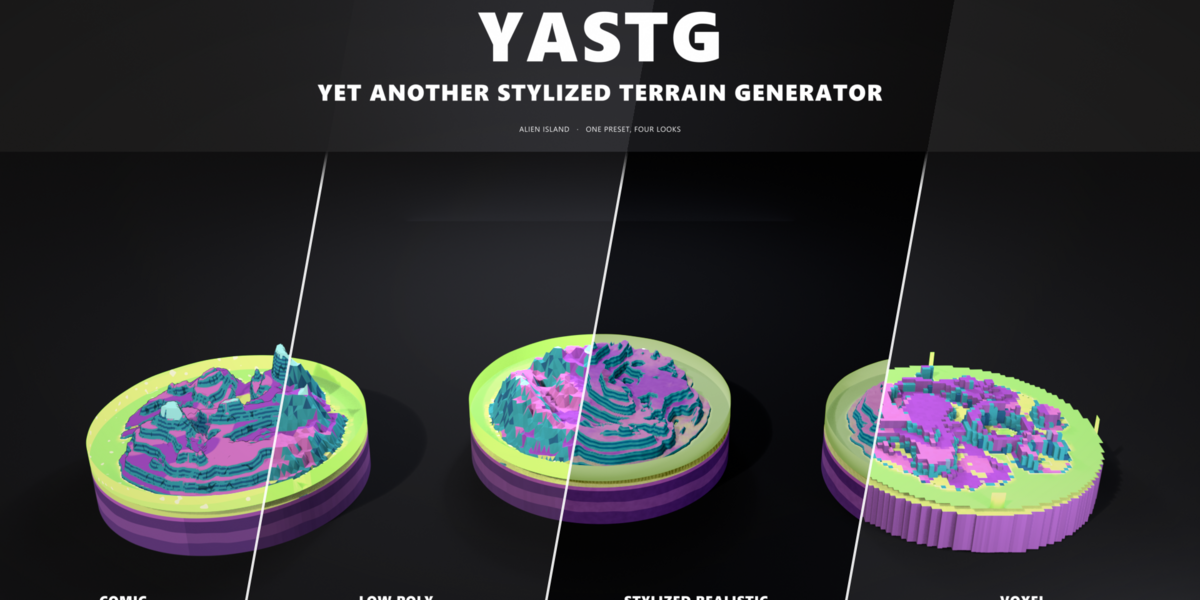
YASTerrain builds stylized terrains with Geometry Nodes: hills, mountains, islands, canyons, dunes, volcanoes, diorama tiles, floating islands and alien worlds, in a comic, low poly, stylized realistic or voxel look. Every terrain stays a live modifier, so you can change any setting at any time: run it through the seasons, sculpt and paint on it, pick from variants, join tiles into a world, and export it game ready as meshes or as a heightmap.
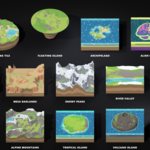
Contents: 1 Installation · 2 Your first terrain · 3 The sidebar · 4 Looks · 5 Presets · 6 Generator settings · 7 Paths, rivers and stamps · 8 Paint layers · 9 Own textures · 10 Height sculpt · 11 Seasons · 12 Variants · 13 Tile worlds · 14 Heightmap import · 15 Scatter · 16 Game export · 17 Heightmap export · 18 Troubleshooting · 19 License
1. Installation
- Download yasterrain-1.0.0.zip. Do not unzip it.
- In Blender open Edit → Preferences → Get Extensions.
- Open the ⌄ menu in the top right corner and choose Install from Disk….
- Pick the zip. YASTerrain is enabled right away.
You find it in two places:
- the YASTerrain tab in the sidebar of the 3D viewport (press N),
- Add → Mesh → YASTerrain with every preset and Tile World….
Requirements: Blender 4.5 LTS or newer, tested with 4.5, 5.0, 5.1, 5.2 and 5.3. Nothing else to install.
2. Your first terrain
- In the sidebar choose a Terrain preset (for example Diorama Tile) and a Look (for example Comic).
- Press Add Terrain. The terrain appears at the 3D cursor.
- Press Stylized Scene Setup once. It sets EEVEE, the color management for the look, a low sun and a sky colored world. Switch the viewport to Rendered to see the final shading.
- Press Randomize for a new seed, or change any value in the sidebar. Everything updates live.
Each terrain is a normal mesh object with a YASTerrain Geometry Nodes modifier. All settings are also in the modifier panel (Properties → Modifiers), sorted into panels.
3. The sidebar
Top section
- Terrain: Preset used by Add Terrain and by the Terrain button
- Look: Look used by Add Terrain and by the Look button
- Add Terrain: Adds a new terrain with the chosen preset and look
- Stylized Scene Setup: Render engine, color management, sun and sky for the chosen look
Active terrain (shown when a terrain is selected)
- Randomize: New random seed for all selected terrains
- Variants: Eight variants of the terrain around it, click one to keep it (chapter 12)
- Terrain: Applies the chosen preset to the selected terrains. The seed, stamps, path, river and heightmap stay
- Look: Applies the chosen look; shape and colors stay
- Path / River / Stamp: Adds a guide object and assigns it (see chapter 7)
- Load Heightmap: Loads an image as non-color data and shapes the terrain with it (see chapter 14)
Below these buttons are the most used settings. The subpanels follow:
- Paint & Sculpt: Rock, Sand, Grass, Path, Snow: weight paint a layer onto the terrain (chapter 8). Sculpt Height: raise and lower the ground with sculpt brushes (chapter 10). Finish applies both
- Realistic Textures: Your own image per layer for the Stylized Realistic look (chapter 9)
- World: Build World: tiles with different biomes that blend at the edges; Update World (chapter 13)
- Scatter: Trees, bushes, rocks and grass (chapter 15)
- Game: Triangle count, game export, heightmap export, convert to mesh (chapters 16 and 17)
4. Looks
A look only changes shading related settings: the material, flat or smooth shading, the outline, the layer blend, the vertex jitter and the resolution (the Voxel look also turns the surface into blocks). Shape and colors stay, so every preset works in every look.
- Comic: Terrain: Cel shading, sharp layer borders drawn per pixel, a darker tone on steep slopes, ink hatching on rock cliffs, outline, resolution 128; Water: Flat colors with sparkles; Typical use: Toon games, illustrations
- Low Poly: Terrain: Jittered triangles, one layer and color per face, facet variation, resolution 56; Water: Faceted, opaque; Typical use: Low poly worlds, mobile
- Stylized Realistic: Terrain: Soft, ragged layer borders, painted ground, layered rock, rippled sand, glossier snow, resolution 256; Water: Glossy, see-through in the shallows; Typical use: Stylized PBR projects
- Voxel: Terrain: One block column per grid point, heights in whole blocks, flat colored tops, soil walls under grass, resolution 64; Water: Opaque, a little under a block top; Typical use: Block worlds, indie games
The comic cel shading needs EEVEE. In Cycles the comic terrain renders with PBR shading. Stylized Scene Setup uses Standard color management for Comic and Low Poly and AgX Punchy for Stylized Realistic.
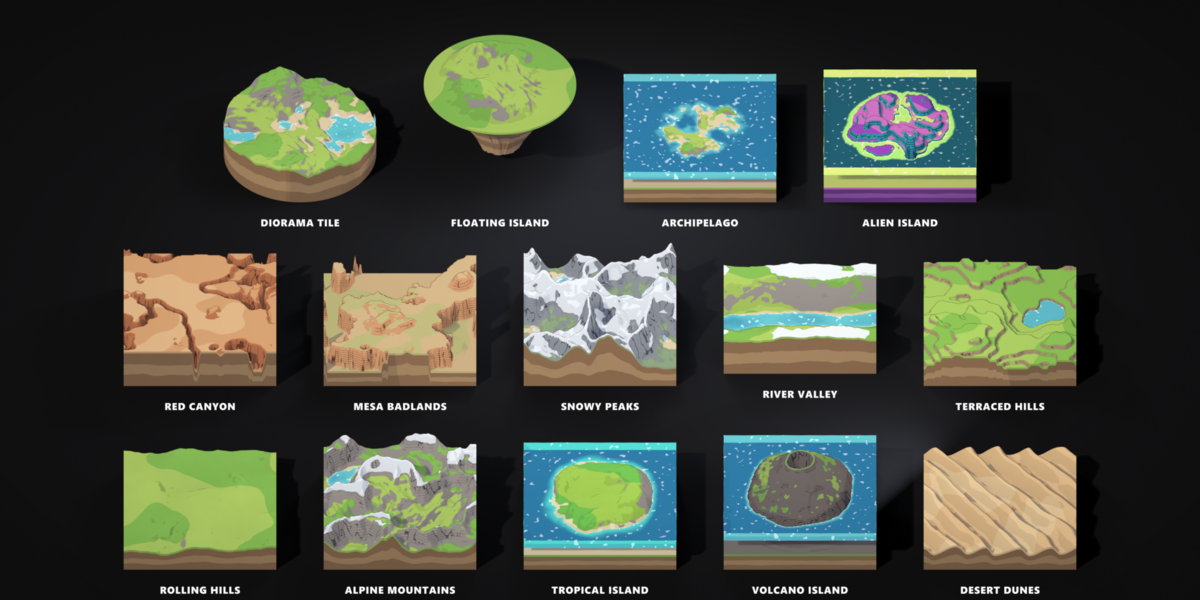
5. Presets
- Rolling Hills: Shape: Hills; Highlights: Gentle green hills with grass patches
- Alpine Mountains: Shape: Mountains; Highlights: Sharp ridges, erosion, snow line, a lake
- Tropical Island: Shape: Hills + Island falloff; Highlights: Beaches, turquoise shallows
- Volcano Island: Shape: Volcano + Island falloff; Highlights: Cone with crater, dark rock with strata
- Desert Dunes: Shape: Dunes; Highlights: Wind ripples in warm sand tones
- Red Canyon: Shape: Canyon; Highlights: Carved plateau, terraces, red rock bands
- Mesa Badlands: Shape: Mesa; Highlights: Flat topped cliffs with strata
- Snowy Peaks: Shape: Mountains; Highlights: Low snow line, frozen lakes
- River Valley: Shape: Valley; Highlights: U shaped valley with a river along the floor
- Terraced Hills: Shape: Hills + Terraces; Highlights: Stepped fields
- Diorama Tile: Shape: Hills, round tile, base; Highlights: A 16 m round diorama with a lake and soil strata
- Floating Island: Shape: Hills, round tile, tapered base; Highlights: A floating island with a rocky underside
- Archipelago: Shape: Hills + Island falloff; Highlights: Many small islands in a large sea
- Alien Island: Shape: Alien + Island falloff; Highlights: Rock spires, crater rings, glowing lagoon, crystal frost
A preset resets every setting to its default first, then applies its own values and the look. Your seed, stamps, path, river and heightmap are kept.
6. Generator settings
All lengths are in metres. Height is the real distance from the lowest to the highest point of the terrain (before stamps, paths and rivers).
Terrain
- Seed: Master seed. Every random part of the terrain varies with it
- Shape: Hills, Mountains (ridges), Dunes (wind ripples), Canyon (carved plateau), Mesa (flat topped cliffs), Volcano (cone with crater), Valley (U shape), Alien (rock spires, crater rings and bowls)
- Size X / Size Y: Size of the terrain
- Height: Distance from the lowest to the highest point
- Resolution: Vertices along the longer side. The looks set it to 128, 56 and 256
- Feature Size: Size of the hills and mountains
- Roughness: Small scale bumpiness
- Noise Detail: Noise octaves; more gives more small detail
- Ridges: Blends from round hills (0) to sharp ridges (1)
- Warp: Swirls the shapes
- Offset: Scrolls through the noise, a quick way to find a different area of the same terrain
- Terraces: Number of terrace steps, 0 is off
- Terrace Sharpness: Flat steps with steep risers (1) or soft steps (0)
- Erosion: Fills valleys with sediment and softens slopes
- Water Erosion: Rain runs downhill and carves gullies between sharp ridges. The flow is computed on a fixed grid, so LODs, chunks and seamless tiles erode alike. Combine it with Erosion for sediment filled valley floors
- Falloff: None, Island (land in the middle, sea floor at the edges, with a noisy coast) or Edges (flat at the border)
- Falloff Size: How far the falloff reaches inwards
- Tile Shape: Square or Round. Round tiles keep a clean circular rim
- Seamless: Tileable noise: opposite edges match exactly. Works for Hills, Mountains, Canyon, Mesa and Alien; Dunes, Volcano and Valley follow the tile layout
- Jitter: Random vertex offsets for irregular low poly triangles. The rim stays straight
- Triangulate: Triangles instead of quads
- Voxel: Blocky columns: one per grid point, as wide as the grid spacing, heights rounded to whole blocks. Walls reach down to the lowest neighbour, at the rim to the floor (Base Depth with Base on). Set by the Voxel look
Heightmap
- Heightmap: Grayscale image, white is high. Mapped over the whole tile
- Heightmap Strength: Blend between the noise (0) and the image (1)
Water
- Water: Turns the sea on
- Sea Level: Height of the water surface
- Waves: Wave height; the waves move with the scene time
- Wave Speed: Speed of the waves
- Shallow Color / Deep Color: Water color near the shore and in deep water
- Depth Fade: Depth at which the water reaches the deep color
- Foam Color / Foam Width: Foam where the water is shallower than Foam Width
- Water Glow: The water emits its own color (toxic lagoons, lava lakes)
The water is a separate surface over the terrain. Faces over dry land are removed, so lakes only appear where the terrain lies below the sea level.
Base
- Base: Closes the terrain into a solid diorama block
- Base Depth: Depth below the lowest terrain point
- Base Layers: Number of soil layers on the sides (plus a thin grass lip at the top)
- Base Taper: Every layer shrinks towards the middle: a rocky floating island underside
- Soil Color / Soil Dark: Alternating colors of the layers
The base is watertight: the bottom is capped and welded. With water and a base, the water gets side walls where it meets the rim.
Path, River and Stamps
See chapter 7.
- Path: Curve or mesh object that becomes a flat path
- Path Width / Path Color: Width and color of the path
- River: Curve or mesh object that carves a river bed with water
- River Width / River Depth: Width and depth of the river bed
- Stamps: Collection of meshes that shape the terrain
- Stamp Mode: Flatten (to the stamp), Raise (only up) or Lower (only down)
- Stamp Blend: Soft border around the stamps
- Layer Paint: Mesh with the vertex groups Rock, Sand, Grass, Path and Snow (chapter 8)
- Height Sculpt: Mesh whose height above its yt_base_z attribute is added to the terrain (chapter 10)
- World Map: The biome map of a tile world, made by Build World (chapter 13)
Colors
- Season: 0 spring, 1 summer (the colors as set), 2 autumn, 3 winter, 4 spring again (chapter 11)
- Grass Color / Grass Color 2: Base ground color and the color of the patches
- Grass Patches: Amount of patches
- Sand Color / Beach Height: Beaches up to this height above the water
- Rock Color / Rock Dark: Rock and its strata bands
- Rock Slope: Slopes steeper than this are rock
- Strata / Strata Scale: Strength and density (bands per metre) of the horizontal bands on cliffs
- Layer Blend: 0 gives hard comic borders between the layers, 1 soft blends
- Height Gradient: Darker valleys and lighter heights
- Color Variation: Hue and brightness shift per terrain, by seed
- Facet Variation: Brightness jitter per face, the low poly look
- Flat Shading: Faceted shading with one color per face
Snow and Outline
- Snow / Snow Line / Snow Color: Snow above this relative height (0 bottom, 1 top), on surfaces flat enough to hold it
- Outline / Outline Width / Outline Color: Comic outline as an inverted hull
Game
- Detail: Level of detail (grid resolution), lowered by the export for LODs
- Chunks / Chunk: Keeps one tile of a Chunks × Chunks grid; the export sets these per chunk
- Terrain / Water / Outline Material: Materials, set by the look
Attributes
The terrain carries attributes you can use in your own shaders or node trees:
- Col: Domain: Face corner; Content: Final vertex color
- UVMap: Domain: Face corner; Content: UVs over the whole tile
- yt_grass, yt_rock, yt_sand, yt_snow: Domain: Point; Content: Layer weights (the splatmap channels)
- yt_path: Domain: Point; Content: Path mask
- yt_height: Domain: Point; Content: Relative height, 0 at the bottom and 1 at the top
- yt_wet: Domain: Point; Content: 1 under water
- yt_top: Domain: Point; Content: 1 on the top surface, 0 on the base and the outline
- yt_water, yt_depth: Domain: Point; Content: Water surface and its depth
- yt_ice: Domain: Point; Content: 1 where the water is frozen (winter)
- yt_skirt: Domain: Face; Content: 1 on the base sides and bottom
- yt_la, yt_lb, yt_lc: Domain: Point; Content: Layer border positions (patches, sand, rock / strata / snow, path, wet)
- yt_pal_grass … yt_pal_path: Domain: Point; Content: The layer colors after color variation
The Comic and Stylized Realistic materials rebuild the layer colors per pixel from yt_la, yt_lb, yt_lc and the yt_pal_* colors. That keeps layer borders sharp and smooth inside the triangles, where interpolated vertex colors would blur them. Exports only use Col.
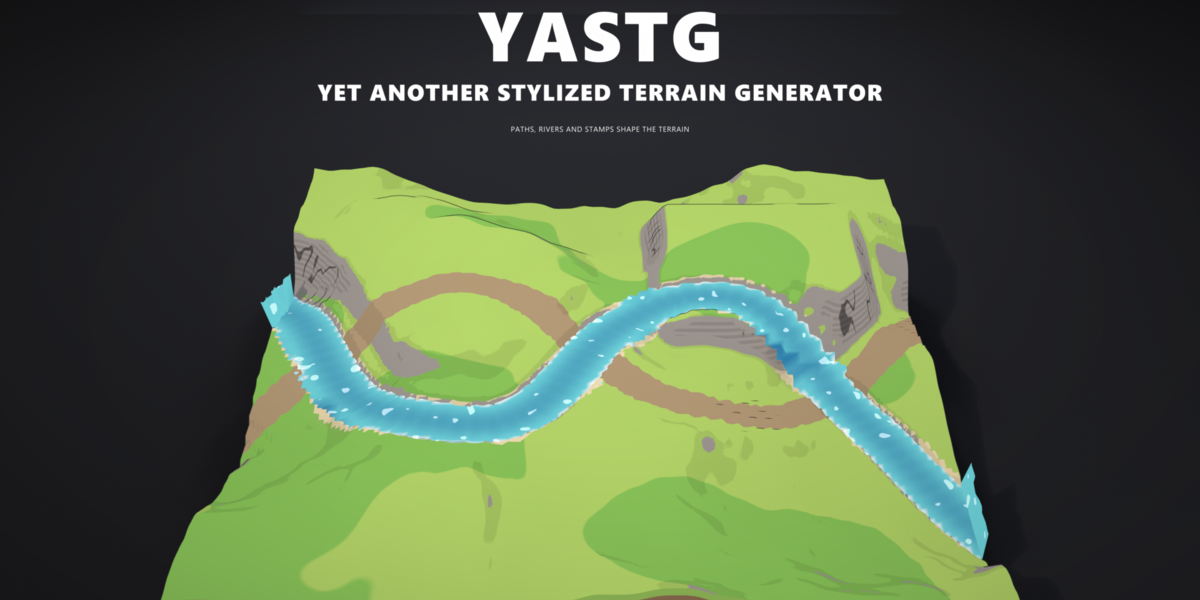
7. Paths, rivers and stamps
Guides are ordinary objects that shape the terrain while you edit them.
Path. Press Path in the sidebar. A Bézier curve is added across the terrain and assigned. Edit the curve (Tab, move the points) and a flat strip follows it, painted with the path color and with softly blended edges. The height of the path follows the terrain smoothly along the curve. Mesh objects work too: their edges are used as the path.
River. Press River. The river carves a rounded bed along its curve and fills it with water at its own level, independent of the sea. Rivers flow over hills and through valleys; draw the curve downhill for the most natural result.
Stamp. Press Stamp. A box is added to the YASTerrain Stamps collection (shown as wire, hidden in renders). Seen from above, its top faces pull the terrain to their height: a building plot, a plateau or a ramp. Move, scale or rotate the box, or add any other mesh to the collection. Stamp Mode decides whether stamps flatten, only raise or only lower the terrain.
Guides are placed relative to the terrain object, so you can move the terrain and its guides together by parenting them to the terrain.
8. Paint layers
Paint exactly where rock, sand, grass, a path or snow should be, on top of the automatic rules.
- Select the terrain and press a layer in Paint & Sculpt: Rock, Sand, Grass, Path or Snow. The first time, a paint mesh (Terrain Paint) is made: a grid over the tile, parented to the terrain and lifted onto its surface. Blender switches to Weight Paint on it.
- Paint with weight 1 to add the layer. Use the Subtract brush (or weight 0) to erase. Press another layer button to switch the layer while you paint.
- Press Finish. The terrain picks up the paint (it lets go of the paint mesh while you paint, so brush strokes stay fast), and the paint mesh is hidden again.
Rock, Sand, Path and Snow are added to what the rules make. Grass clears rock, sand and snow. The paint is read from above, so it stays in place when you change the shape, the height or the look; press a layer button again and the paint mesh is lifted onto the new surface. Painted layers count everywhere a layer counts: the scatter (no trees on painted rock), the splatmap and the baked textures. Hard or soft painted borders follow Layer Blend like every other border.
9. Own textures
The Stylized Realistic look can use your own images: open Realistic Textures in the sidebar and press Grass Texture, Sand Texture, Rock Texture or Snow Texture. The image is box mapped (triplanar), so cliffs do not stretch, and Texture Size sets how many metres one image covers. The slider next to a loaded image blends it with the generated color; the trash button removes it.
The first texture gives the terrain its own copy of the material (Terrain Textures), so other terrains keep the generated look. Applying a look again assigns the shared look material; your copy stays in the file and can be picked as Terrain Material in the modifier's Game panel.
10. Height sculpt
Shape the ground by hand with Blender's sculpt brushes, without giving up the procedural terrain.
- Select the terrain and press Sculpt Height in Paint & Sculpt. The first time, a sculpt mesh (Terrain Sculpt) is made: a grid over the tile, parented to the terrain, shown as a wireframe on top of it. Blender switches to Sculpt Mode on it.
- Sculpt: Draw raises, Ctrl lowers, Shift smooths; Grab, Inflate and the other brushes work too. The terrain follows after every stroke, with its colors, snow, beaches and water.
- Press Finish. The sculpt mesh is hidden again.
The sculpt mesh remembers how far you moved each of its vertices above the terrain it was laid on. That lift is added to the terrain, so it stays when you change the shape, the seed, the preset or the look: press Sculpt Height again and the mesh is laid onto the new surface with your lift on top. Dig below the sea level and a lake fills up; raise a peak above the snow line and it gets snow. The trash button next to Sculpt Height removes the sculpt. Do not remesh the sculpt mesh (Dyntopo, Voxel Remesh): it needs its grid.
11. Seasons
Season (top of the sidebar settings, and in the Colors panel) runs the terrain through the year:
- Spring: Value: 0; What changes: Fresh light green grass, the snow line a little lower
- Summer: Value: 1; What changes: The colors as set
- Autumn: Value: 2; What changes: Olive grass with orange and red patches, the snow line a little lower
- Winter: Value: 3; What changes: Snow down to the shore (cliffs stay free), dull grass under it, frozen water without waves
- Spring: Value: 4; What changes: Back to the start, so an animation from 0 to 4 loops
Values in between blend smoothly. Right click the slider and choose Insert Keyframe to animate it, for example 0 at frame 1 and 4 at frame 96 for a looping year. Terrains without Snow only get snow in winter. The season works in every look, in tile worlds and in the bake.
12. Variants
Press Variants next to Randomize. Eight copies of the terrain with new seeds appear around it in a 3 × 3 grid, and the view zooms out to show all nine. Click the one you like: the terrain takes over its seed and the copies disappear. Esc or a right click keeps the current terrain. Paint, sculpt, path and river come along to the variants, so you see the full result; the scatter is left out to keep it fast.
13. Tile worlds
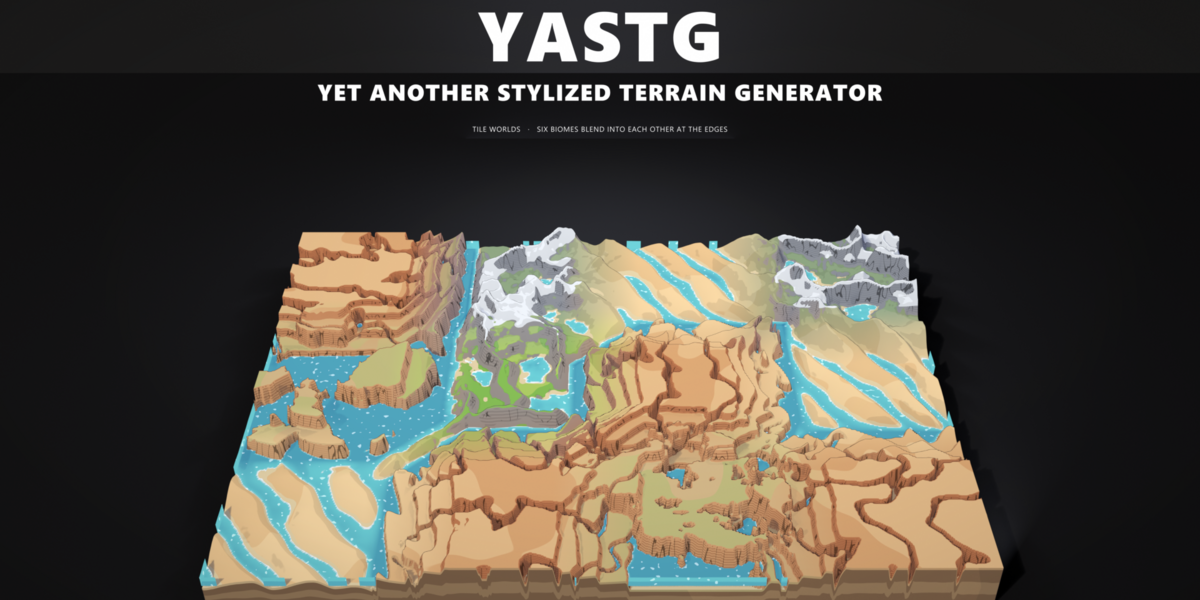
Build World (World subpanel, or Add → Mesh → YASTerrain → Tile World…) makes a world of terrain tiles, edge to edge around the 3D cursor:
- Columns / Rows: Number of tiles, up to 8 × 8
- Tile Size: Size of each tile
- Biomes: Presets the tiles are picked from at random
- Blend: Width of the blend on each side of a tile edge, relative to the tile
- Water / Sea Level: One sea for the whole world
- Seed: One noise field for the whole world (random at −1)
Every tile is a normal terrain with its own preset. All tiles share the seed and read the noise at their place in the world, and a hidden World Map object holds each tile's shape, height, terraces, rock, snow and colors. Near the edges every tile blends towards its neighbours, so a desert runs into grassland and grassland climbs into mountains, and neighbouring tiles meet exactly. Each tile can still be exported, chunked and given LODs on its own.
To change a biome, select a tile, choose a Terrain preset and press Terrain: the world map updates by itself. After you change a tile's Height, colors or other settings by hand, press Update World. Inputs that must match across the world (size, noise, sea, water colors) are set the same on all tiles. The look is set per tile; give all tiles the same look (select them all and press Look).
14. Heightmap import
Press Load Heightmap and pick a grayscale image (PNG, EXR, TIFF, JPG). The image is loaded as non-color data, so the heights are not bent by a gamma curve, and assigned with a strength of 1. Lower Heightmap Strength to blend it with the noise. Falloff, terraces, erosion, stamps, paths, rivers, water and colors all work on top of the image.
If you assign an image in the modifier panel yourself, set its color space to Non-Color in the Image Editor.
15. Scatter
Add Scatter adds a second modifier, YASTerrain Scatter, after the generator. It reads the layer attributes, so objects grow where they belong:
- Trees on grass, below the Tree Line and on slopes up to Max Slope,
- Bushes on grass at their own density,
- Rocks everywhere on land, preferring rocky slopes, sunk into the ground by Rock Sink,
- Grass: built-in low poly grass tufts with Flowers, colored like the ground below them.
Nothing grows under water, on paths, on the base or on the outline. Pick any collection for Trees, Bushes and Rocks; every object in the collection is one variant. Hide the source collection (uncheck it in the outliner) so only the scattered copies show. Spacing, density and scale are set relative to the terrain size when the scatter is added.
16. Game export
Select one or more terrains and press Export Game Ready (GLB/FBX) in the Game subpanel.
- Format: glTF Binary (.glb) or FBX
- Engine: Unity, Unreal, Godot or Generic: names, collision and axes
- One File per Terrain: One file per terrain, or all terrains in one file
- Center at Origin: Exports each terrain at the origin
- Chunks: Splits each terrain into Chunks × Chunks tiles for streaming
- LODs: Extra levels with a coarser grid
- LOD Ratio: Grid resolution of each level relative to the previous one
- Collision Mesh: A low detail copy for physics
- Include Water: Exports the water surface
- Include Outline: Keeps the comic outline shell
- Bake Textures: Bakes the terrain material into a color texture, plus a normal map for Stylized Realistic
- Texture Size: 1024, 2048 and 4096 pixels
LODs are not decimated: every level re-evaluates the terrain with a coarser grid, so the shape and the colors stay clean. Chunks are named Name_X0_Y0, Name_X1_Y0, …; neighbouring chunks of the same LOD fit seamlessly. The scatter modifier is left out of the export.
Materials. Without baking, two materials are exported, YASTerrain_Terrain and YASTerrain_Water, both reading the vertex colors (Col), so no textures are needed. Vertex colors can only change from vertex to vertex, so layer borders look softer in the engine than in Blender. Bake Textures renders the terrain's own material with Cycles over the UV map instead: sharp layer borders, the comic slope tone and ink, painted layers, own textures and the realistic bump. The textures span the whole tile, so every chunk and LOD shares them. They are embedded in the GLB or FBX and also saved next to it as file_Name_albedo.png (and file_Name_normal.png). The terrain top then uses Name_Terrain with the textures; base sides and outline keep their vertex colors (YASTerrain_Base), water keeps YASTerrain_Water. Baking takes a few seconds per terrain at 2048.
- Unity: Names: Name_LOD0 … Name_LODn under an empty Name (Unity builds a LOD Group); Collision: Name_Collider, add a Mesh Collider; LODs: yes
- Unreal: Names: Name, Name_LOD1 … Name_LODn; Collision: none: enable Use Complex Collision As Simple; LODs: yes
- Godot: Names: Name; Collision: Name-colonly (trimesh static body); LODs: Godot generates them
- Generic: Names: Name_LOD0 … Name_LODn; Collision: Name_Collision; LODs: yes
17. Heightmap export
For Unity and Unreal terrain systems press Export Heightmap / Splatmap with a terrain active.
- Format: PNG 16 bit (Unreal, Godot) or RAW 16 bit (Unity)
- Resolution: 505, 1009, 2017, 4033 (Unreal) and 257, 513, 1025, 2049 (Unity)
- Splatmap: RGBA image with the layer weights
Three files are written next to each other:
- name.png or name.raw: 16 bit heights, black at the lowest and white at the highest point. The PNG runs from +Y at the top of the image; the RAW is little endian (Windows byte order) and starts at −Y.
- name_splat.png: R grass, G rock, B sand and path, A snow. The weights add up to 1.
- name_settings.txt: size, height range and the import values for both engines.
Unreal: Landscape → Import from File, pick the PNG and enter the X, Y and Z scale from the settings file.
Unity: Terrain → Import Raw, set Depth 16 bit, Byte Order Windows, the resolution, and the terrain width, length and height from the settings file. If the terrain appears mirrored, enable Flip Vertically.
The heightmap is read from the terrain grid without base, outline and jitter, and always as a square tile.
18. Troubleshooting
Painted layers do not show. Press Finish: while you paint, the terrain lets go of the paint mesh so the brush stays fast.
A world tile ignores its Height or color sliders. In a tile world those values come from the world map. Press Update World after changing them.
Creating the first terrain in a file takes a few seconds. YASTerrain builds its node tree once per file (about ten seconds on a typical machine); every further terrain appears at once.
The terrain is slow with Water Erosion. The erosion runs on its own fixed grid and takes a fraction of a second; if the viewport is slow, lower Resolution while you work.
The comic look renders without cel shading. Cel shading needs EEVEE. Press Stylized Scene Setup or switch the render engine to EEVEE.
The terrain looks washed out. Stylized Realistic uses AgX; Comic and Low Poly need Standard color management. Press Stylized Scene Setup after changing the look.
A heightmap looks too steep or too flat in the middle. The image is read as sRGB. Use Load Heightmap, or set the image's color space to Non-Color.
A lake shows white foam in the middle. A path or river crossing the lake raises its bed to the path height, which makes the water shallow. Move the curve or lower Foam Width.
The viewport is slow. Lower Resolution or Detail while you work, or turn Grass off in the scatter. The Stylized Realistic look uses the highest resolution.
Scattered objects are missing. Check that the collection is assigned and not empty. Objects with modifiers inside an excluded collection are not evaluated and scatter as empty: apply their modifiers first (Object → Convert → Mesh).
Faces look dark or inverted after export. Make sure the engine reads the vertex colors (Col). In Unity, use a shader that multiplies the vertex color, or export with Bake Textures.
19. License
The terrains you generate and export are yours to use in commercial games, films and renders, with no attribution required. The add-on's code is licensed under GPL-3.0-or-later. © 2026 SchirmerLabs
Have questions about this product?
Login to message
| Published | about 3 hours ago |
| Blender Version | 4.5 - 5.3 |
| Render Engine Used | Cycles, Eevee |
| License | GPL |
Discover more products like this
low poly toon Heightmap landscape diorama voxel terrain game ready stylized procedural geometry nodes environment