 Studio Guerra



Blender Add-on · 3D Printing
Cut any model into parts your printer can actually build
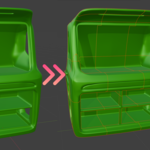
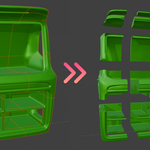
Pick your printer, press one button, and the model comes back as printable blocks held together by keyed interlock pins — every joint numbered so you always know what meets what. Or draw the seam yourself, straight or freehand.
23 Printer Presets Keyed Joints That Fit Grid, Line & Freehand Hollow + Drain Holes Blender 4.2 → 5.x
New version Out now · free update
Every cut face gets its own joint
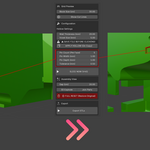
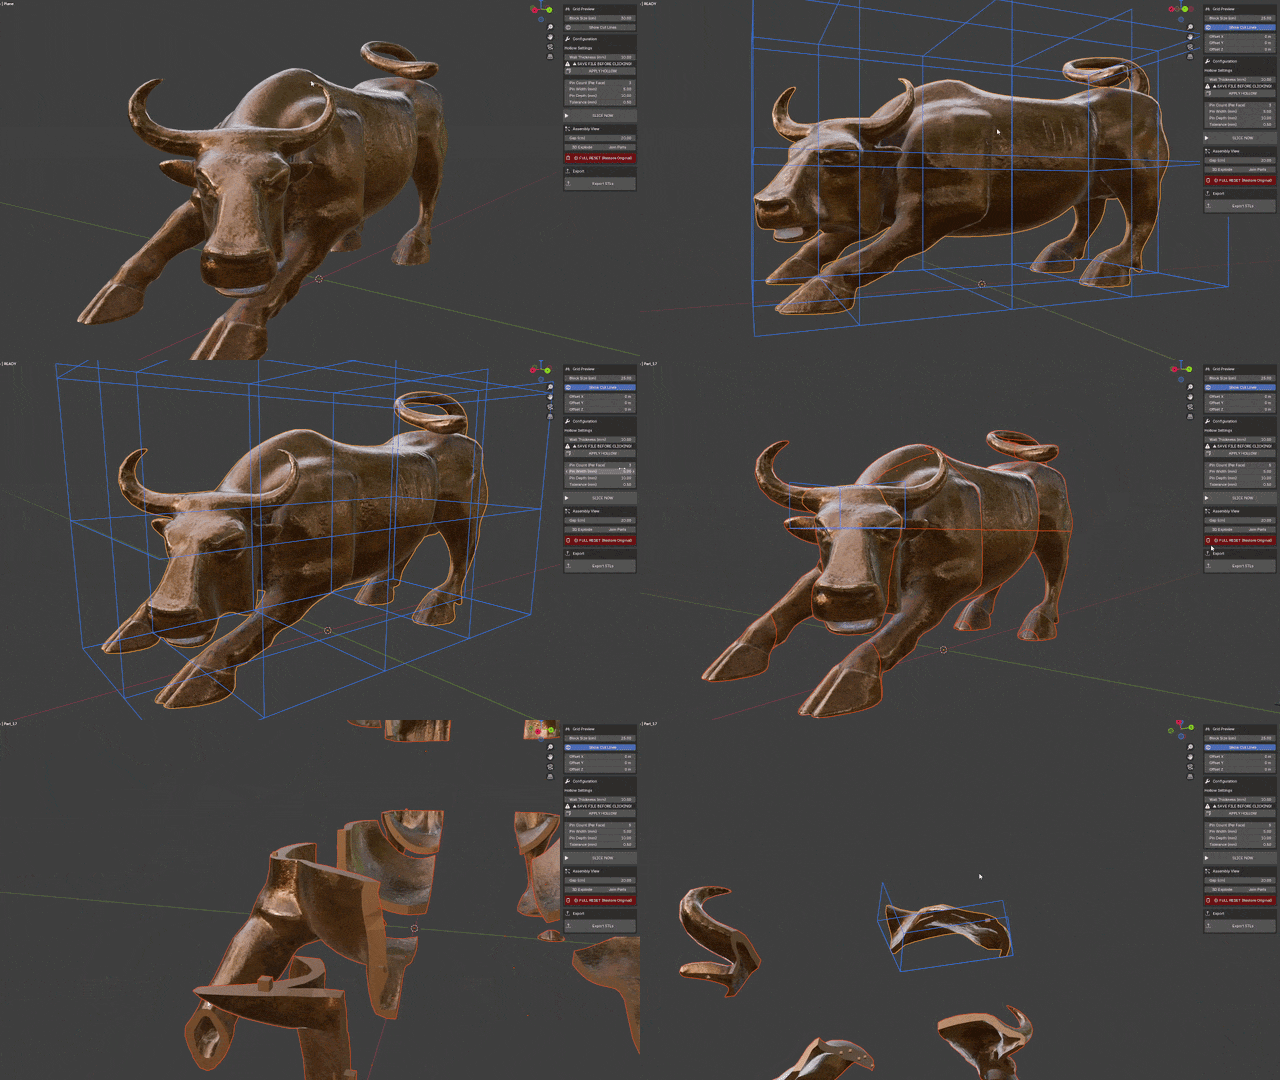
A stroke across a ring, a horseshoe or a pair of legs crosses the model twice and leaves two seams. Both are pinned now, so the parts cannot hinge open around a single pin.
|
Drain holes by click Put the hole under an arm or behind a head, not only at the lowest wall. |
Honest wall thickness Hollow keeps the object origin and gives the millimetres you typed, scale or no scale. |
No missing pieces A grid cell a solver refuses is retried and carved directly instead of dropped. |
|
Doing it by hand The sculpt is 60 cm tall and the plate is 22 cm. You add boolean cubes one by one, guess a pin size, watch the solver fail on a thin wall, and find out at assembly time that the pin does not enter the socket — or that you no longer remember which of the forty pieces met which. |
Doing it with the add-on Choose your machine and the block size sets itself. Slice, and every shared face gets a keyed pin and a socket cut from that same pin, with your own printing clearance. Then the add-on tells you whether every part fits the plate you selected. |
Built to be checked, not trusted
Every release is run end to end on Blender 4.5 LTS and 5.x before it ships.
| 0 mm³pin/socket interference, pins from 5 % to 78 % | 99.9 %volume kept after a cut, the rest is the kerf | 500 kpolygons cut end to end | 23printer presets built in |
One panel, the whole workflow
Repair, slice, pin, hollow, inspect and export — without leaving the 3D viewport.
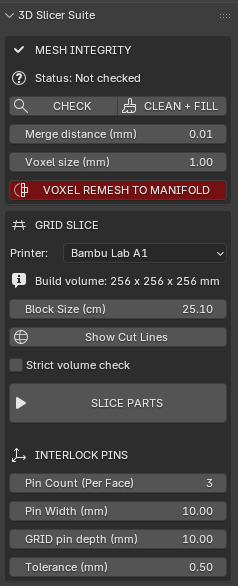
Repair & slice. Check watertightness, clean or voxel-remesh, pick the printer, preview the cut lines, then Slice Parts. Pin count, width, depth and tolerance are yours.
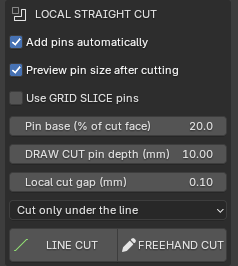
Draw the seam. Line Cut and Freehand Cut, with automatic pins, a live size preview, pin base as a percentage of the cut face, and the choice between cutting under the line or through the model.
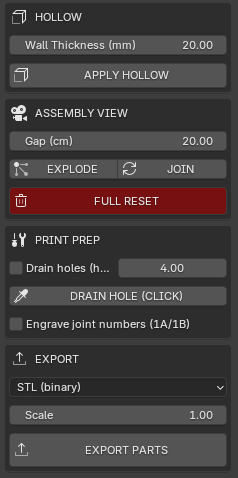
Hollow, inspect, export. Wall thickness, Explode and Join, one Full Reset that undoes the whole chain, drain holes, engraved joint numbers, and export in five formats.
See it work
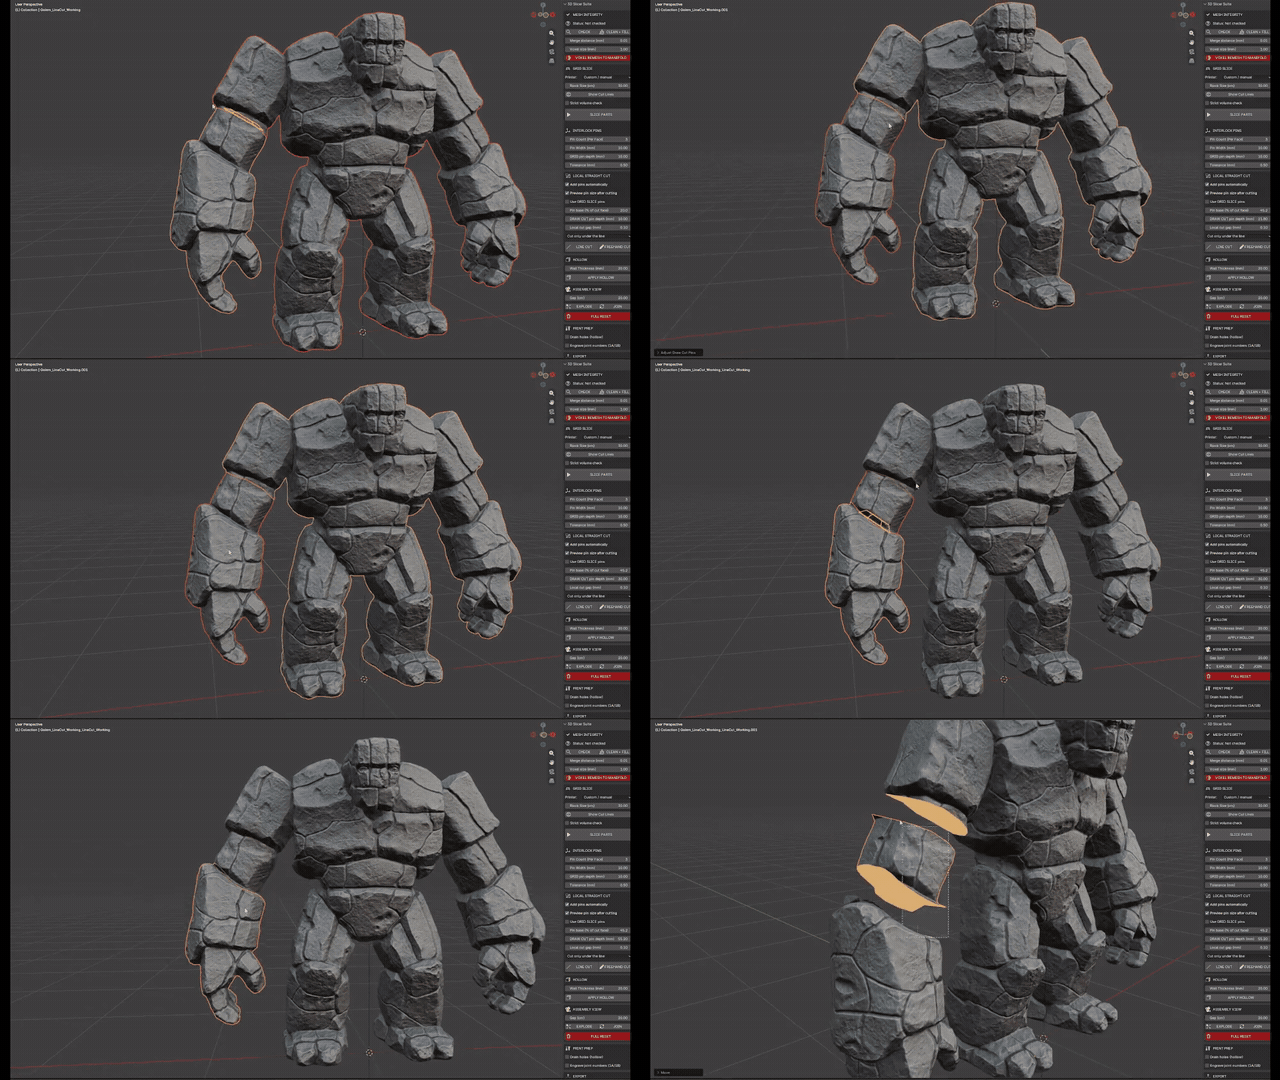
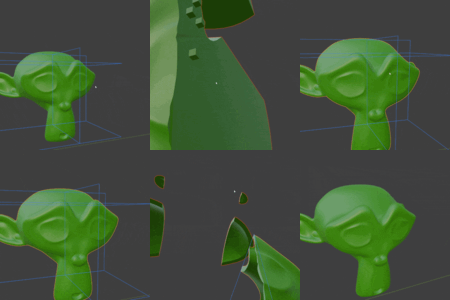
Cut exactly where you want. Line Cut for a clean straight split, Freehand Cut when the seam should follow the shape. Both work in screen space, so you cut what you see — an arm, a horn, a base.
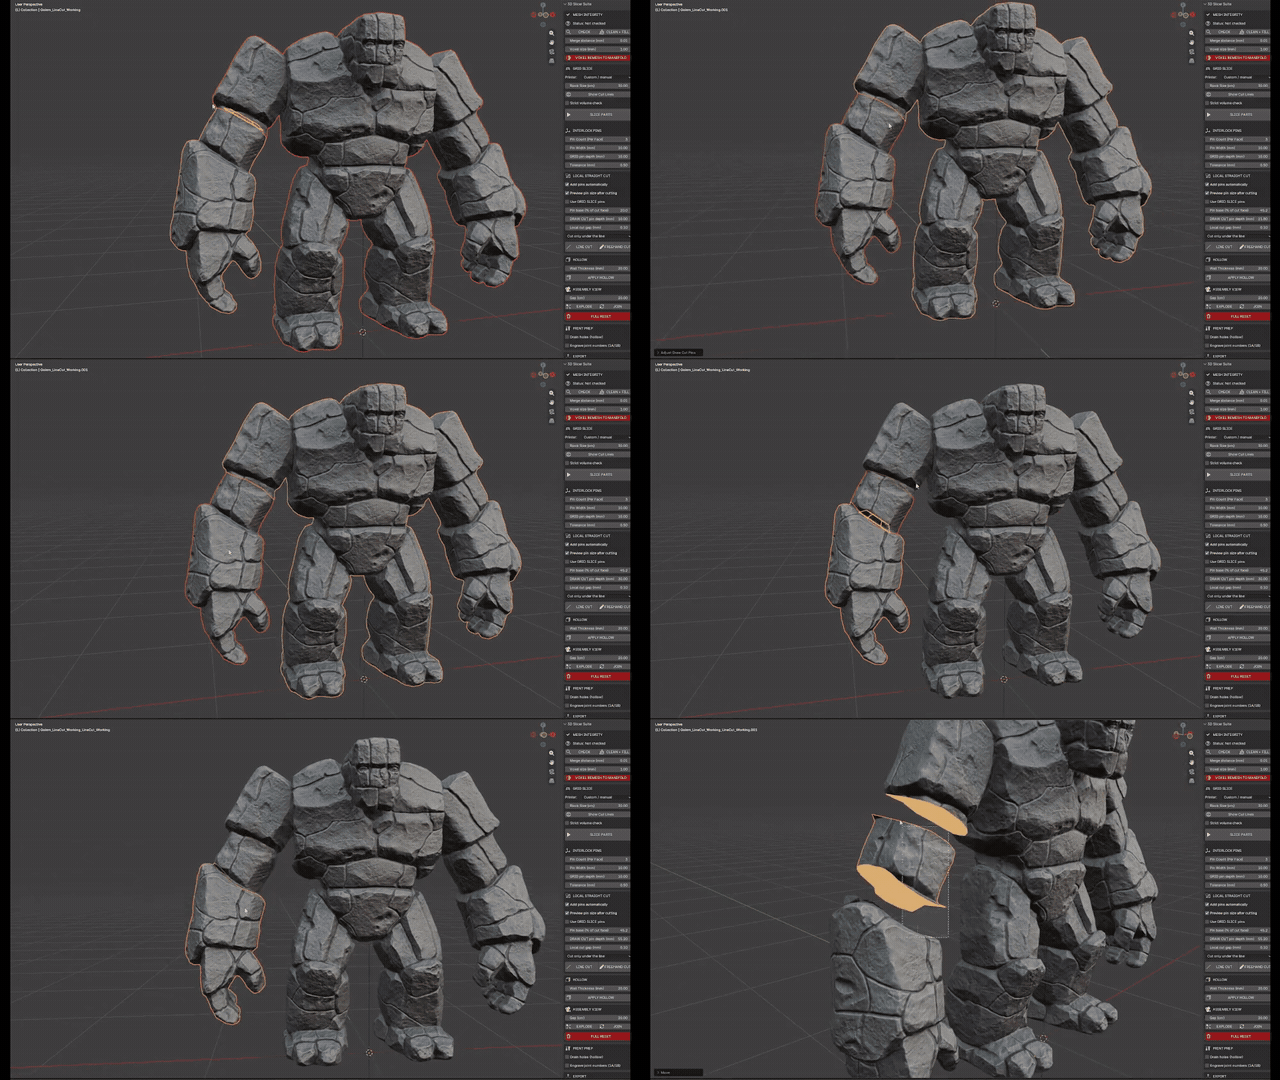
Clean faces, every time. The cut leaves a closed, watertight face on both halves — ready for the joint, not a hole to repair by hand.
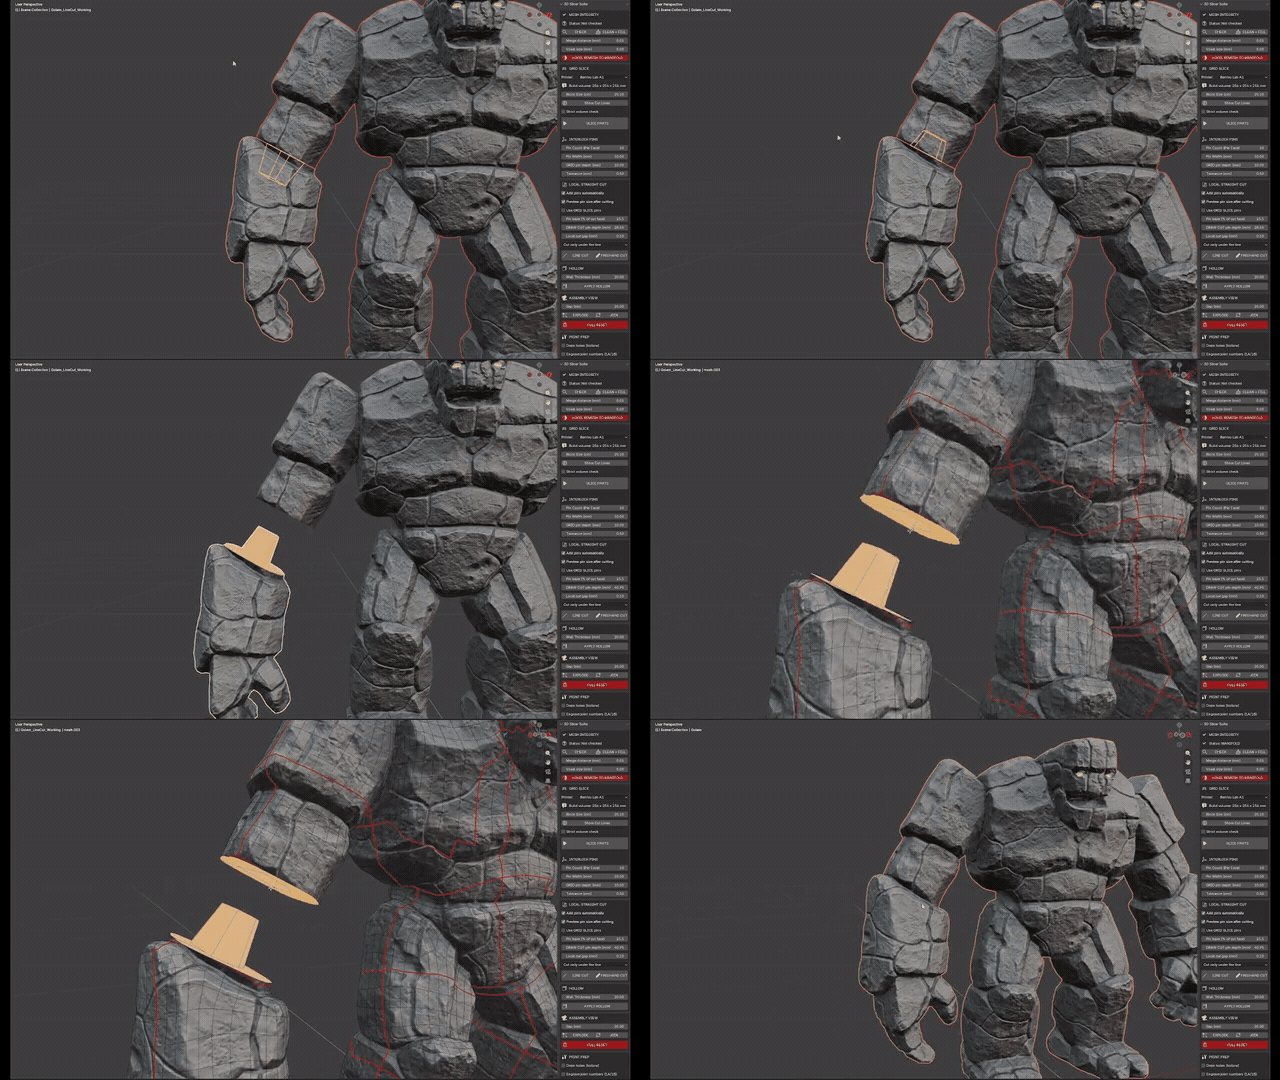
Joints that actually close. A tapered, keyed pin with a real tolerance, and a socket generated from that same pin so the clearance is identical all the way in. Measured interference: zero.
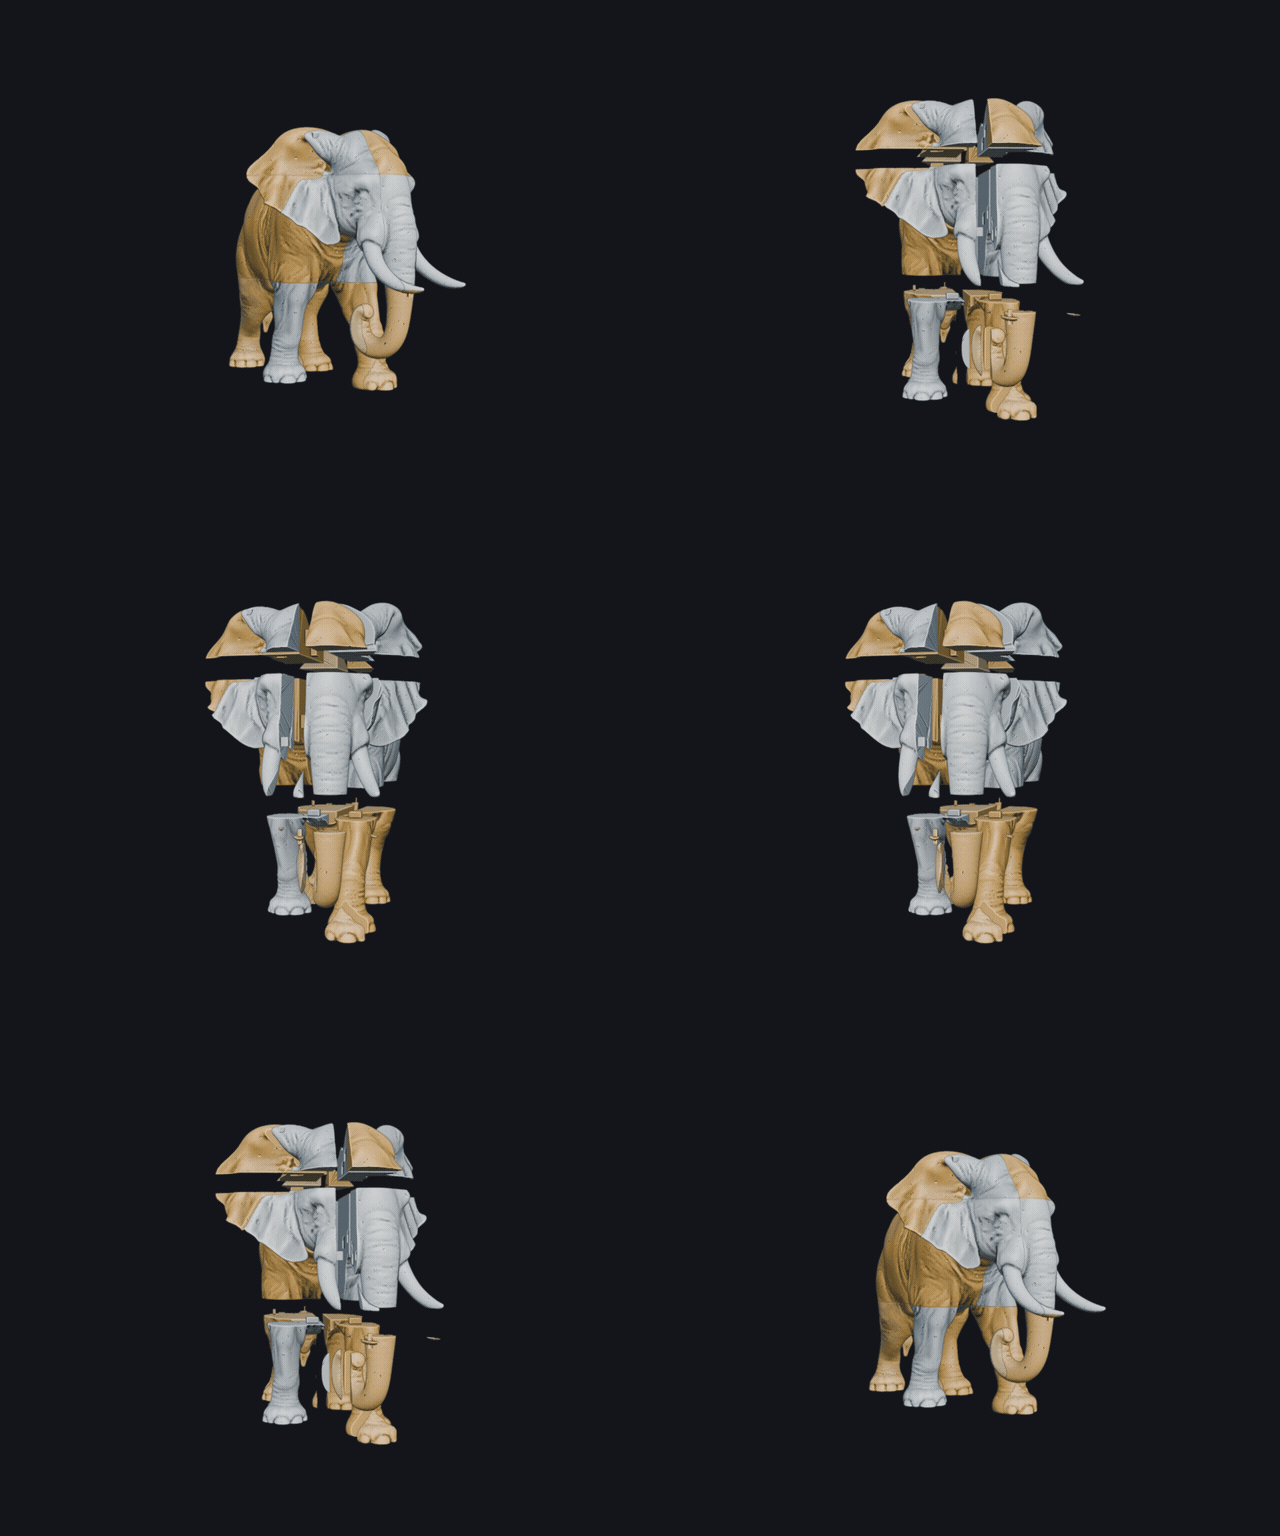
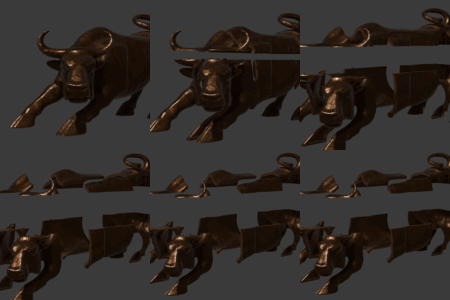
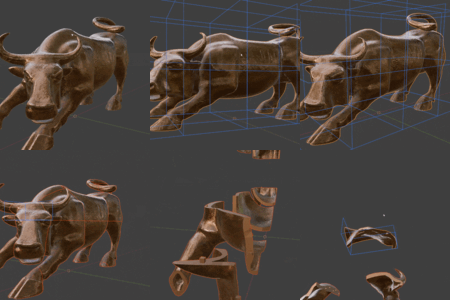
A whole statue, in one click. A 30 cm elephant on a 12 cm plate becomes 22 blocks, every one inside the build volume, every shared face pinned automatically.
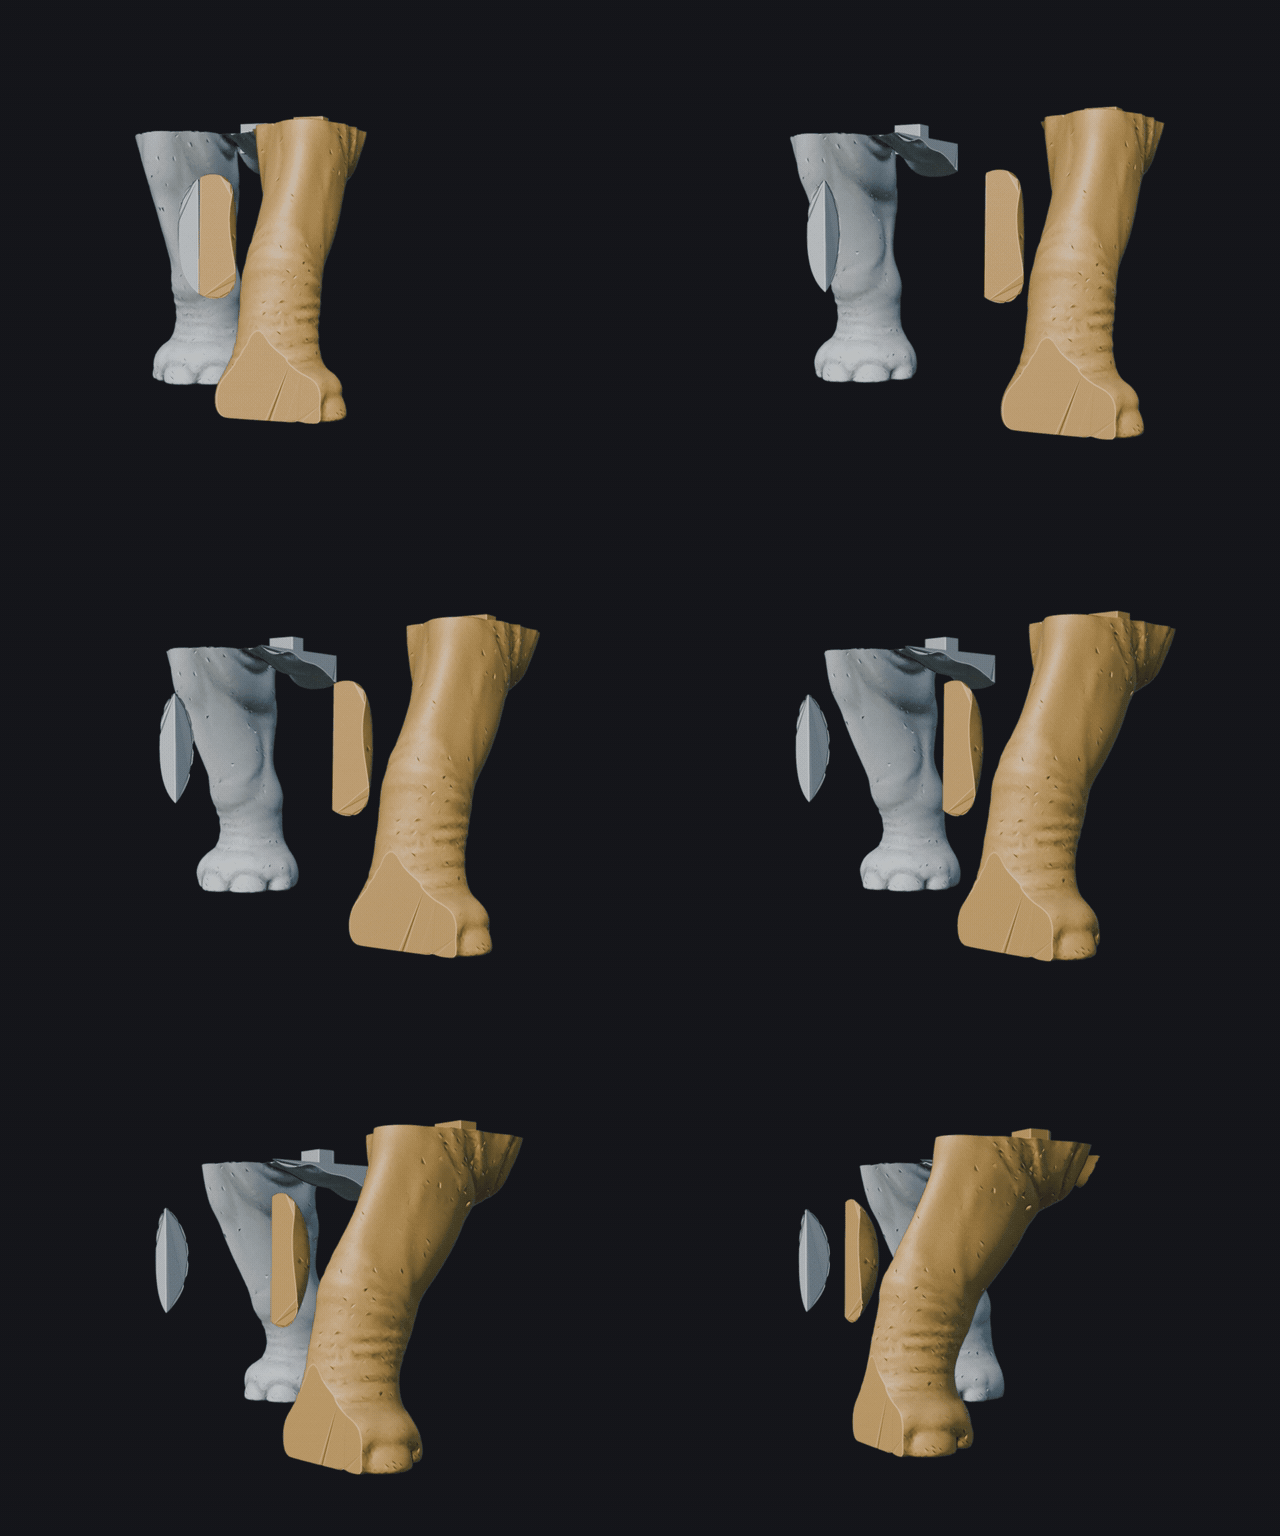
Explode, inspect, join. Pull the parts apart to check every joint before exporting, then put them back with a single button.
Every tool you get
Sixteen tools covering the whole road from a raw sculpt to numbered, watertight, printable parts.
Grid Slice
Cuts the whole model into blocks sized for your printer. Every face two blocks share gets interlock pins, with your own count, width, depth and tolerance.
Printer presets
23 machines built in — Creality, Bambu Lab, Prusa, Elegoo, Anycubic, Sovol and resin printers. Picking one sets the block from the shortest axis of the build volume, minus clearance.
Fit report
After every cut each part is compared against the selected plate in all three orientations, and the worst offender is named if something still does not fit.
Show Cut Lines
Draws the grid over the model before anything is cut, so you can nudge the offsets until the seams fall where you want them — not through a face or a fine detail.
Line Cut
Click the start point, click the end point. The line is screen based and each end extends on its own until it leaves the mesh, so a stroke drawn silhouette to silhouette still separates the parts.
Freehand Cut
Hold the button and draw. The stroke becomes the cutting surface, curved seams included, so the split can follow a natural line of the model instead of a flat plane.
Cut depth control
Cut only under the line measures the material the stroke was drawn over and stops at its back face. Cut through the model slices everything front to back. A hollow model is always cut through, automatically.
Live pin preview
After the cut the pins appear as an outline before any boolean runs. Move the mouse left and right to choose which part carries the pin, up and down for its length, the wheel to scale it, G to swap the pin type. Nothing touches the geometry until you click.
Keyed joints
Every pin has one corner cut off and its socket carries the same shape, so the parts close in the correct orientation only — no more gluing a piece in rotated by 90°.
Numbered joints
Both sides of a joint are engraved with the same number: 1A where the pin is, 1B where the socket is. One mark per joint, next to the joint it names, never on top of a pin or a socket.
Hollow
Turns a solid into a shell with the wall thickness you choose, in real millimetres even if the object still carries a scale. Pins then test the actual solid area on both faces of a joint and shrink, or step aside and report, rather than fail silently.
Drain holes
Automatic through the lowest wall of every hollow part — or click exactly where you want each one. The bore follows the surface normal, so it can go under an arm or behind a head.
Mesh Integrity
Check reports how watertight the model is. Clean + Fill repairs it in place. Voxel Remesh rebuilds a closed volume when repair is not enough. A model that is not watertight is the usual reason a slice leaves stray fragments.
Assembly view
Explode pulls the parts apart to inspect every joint, Join puts them back — across every round of cutting, not only the last one.
Export
Every visible part to the folder you choose: STL binary, STL ASCII, OBJ, one 3MF per part, or all parts in a single 3MF, with a scale factor. The 3MF is written in millimetres, ready for current slicers.
Full Reset
Cut a part again and the add-on remembers the chain. One reset from any piece removes every part and backup from every round and brings back the first model, including the mesh from before it was hollowed.
Who it is for
Miniature & tabletop makers. Split a large monster or a vehicle into pieces that print without supports, and keep the numbered joints so a customer can assemble it from a photo.
Cosplay & prop builders. Helmets, pauldrons, swords and full armour cut into printable sections that key together in one orientation only.
Statue & bust printers. A 60 cm sculpt becomes a set of blocks, hollowed to save resin, with drain holes where you put them and clean seams where you chose.
Architecture & scale models. Large facades, terrain and site models split on a regular grid, exported as 3MF in millimetres, ready for the slicer without a rescale.
Terrain & modular sets. Cut a landscape into tiles that key to their neighbours, so the set stays aligned on the table.
Resin printers. Hollow with a real wall thickness, drain holes placed by hand, and pins that test the actual solid area of the wall before they are made.
Print farms & services. Take a client file, fit it to the machine you actually own, and hand back numbered parts with an assembly that is verified, not hoped for.
Teachers & makerspaces. One panel, plain-language messages, and a Full Reset that always brings the original back.
What changes on your desk
| Step | By hand | With 3D Slicer Suite |
|---|---|---|
| Block size | Measure the plate, subtract clearance, do the arithmetic, hope. | Pick the printer. The block size sets itself. |
| Making the cuts | A boolean cube per cell, applied one at a time, and a stray fragment when the mesh is not watertight. | One button. A cell a solver refuses is retried with the others and carved directly if they all fail. |
| Joints | Model a pin, duplicate it, subtract it, discover the clearance is wrong after printing. | Keyed pin plus a socket cut from that pin. Interference measured at zero. |
| Knowing what fits what | A photo, a sketch, or memory. | 1A and 1B engraved on the two halves of every joint. |
| Checking it will print | Load each STL in the slicer and find out there. | Fit report and watertightness check before you export. |
| Changing your mind | Undo forty times, or start from the backup file you hopefully saved. | Full Reset. One click from any piece restores the original, hollow included. |
Requirements
| Blender | 4.2 or newer — tested on 4.5 LTS and 5.x |
| Install | Preferences → Get Extensions → Install from Disk |
| Units | Millimetres throughout the interface |
| License | GPL-3.0-or-later |
| Updates | Free for life, delivered through Superhive |
Two minutes before your first cut. 1. Apply the object scale (Ctrl+A → Scale). 2. Run Mesh Integrity → Check, and Clean + Fill if it reports problems. 3. Pick your printer and press Slice Parts. A watertight model at its real size gives clean parts and pins at the size you asked for.
FAQ
Does my model have to be watertight?
It gives the best results, and the built-in Mesh Integrity → Check tells you in one click. Clean + Fill repairs most problems in place; Voxel Remesh rebuilds a closed volume when the mesh is beyond repair.
Will the printed parts really fit together?
The pins are tapered and keyed, and each socket is generated from the pin itself with your own tolerance value, so the clearance is the same all the way in. Interference between assembled parts is measured at zero from 5 % up to 78 % pin size.
Can I cut a part again after slicing?
Yes. Cuts chain, and Explode, Join, Export and Full Reset all see every generation — one reset from any piece restores the original model.
Does it work on hollow models?
Yes. Apply Hollow turns a solid into a shell with the wall thickness you type, in real millimetres. Pins then test the actual solid area on both faces of a joint: if the pin does not fit the wall it is reduced, and if no reliable fit exists that connection is left plain and reported.
Where do the drain holes go?
Either automatically, through the lowest wall of every hollow part, or exactly where you click — the bore follows the surface normal at that point. Both use the diameter you set in the panel.
Which Blender versions are supported?
One file covers Blender 4.2 and everything after it. Every release is tested end to end on 4.5 LTS and on 5.x.
What happens to very thin walls?
Slicing a thin shell into large blocks can leave open fragments where the model is very thin — a tail, a mane, a finger. Mesh Integrity points out which parts need a repair before export. A thicker wall or a smaller block size avoids it.
Support straight from the person who wrote it
Questions, a model that misbehaves, or a feature you need? Write to [email protected] with your Blender version, the add-on version, the model statistics and a screenshot.
STUDIO GUERRA 3D