3Dprs Advanced Curve Modifier Addon

3DPRS in Geometry Node Groups


DOCUMENTATION VERSION 1.0.0 BLENDER 4.3+

Advanced Curve Control

Installation, controls, recommended workflows, and troubleshooting for Advanced Curve Control.

Documentation contents
Installation Quick Start Controls Rail Setup Tips Troubleshooting

01 — INSTALLATION

Install the extension

1 Download advanced_curve_modifier-1.0.0.zip. Do not extract the ZIP.
2 In Blender, open Edit → Preferences → Get Extensions.
3 Open the extension menu, choose Install from Disk, and select the downloaded ZIP.
4 Enable Advanced Curve Control if Blender does not enable it automatically.
The extension is self-contained. No external .blend files or additional assets are required.

02 — QUICK START

Create your first curve setup

  1. Select the mesh or curve object you want to control.
  2. Open the 3D View sidebar by pressing N.
  3. Open the 3DPRS tab.
  4. Click Add Advanced Curve.
  5. Choose Follow Path or Curve Deform.
  6. Assign a separate Curve object to the Curve field.
  7. Choose the axis that points along the length or forward direction of your object.
  8. Adjust the offset and position to place the object along the curve.
The controlled object and the path curve must be separate objects.

03 — CURVE TYPES

Choose how the object interacts with the curve

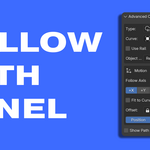
Follow Path

Moves and rotates the object along the curve without deforming its geometry.

Recommended for:

Vehicles, cameras, props, rigid assets, mechanical parts, and motion graphics.

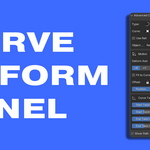
Curve Deform

Bends the object’s geometry so it follows the shape of the curve.

Recommended for:

Cables, roads, belts, pipes, trims, architecture, and flexible procedural assets.

04 — CONTROLS

Main settings

Type Switch between Follow Path and Curve Deform.
Curve The Curve object used as the primary path.
Use Rail and Rail Enable an optional second curve to guide rotation and roll.
Object Location Choose between the object’s original coordinate behavior and placement relative to the curve.
Axis Choose +X, +Y, +Z, -X, -Y, or -Z as the forward or deformation axis.
Fit to Curve Scales the object along the selected axis so its length matches the curve.
Show Path Includes the main path curve in the modifier output.

05 — OFFSET MODES

Position the object along the path

Relative 0 — 1

A normalized range where 0 represents the start of the curve and 1 represents the end.

Free -1 — 2

Allows the object to move before the start or beyond the end. The displayed range is soft and does not hard-cap the value.

06 — CURVE TWIST

Control rotation in Curve Deform

Twist controls are shown only when using Curve Deform.

Start Twist Angle Rotation applied at the beginning of the curve.
Start Twist Amount Controls how far the starting twist extends.
End Twist Angle Rotation reached at the end of the curve.
End Twist Amount Controls how far the ending twist extends.

07 — RAIL SETUP

Guide orientation with a second curve

  1. Create or duplicate a separate Curve object.
  2. Position it beside the main path so the distance between both curves defines an orientation direction.
  3. Enable Use Rail.
  4. Assign the second curve to the Rail field.
Keep the rail separated from the main curve. If both curves overlap, there is no reliable direction for the rail to provide.

08 — RECOMMENDED WORKFLOW

Tips for better results

  • Model the object’s length along one clear local axis.
  • Choose the matching positive or negative axis in the modifier.
  • Use a negative axis if the object faces backward along the path.
  • Curve Deform requires enough geometry subdivisions to bend smoothly.
  • Use Relative Offset for predictable animation between the curve endpoints.
  • Use Free Offset when the object must continue outside the curve range.
  • Enable Fit to Curve when the object should match the complete curve length.
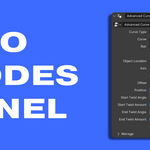
  • Use the sidebar for quick adjustments and Geometry Nodes for deeper customization.

09 — TROUBLESHOOTING

Common issues

The object is facing the wrong direction Choose another axis. Try the negative version of the current axis if the direction is reversed.
Curve Deform looks faceted Add more subdivisions along the object’s deformation axis. Geometry needs enough vertices to bend smoothly.
The rail does not affect rotation Confirm that Use Rail is enabled, a valid Curve object is assigned, and the rail does not overlap the main path.
The object does not move from start to end Use Relative Offset and animate Position from 0 to 1. Also confirm that a valid curve is assigned.
No curve is assigned The original object remains visible. Assigning a valid curve activates the path or deformation behavior.
An older node setup is still being used Use the Upgrade Advanced Curve button when it appears, or remove the old modifier and add a new Advanced Curve modifier.

10 — COMPATIBILITY

Product information

Product version 1.0.0
Minimum Blender version Blender 4.3
Workflow Geometry Nodes modifier
External assets required None

Quick controls when you need them.
Editable nodes when you want them.

Advanced Curve Control provides a focused curve workflow while keeping the generated Geometry Nodes system open for inspection and customization.


```
$5

Support Period Included

Includes 12 months of

  • Support from 3DPRS
  • Product updates

Extend this product’s Support Period +12 months: 25% of product price

Have questions before purchasing?
Login to message

Details
Published about 2 months ago
Blender Version 4.3 - 5.2
Render Engine Used Cycles, Eevee, Octane, Vray
License GPL