 auron3d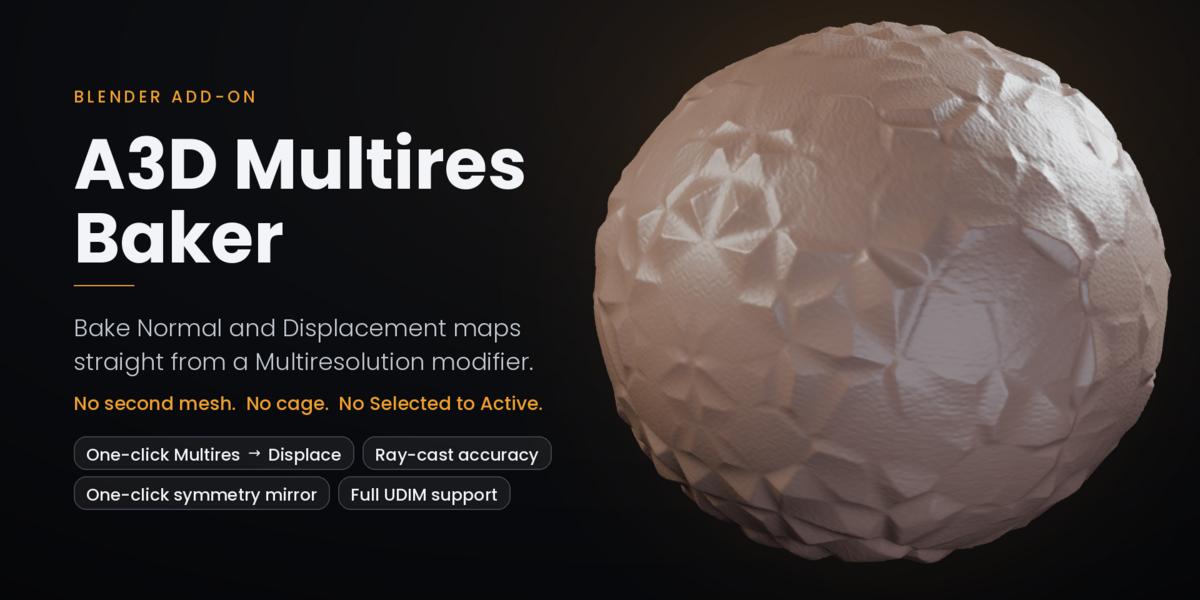
# A3D Multires Baker — Documentation
Version 1.4.1 · Blender 4.0 – 5.x · by Auron3D
---
## Table of contents
1. [Installation](#1-installation)
2. [Where to find it](#2-where-to-find-it)
3. [Tool 1 — Bake from Multires](#3-tool-1--bake-from-multires)
4. [Tool 2 — Multires to Displace](#4-tool-2--multires-to-displace)
5. [Tool 3 — Mirror](#5-tool-3--mirror)
6. [Typical workflows](#6-typical-workflows)
7. [Understanding the report line](#7-understanding-the-report-line)
8. [Troubleshooting](#8-troubleshooting)
9. [How it works internally](#9-how-it-works-internally)
10. [Limits and known behaviour](#10-limits-and-known-behaviour)
---
## 1. Installation
**Blender 4.2 and newer (extension)**
`Edit ▸ Preferences ▸ Get Extensions ▸ ▾ ▸ Install from Disk…` and pick
`A3D_Multires_Baker-v1.4.0.zip`.
**Blender 4.0 and 4.1 (legacy add-on)**
`Edit ▸ Preferences ▸ Add-ons ▸ Install…` and pick `a3d_multires_baker.py`.
No dependencies to install. The add-on uses NumPy, which ships with Blender.
---
## 2. Where to find it
**3D Viewport ▸ Sidebar (`N`) ▸ Tool ▸ A3D Multires Baker**
There is also a copy under **Properties ▸ Object Data**, collapsed by default.
The panel appears when the active object is a mesh and either:
- it has a **Multiresolution** modifier (baking and conversion are available), or
- it has a **Displace** modifier using an image texture with UV coordinates
(only the mirror section is shown).
That second condition matters: after you convert a Multires to a Displace the
Multires is gone, and without it the panel would disappear exactly when you need
the mirror button.
### The info box
The top of the panel reports the state of the active object before you touch
anything:
| Line | Meaning |
|---|---|
| Object name | Which mesh will be processed |
| `Levels: viewport N / sculpted M` | Multires viewport level and total sculpted levels |
| `Active UV:` | The UV map the bake will use — **the active one, not the render one** |
| `UDIM: 1001, 1002…` | Tiles your active UV actually occupies |
If the UDIM line is shown in red, your UVs need tiles but UDIM is disabled, and
everything outside the 0–1 square will be discarded.
---
## 3. Tool 1 — Bake from Multires
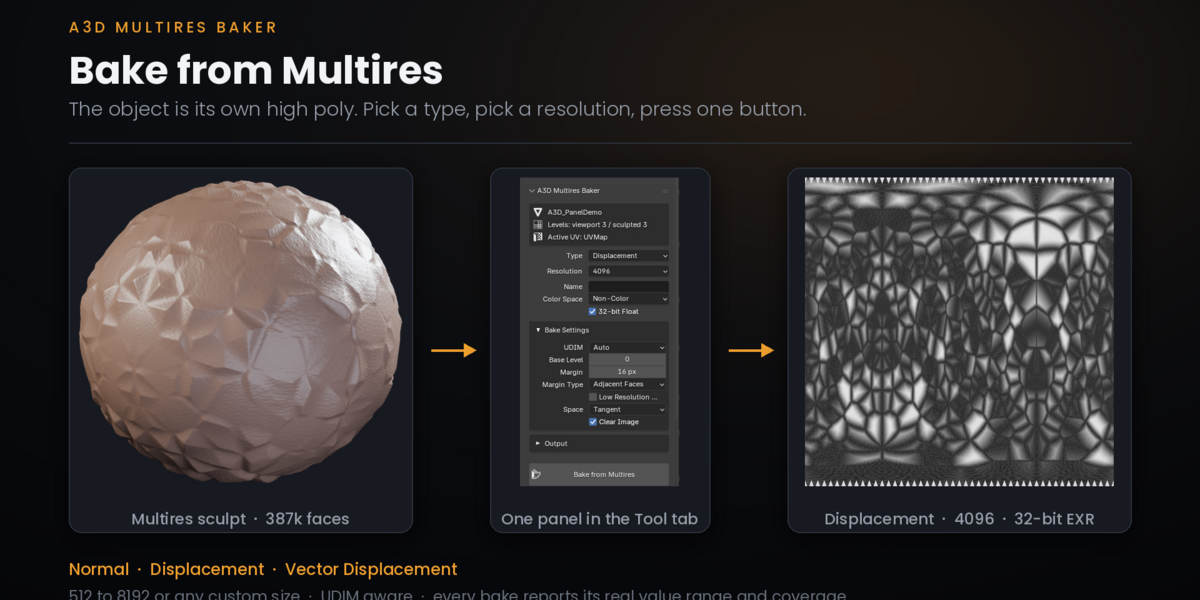
Bakes the sculpted detail of the Multiresolution modifier into an image, using
the same object as both high and low poly. No second mesh and no cage.
### Main settings
**Type**
| Option | Result |
|---|---|
| Normal | Tangent-space normal map |
| Displacement | Scalar height map |
| Vector Displacement | Full XYZ offset — supports overhangs. **Blender 5.0+ only** |
**Resolution** — 512 to 8192, or `Custom` with separate
width and height.
> Higher is not always better. A texture cannot carry more detail than the mesh
> has. As a rule, aim for a texel roughly the size of the spacing between
> subdivided vertices; beyond that you only get bigger files.
**Name** — leave empty for an automatic name built from the object and
the bake type: `_Normal`, `_Disp`, `_VDisp`.
**Color Space** — leave on **Non-Color**. Normal and
displacement maps are data, not colour; sRGB will corrupt them.
**32-bit Float** — keep on for Displacement and Vector Displacement. With 8 bits
a subtle relief bands into visible steps and negative values are lost.
### Bake Settings
**UDIM** — `Auto` builds a tiled image only when your active UV actually leaves
the 0–1 square. `Force` always builds one. `Never` bakes a single plain image
and discards everything outside 0–1.
**Base Level** — the Multires level used as the low-poly
reference. **0** is what you want in almost every case. If you set it equal to
the total level there is no difference left to bake and the map comes out flat.
**Margin** and **Margin Type** — bleed outside the
UV islands. 16 is a sensible default; raise it if you see a dotted seam where a
feature crosses between two materials.
**Low Resolution Mesh** — measures heights against the unsubdivided base mesh
instead of the subdivided limit surface. Off by default. Turn it on only if the
normal bake produces detail but the displacement bake comes out completely flat.
**Space** — Tangent or Object, for Displacement and Vector
Displacement. Blender 5.0+ only; hidden on older versions.
**Clear Image** — wipe the image before baking instead of
accumulating on top of the previous result.
### Output
**Save to Disk** with **Destination**: next to
the `.blend` file, or a folder of your choice.
**Format** — `Auto` picks OpenEXR for float buffers and PNG for
8-bit. You can force PNG, OpenEXR or TIFF.
**Create Material** — builds a simple material with the map
already wired: Normal Map node into the Principled normal input, or a
Displacement node into the Material Output with `displacement_method` set to
`BOTH`. **Replace Materials** clears the existing slots
first; otherwise the new material is added as an extra slot.
**All Selected** — batch every selected object that
has a Multires, producing one image per object.
**Apply Multires After Baking** —  applies
appliesthe modifier at its maximum level and **destroys the sculpt levels
permanently**. Off by default and marked with a warning icon.
### Running it
Press **Bake from Multires**. When there is no image and no material on the
object, the add-on creates a temporary material for the bake and removes it
afterwards — you never have to prepare anything by hand.
---
## 4. Tool 2 — Multires to Displace
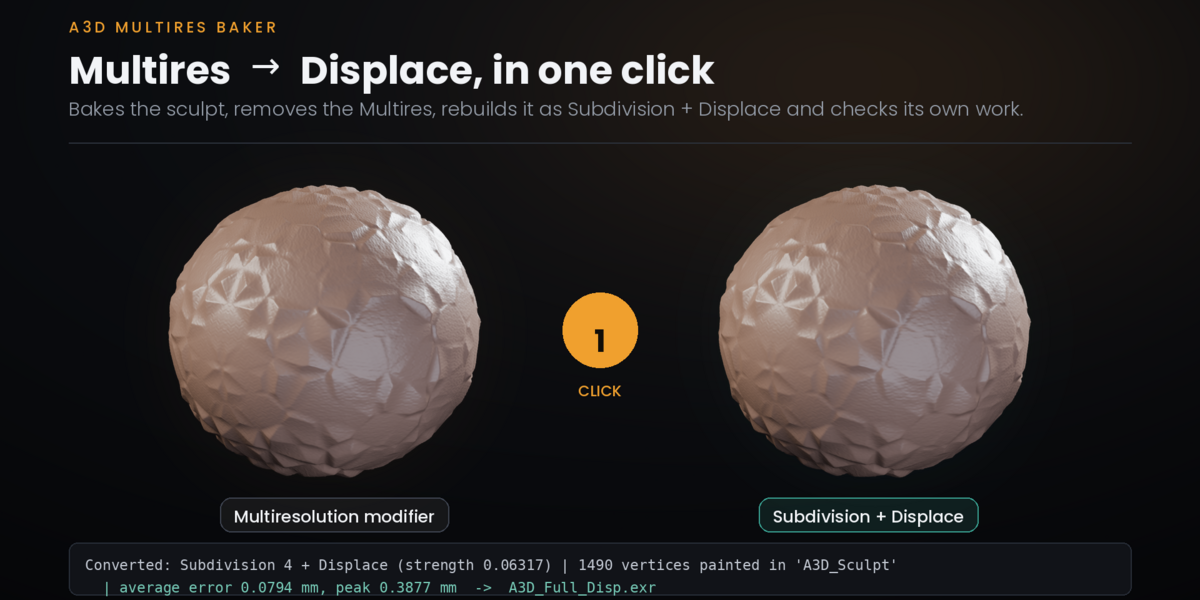
Replaces the Multiresolution modifier with a Subdivision Surface + Displace pair
that reproduces the same shape, and proves it did.
### What one click does
1. Measures the real height of the sculpt over the limit surface, by ray cast.
2. Bakes it to a 32-bit float EXR (UDIM aware), saved next to the `.blend`.
3. Recompresses the EXR to single-channel ZIP.
4. Paints a vertex group over the sculpted region, detected from the map.
5. Removes the Multires.
6. Inserts **A3D_Subdiv** (Catmull-Clark, at the Multires' total level) and
**A3D_Displace** in exactly the same position in the stack, so everything
above them — armature, correctives, your wrinkle displaces — keeps affecting
the mesh the same way.
7. Compares the result against the mesh the Multires produced and reports the
average and maximum error in millimetres.
### Settings
**Paint Weights Automatically** with
**Group Name**, default `A3D_Sculpt`.
The group is detected by sampling the baked map at each vertex's UV, then grown
two edge rings so it reaches 1.0 with room to spare over the whole displaced
area. That margin is deliberate: if the edge of the group fell inside the relief,
the weight would fade it and the result would no longer match the Multires.
**Keep the Multires** — leaves the modifier in place,
disabled, instead of deleting it. Off by default.
**Verify the Result** — measures the final mesh
against the Multires mesh and puts the error in the report line. Costs a few
seconds. Leave it on.
### The Displace values it sets
| Property | Value |
|---|---|
| Mid Level | `0.5` |
| Strength | `2 × peak height` in metres |
| Texture Coordinates | UV |
| Direction | Normal |
| Space | Local |
These are not arbitrary. Blender's Multires displacement bake normalises the
output: 0.5 means no displacement and the measured peak maps to 1.0. Setting
Strength to exactly twice the peak turns the map back into real millimetres, so
`depth × strength` is the actual physical displacement.
### Expected accuracy
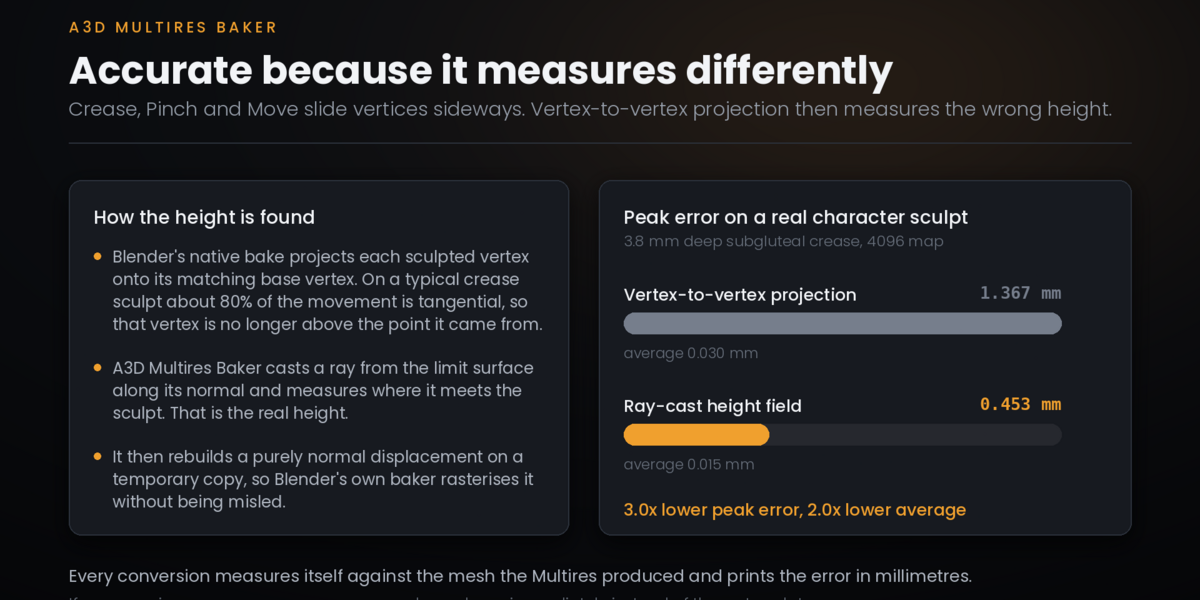
Measured on a 5-level sculpt of a glute crease, 179 265 evaluated vertices:
| | average | maximum |
|---|---|---|
| Sculpt depth | 0.285 mm | 3.793 mm |
| Conversion error | **0.015 mm** | **0.453 mm** |
The residual sits at the sharpest point of the crease, where the sculpted
surface stops being a height field over the base and a scalar displacement can
no longer follow it exactly. It is not visible at normal viewing distance.
---
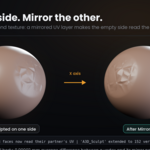
## 5. Tool 3 — Mirror
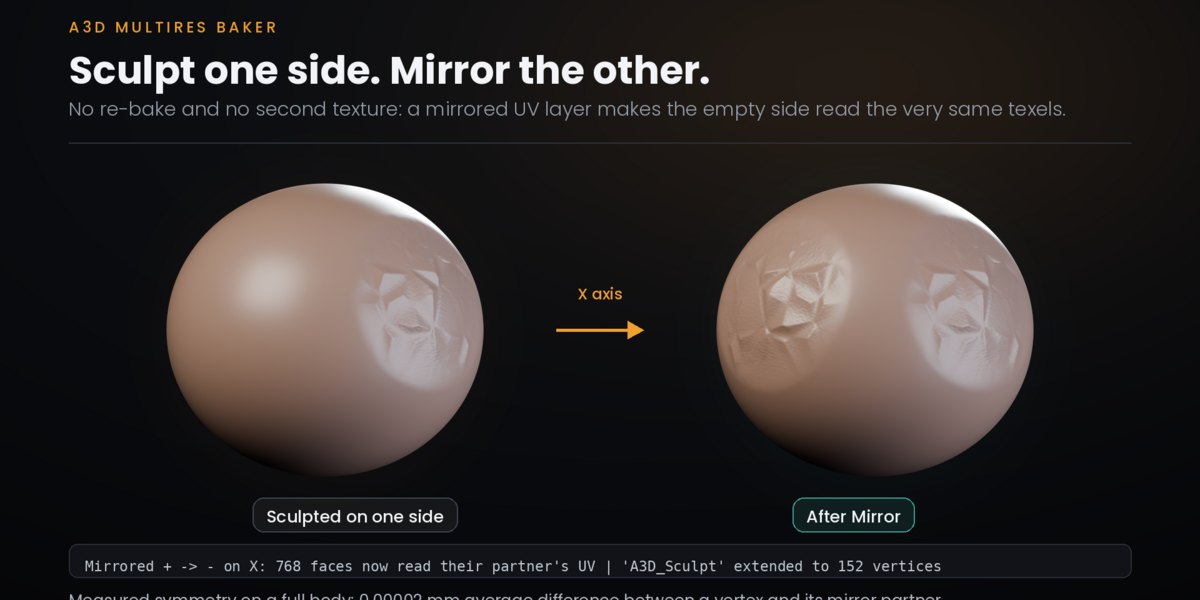
Makes the un-sculpted side show the identical relief, without baking anything
again.
### Settings
**Axis** — X, Y or Z. X (left/right) in almost every case.
**Direction** — `Auto` samples the map through each vertex's UV,
sums the signal on each side of the axis and copies from the stronger one. You
can force `- hacia +` or `+ hacia -`.
**UV Layer** — name of the mirrored UV layer that gets created,
default `A3D_MirrorUV`.
**Symmetrize Weights** — extends the modifier's vertex
group to the mirrored side. Shown only when the modifier uses a group. Leave it
on: otherwise the mask would hide exactly the relief you just copied.
### What it actually changes
It creates a new UV layer in which every face on the empty side carries the UV
coordinates of its symmetric twin, and points the Displace modifier at that
layer. Your active UV map is not modified and the texture is not rebaked — both
sides read the very same texels, so the two halves are identical by
construction, not by approximation.
Measured on a full body: 5408 displaced vertices, **2704 on each side**, average
difference between a vertex and its mirror partner **0.00002 mm**.
### Undoing it
Set the Displace modifier's UV Map field back to your original UV layer. The
panel shows a tick and the text *"Already mirrored"* when the mirror is active.
> If you sculpt again and re-run the conversion, the new Displace will point at
> the normal UV map and you will need to press Mirror again.
---
## 6. Typical workflows
### Sculpt once, get both sides
1. Add a Multires to the character mesh and subdivide.
2. Sculpt the detail on one side only.
3. **Multires → Displace**.
4. **Mirror**.
### Just get a normal map out of a sculpt
1. Select the object with the Multires.
2. Type = Normal, resolution, **Bake from Multires**.
3. Enable **Create material** if you want it wired up for you.
### Sculpting on a cut-out piece
Separating a region into its own object, sculpting there and baking works, but
the piece keeps the UV coordinates of the full body — usually spread over
several UDIM tiles. Leave UDIM on `Auto` and it is handled for you.
---
## 7. Understanding the report line
Every operation writes a line to the status bar. It is worth reading.
**After a bake**
```
Bake finished: 'Head_Normal' | range 0.0588 | detail over 12.29%
```
- **range** — the largest spread within any single channel. Near zero means the
map is flat.
- **detail over** — the percentage of the map that carries data. A low number is
not necessarily wrong (a small UV island on a big map), but if you expected
full coverage it points at a UV problem.
For UDIM images the tile list is shown instead, because a tiled image cannot be
measured through Blender's Python API.
**After a conversion**
```
Converted: Subdivision 5 + Displace (strength 0.00759)
| 119 vertices painted in 'A3D_Sculpt'
| average error 0.0148 mm, peak 0.4528 mm
-> C:\...\Head_Disp..exr
```
**After a mirror**
```
Mirrored - -> + on X: 8811 faces now read their partner's UV
| 65 with no partner, left as they were
```
Faces "without a partner" are places where the mesh is not topologically
symmetric. A handful is normal; a large number means the axis is wrong or the
mesh is genuinely asymmetric.
---
## 8. Troubleshooting
**The map is completely grey / nothing happens**
Check the UDIM line in the info box first. This is the most common cause by far:
DAZ and Genesis figures put the torso, legs and arms in different UDIM tiles, and
a non-tiled bake only writes the 0–1 square. Set UDIM to `Auto`.
Then check the **Base level**. If it equals the total level there is no
difference to bake.
**The map has data but the relief is invisible**
Read the `range` value in the report. A very small number means the bake is
correct but the sculpt is genuinely shallow. This is normal for a scalar
displacement in scene units; it will still work when driven with the right
Strength.
**The displacement banded into steps**
You saved a float bake into an 8-bit format. Use OpenEXR, or leave Format on
`Auto`. The add-on warns you about this in the report line.
**A dotted line appears where a feature crosses between two materials**
Raise the **Margin**. That is the UV seam between tiles, and the bleed is not
reaching far enough.
**The conversion left the Displace before the Subdivision**
Fixed in 1.3.0. Blender refuses to move any modifier above a Multiresolution, so
the Multires is now removed before the new modifiers are inserted.
**Nothing moves after converting**
Check that the Displace's vertex group actually exists on that object. A group
name that does not exist is treated as "no mask", but a group that exists and is
empty masks everything out.
**Mirror reports most faces without a partner**
The mesh is not symmetric on that axis, or you picked the wrong axis. The
operator refuses to run when fewer than half the vertices have a symmetric
partner.
---
## 9. How it works internally
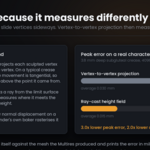
### Why the native bake is not enough
Blender's Multires displacement bake measures `dot(sculpted_vertex −
base_vertex, normal)`. That assumes each sculpted vertex is still directly above
the point it came from. Crease, Pinch and Move brushes break that assumption:
they slide vertices **along** the surface. On a typical crease sculpt about 80%
of the total movement is tangential.
Tangential movement does not change the shape — the vertex just slides over the
same surface — but it does ruin the measurement, because the projection is taken
against a normal that no longer belongs to that point. The result is a height
field that is too shallow exactly where the crease is sharpest.
### The ray-cast height field
The add-on casts a ray from each point of the limit surface along its own
normal, in both directions, and keeps the nearest hit. That distance is the real
height of the sculpted surface above that point, whatever direction the vertex
drifted.
A safety cap discards rays that crossed to another part of the mesh, and points
where no ray hits (the open border of a cut-out piece) get height zero.
### Why a temporary reshaped copy
Rasterising 356 000 triangles into a UV map from Python would take minutes.
Instead the add-on builds the mesh `limit surface + height × normal` — a purely
normal displacement with no tangential component at all — writes it into the
Multires of a temporary duplicate with `multires_reshape`, and lets Blender's own
baker rasterise it. The native baker now measures vertex against vertex and gets
it right, because there is nothing left to mislead it. The original sculpt is
never touched.
### Measuring in rest space
Everything is measured with all other modifiers disabled. Sculpted detail is a
property of the rest shape; measuring it with the armature active would bake the
current pose into the map.
### Verification by surface distance
The verification does **not** compare vertex against vertex by index — that
would report the tangential slide as an error of several millimetres when the
shape is identical. It builds a BVH tree of the Multires mesh and measures the
distance from the converted mesh to that **surface**, which is what the eye
actually sees.
### EXR compression
`Image.save()` writes uncompressed RGB float with no configurable options — an
8K map lands at 805 MB per tile. After saving, each file is rewritten through
`save_render` as single-channel 32-bit ZIP. The map is mostly the neutral value,
so it compresses enormously: 805 MB becomes under 2 MB with no loss of
precision.
### Version compatibility
In Blender 4.x the Multires bake settings live loose on `scene.render`
(`use_bake_multires`, `bake_type`, `bake_margin`…). In 5.x they moved inside
`scene.render.bake` (`use_multires`, `type`, `margin`…). Rather than checking
`bpy.app.version`, the add-on detects by introspection which container exists and
maps the names. Anything a given version does not support is skipped silently, so
a newer option never breaks an older Blender.
---
## 10. Limits and known behaviour
**Scalar displacement cannot reproduce overhangs.** Where the sculpted surface
folds over itself, no scalar height field can follow it. This is the source of
the residual peak error in the conversion. For genuine overhangs, bake Vector
Displacement instead (Blender 5.0+).
**The bake uses the active UV map, not the render UV map.** The info box shows
which one it is.
**Mirror needs a topologically symmetric mesh.** It pairs vertices by position
with a tolerance of 0.2% of the mesh size.
**Mirror decides per face, not per corner.** Because the Displace sits after a
Subdivision, a face whose corners came from two different UV islands would
interpolate between them and produce garbage. Each face is assigned whole.
**Vertex groups live on the base mesh.** On a low-density cage the group is
coarse after subdivision. This is why the painted group is deliberately grown
outwards rather than fitted tightly.
**Applying the Multires is irreversible** and destroys the sculpt levels.
---
## Changelog
**1.4.1** — Interface, messages and source comments are now fully in English.
No functional change.
**1.4.0** — Mirror tool. Panel now also appears on converted objects.
**1.3.0** — Ray-cast height field replaces vertex-to-vertex projection: peak
conversion error from 1.367 mm down to 0.453 mm. Measurement moved to rest
space. EXR recompression. Fixed modifier identity comparison that could disable
the Multires and abort the bake.
**1.2.0** — Multires → Displace conversion with automatic weights and
self-verification.
**1.1.0** — UDIM support with automatic tile detection. Fixed a bug where
reassigning `image.filepath` after saving reloaded the file over the freshly
baked buffer, destroying float data and leaving 0-pixel datablocks. Per-channel
signal reporting and warnings.
**1.0.0** — First release: Normal, Displacement and Vector Displacement baking
from Multires.
---
*A3D Multires Baker — by Auron3D · https://superhivemarket.com/creators/auron3d*
$9.99
 Included
Includes 12 months of
- Support from auron3d
- Product updates
Extend this product’s Support Period +12 months: 50% of product price
Have questions before purchasing?
Login to message
| Blender Extension Compatible | Yes |
| Published | 3 days ago |
| Blender Version | 5.1 - 5.2 |
| Extension Type | Add-on |
| Render Engine Used | Cycles, Eevee |
| License | GPL |
Discover more products like this
multiresolution sculpting texture-baking Multires displacement map normal map baking displacement retopology bake