Advanced Ripple Modifier
 All Angles Ltd
Advanced Ripple User Guide
Version 0.9.16 · All Angles Ltd
Quick start
Advanced Ripple builds deterministic wave patterns on a mesh. A receiver is the mesh being displaced. A source tells the pattern where to begin. A layer is one Advanced Ripple modifier with its own settings.
- Add a Grid mesh with roughly 100 × 100 vertices and a size of about 10 Blender units. Shade it smooth. A plane with four corners has too few vertices to show waves.
- Select the grid in Object Mode. On Blender 4.x/5.x, choose Add Modifier → Advanced Ripple. On Blender 3.6, press F3, search Add Advanced Ripple, or use the Object menu.
- With no source rows, the Fallback Point emits a radial pattern. Try Height 0.10, Wavelength 1.0 and Speed 1.0.
- Play or scrub the timeline. Add an Empty, then reselect the grid, choose Add Source → Point and pick the Empty.
- Move the Empty. The pattern updates when Live Source Updates is enabled.
Where to find controls
Select the receiving mesh and open Properties → Modifiers → Advanced Ripple. If several Advanced Ripple modifiers are stacked, choose the layer before changing its settings.
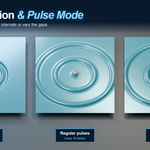
- Frame Emission and Pulse Mode · Enable Frame Emission, then Pulse Mode. Pulse Every sets the interval, Pulse Duration sets the burst length and Pulse Variation sets how much the gaps vary. Seed appears here when variation is above zero.
- Choppiness and Custom Profile · Reverse Choppiness appears directly below Choppiness when Choppiness is above zero. The custom graph appears when Profile is set to Custom.
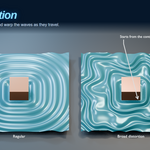
- UV Flow · In Sources, set Travel to UV Flow to reveal UV Scale and UV Seam Blend.
- Edge Detection · Add an Edge Detection source and choose Holes Only or All Open Edges. Freeze Edges is in Banks.
- Reflection Objects · Raise Strength in Reflections — One Bounce to edit the object list. Pick a reflector to enable Shadow Fill. Wrap Reach becomes editable when Shadow Fill is above zero.
- Version and backend · Expand Performance at the bottom of the modifier to check the installed version and see which backend is active.
Installation and updates
Choose the right file
On Windows, install AdvancedRipple-0.9.16-Windows.zip. On macOS, install AdvancedRipple-0.9.16-macOS-Preview.zip. Do not install the larger Documentation or Source ZIP. Do not unzip the add-on ZIP before installing it. Its internal Python module remains ripple_pattern so existing projects can keep their references.
Blender 4.2 and newer
- Open Edit → Preferences → Add-ons.
- Open the drop-down menu in the upper-right corner and choose Install from Disk. UI wording can vary slightly between versions.
- Select the add-on ZIP, confirm, then enable Advanced Ripple.
- Select a mesh in Object Mode and choose Add Modifier → Advanced Ripple.
Blender 3.6
- Open Edit → Preferences → Add-ons → Install.
- Select the add-on ZIP and enable Advanced Ripple.
- Select a mesh, press F3 and search Add Advanced Ripple. It is also available in the Object menu.
Blender 4.0–4.1
These releases use the older Preferences installation button where available. Use Install, select the same ZIP, enable the add-on and add it from the modifier menu. Check the compatibility table for tested status.
Updating an existing installation
Save a backup of your .blend file. Close other Blender sessions, disable the old Ripple Pattern/Advanced Ripple add-on, install the new ZIP and enable it again. Restart Blender before continuing. The earlier display name was Ripple Pattern; do not keep two copies of the same module installed. Existing settings retain their internal identifiers.
Removing it
Save a backup first. Remove the effect from the modifier stack or use the panel's X for the selected layer. Disabling or uninstalling the add-on does not bake animated geometry. Apply a modifier to a duplicate mesh to keep a single evaluated result, or use an appropriate geometry-cache export for animation.
Mesh preparation
Add Advanced Ripple finishes Edit Mode before preparing a newly subdivided mesh. The modifier can also follow an unapplied Subdivision Surface modifier on a four-vertex plane; no bake or manual Refresh is required.
Displacement moves existing vertices. Start with a reasonably even grid or a dense curved mesh. Short wavelengths and square/saw profiles need more samples across each band. Increase density gradually; four to eight edges per wavelength is only a starting point, and close-ups may need more.
You can put your own Subdivision Surface modifier before Advanced Ripple. More incoming vertices increase Geometry Nodes evaluation cost. A subdivision after the effect smooths the resulting mesh but cannot recover wave detail that the original vertices never sampled.
Connected geometry matters for Surface travel. Ripples do not jump a disconnected mesh island. Poor triangles, narrow faces, holes or very uneven density can affect path quality. Curved distances are numerical approximations on the rest mesh, not exact analytic distances on every possible surface.
Planar surfaces are generally the cheapest case. Curved contact paths and their smoothing cost more. Extreme Choppiness or overlapping strong layers can fold geometry; reduce displacement before adding resolution.
Layers and modifier stack
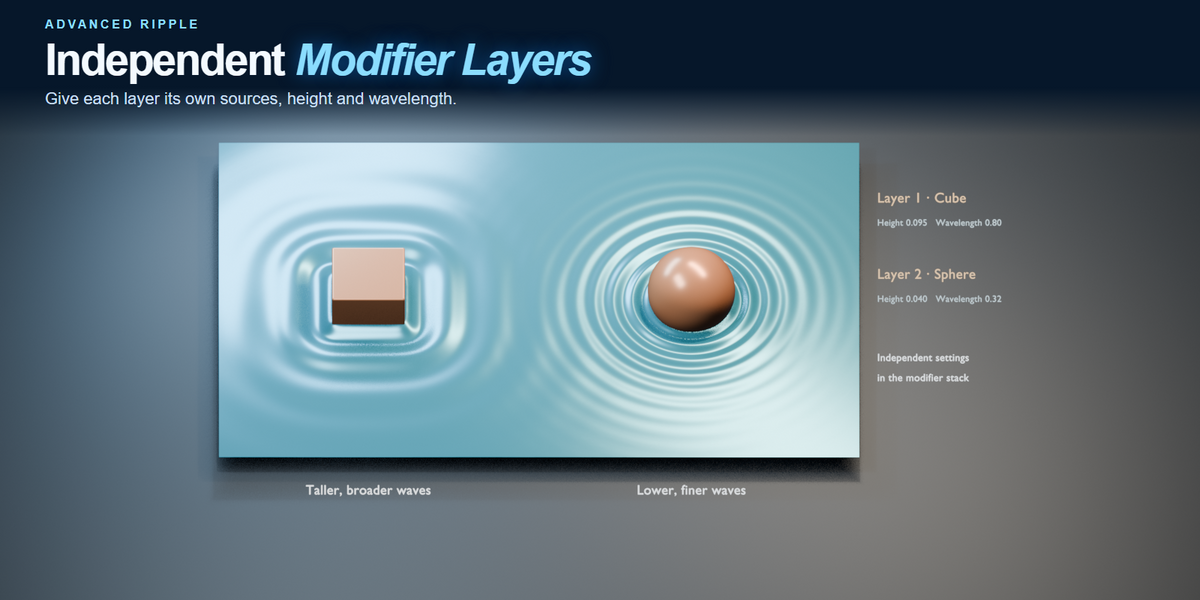
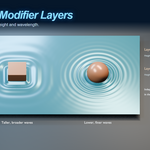
Add Advanced Ripple again to create a fresh layer. The Layer dropdown at the top of the panel chooses which modifier you are editing. Native modifier names appear in the dropdown, so rename layers to describe their job.
- Use one layer for a broad point swell.
- Add a second layer for fine mesh-contact waves.
- Choose each layer in the dropdown and set its own Height, Wavelength, sources and timing.
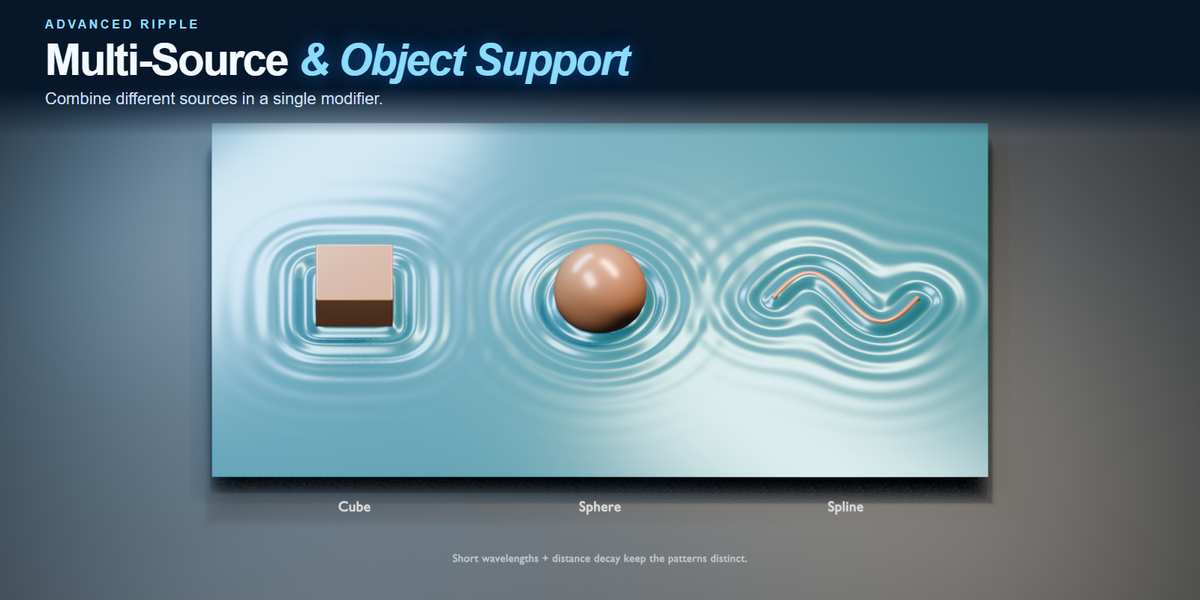
To give a source a separate strength, place it in another layer and adjust that layer's Height. Multiple sources in one layer share its controls. A shared source object can drive several layers.
Each layer adds its contribution over the same rest surface. Later layers do not recompute travel across the already animated waves beneath them. Float and distance clips control only their own layer; another layer can still displace that area. Reordering layers with substantial tangent displacement or other intervening modifiers can change the final appearance.
The panel X removes the selected layer. Native modifier visibility controls mute it. Native modifier Duplicate copies a layer independently, including its settings and supported animation. Each additional layer needs its own fields and waveform data, increasing memory and evaluation cost.
Source types
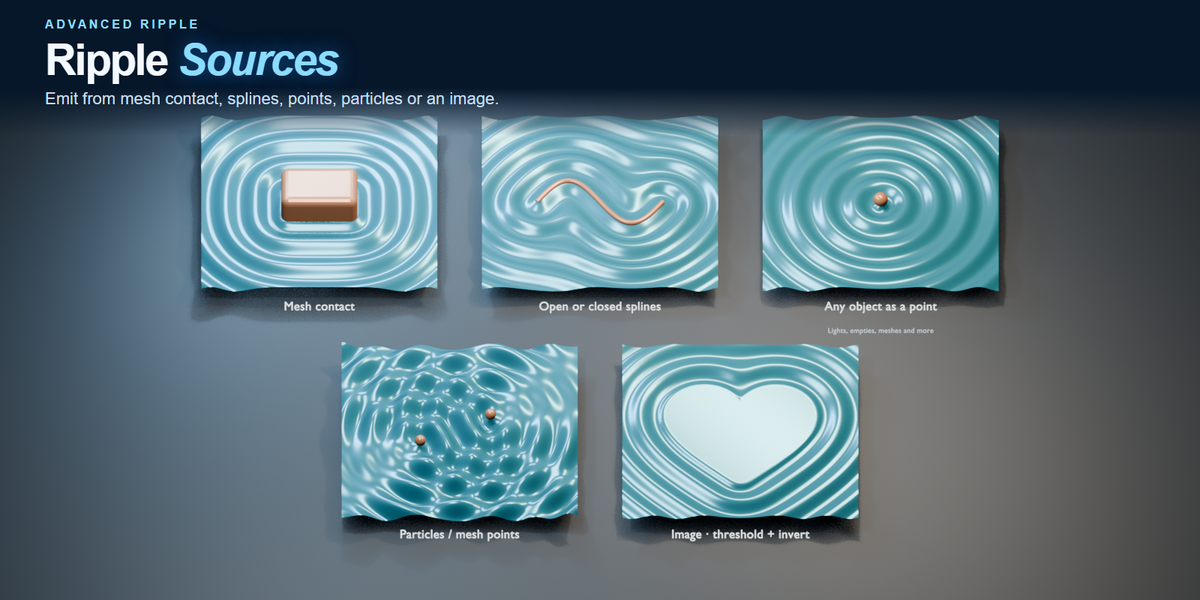
Point
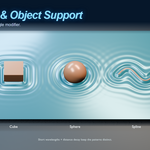
Pick an object, commonly an Empty. Its origin is projected onto the receiver. The source object's visible shape is ignored. Moving it away from the surface still gives a projected point; choose Mesh Contact if emission must require a physical intersection.
Mesh Contact
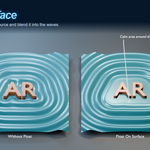
Pick a mesh or an editable Blender Text object intersecting the receiver's rest surface. The actual intersection outline drives the pattern. A source merely hovering above the receiver has no contact and produces no mesh-contact waves. For Text, set Text Data Properties → Geometry → Extrude so the letters cross the receiver. With Live Source Updates enabled, ripples update as you type in Text Edit Mode. Use closed, clean geometry for predictable Float interiors.
Spline
Pick an open or closed Curve, or an edge mesh. The evaluated path is sampled and projected onto the receiver. Increase the source curve's resolution if its outline looks faceted. Closed paths work best when you need a filled quiet region with Float On Surface; an open path does not define an enclosed interior.
Particles / Points
Use alive legacy particles, evaluated point-cloud points or vertices from a mesh. Each sampled position emits an independent ring system. For Geometry Nodes point sources, supply evaluated mesh vertices or point-cloud points; realise instances and convert to mesh when needed. Unrelated instance containers are not guaranteed to provide usable points.
The default Emitter Budget is 16, adjustable up to 256 in Performance. An independent particle can consume one emitter channel. Increasing this budget can be expensive. The warning reports omitted emitters. This is a current-position pattern, not a simulation that leaves a historical trail.
Image
The receiver needs an active UV map. Load a black-and-white image, choose a Threshold and use Invert Black / White to swap the selected region. The normal threshold selects the lighter region; inversion selects the darker one. The selected region stays flat. Ripples start at its border and travel into the unselected region. Edge Blend fades in the waves over a distance outside the filled region. Each image source keeps its own filled region; other sources and stacked modifiers remain independent. Mesh/UV sampling limits detail: a tiny image feature cannot produce a clean outline if no receiver samples hit it.
Use File → External Data → Pack Resources before sharing a demo or project that needs external image files. Inversion does not edit the image pixels.
Source list behaviour
The checkbox enables a row; its X removes the row. Add Source appends a fresh row. Deleting a picked object clears its reference and contribution; Undo restores them. With no source rows, Fallback Point is used. A disabled or missing entry in a non-empty list is not a substitute for a valid source. Use Refresh if you have changed geometry while live updates are off.
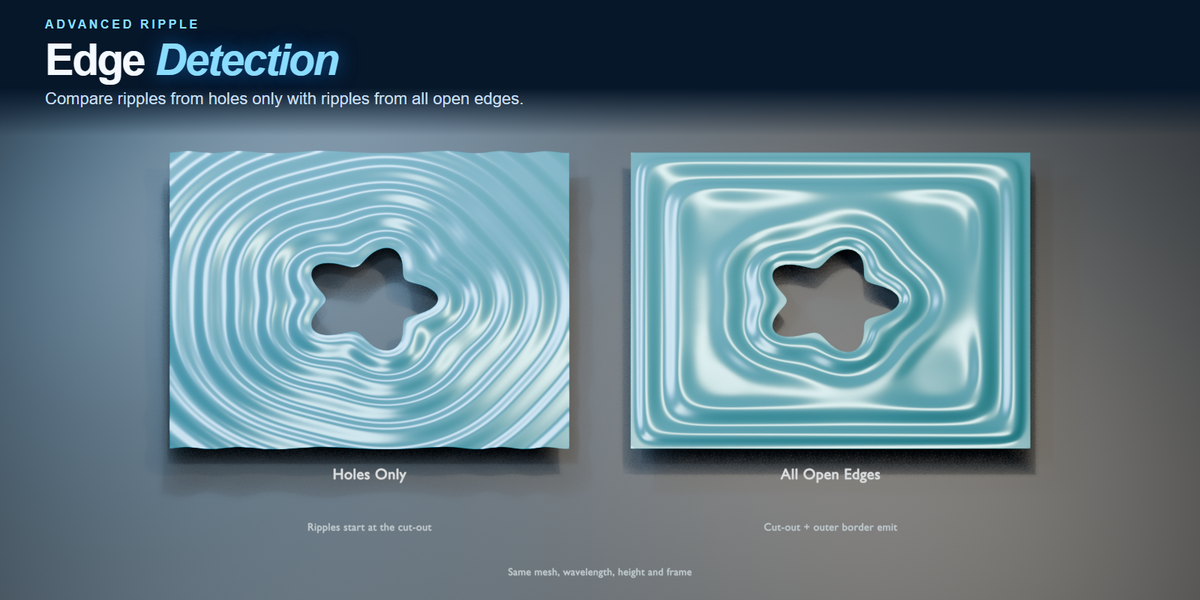
Edge Detection
Use holes or open edges already present in the receiver as ripple sources. No separate object is needed.
- Cut a hole through a dense surface mesh. Remove the faces inside the cut-out; a material or dark texture alone is not a geometric hole.
- Add an Advanced Ripple modifier. Choose Add Source, then change the source type to Edge Detection.
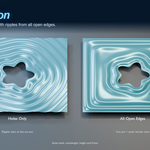
- Choose Holes Only to emit from enclosed cut-outs while excluding the outside perimeter.
- Use the normal Height, Wavelength, Speed, Decay, Distortion, Variation and Frame Emission controls.
All Open Edges includes every open boundary, including the outside perimeter and openings in curved shells. Holes Only identifies nested boundary loops in a best-fit projection and is most predictable on flat surfaces. For folded surfaces with overlapping projections, choose All Open Edges. A closed mesh without any open boundaries cannot emit using this source.
Boundary edges must be actual edges with one neighbouring face. Internal triangulation, painted patterns and closed solid caps are not open boundaries. Disable the source row to stop its contribution.
Surface and UV travel
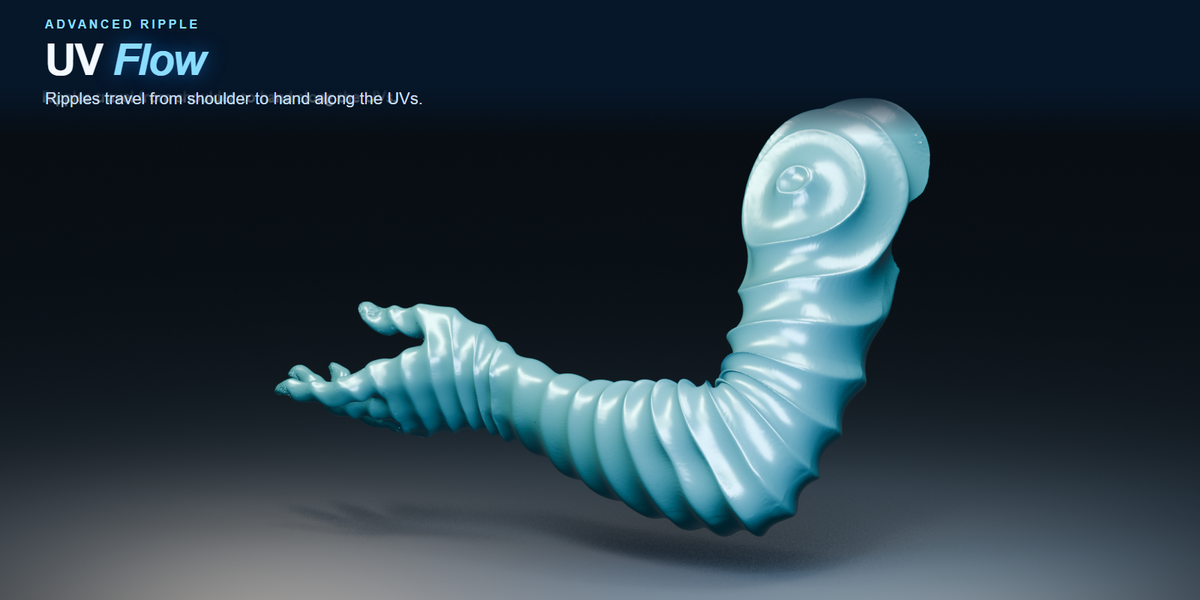
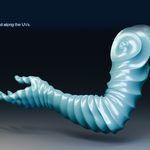
UV Flow requires an active UV map. It changes the travel coordinate, not the mesh topology or material UVs.
Live UV updates
Undo and Redo reuse prepared Surface and UV travel graphs when the restored receiver matches. Ripple fields refresh for changed sources and can be reused for unchanged receivers.
Each travel mode prepares its graph on first use. Switching back on the most recently switched receiver or layer reuses its prepared fields when the mesh, sources and relevant settings still match.
Live Source Updates follows the fallback point, evaluated Point-source origins, and changes made with Blender's Set Origin command. With no source rows, Fallback Point is a position in the receiver's local coordinates. A Point source uses the picked object's origin. Both are projected onto the receiving mesh.
The UV traversal data is cached separately from object transforms and 3D vertex positions. Moving or scaling the receiver, or relocating its origin, reuses that UV data. Changing UV coordinates or topology requires new preparation. Dense meshes still have an initial setup cost.
Hidden receivers and modifiers disabled in the viewport do not run live viewport calculations. Render-enabled receivers are prepared for rendering. If Live Source Updates is off, use Refresh to accept a source or geometry edit.
Wave controls
| Control | What it does |
|---|---|
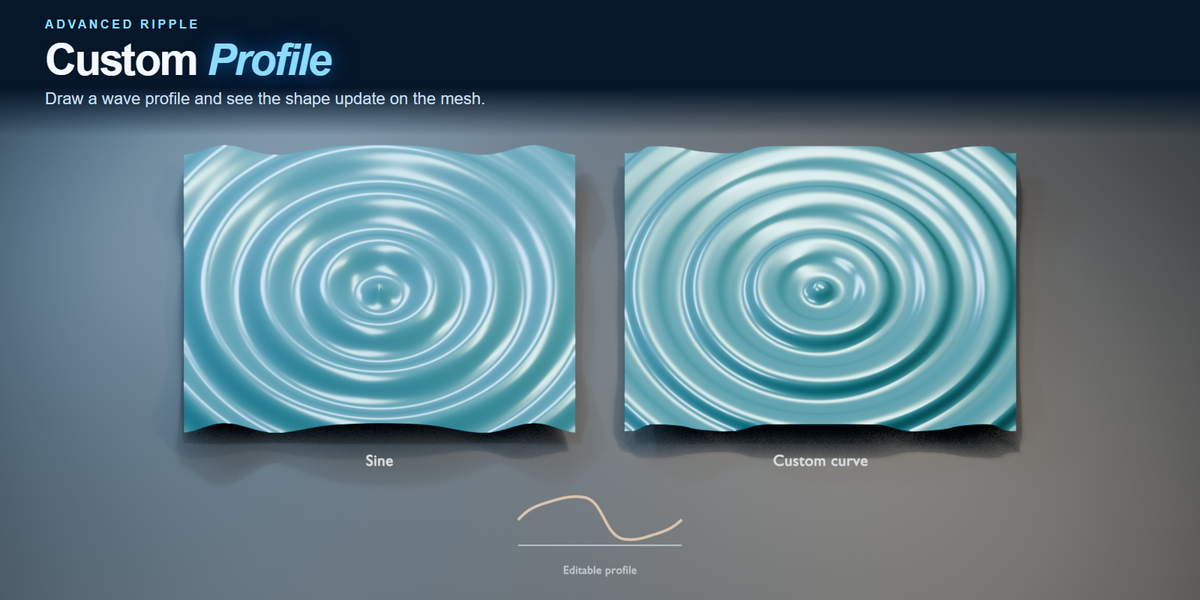
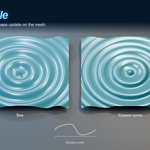
| Profile | Sine is a smooth starting point. Gerstner and Trochoidal support a more rolling form with tangent displacement. Square and Saw are deliberately sharper. Custom exposes an editable curve. Open the graph menu and choose Reset Curve to restore the sine shape with two interior control points. |
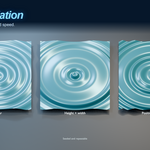
| Height | Layer displacement strength along the rest-surface normal. It is not a separate strength per source row. |
| Wavelength | Nominal band spacing before variation. Smaller values require denser geometry. |
| Speed | Propagation speed. Positive values are needed for outward Frame Emission. Zero freezes travel; negative speed is available for ungated patterns. |
| Phase | Offsets the waveform phase without moving the source. |
| Time Offset | Offsets time in seconds. |
| Distance Decay | Reduces amplitude as travel distance increases. Zero removes this decay. |
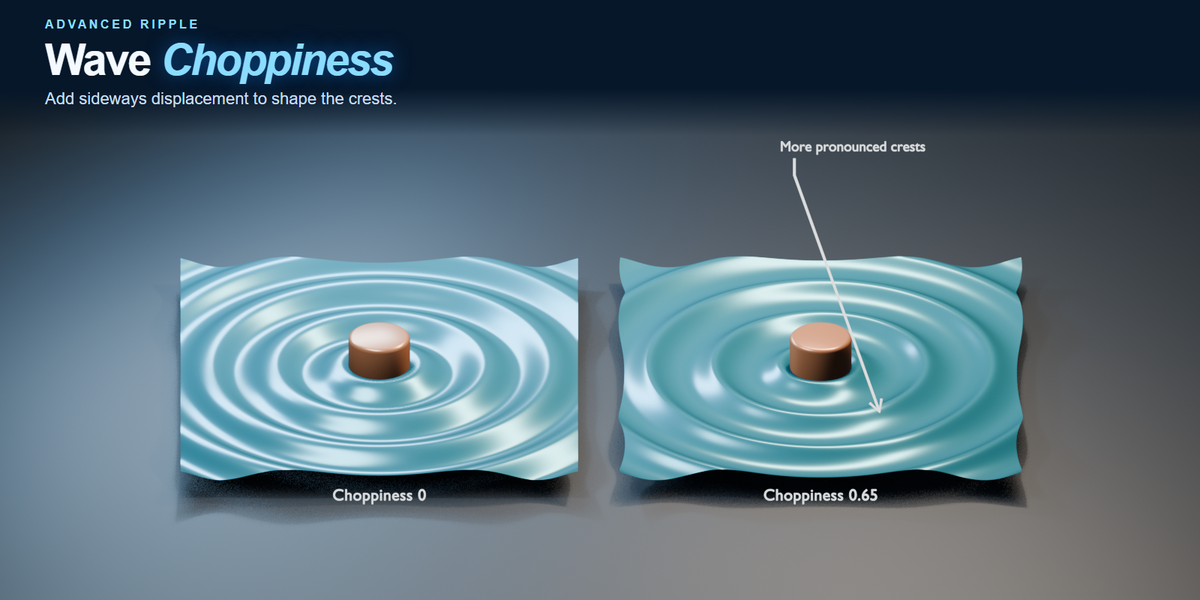
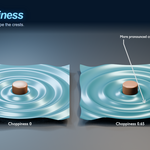
| Choppiness | Adds tangent displacement. Start low; extreme settings can self-intersect. Choosing Gerstner/Trochoidal can introduce a starting Choppiness value. |
| Reverse Choppiness | Use Reverse Choppiness below Choppiness in the Wave panel if the trough is pinching instead of the crest. This flips the sideways displacement for the selected layer. Reverse Choppiness starts unchecked on macOS and Windows. The macOS direction correction is applied internally. If you previously saved the toggle checked to correct a Mac scene, clear it once. |
For a smooth result, start with Sine, Choppiness 0 and no FBM. Custom curves, Square and Saw can intentionally create hard features that should not be confused with a distance-field seam.
Variation controls
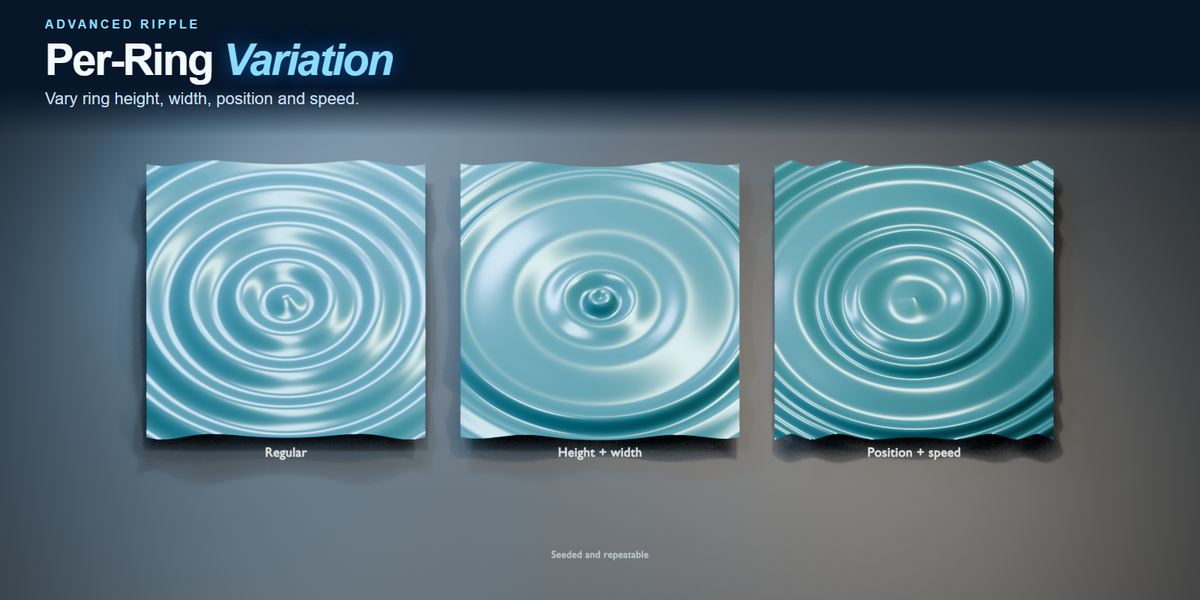
These controls interact. Ordering limits can constrain an extreme width, speed or position request, so variations are not independent physical particles moving through one another. Start around 0.3–0.5, then change the seed. Increase Height modestly if you need greater absolute differences in amplitude.
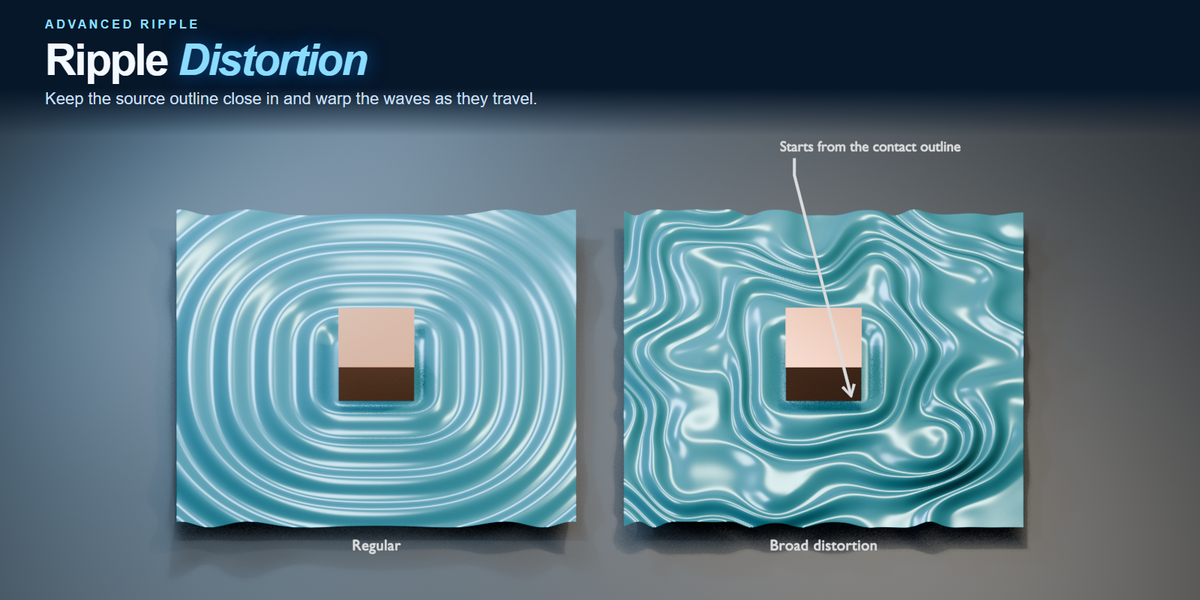
Distortion and FBM
For a clean outline that becomes organic: Distort 0.25, Distort Detail 0, Distort Start about one wavelength, and Distort Ramp about two wavelengths. Treat these as starting values in your scene's scale.
Float On Surface
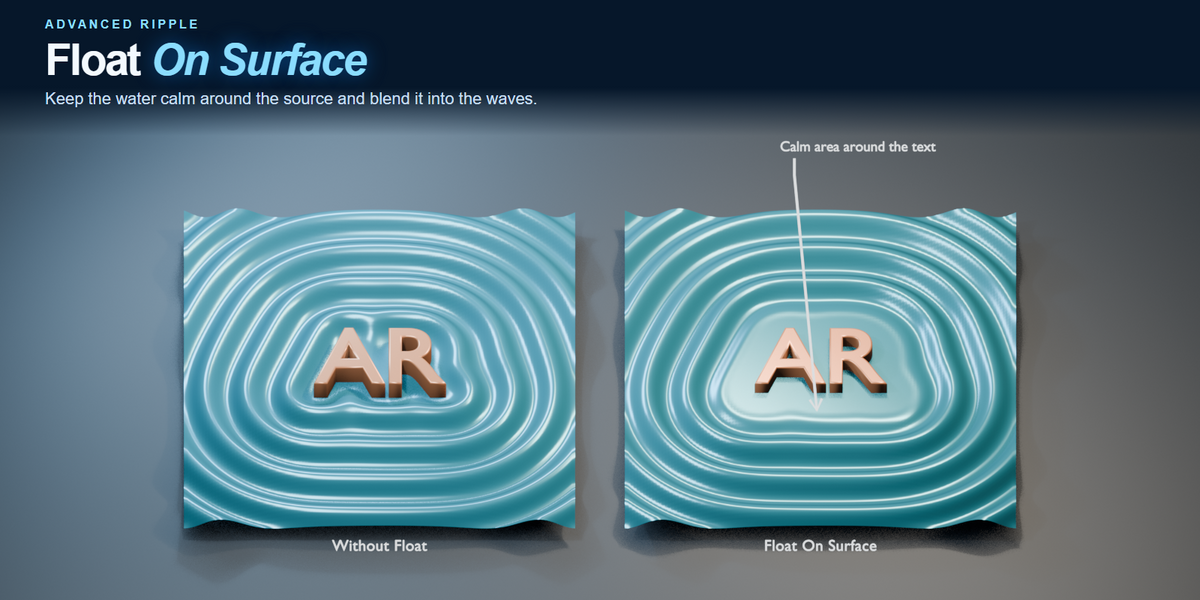
Enable Float On Surface to suppress this layer's ripples within and around a source footprint. It does not add a constraint, buoyancy or automatic motion to the source object.
A clean closed mesh or closed planar spline gives the clearest filled interior. An open spline has no enclosed area; expansion can still quiet a neighbourhood around its path. On curved receivers, “flat” means the ripple contribution is suppressed along the rest normals, not that a spherical patch becomes a world-space plane.
Other ripple layers can still affect the footprint. Give those layers their own Float settings if all layers need to leave it quiet.
Distance clipping
Distance Clip keeps waves between Near Distance and Far Distance. Invert Range keeps the outside instead. These limits use the source travel coordinate; they are not height clamps on crests and troughs.
Use a small Near Distance and a soft Near Fade to keep the source neighbourhood calm. Combine clipping with Distance Decay or Frame Emission when you need a finite animated patch.
Frame emission
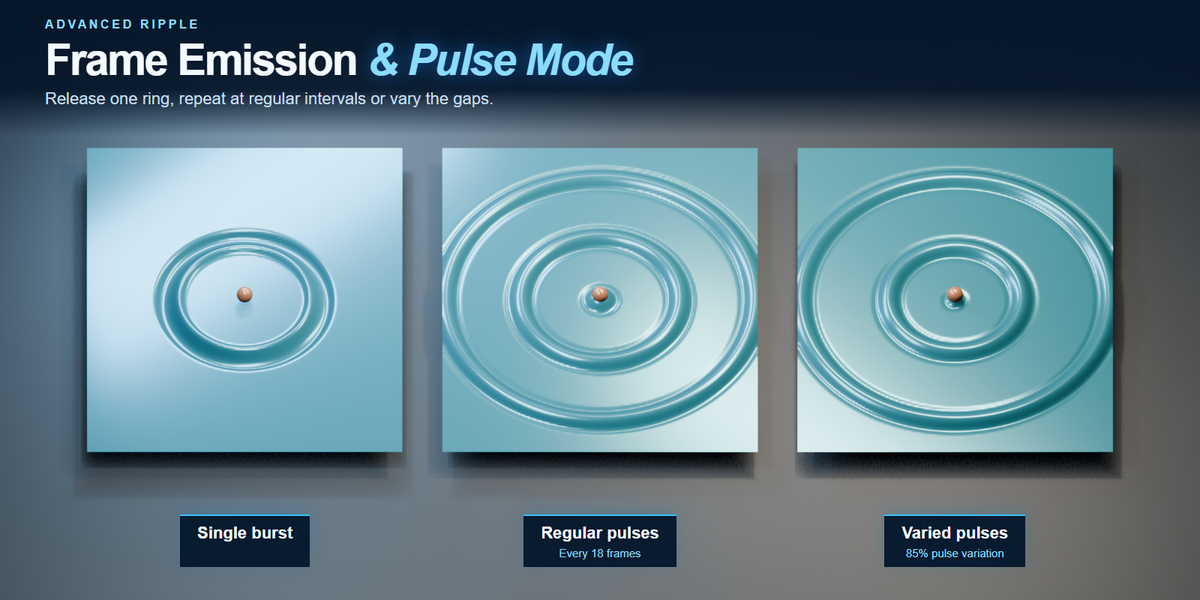
Enable Frame Emission and use a positive Speed. Waves begin at the source after Start Frame, travel outward, and stop being emitted at Stop Frame. Existing rings continue their outward travel.
| Control | Use |
|---|---|
| Start / Stop Frame | The emission window. Keep Stop after Start. |
| Start Fade | Frames of gradual activation after the start. |
| Stop Fade | Frames of gradual release leading up to the stop. |
| Lifetime | Travel lifetime in frames for emitted waves. Zero disables lifetime fading. |
| Life Fade | Frames of amplitude fading near the end of each wave's lifetime. |
Example: Start 1, Stop 72, Start Fade 6, Stop Fade 12, Lifetime 120 and Life Fade 24. Scrub before frame 1, through the growing front, then beyond frame 72 to inspect the last rings. Lifetime 0 needs distance decay, clipping or another envelope if you want the remaining waves to disappear completely.
Pulse Mode
Enable Pulse Mode to repeat emission within the Start and Stop Frame window. Set Pulse Every for the nominal interval and Pulse Duration for the number of frames each burst emits. Duration is limited to one frame less than the interval. Start Fade and Stop Fade apply to each burst and are each limited to half its duration.
Pulse Variation uses the layer Seed to shift later bursts within their intervals. At 0% they are evenly spaced. The first burst always starts on Start Frame. To compare spacing, set Start Frame to 1, Stop Frame to 100, Pulse Every to 24 and Pulse Duration to 8. Play once at 0% Pulse Variation, then try 35% and change Seed for another repeatable sequence. Scrub past Stop Frame to see the last bursts travel outward. Stop Frame can cut a burst short.
Keep Duration near or below one wavelength of travel for a single narrow ring. A longer Duration can emit several crests within one burst.
These are deterministic envelopes, not a stored simulation history. Moving a source changes the current frame's pattern; it does not leave past waves behind along the object's trajectory.
Banks and reflections
Banks
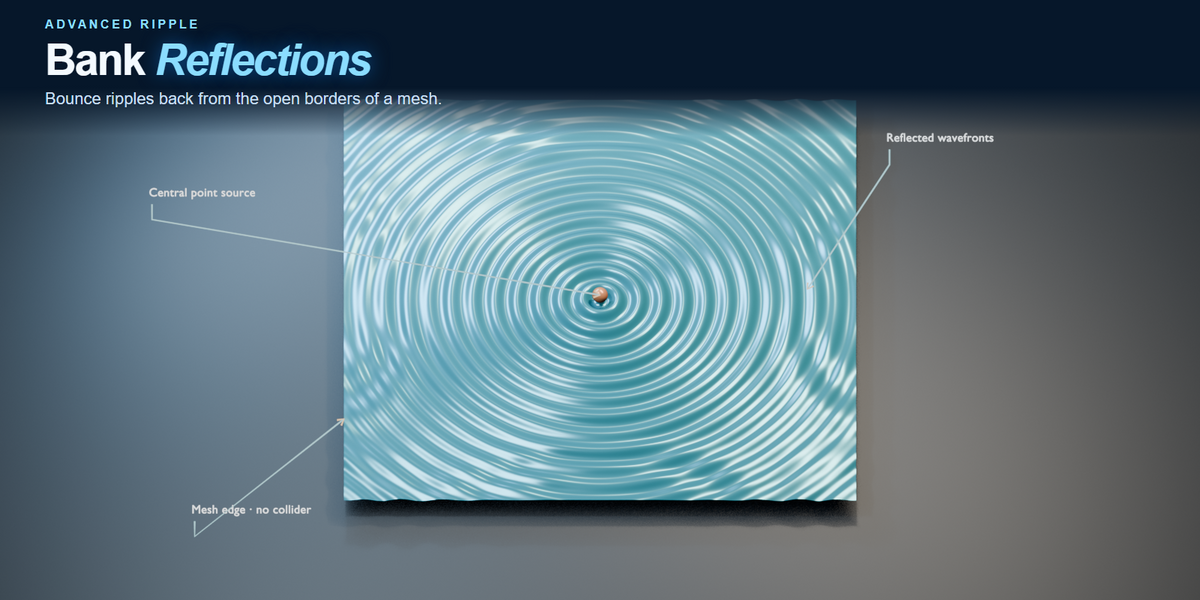
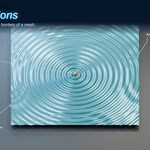
Bank Emission creates waves from the receiver's open borders. Bank Fade reduces displacement near those borders. Freeze Edges holds open hole rims and outer borders at their original positions for this modifier, including when Edge Detection emits from those edges. Set Bank Fade to adjust how gradually the surrounding water starts to move. With Freeze Edges on and Bank Fade at zero, the blend covers a quarter of the nominal wavelength. Edge Detection is a separate source type for emitting from holes or all open edges.
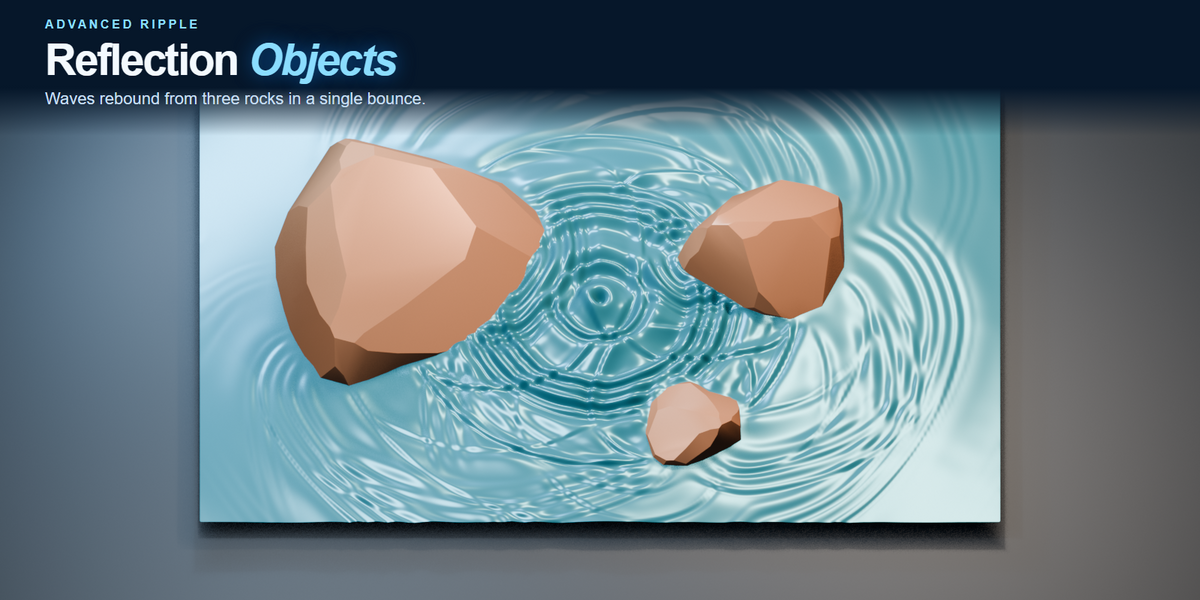
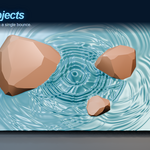
Reflection objects — one bounce
- Open Reflections — One Bounce and raise Strength above 0.
- Enable Mesh Banks to reflect from the receiver's borders, or disable it to use only reflection objects.
- Choose Add Reflection Object and pick a mesh. Repeat to add more objects.
- Position each reflector so that it intersects the receiver's rest surface. Contact with displaced wave crests alone is insufficient.
Each object blocks through-waves and adds an independent returning contribution from each ripple source. The source-to-object travel distance is included, so Frame Emission waits for the incident wave to reach the object. Reflections retain the source waveform, variation and emission timing. A short Frame Emission pulse makes the incident and returning waves easy to inspect. A small automatic minimum feather softens reflected pulse edges and incident pulse edges in contact setups. Use larger Start Fade, Stop Fade or Life Fade values for longer transitions. A reflected contribution never creates another bounce, including between different reflectors or mesh banks.
The enable checkbox temporarily disables a reflector. The X button removes its row. Live Source Updates follows object movement, geometry edits and scene membership; deleting an object clears its picker. Undo and Redo restore the objects and reflected fields. Adding the same object twice does not double its reflection. Each modifier layer has its own reflector list.
Planar receivers use finite contact-edge mirror paths, with reflections restricted to the incident side. Surface and UV travel use an intrinsic first-arrival approximation along the receiver. These are deterministic pattern reflections, not a fluid simulation or a full obstacle-scattering solver. Wave paths travel around reflector contact outlines. The extra distance delays their arrival in the shadow, and the wave recovers strength farther from the obstacle. Shadow Fill controls the strength of this recovery for all reflection objects on the current modifier. At 0% the shadow stays calm and feathers into the surrounding water. At 100% it fills with the full delayed wave within the selected reach. Wrap Reach controls how far the waves creep in from the sides. At 0% the shadow stays calm, at 50% the wrap fades over one wavelength, and at 100% the reach is unlimited. Both controls apply to all reflection objects on the modifier. A reflector spanning the receiver blocks paths across it. Wraparound uses a first-arrival approximation at mesh resolution. Reflectors do not cut holes in the mesh.
Contact outlines are cached. Changing a wave slider reuses those outlines; moving a reflector or changing receiver geometry updates the relevant contacts. More sources and reflection objects add evaluation work. No reflected fields are prepared when Strength is 0.
Performance controls
- Use enough geometry to sample the wave, then stop adding density that the camera cannot resolve.
- Start with one layer and one emitter. Particles/Points and extra layers multiply work.
- Keep Fast Source Dragging enabled for interactive curved mesh/spline source moves.
- Open Performance only when tuning budgets or diagnosing a backend.
- Use Refresh after rest-mesh edits or if live updates were disabled.
GPU waveform generation is only one stage. Surface preparation, source contact and Geometry Nodes deformation still include CPU work. GPU mode is not a promise of higher speed on every machine.
Native accelerators are included for Windows x64 and both Mac architectures. If it fails to load, a slower Python fallback may be used. Confirm your platform and installation files before treating fallback performance as the normal result.
Animation and rendering
Keyframe exposed controls using Blender's standard property keyframe controls. Layer settings live on the visible receiver object, so their animation is available in its Dope Sheet and Graph Editor. Use out-of-order frame scrubbing as a simple check of your scene.
The same complete scene state, frame, settings, sources and seed produce the same pattern. Editing animated sources or the rest mesh changes that state. Extreme values or insufficient sampling can still produce visual artefacts.
For a single permanent mesh result, duplicate the receiver and apply its modifier at the required frame. For animated delivery to another application, use an appropriate evaluated geometry cache such as Alembic and test the export. Copying only the raw undeformed mesh will not preserve live waves.
Render workers need the add-on and its native files for dependable live field preparation, source movement and custom waveform updates. Background Blender uses CPU packet generation. Pack images and send a small test scene through your actual render pipeline before committing the job.
The add-on supplies displacement, not a production water material or lighting system. Geometry can be rendered with your own Cycles or Eevee materials; render-engine availability and shading differences depend on Blender version.
Example setups
Text sitting in water
- Extrude the Text object and position it so the letters intersect a dense water grid.
- Pick it as a Mesh Contact source. Start with Sine, Height 0.08 and Wavelength 0.6.
- Enable Float On Surface. Set Float Level 0, Expand 0.05 and Smooth 0.3.
- Keep Distort Detail at 0. Begin broad distortion one wavelength from the source.
Ripples across a sphere
Use a dense connected sphere, Surface travel and a box that actually intersects it. Use a wavelength large enough for the sphere's density. Expect a brief coarse preview during source dragging if Fast Source Dragging is on; wait for refinement before judging the final joins.
Spaced ripple bursts
- Add a point source to a dense mesh and set Speed to 1.5 and Wavelength to 0.6.
- Enable Frame Emission and Pulse Mode. Set Start Frame to 1, Stop Frame to 100, Pulse Every to 24 and Pulse Duration to 8.
- Try Pulse Variation at 0%, then 35%. Change Seed to try a different sequence. Scrub beyond Stop Frame to see the final waves travel.
Logo reveal
Use Text in Mesh Contact mode or a closed curve in Spline mode. Enable Frame Emission, set Start/Stop and soft lifetime fading, and add a distance clip if the shot needs a finite radius.
Broad swell plus fine rings
Put a Point in the first layer with a long wavelength. Add another modifier with a Mesh Contact source and a smaller wavelength/height. Switch between them with Layer. This gives separate strength without per-source strength controls.
Image-driven motif
Unwrap the receiver, use a simple high-contrast image and start at Threshold 0.5. Invert to swap the region. The selected image region remains flat and waves travel outward. Use Edge Blend for a smooth transition. Increase receiver sampling before adding tiny image details.
Blender compatibility
| Windows x64 build | Test results |
|---|---|
| 3.6.23 LTS | Core + layers + animation + save/load passed |
| 4.0.2 | Core + layers + animation + save/load passed |
| 4.1.1 | Core + layers + animation + save/load passed |
| 4.2.23 LTS | Core + layers + animation + save/load passed |
| 4.3.2 | Core + layers + animation + save/load passed |
| 4.4.3 | Core + layers + animation + save/load passed |
| 4.5.15 LTS | Core + layers + animation + save/load passed |
| 5.0.0 | Core + layers + animation + save/load passed |
| 5.1.2 | Core + layers + animation + save/load passed |
| 5.2.3 LTS | Core + layers + animation + save/load passed |
Tests are on Windows x64 and the listed patch builds. Intermediate releases and later patches are not individually certified unless a report is supplied. A compatible API target is not the same as a completed test. Newer Blender .blend files should not be opened in older releases.
Blender 3.6 uses CPU waveform packets and the Object menu/F3 add command. The feature uses the older Geometry Nodes interface and action API there. The macOS preview targets Blender 3.6–5.2 on Apple Silicon and Blender 3.6–4.5 on Intel. The native libraries target macOS 11.0 on Apple Silicon and macOS 10.15 on Intel. Blender may require a newer macOS version. The previous preview was tried on Mac with Blender 5.2.0 LTS. Runtime checks for this update and other Mac versions are pending.
Troubleshooting
No ripples are visible
Check that the receiver has enough vertices, the modifier is enabled, Height is above zero and a source row is valid and enabled. If Frame Emission is on, inspect its frame window. Check Distance Clip and source contact with the rest surface. With no source rows, test Fallback Point.
Mesh contact disappears
Mesh Contact requires intersection. Visible displaced wave crests touching an object are not a substitute for intersection with the rest surface. Use Point or Spline when projection is the intended behaviour.
Too few particle ripples
Check the warning and Emitter Budget. Realise instances or supply a mesh/point cloud. Increase the budget cautiously; each independent emitter adds work.
Granular or sharp waves
Set Distort Detail and FBM Strength to 0, choose Sine and reduce Choppiness. Add mesh density if bands are undersampled. During curved source movement, wait for idle refinement. Very sharp custom/Square/Saw profiles are intentional.
UV seam or stretched wavefront
Inspect the active UV map, chart scale and UV Seam Blend. Correct severe stretching or overlap. Use Surface travel when you do not need UV art direction.
Layer selection or controls look wrong
Use 0.8.1 or newer, restart after updating, and ensure only one installation of the internal ripple_pattern module exists. Choose the layer by name. Earlier 0.7.0 UI IDs could round and snap back to layer 1; that bug was corrected.
GPU mode says fallback
CPU fallback is expected in background Blender and Blender 3.6. It can also occur when compute is unavailable, fails precision checks or provides no benefit in Auto. It does not mean the whole effect has stopped.
Deleted or restored source looks stale
Allow Blender's Undo recovery to finish, then use Refresh if needed. Check the row's picker and whether the object belongs to the evaluated scene. Send a minimal reproduction if a current release retains an echo.
Old file fails to open
Check the .blend file's creator version. Keep an untouched backup before migrating a production scene between Blender versions.
Have questions about this product?
Login to message
| Published | 28 minutes ago |
| Blender Version | 3.6 - 5.3 |
| Extension Type | N/A |
| Render Engine Used | Cycles, Eevee |
| License | GPL |