 Melisa


AI Sound Designer Documentation
A simple, step-by-step guide. From installing the add-on to scoring your first video.
What it does
AI Sound Designer lives inside Blender's Video Sequence Editor (VSE). It looks at your silent video, works out which sounds the scene needs, and places matching sounds from your own audio library onto the timeline.
You can also browse and drop sounds by hand, find a sound by typing a short description, and build a clean, tagged library with the AI's help. It never creates new audio. It only finds and places sounds you already own.
Requirements
- Blender 4.2, 4.5, or 5.x (Windows, macOS, or Linux).
- A folder of audio files on your computer. These are the sounds the add-on uses.
- A free Google Gemini API key for the AI features. The library browser works without it.
- An internet connection, only when you use the AI features.
1. Install the add-on
- Open Blender and go to Edit > Preferences.
- Click the Get Extensions tab.
- Click the arrow menu (top-right) and choose Install from Disk.
- Select the add-on .zip file.
- Make sure AI Sound Designer is enabled (checkbox ticked).
2. Get a Google Gemini API key
Free, and only needed for the AI features.
- Go to Google AI Studio and sign in with a Google account.
- Click Create API key.
- Copy the key (a long line of letters and numbers).
- Keep it safe. You will paste it into the add-on next.
3. First-time setup
- Go to Edit > Preferences > Add-ons and open AI Sound Designer.
- Paste your key into the API key field.
- Set the Library folder to the folder with your audio files.
- Click Index library now and wait for the progress bar.
4. Prepare your sound library
Point the add-on at one main folder. Inside it, group sounds into category subfolders with any names you like, such as Music, Ambience, SFX, Voice, Animal, Foley, or your own themes like Minecraft or Horror. These folder names become filters in the add-on.
The add-on reads tags from the file name. Words joined by underscores become searchable tags. For example door_slam_short.wav is tagged door, slam, and short. Clear names give better matches. If your files are not named this way, the Library Builder can rename and tag them for you.
Supported formats: ogg, oga, opus, wav, mp3, flac, m4a, aac, aiff, wma.
5. Audio tab: browse and drop sounds
The library browser. Works even without an API key.
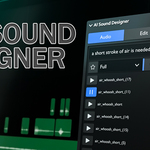
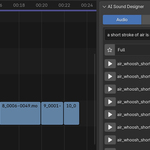
- Open AI Sound Designer in the sidebar and select the Audio tab.
- Type a word or two (like whoosh or door) and click the magnifier.
- Press the play button on a result to hear it. Press again to stop.
- Move the playhead, then click + to drop the sound on the timeline.
Extras:
- AI search: turn on the sparkle button to find sounds from a longer description.
- Favorites: star a sound, then filter to show only your favorites.
- Filters: narrow by category and by rough length in seconds.
- Load more: shows the next batch of results.
6. Edit tab: one-prompt sound drop
Describe a sound, get the best match at the playhead. Needs an API key.
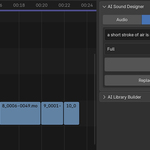
- Open the Edit tab.
- Type what you want, for example cartoon jump sound.
- Optional: pick a category and a rough length to narrow the search.
- Move the playhead and click Add. The best match drops in on a free channel.
7. Auto-Score: let the AI score your video
The main feature. Needs an API key and an indexed library.
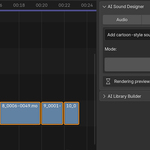
- On the timeline, select the video strips you want to score.
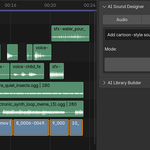
- Open the Auto tab. Optional: type a style prompt (like cartoon style) and pick a Mode to limit which folders are used.
- Click Run.
- When it finishes, your sounds are on the timeline, ready to play and render.
8. AI Library Builder: tag and save sounds
Turn raw clips into clean, tagged library files. Found below the main panel.
- Drop some raw sound files onto the timeline as sound strips.
- Select the strip you want to save.
- Open the AI Library Builder panel and pick a target category folder.
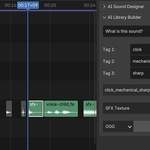
- Optional: type a short hint, then click Fill with AI. Gemini listens and fills the tag fields.
- Check or edit the tags. The file name preview updates as you type.
- Pick a format and click Save. The sound goes into your library and the index updates.
9. Settings
All in Edit > Preferences > Add-ons > AI Sound Designer.
- API key: your Google Gemini key.
- Auto-score model: the model used for video Auto-Score.
- Search model: a fast model for text search and the Edit prompt.
- Library Builder model: tags single sounds. A small, fast one is fine.
- Library folder: the folder with your sounds, plus the Index / Update button.
- Base channel: the first timeline channel used for placed sounds.
- Max stack channels: how many channels it may use when sounds overlap in time.
- Avoid duplicates: stops the same file being picked twice in one run.
10. Troubleshooting
The Auto or Edit tab is missing. Those tabs appear only once your API key and model are set. The Audio tab is always available.
No results, or "no index". Open Preferences and click Index library now (or Update after adding files). Check that the library folder path is correct.
Auto-Score placed nothing. Make sure you selected video strips, your library is indexed, and the chosen Mode folders actually contain sounds. The decision log explains what was skipped.
Preview won't play. Try a different sound and make sure system audio works in Blender.
A Gemini error appears. Check your API key, your internet connection, and that your key still has free quota at Google. Then try again.
Have questions about this product?
Login to message
| Blender Extension Compatible | Yes |
| Published | 4 months ago |
| Blender Version | 4.2 - 5.2 |
| Extension Type | Add-on |
| Render Engine Used | Cycles |
| License | GPL |
Discover more products like this
sound design sequencer audio sound effects vse ai soundtrack gemini foley video editing sfx sound library