Andra Uv Rename
 Angles Of Dice


AnDra UV Renamer Documentation
Installation
Installing UV Renamer takes less than a minute:
- Download the addon zip file from your purchase page
- In Blender, go to Edit → Preferences → Add-ons
- Click the Install button in the top right
- Navigate to and select the downloaded zip file
- Enable the addon by checking the box next to "Mesh: UV Renamer"
The UV Renamer panel will now be available in your 3D Viewport sidebar under the Edit tab.
Getting Started
Quick Start
The basic workflow is straightforward:
- Select one or more mesh objects in your scene
- Press N to open the sidebar if it's not already visible
- Navigate to the Edit tab
- Find the UV Renamer panel
- Choose your desired operation and click the corresponding button
That's all there is to it. The first UV map on each selected mesh will be renamed according to your choice.
Panel Location
3D Viewport → Sidebar (N) → Edit Tab → UV Renamer
Interface Overview
The UV Renamer panel is designed to be simple and self-explanatory. Here's what you'll see:
Information Display
At the top of the panel, you'll find a status box showing:
- Total number of selected objects
- Number of mesh objects in your selection
This helps you quickly verify that you've selected the right objects before renaming.
Blender Standard
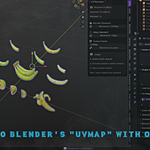
One button to rename UV maps to "UVMap" - Blender's default naming convention.
Maya Standard
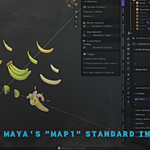
One button to rename UV maps to "map1" - Maya's default naming convention.
Custom Name
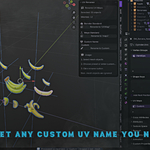
A text input field and button that let you specify any custom name up to 64 characters long.
Usage Instructions
A helpful reminder box at the bottom explains the basic workflow and notes that non-mesh objects are automatically ignored.
How to Use
Renaming to Blender Standard
When to use this: You've imported models from other software or have UV maps with inconsistent names that you want to standardize to Blender's convention.
Steps:
- Select your mesh objects in Object Mode
- Open the sidebar and go to the Edit tab
- Click "Rename to 'UVMap'"
Result: The first UV map on each selected mesh is renamed to "UVMap"
You'll see a report in Blender's info area showing how many objects were processed. For example:
"Processed 5 mesh(es)"
Renaming to Maya Standard
When to use this: You're preparing assets for export to Maya or a Maya-based pipeline that expects the standard "map1" naming.
Steps:
- Select your mesh objects
- Navigate to the UV Renamer panel
- Click "Rename to 'map1'"
Result: UV maps are renamed to "map1"
If you have non-mesh objects selected, they'll be automatically skipped and counted in the report:
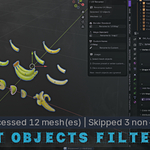
"Processed 8 mesh(es) | Skipped 2 non-mesh"
Renaming to a Custom Name
When to use this: Your project or studio has specific naming requirements, such as "UV_Lightmap", "UV_Main", "UVChannel_Diffuse", etc.
Steps:
- Select your mesh objects
- Click in the text field under "Custom Name"
- Type your desired UV map name
- Click "Rename to Custom"
Result: UV maps are renamed to your specified name
The operation report will confirm your custom name:
"Processed 12 mesh(es) → 'UV_Lightmap'"
Note: If you click the button without entering a name, you'll get a warning prompting you to enter a custom UV name first.
Tips and Best Practices
Working with Multiple Objects
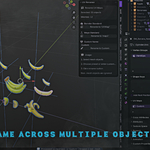
UV Renamer shines when you need to process many objects at once. Select everything you need to rename and run the operation once. This is particularly useful when:
- Cleaning up imported asset libraries
- Standardizing an entire scene before export
- Preparing collections of props or environment pieces
Undo Support
UV Renamer integrates fully with Blender's undo system. If you rename something by mistake, simply press Ctrl+Z (or Cmd+Z on Mac) to revert the changes. You can also redo with Ctrl+Shift+Z.
Verifying UV Names
Before exporting to game engines or other software, it's good practice to verify your UV map names:
- Select an object
- Go to the Object Data Properties panel (the green triangle icon)
- Expand the UV Maps section
- Confirm the name matches your requirements
Pipeline Integration
For team or studio workflows:
- Establish a naming convention at the start of your project
- Use the Custom Name feature to enforce consistency
- Document your standards so everyone on the team follows them
- Consider adding UV renaming as a step in your export checklist
Best Practices
Do:
- Use standard names for simple, single-purpose projects
- Use descriptive custom names when working with multiple UV sets
- Rename UVs before exporting FBX, glTF, or other formats
- Keep names short and alphanumeric
Avoid:
- Using special characters or spaces in UV names
- Creating excessively long names (64 character maximum)
- Forgetting that only the first UV map is affected
Troubleshooting
Common Issues and Solutions
Warning: "No objects selected!"
Problem: You clicked a rename button without selecting any objects.
Solution: Select at least one object in the 3D Viewport before using UV Renamer.
Warning: "Please enter a custom UV name!"
Problem: You clicked "Rename to Custom" with an empty text field.
Solution: Type a name in the Custom UV Name field before clicking the button.
Operation completes but nothing seems to change
Possible causes:
- Selected objects aren't meshes: Check the operation report. If it says "Skipped X non-mesh", you've selected cameras, lights, empties, or other non-mesh objects.
- Objects don't have UV maps: The report will note "X without UVs". These objects need to be UV unwrapped first.
- UV already has the target name: If a UV map is already named "UVMap" and you try to rename it to "UVMap", nothing changes (though it still counts as processed).
Solution: Read the operation report carefully to understand what was actually processed.
Can't find the UV Renamer panel
Solutions to try:
- Make sure you're in the 3D Viewport, not the UV Editor or another editor type
- Press N to toggle the sidebar on if it's hidden
- Click the Edit tab in the sidebar (it may be on Tool, Item, or View by default)
- Scroll down in the sidebar - the panel might be below other addons
- Verify the addon is enabled in Edit → Preferences → Add-ons
Need to rename secondary or tertiary UV maps
Current limitation: UV Renamer only operates on the first UV map in each object.
Workaround:
- Go to Object Data Properties → UV Maps
- Drag and drop to reorder your UV maps so the one you want to rename is first
- Use UV Renamer to rename it
- Reorder your UV maps back to the original order if needed
Alternatively, you can rename additional UV maps manually in the UV Maps panel.
Uninstalling UV Renamer
Recommended Method
- Go to Edit → Preferences → Add-ons
- Find "Mesh: UV Renamer" in the list
- Click to expand the addon details
- Click the Uninstall button
- Confirm the deletion when prompted
- Restart Blender to complete the removal
This method cleanly removes all addon files from your Blender installation.
Manual Method
If the built-in uninstaller doesn't work:
- Disable the addon by unchecking it in the Add-ons preferences
- Click the Remove button
- Navigate to your Blender addons folder and manually delete the
uv_renamerdirectory
Addon folder locations:
-
Windows:
C:\Users\[YourName]\AppData\Roaming\Blender Foundation\Blender\[Version]\scripts\addons\ -
Mac:
/Users/[YourName]/Library/Application Support/Blender/[Version]/scripts/addons/ -
Linux:
/home/[YourName]/.config/blender/[Version]/scripts/addons/
Have questions about this product?
Login to message
| Blender Extension Compatible | Yes |
| Published | 10 months ago |
| Blender Version | 2.92 - 4.5 |
| Extension Type | Add-on |
| Render Engine Used | Cycles |
| License | GPL |
Discover more products like this
batch uv pipeline Blender utility tools rename automation fbx maya mesh organisation Export