 Skava
Skava



AnimLayer — documentation
v1.1.1 · Blender 4.2 LTS and later (tested on 5.2) · Windows / macOS (Intel and Apple Silicon) / Linux
1. Installing
Edit, then Preferences, then Add-ons, then Install, and pick the downloaded zip. Tick the checkbox to enable it. Nothing else to download.
2. Where it lives
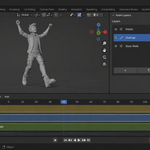
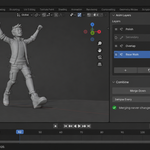
Press N in the 3D viewport and choose the "Anim Layers" tab.
3. Your first layer
- Select your rig or object and make sure it has some animation.
- Open the Anim Layers tab and press Start Layering. Your current action becomes the bottom layer, unchanged.
- Press Add. An empty layer appears on top and editing starts automatically.
- Pose and key as you normally would. The keys go into the new layer.
- Press Finish Editing when the pass is done.
4. What you dial in is what you get
This is the part worth understanding, because it is what makes layers usable.
When you are editing an additive layer, the value you set is the value you see. If the base has the arm at 30 degrees and you set 20, the arm ends up at 20. Behind the scenes the layer stores the difference of minus 10, which is what lets you dial the layer's weight down and have the arm travel smoothly back to 30. You never have to think in offsets.
5. The layer list
Layers are listed top of stack first, matching the NLA editor. Each row shows:
- A pencil icon on the layer currently being edited.
- The layer name — click to rename it.
- The weight as a number.
- Solo, mute and lock toggles.
6. Layer modes
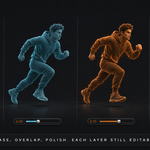
- Additive — offsets whatever is beneath. This is what you want for almost every pass on top of a base: overlap, polish, a bit of extra lean.
- Override — replaces the layers beneath on every channel it animates. Use it for the base performance, or when a section must ignore everything below it.
- Combine — blends with the layers beneath while handling rotation correctly. Useful when additive rotation starts to look wrong on large angles.
Set the mode for new layers under New Layer Options, or change any existing layer's mode in the Selected Layer box.
7. Weight
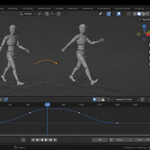
The weight slider mixes a layer in from 0 to 1. It is a real animatable value: right-click it and insert a keyframe to fade a whole pass in or out over time. When a layer's weight varies over time the panel tells you so, so you do not mistake an animated fade for a stuck slider.
8. Solo, mute and lock
- Solo plays that layer on its own. An additive layer soloed shows its raw offsets, which is exactly what you want when checking what a pass is contributing.
- Mute takes a layer out of the mix without deleting it.
- Lock protects a finished pass. A locked layer cannot be edited or merged.
9. Layer From Pose
The usual way to start a correction pass is: add a layer, start editing it, then re-do the change you were already looking at. This button does it the other way round, which is the order the work actually happens in.
- Go to the frame you care about and pose the rig until it reads.
- Press Layer From Pose.
The push you just made becomes a new additive layer, keyed at the current frame, and the viewport does not move — what you were looking at is what you keep. Only the channels you actually changed are keyed, so the layer stays small and easy to adjust afterwards.
With bones selected, only those bones are captured. With nothing selected the whole rig is, so deselecting to look at the result does not leave you with an empty layer.
The layer holds its offset across the whole take, which is usually what you want for a correction. If you only want it in one place, follow it with Limit To Range.
10. Mirror Layer
Mirror Layer flips a pass left to right on a symmetric rig. Animate one arm, mirror it, and you have both — as two separate layers, each still adjustable on its own.
Bones are matched by their side names, the usual left and right suffixes. A bone with no side in its name, like a spine or a head, is mirrored onto itself with its values flipped, so a symmetric motion keeps the body's contribution. The flip itself uses the same convention as Blender's own flipped pose paste — it is checked against it on every release rather than assumed.
Turn on Replace This Layer in the operator options to flip a layer where it stands instead of making a new one, which is what you want for a layer that already animates both sides.
11. Copy To Rig
Pick the other character in the Copy To Another Rig field and press the button. The layer lands on top of that rig's stack with its blend mode, its timing and its weight curve intact.
Bones are matched by name. Anything the second rig does not have is left out and named in the report, so a partial match tells you exactly what did not come across. If none of the bones match at all, the copy is refused rather than producing a layer that animates nothing.
12. Frames and fades
Under Frames and Fades you can confine a layer to a stretch of the timeline.
- Limit To Range switches the layer off outside the From and To frames. A fix made for one shot stops affecting the rest of the take.
- Fade In And Out does the same with a ramp at each end, over the number of frames you set. Use it to hand over between two passes without a pop.
- Weight Inside sets how much of the layer is mixed in between those frames, if you want the limited section at less than full strength.
- Clear removes the limit and puts the layer back to one weight everywhere.
None of this deletes a keyframe. The limit is written as the layer's weight over time, so the pass underneath is untouched and the range can be moved, widened or lifted at any point. The Selected Layer box shows the frames a limited layer is heard on.
If the range reaches past the ends of the layer's own strip, the strip is widened to meet it. That never changes what the layer plays — it is checked frame by frame — it only gives the fade somewhere to live.
13. Merging
Merge Down combines the selected layer with the one below it. Flatten All collapses the whole stack into a single layer. Both are exact: the pose after merging is the same as the pose before it, including layers keyed on different frames and layers at partial weight.
Sample Every controls the frame step used when merging. Leave it at 1 for an exact result. Larger values produce fewer keyframes and a looser match, which is occasionally useful for a rough cleanup.
Merging an Override layer downwards is refused. An override hides the layers beneath it channel by channel, including channels it does not animate, so there is no single action that reproduces the pair exactly. Either flatten the whole stack instead, or change the layer to Additive.
14. Working with an existing NLA setup
A layer is just an NLA track holding one strip, so anything you built by hand in the NLA editor appears here as layers straight away, with no conversion step. Tracks holding several strips are shown but not driven — they are a timeline rather than a layer, and collapsing them into one weight and blend mode would misrepresent what is in them.
15. Troubleshooting
My keys are going into the wrong layer. Check the panel says "Editing" with the layer name you expect. If not, select the layer and press Edit Layer.
The weight slider does nothing. Check the layer is not muted, and that no other layer is soloed.
Edit Layer will not run. The layer is locked, or the track holds more than one strip.
Merge Down is refused. Read the message — the usual reasons are that the layer is an Override, that it is the bottom layer with nothing beneath it, that one of the two layers is locked, or that the layer below fades over time and so cannot receive an exact merge. Clear the fade on the lower layer and try again.
Layer From Pose says there is no offset to keep. The pose matches what the layers already play, so there is nothing to store. Move something first.
Mirror Layer did nothing to one side. The bone names have to carry the usual left and right suffixes for the two sides to be paired up. A bone with no side in its name is mirrored onto itself instead.
Copy To Rig left bones out. The other rig does not have them under those names. The report lists which ones.
I want my animation back as a plain action. Press Flatten All, then in the NLA editor use Start Editing on the single remaining strip, or simply leave it — a one-layer stack behaves exactly like a normal action.
16. Changelog
v1.1.1 — maintenance release. The package ships the full licence text and an updated README (install, first run, uninstall). No changes to the tools.
v1.1.0 — five ways to reuse and place a layer. Layer From Pose keeps the correction you have just posed as a new layer. Mirror Layer flips a pass to the other side of a symmetric rig. Copy To Rig sends a layer to a second character, matching bones by name and reporting anything the other rig does not have. Limit To Range confines a layer to two frames without deleting a keyframe, and Fade In And Out ramps it in and out; Clear lifts either again. Merging is now exact for layers that fade or sit at partial weight, and refuses the two cases where an exact result is impossible instead of guessing at one. Reordering and duplicating a layer carry its whole weight curve and timing across, so a fade survives both.
v1.0.0 — first release. Layer stack with additive, override and combine modes, animatable per-layer weight, solo, mute and lock, reorder, duplicate, exact Merge Down and Flatten All, and automatic adoption of an existing NLA setup.
Have questions about this product?
Login to message
| Published | about 2 months ago |
| Blender Version | 4.2 - 5.2 |
| Extension Type | N/A |
| Render Engine Used | Arnold, Blender-Internal, Blender-Game-Engine, Cycles, Eevee, Freestyle, Luxrender, Mental-Ray, Octane, Vray, Yafaray |
| License | GPL |
Discover more products like this
non-destructive NLA Workflow animation keyframe polish pass mocap character animation layers overlap Additive animation layers