Architecture Window Generator
 Hydrocallis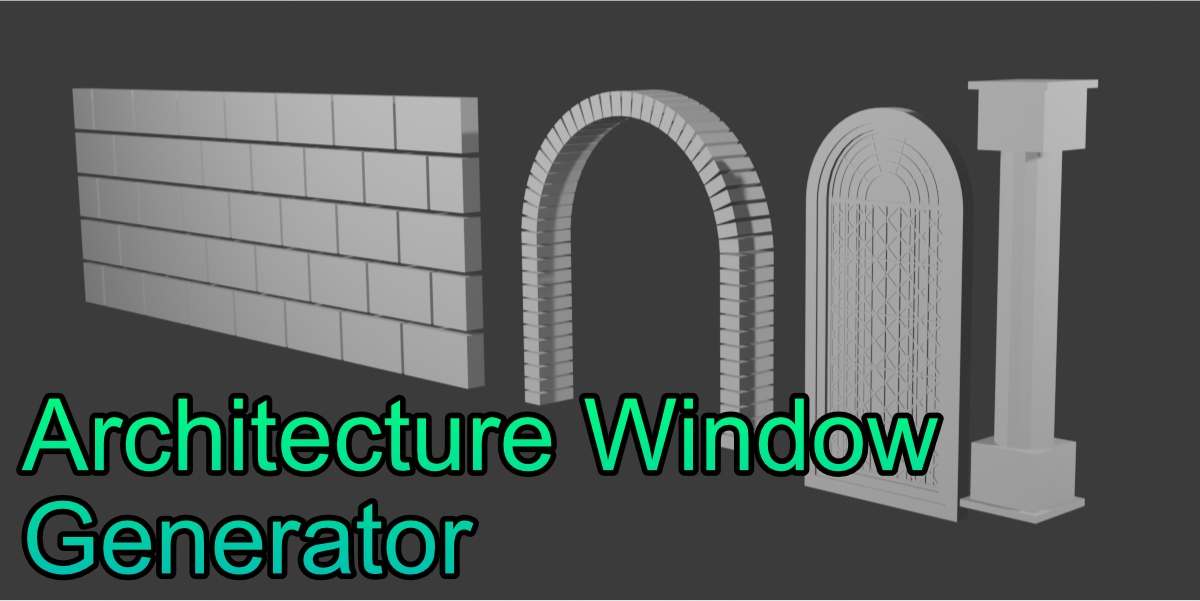
Step-by-Step Usage Guide
🪜 How to Use Architecture Window Generator
Step 1: Enable the Addon
Go to Blender’s “Edit” → “Preferences” → “Add-ons” and install the zip file to activate the addon.
Step 2: Open the KSYN Tab
A new “KSYN” tab will appear in the right-side properties panel.
Inside it, you’ll find the “Architecture Window Generator” section.
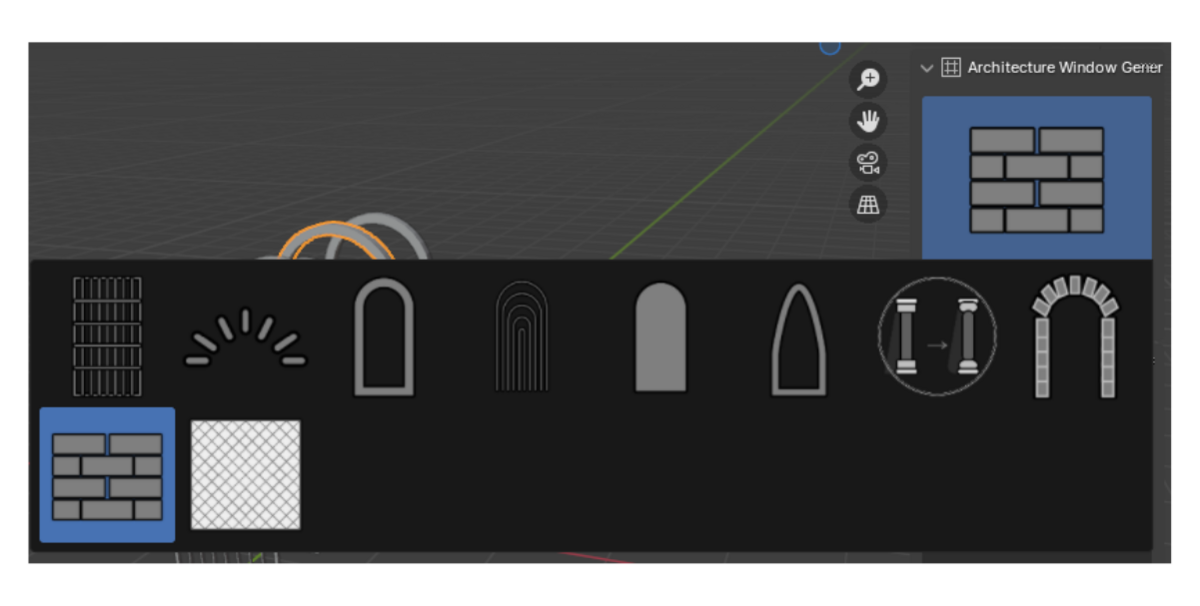
Step 3: Choose a Part
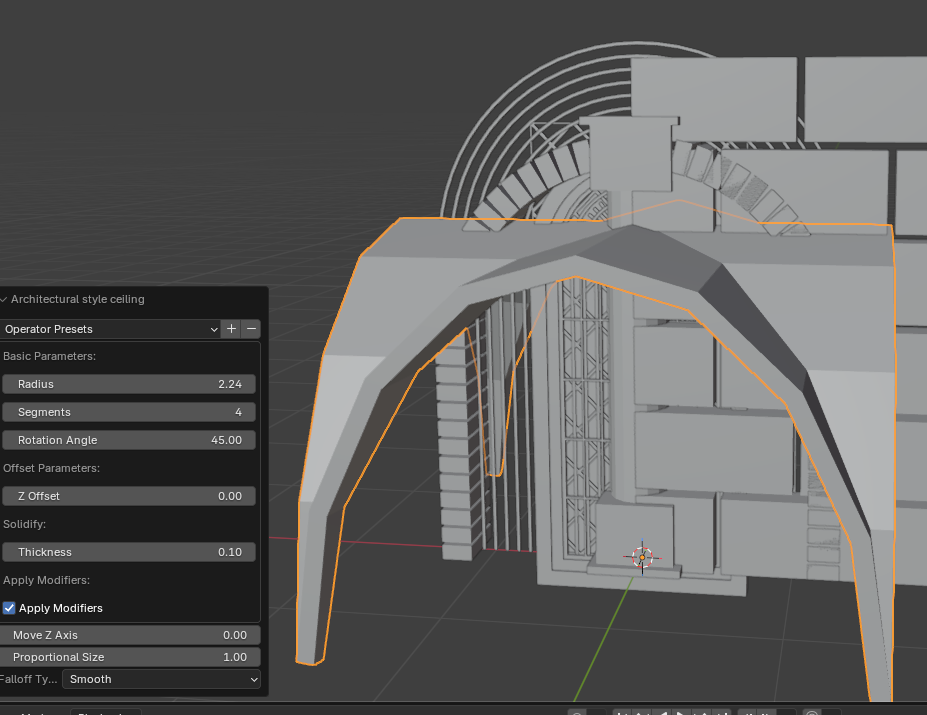
Click operator buttons like “Architectural style ceiling” to generate specific parts.
Some buttons include previews to help you choose visually.
Step 4: Adjust Parameters
Use the settings panel to fine-tune dimensions, segments, thickness, and placement.
Examples: arch height, number of bars, frame thickness, etc.
Step 5: Watch the 3D Cursor
If “Move to Cursor” or “Rotate to Cursor” is enabled, the object will be placed and rotated based on the 3D cursor.
Make sure the cursor is in the right spot to avoid losing your object!
Step 6: Save Your Favorite Presets
Use “Operator Presets” to save frequently used configurations.
You can load them instantly next time for faster workflow.
🧭Where to Find It
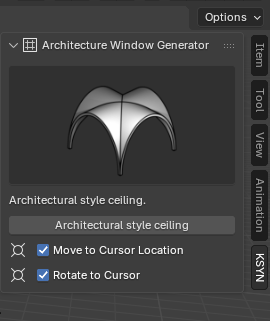
The addon appears under the KSYN tab on the right side of the Blender interface.
Inside the Architecture Window Generator section, you will find:
- Architectural style ceiling (button with preview)
- Move to Cursor Location (checkbox)
- Rotate to Cursor (checkbox)
These options allow you to automatically place and rotate the generated parts at the 3D cursor position.
🧱 Part Editing
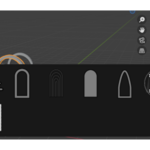
Clicking the icon opens the part editing interface, where you can:
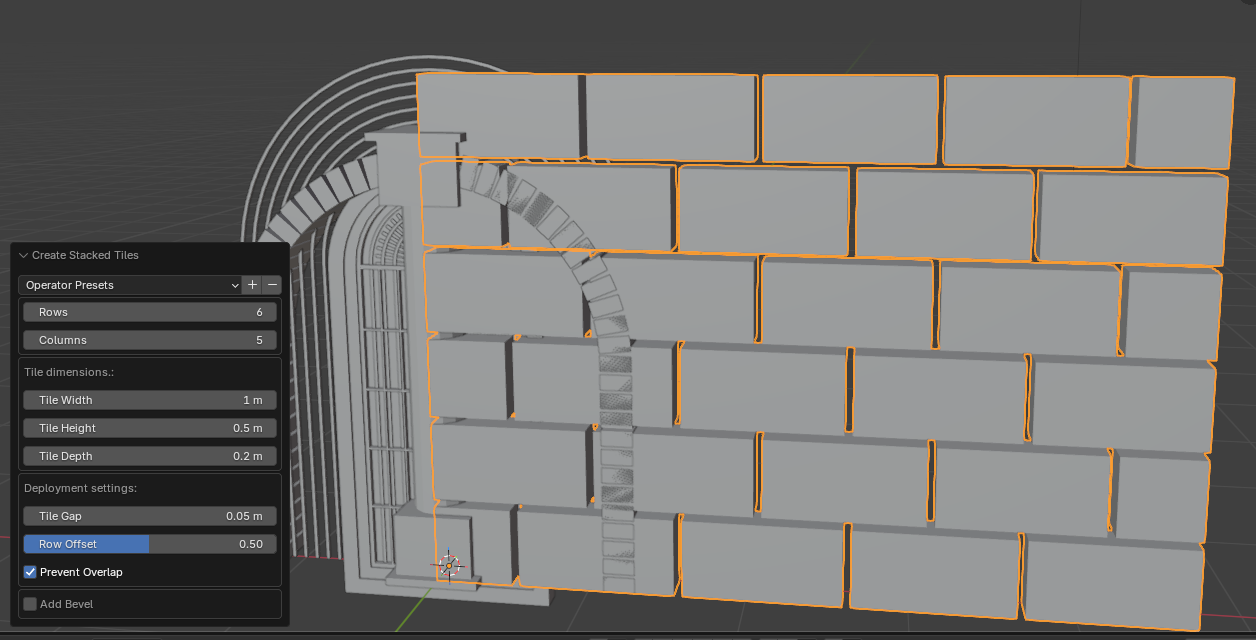
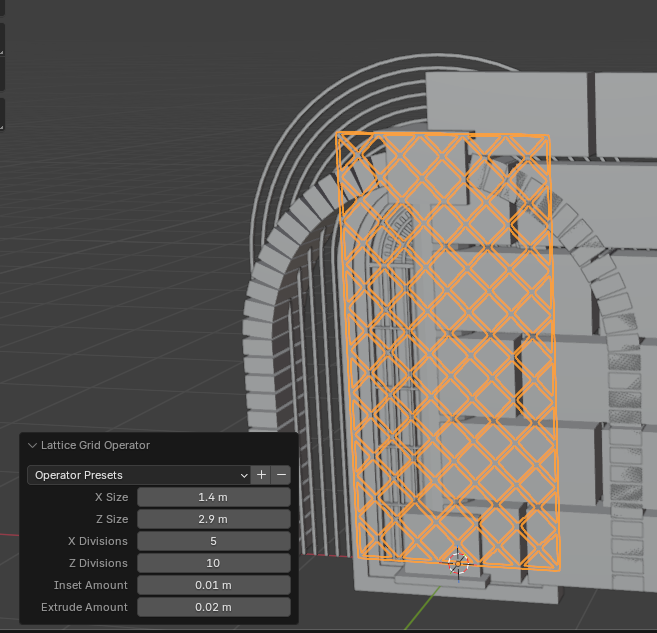
- Choose from various window styles such as arches, lattice patterns, and brick designs
- The selected part is highlighted in blue in the preview area for instant feedback
- You can also use transform tools (move, rotate, scale) directly
(Screenshot)
This interface allows precise customization to match your architectural style.
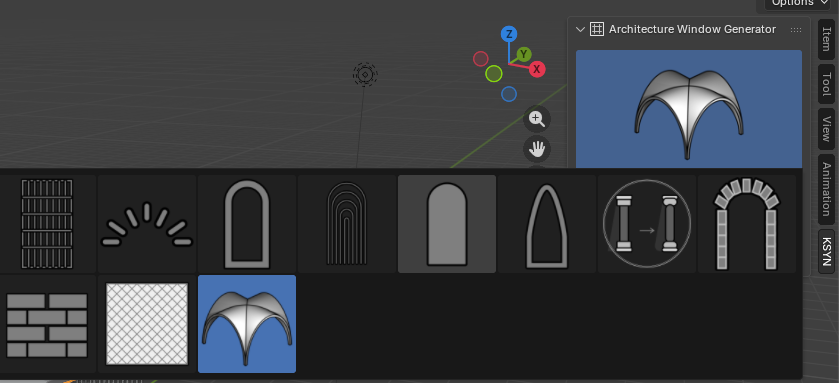
🧊 Object Generation and Placement Tips
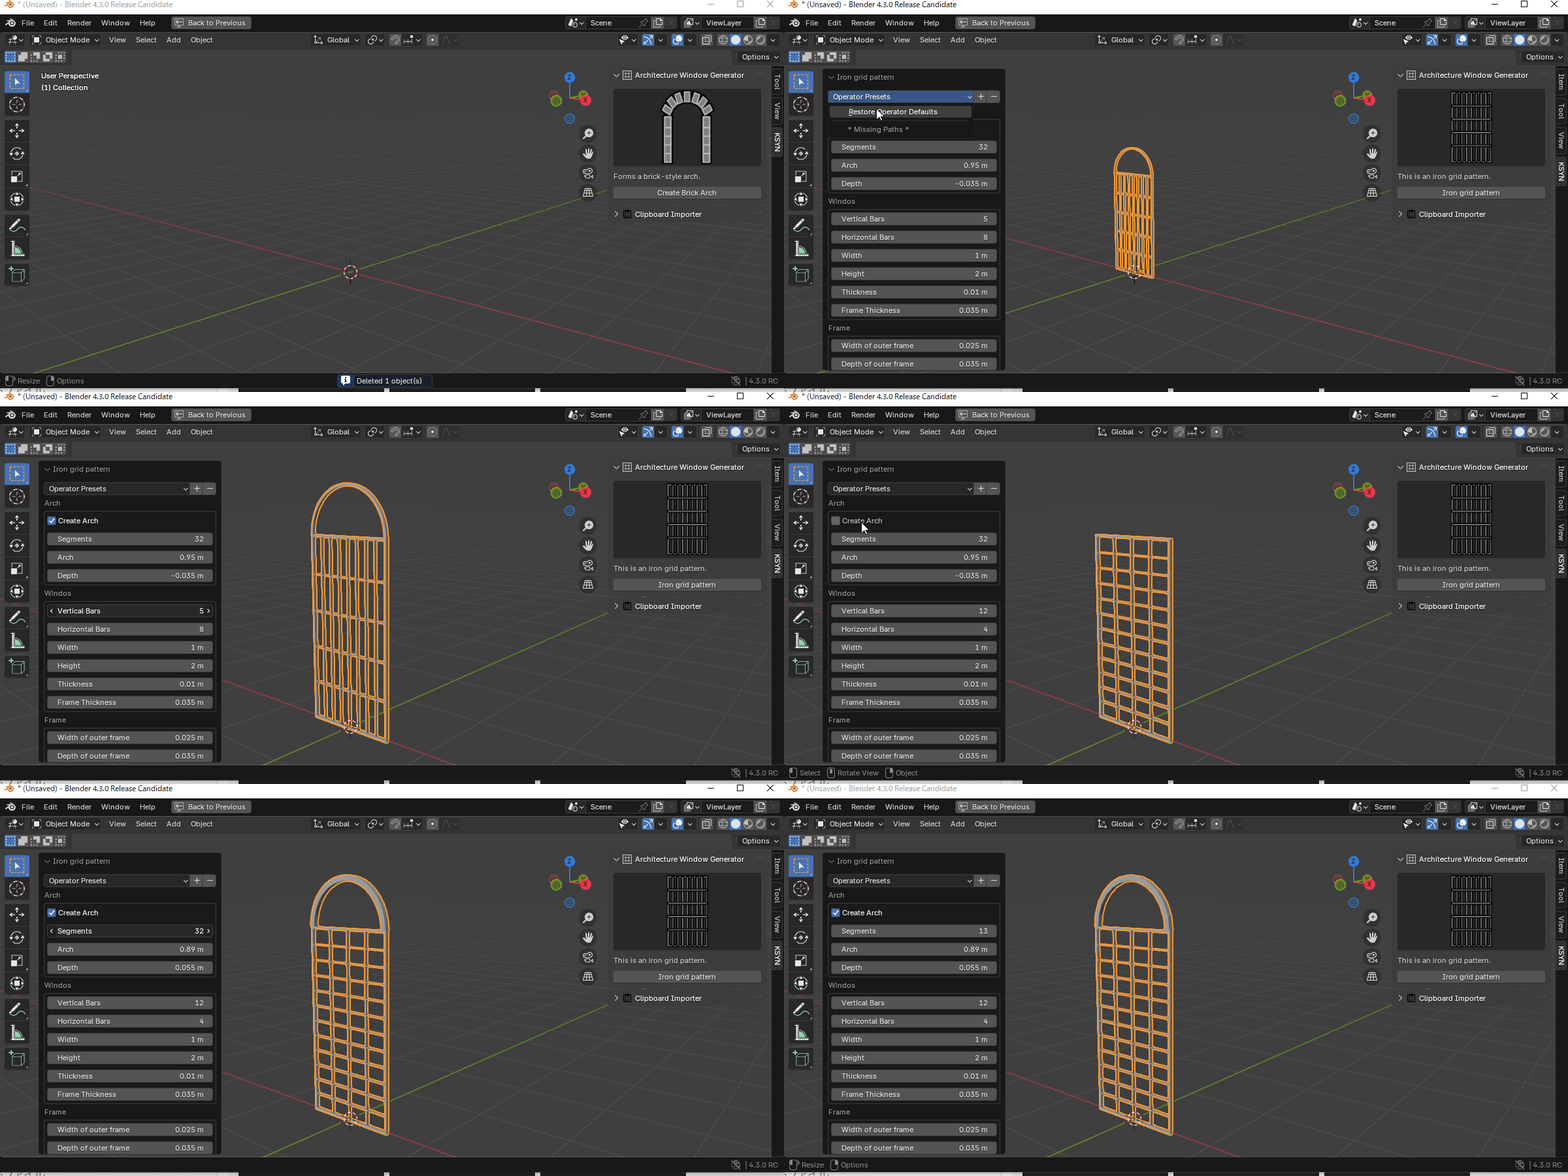
When you click an operator button (e.g., “Iron grid pattern”), a new object will appear in the 3D viewport.
(Screenshot)
Pay attention to the following checkbox settings:
• ✅ Move to Cursor → The object will be placed at the 3D cursor location
• ✅ Rotate to Cursor → The object will be rotated to match the cursor orientation
If the 3D cursor is in an unexpected location, the object may appear off-screen or be hard to find.
Make sure to check the cursor position before generating objects.
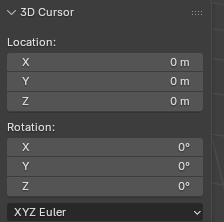
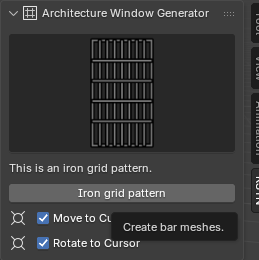
🏗️ Generated Object and Customization
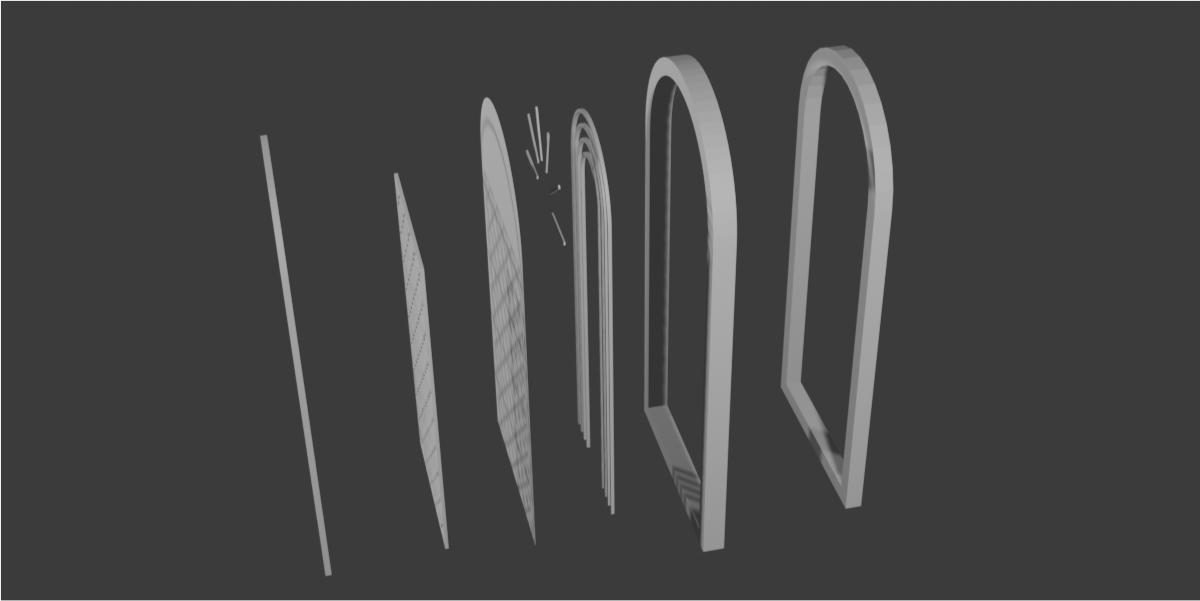
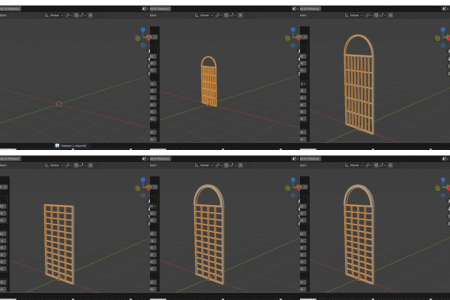
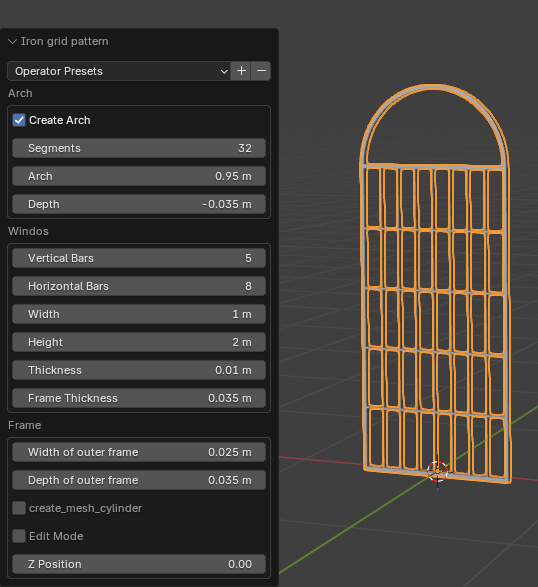
After clicking the operator button, a window part like the one below will appear in the 3D viewport:
(Screenshot)
- You can customize the arch, grid bars, and frame using the options panel on the left
- Adjust parameters like “Create Arch,” “Vertical Bars,” and “Frame Thickness” to modify the shape in real time
- Favorite configurations can be saved as presets via the “Operator Presets” section for quick reuse
① Arch Settings – Detailed Guide
🔧 Create Arch
Enable this checkbox to add an arch shape to the top of the window.
Disable it for a rectangular-only structure.
🔢 Segments
Controls the number of subdivisions in the arch.
Higher values create smoother curves but increase polygon count.
Example: 16 → blocky arch, 32 → smooth arch
📏 Arch
Sets the height of the arch in meters.
Higher values produce taller, more pointed arches.
Example: 0.95 → standard height, 1.5 → sharper arch
📐 Depth
Defines the extrusion depth of the arch.
Negative values push inward, positive values push outward.
Example: -0.035 → recessed arch, 0.05 → protruding arch
② Radial Lines Settings – Detailed Guide
🔘 Start Radius
Sets the inner radius where radial bars begin. Smaller values place them closer to the center.
🔘 End Radius
Defines the outer radius where radial bars end. Larger values spread them farther outward.
🔢 Number of Meshes
Specifies how many radial bars are generated. Higher values create denser patterns.
📏 Mesh Depth
Controls the extrusion depth of each bar, affecting their 3D thickness.
⬆️ Height Offset
Adjusts the vertical position of the entire radial pattern. Useful for placing it near the top of the window.
🧱 Solidify Thickness
Adds thickness to the bars, similar to applying a Solidify modifier.
↕️ Y Position
Fine-tunes the vertical placement along the Y axis.
🚫 Skip End Faces
If checked, the end caps of the bars are omitted. Useful for reducing geometry or changing appearance.
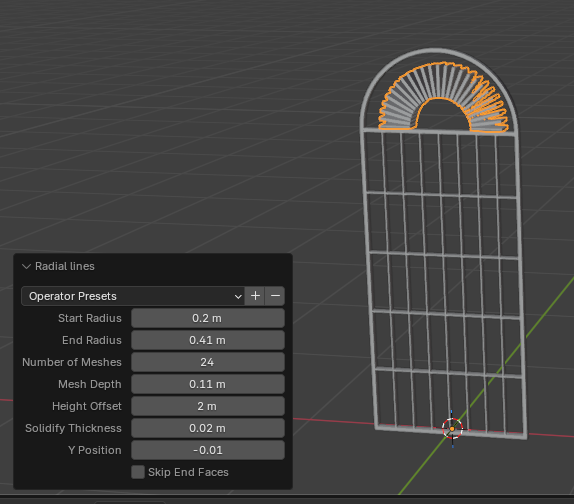
③ Arched Window Frame Settings – Detailed Guide
📏 Radius
Sets the radius of the arch. Larger values create wider arch shapes.
📏 Height
Defines the total height of the window frame, including both the arch and rectangular section.
🔢 Segments
Controls the number of subdivisions in the arch. Higher values result in smoother curves but more geometry.
📐 Width
Specifies the thickness of the frame in the horizontal direction. Affects visual weight.
📐 Depth
Sets the depth of the frame along the front-back axis. Useful for adjusting how far it protrudes from the wall.
↕️ Y Position
Fine-tunes the vertical placement of the frame. Helps align with other elements.
↕️ Z Position
Adjusts the front-back position of the frame. Useful for controlling its distance from the wall surface.
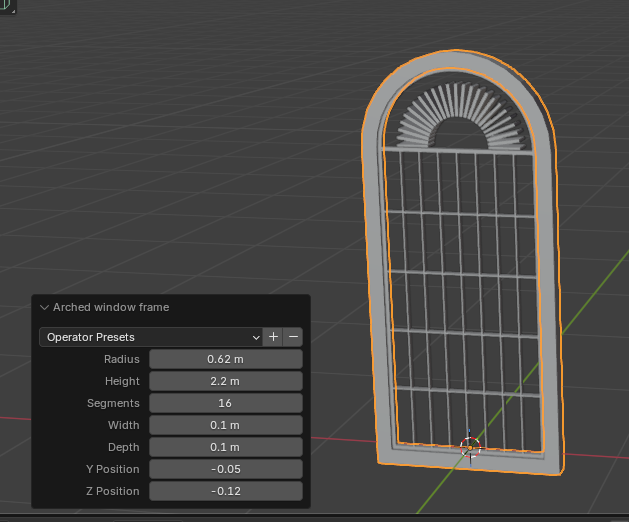
④ Concentric Arched Lines Settings – Detailed Guide
🔘 Start Radius
Sets the radius of the innermost arch. Smaller values place it closer to the center.
🔢 Arch Count
Specifies how many concentric arches to generate. More arches create denser patterns.
➕ Width Increment
Controls how much the width of each arch increases. Larger values make outer arches thicker.
➕ Radius Increment
Defines how much the radius expands for each successive arch. Larger values spread them outward.
🔢 Segments
Sets the number of subdivisions per arch. Higher values result in smoother curves.
📏 Height
Adjusts the overall vertical scale of the arch pattern.
🧱 Thickness
Controls the extrusion depth of the arches, affecting their 3D thickness.
⬆️ Arch Top Position
Specifies the vertical position of the top of the arch. Useful for aligning with window elements.
↕️ Straight Part Height
Adds a straight section below the arches. Set to 0 to omit it.
✅ Add Straight Part
If checked, a straight part is added beneath the arches. Useful for structural or decorative adjustments.
↕️ Y Position
Fine-tunes the vertical placement of the entire pattern.
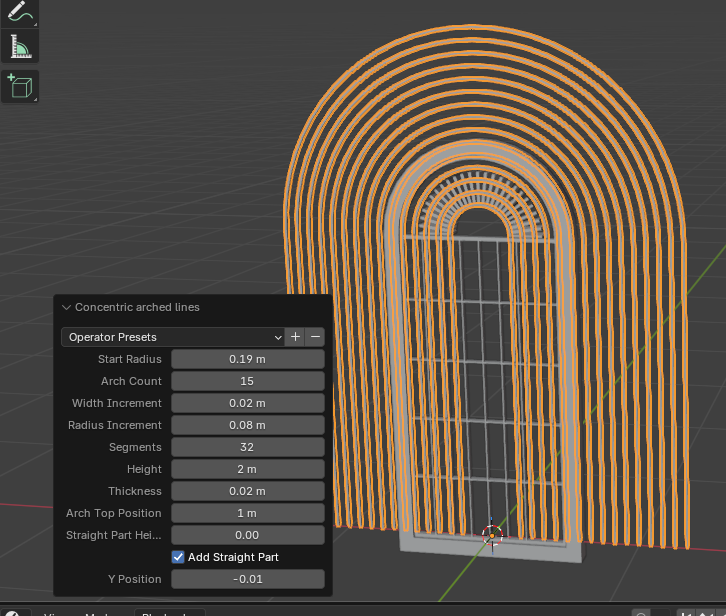
⑤ Create Edited Arch Settings – Detailed Guide
🔢 Segments
Sets the number of subdivisions in the arch. Higher values create smoother curves but increase geometry.
📏 Radius
Defines the radius of the arch. Larger values produce wider arch shapes.
📏 Rectangle Height
Specifies the height of the rectangular section below the arch. Affects the overall vertical size.
↔️ Move Distance
Controls how far the object is moved. Usually set to 0, but useful for placement adjustments.
🌀 Proportional Type
Determines the falloff type for proportional editing. Options like “Smooth” or “Sharp” affect deformation style.
🔘 Proportional Size
Sets the influence radius for proportional editing. Larger values affect a wider area.
🧱 Frame Thickness
Specifies the thickness of the window frame. Set to 0 for no frame.
📍 Location X / Y / Z
Controls the object’s position in 3D space. Adjusts placement along X (left-right), Y (up-down), and Z (front-back) axes.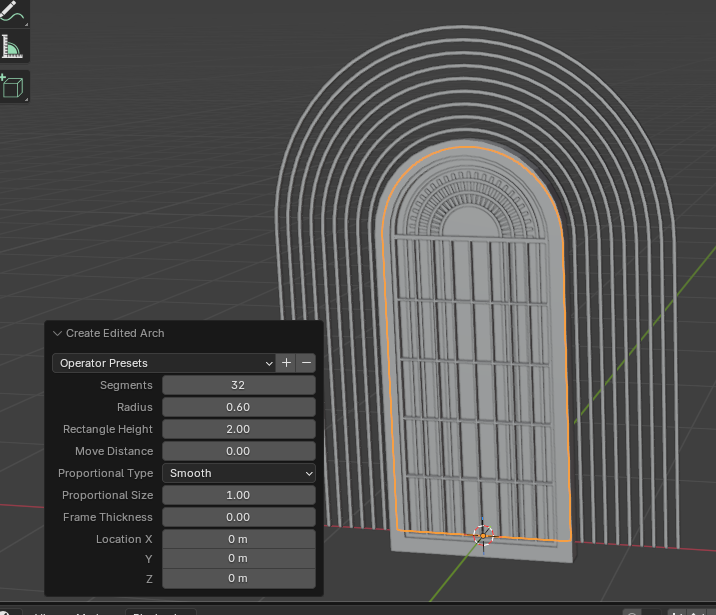
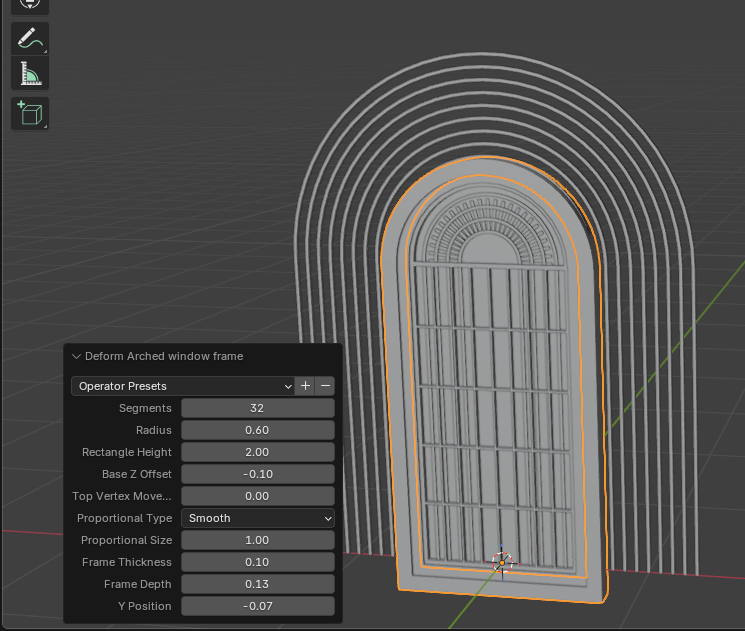
⑥ Deform Arched Window Frame Settings – Detailed Guide
🔢 Segments
Sets the number of subdivisions in the arch. Higher values result in smoother curves.
📏 Radius
Defines the radius of the arch. Larger values produce wider arch shapes.
📏 Rectangle Height
Specifies the height of the rectangular section below the arch. Affects overall vertical size.
↕️ Base Z Offset
Moves the base of the window along the Z axis. Useful for adjusting depth relative to the wall.
⬆️ Top Vertex Move
Moves the top vertex of the arch vertically. Used for shape deformation.
🌀 Proportional Type
Determines the falloff type for proportional editing. Options like “Smooth” or “Sharp” affect deformation style.
🔘 Proportional Size
Sets the influence radius for proportional editing. Larger values affect a wider area.
🧱 Frame Thickness
Specifies the thickness of the window frame. Affects visual weight.
📐 Frame Depth
Controls the depth of the frame along the front-back axis. Useful for wall integration.
↕️ Y Position
Fine-tunes the vertical placement of the entire object. Helps align with other elements.
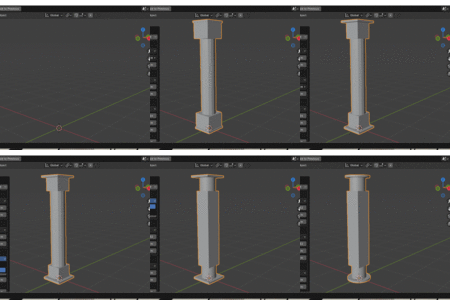
⑦ Artistic Pillar Settings – Detailed Guide
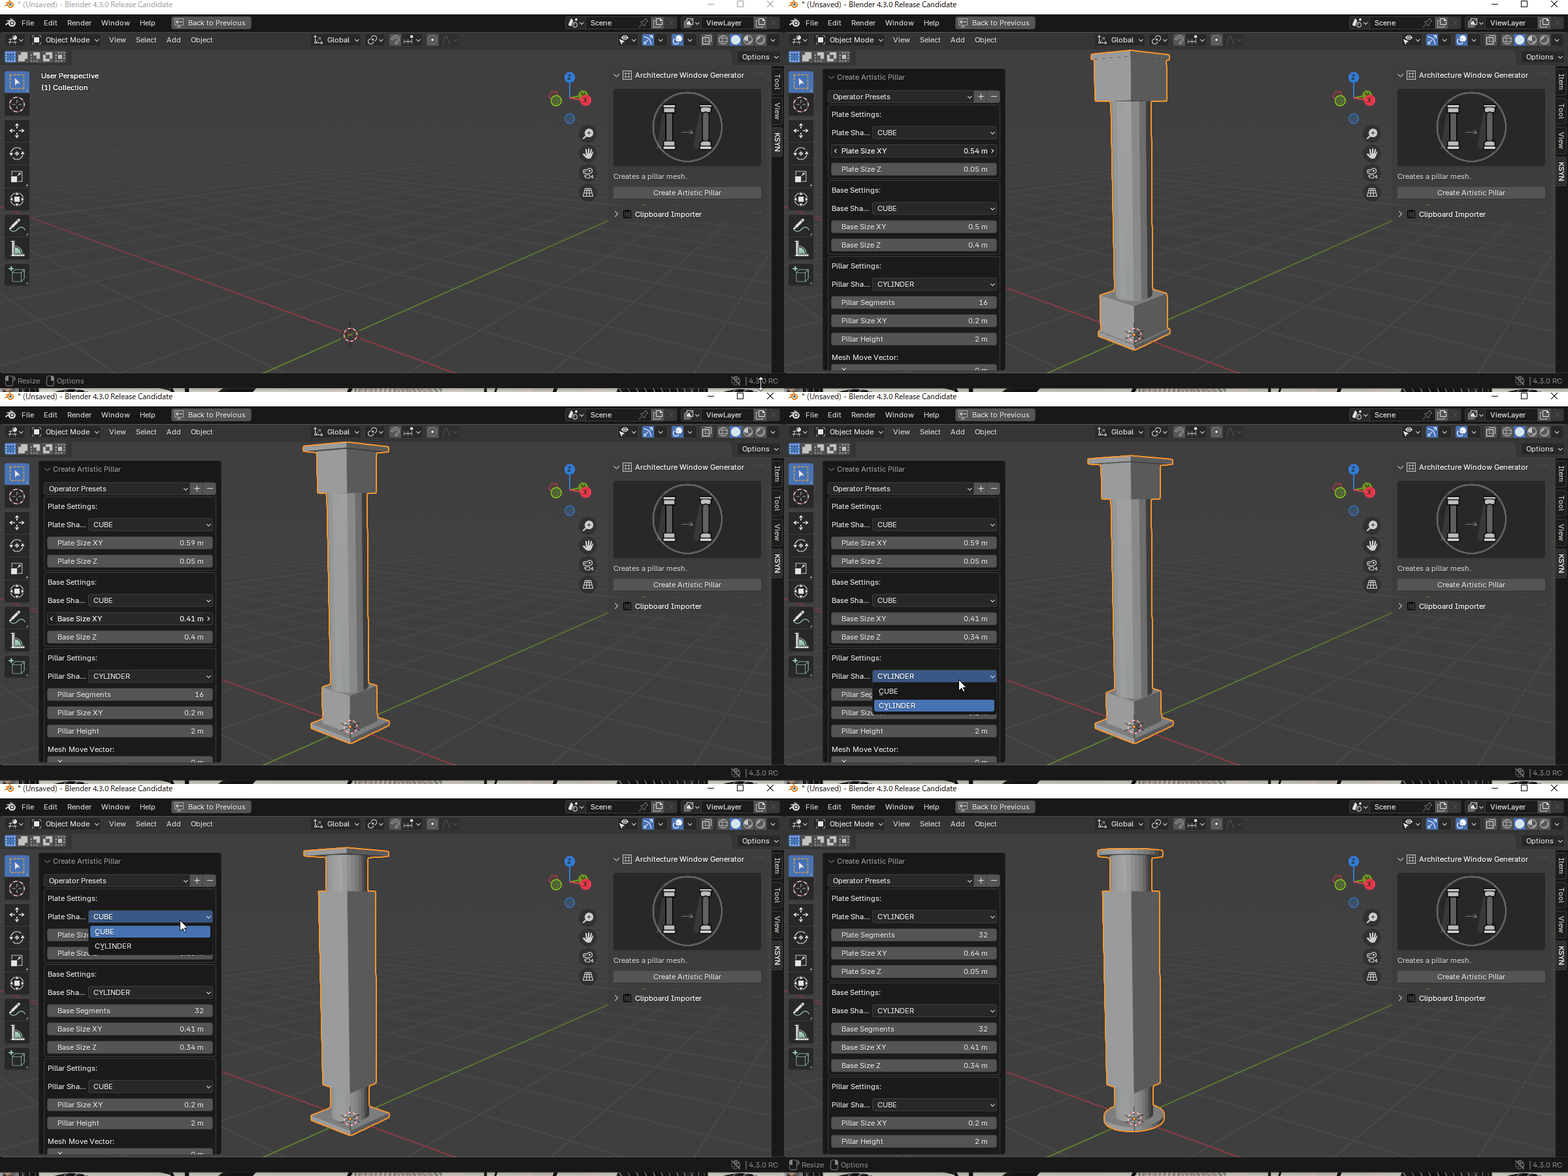
🧱 Plate Settings (Top Cap)
• Plate Shape
Selects the shape of the top plate. Options include CUBE, CYLINDER, etc.
• Plate Size XY
Sets the width and depth of the plate (X and Y axes). Affects the spread of the top.
• Plate Size Z
Controls the thickness of the plate (Z axis). Influences visual weight.
🧱 Base Settings (Bottom Support)
• Base Shape
Selects the shape of the base. Options include CUBE, CYLINDER, etc.
• Base Size XY
Sets the width and depth of the base.
• Base Size Z
Defines the height of the base. Affects stability and proportion.
🗼 Pillar Settings (Main Shaft)
• Pillar Shape
Selects the shape of the pillar. Options include CYLINDER, CUBE, etc.
• Pillar Segments
Number of subdivisions for cylindrical pillars. Higher values create smoother geometry.
• Pillar Size XY
Sets the diameter or thickness of the pillar.
• Pillar Height
Defines the vertical height of the pillar.
📍 Mesh Move Vector (Position Adjustment)
• X / Y / Z
Moves the entire pillar object in 3D space. Useful for aligning with other elements.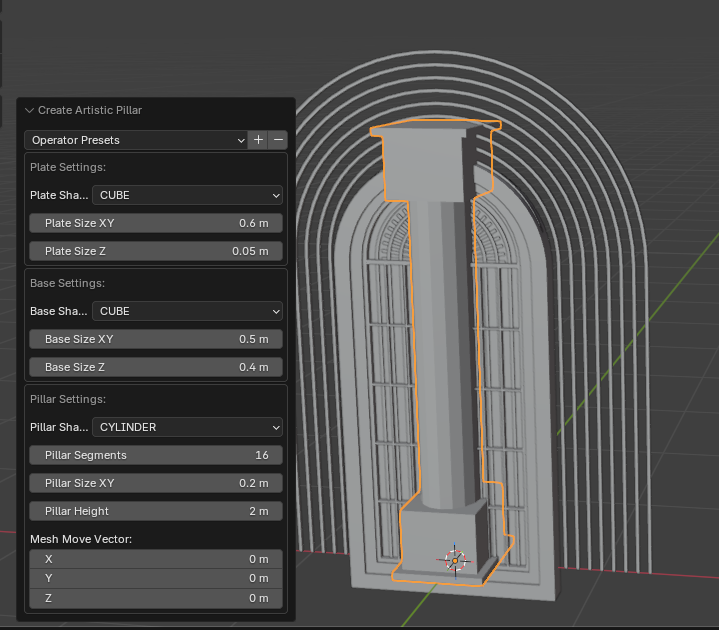
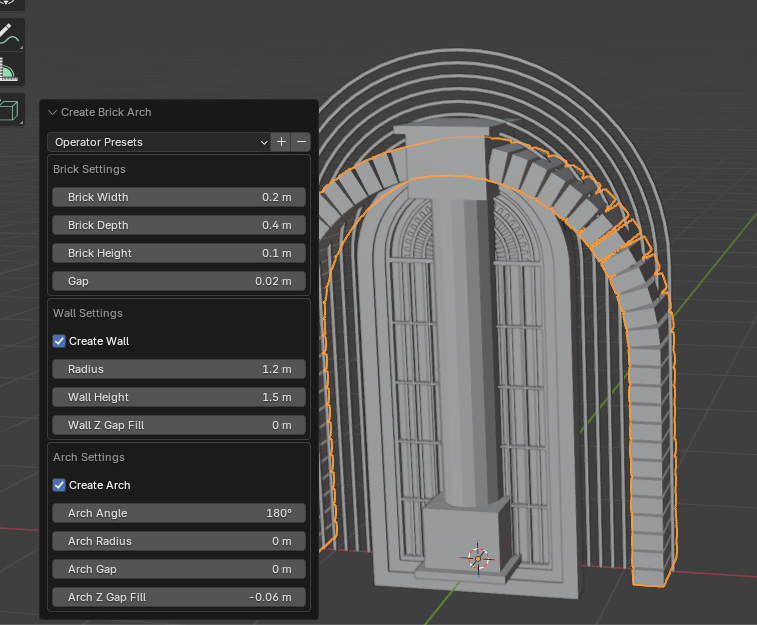
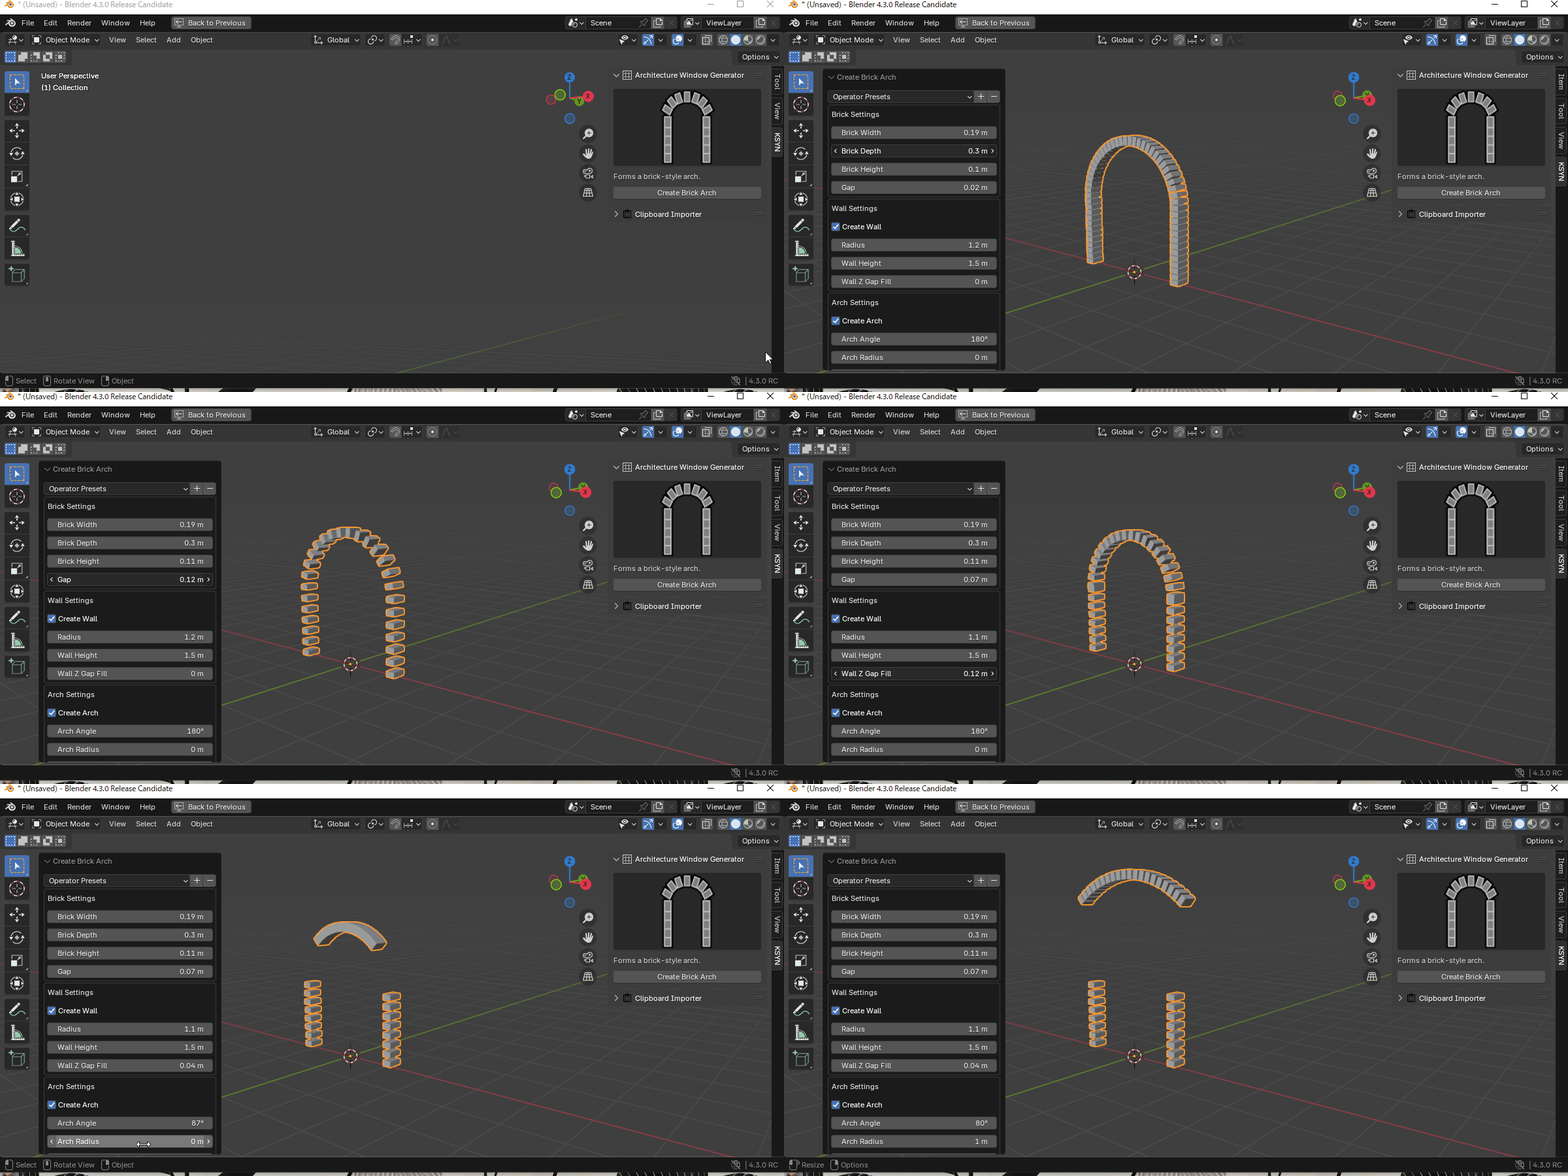
⑧ Brick Arch Settings – Detailed Guide
🧱 Brick Settings
• Brick Width
Sets the horizontal width of each brick. Affects density and appearance of the arch.
• Brick Depth
Controls the front-back thickness of the bricks. Influences how far they protrude.
• Brick Height
Defines the vertical size of each brick. Affects vertical density.
• Gap
Sets the spacing between bricks. Larger values create looser patterns, smaller values create tighter ones.
🧱 Wall Settings
• Create Wall
Enables generation of a wall beneath the arch.
• Radius
Sets the curvature of the wall. Larger values produce wider shapes.
• Wall Height
Defines the vertical size of the wall. Adjust to match building scale.
• Wall Z Gap Fill
Fills vertical gaps in the wall. Useful for fine-tuning alignment.
🧱 Arch Settings
• Create Arch
Enables generation of a brick arch.
• Arch Angle
Sets the opening angle of the arch. 180° for semicircle, 90° for quarter arch, etc.
• Arch Radius
Defines the size of the arch. Larger values produce wider arches.
• Arch Gap
Controls spacing between bricks in the arch. Adjusts density.
• Arch Z Gap Fill
Fills vertical gaps in the arch. Useful for precise alignment.