Autodesk Maya File Import-Export (.Mb .Ma)
 blenderVfxMaster


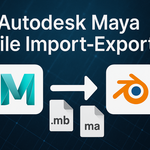



Autodesk Maya File Import-Export Add-on
User Guide for Blender (v 2.0.1)
1. Overview
Autodesk Maya File Import-Export lets you read and write native Maya .mb / .ma files directly inside Blender.
Workflow in a nutshell
-
Blender side – Selected objects are exported to a temporary FBX.
-
Maya Standalone (mayapy) – The FBX is converted to/from a Maya file without launching the Maya UI.
-
Blender side – The final file is automatically imported or saved.
Key benefits
-
No need to open Maya’s GUI
-
Granular filters (Meshes, Lights, Cameras, Splines, Animations, Materials, Armatures)
-
Drag-and-drop import, batch conversion, detailed logging, automatic cache cleanup
2. System Requirements
| Component | Minimum / Recommended |
|---|---|
| Blender | 4.2.0 + (Windows / macOS / Linux) |
| Autodesk Maya | 2018 – 2025 with mayapy installed |
| Disk space | ≥ 2 GB free (temporary FBX + log cache) |
3. Installation
-
Download the ZIP from GitHub or Blender Market.
-
Blender → Edit › Preferences › Add-ons › Install… → pick the ZIP → Install Add-on.
-
Enable Autodesk Maya File Import-Export.
-
In the add-on preferences, set the path to mayapy:
-
Default (Windows):
C:\Program Files\Autodesk\Maya2025\bin\mayapy.exe -
macOS / Linux: choose the corresponding
mayapyexecutable.
-
4. Exporting from Blender to Maya
-
Select the objects you want to export.
-
File › Export › Autodesk Maya (.mb, .ma).
-
Tick the asset types to include (Meshes, Lights, etc.).
-
Choose a file name and extension (.mb or .ma) → Export Maya File.
-
Progress and errors are written to
~/Documents/blender_maya_log.txt.
Tip – To export animation only, tick Animations (and optionally Armatures) and untick everything else.
5. Importing from Maya to Blender
Method A – Menu
-
File › Import › Autodesk Maya (.mb, .ma).
-
Pick a
.mbor.mafile. -
In the right-hand panel choose what to import.
-
Enable Maya Axis (180 ° X-flip) if you work in Y-Up in Blender.
-
Import Maya File.
Method B – Drag & Drop
Drag the .mb / .ma file into the 3D Viewport or Outliner → configure options → OK.
6. Option Reference
| Checkbox / Field | Icon | Meaning (Export ≈ Import) |
|---|---|---|
| Models | 🞇 | Mesh objects |
| Lights | 💡 | Light objects |
| Cameras | 📷 | Cameras |
| Splines | ➰ | Curves / splines |
| Animations | 🎞️ | Keyframes & bone animation |
| Materials † | 🎨 | Keep material slots |
| Armatures † | 🦴 | Skeleton / bone data |
| Maya Axis † | — | Rotate +180 ° around X (Y-Up ↔ Z-Up) |
† Import-only options.
7. Cache & Logging
| Path | Purpose |
|---|---|
~/Documents/blender_maya_cache |
Temporary FBX files (auto-deletes) |
~/Documents/blender_maya_log.txt |
Full addon + Maya Standalone log |
Check the log first when something goes wrong.
8. FAQ
| Issue | Likely Cause | Fix |
|---|---|---|
| “mayapy not found” | Wrong path / Maya not installed | Re-enter correct path in Preferences |
| Export freezes at 0 % | Unsupported objects / no write perms | Export only needed assets; check folder permissions |
| Imported model is upside-down | Axis mismatch | Enable Maya Axis on import or rotate manually |
| Log shows fbxmaya.mll error | Maya FBX plugin missing | Load fbxmaya.mll in Maya or reinstall Maya |
9. Best Practices
-
Coordinate systems – Decide on Y-Up vs Z-Up and stick to it; use Maya Axis when needed.
-
Import only what you need – Speeds up conversion and keeps files small.
-
Clean the cache periodically if you batch-convert many files.
-
Adjust FBX version in the script if you need legacy compatibility.
10. Changelog (v 2.0.1)
-
Drag-and-drop import dialog
-
Per-asset filters for Materials & Armatures
-
Enhanced log formatting with error tags
-
Automatic deletion of temporary FBX files
11. Support & Feedback
When filing a bug, include:
-
Blender and Maya version
-
OS and GPU info
-
Relevant excerpt from
blender_maya_log.txt
Happy shuttling between Blender and Maya!
Have questions about this product?
Login to message
| Sales | 100+ |
| Published | over 1 year ago |
| Blender Version | 3.6 - 5.2 |
| Extension Type | N/A |
| License |
Discover more products like this
Import-Export FBX bridge Maya integration maya blender Geometry Transfer blender tools FPS camera import Animation Transfer blender addon maya-to-blender ma file