Foliage Fusion. Procedural Vegetation Creator
 RobertRoss_VFX

User Guide
How to grow a plant in Blender, read its cost, and take it to a Foliage Assembly.
On this page
What the tile is for, where it sits in the chain, what the sidebar shows.
The limits, how to cut bones, instances, and tris, then the export.
Tileable bark from a photo trunk, then laid back on the scan.
Things that still misbehave, and that the next updates are for.
Start
1.1 What you get, and what this add-on does not do
B- Foliage Fusion grows a plant in Blender with Geometry Nodes. You connect tiles, shape them from the sidebar, then leave with a mesh, vertex color, a wind UV, or a Nanite Foliage Assembly for Unreal 5.8. The same graph builds a tree, a shrub, a palm, or a patch of grass.
The graph stays a row of tiles. Settings and curves live in the sidebar, on the tile you have selected. Two copies of the same tile keep their own sliders. Duplicate the object and the copy is a separate plant.
Physics, collision, and engine lighting stay outside the add-on. The tree graph writes vertex color and a second UV for wind. Tileable bark from a photo scan is a separate tool, Bark From Scan, in the 3D View sidebar. The public add-on is the plant builder and the export.
1.2 Install, Blender 4.5–5.2, the Foliage Fusion workspace
Use Blender 4.5 or newer, through 5.2. Install the extension from disk, or from the extensions platform, then enable B- Foliage Fusion. On enable, the add-on appends a workspace named Foliage Fusion and the module library.
Open that workspace. The Geometry Nodes header carries the module menus and Export. The sidebar tab is Foliage Fusion. In the 3D View the same tab tells you to open the node editor, and it also holds Bark From Scan.
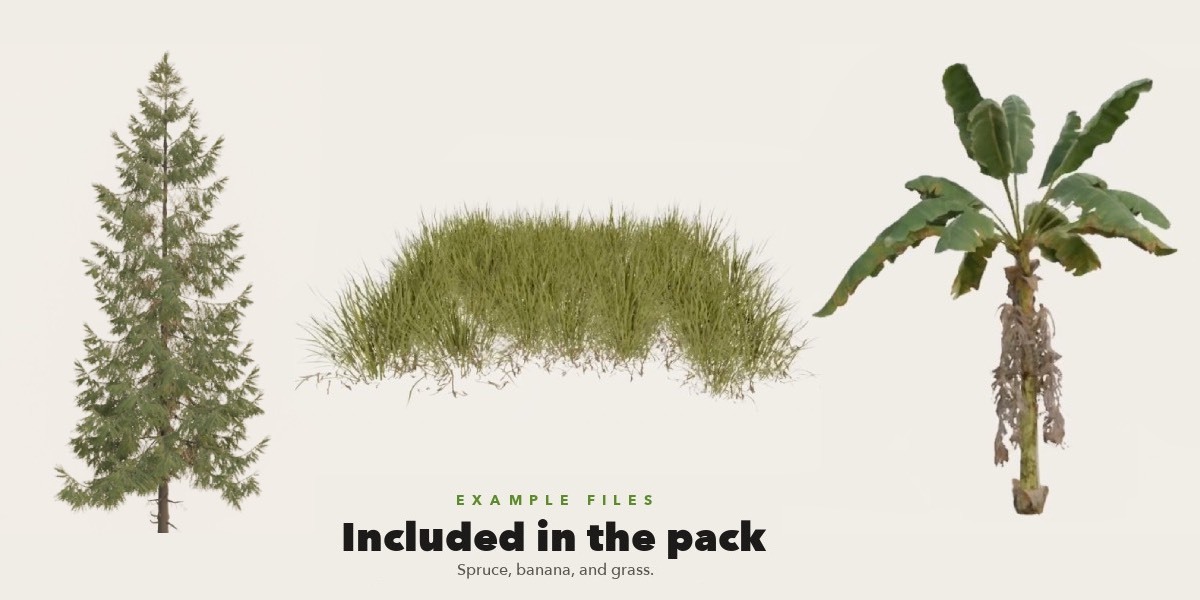
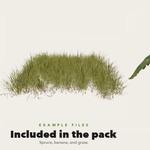
If the node editor has no tree yet, use Create New in the sidebar. Update Selected refreshes the tiles you have selected after an add-on update. Make Unique gives one tile its own copy of the settings when a duplicate is still sharing them. Example blends, when the pack includes them, are a pine, a palm, and grass.
1.3 The graph is a row of tiles
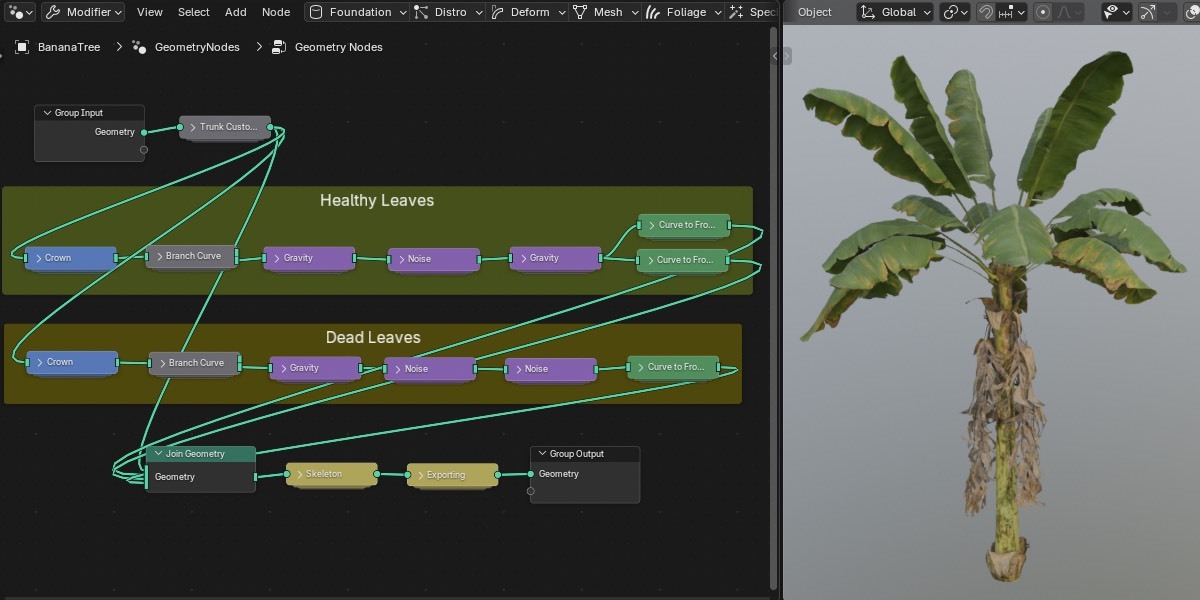
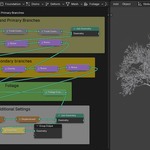
Each tile has one Geometry input and one Geometry output. That is the link you draw along the chain. Branch Curve is the exception: it also has Branches Only, a second Geometry output with just the branches that tile grew. Geometry on that tile still carries the parent plus those branches. Add a tile from the header: Foundation, Distribution, Deformation, Meshing, Foliage, Special. It sticks to the cursor. Connect it to the previous tile. The tile header uses that same grouping: gray, blue, purple, brown, green, yellow. A red tile is out of date. Select it and use Update Selected.
Select a tile. The sidebar shows Module Settings for that tile only: sliders, toggles, collections, materials, and curves. Edit there. Tabbing into the group is the inside of the builder, and it is the wrong place to art-direct the plant.
A stock Join Geometry node is how you merge two chains, for example wood and a second scatter.
1.4 How to read a tree
Trunk — the first wood.
L2 — branches that leave the trunk.
L3 — twigs that leave those branches.
Foliage — leaves, needles, and cards on that wood.
Height runs from 0 at the base to 1 at the tip of the tree. Position along a branch runs from 0 at the attachment to 1 at the tip of that branch. Curves in the sidebar read those two axes. You never wire them by hand.
For a Foliage Assembly the trunk and the branch meshes are the base. Foliage Scatter is the instanced parts. Branch Curve builds the wood the parts hang on. Scatter does not replace that wood.
1.5 Curves: tree height and position along a branch
A curve in the sidebar is a shape along the plant. The horizontal axis is tree height, or position along the parent branch, depending on the curve’s label. The vertical axis is how strong that control is at that point. A flat line at 1 leaves the slider as you set it. A line that falls to 0 turns the effect off along that range.
Labels say which axis you are on: “by Tree Height” or “by Branch Position”. Trunk radius, branch length, whorl count, gravity, and scatter density all use this. Each tile stores its own curves. A second Branch Curve tile does not inherit the first.
Change the curve on the selected tile and the viewport updates. You do not add a Float Curve node in the graph, and you do not connect a named attribute into the tile.
1.6 A first tree from nothing
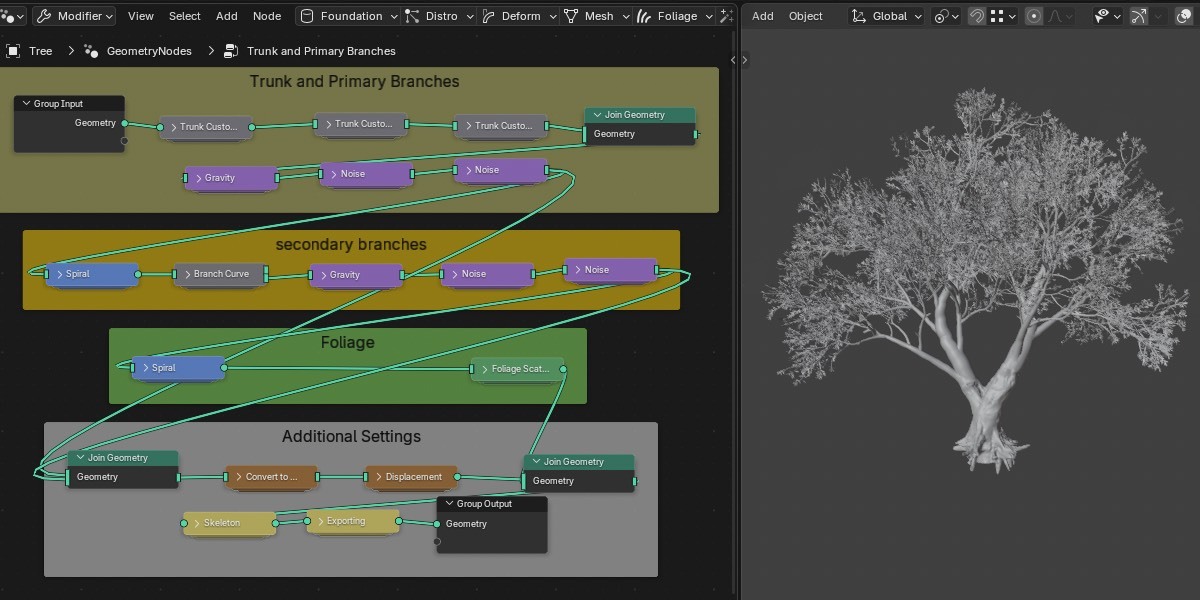
Start with an empty graph and this chain. Stop after Convert to Geo if you only want wood.
- Trunk. Set Length and Base Radius until the stem is the right size.
- Whorled. A few whorls, a few branches each, Spawn Start above the ground.
- Branch Curve. Length and Starting Angle. The curve “Length by Tree Height” shortens branches toward the tip.
- Gravity, if the branches should droop.
- Convert to Geo. This is the mesh of the wood.
- Foliage Scatter. Point it at a collection of cards. Origin at the base, length along +Y, face up along +Z.
Add Exporting at the end when you want a budget readout or a file. Add Skeleton when the export should carry bones. Custom Normals, Vertex Color, and UV Wind Mask come after the foliage, before those two.
1.7 Variants
Build one plant you like. Duplicate the object with Shift+D. The copy still shares the Geometry Nodes tree, so the modifier shows a number, usually 2. Click that number on the Geometry Nodes modifier. Blender gives the copy its own node tree. Edit curves and sliders on the copy. The original stays put. Until you click the number, both objects are the same graph.

Click the number. Until then the copy is the same graph.
Keep the variants in one collection if a later tree should instance them, or export them as one set. On the Exporting tile, Set Name is the shared folder. Variant Name is this plant. See 3.12.
1.8 Two ways out
Bake to Single Mesh, on the Exporting tile, collapses the plant into one mesh in the scene. Vertex color and the wind UV go with it. Use this for any engine that plays a mesh.
Export, on the Geometry Nodes header, writes a file. The two switches on the Exporting tile pick the file:
Both off — FBX mesh.
Skeleton on, Assemblies off — FBX with the rig.
Assemblies on — Nanite Foliage Assembly for Unreal. Trunk and branches are the base. Foliage ships as instances.
The full path is section 3.

Assemblies and Skeleton live on the Exporting tile. Both on is the assembly with the rig.
Modules
Grouped the way they appear on the Geometry Nodes header. Select the tile, then use the sidebar. The chain below is the usual order. You can stop early, skip a tile, or stack another Branch Curve after the first.
2.1 Trunk
Trunk draws the stem from scratch. It is the start of a procedural tree. Length is the height. Down Offset sinks the base. Length Segments is how many cuts run up the stem. Base Radius is the thickness at the ground. Tip Radius Multiplier shrinks the top. Radius by Tree Height bends that taper: keep it high at the base and low at the tip.
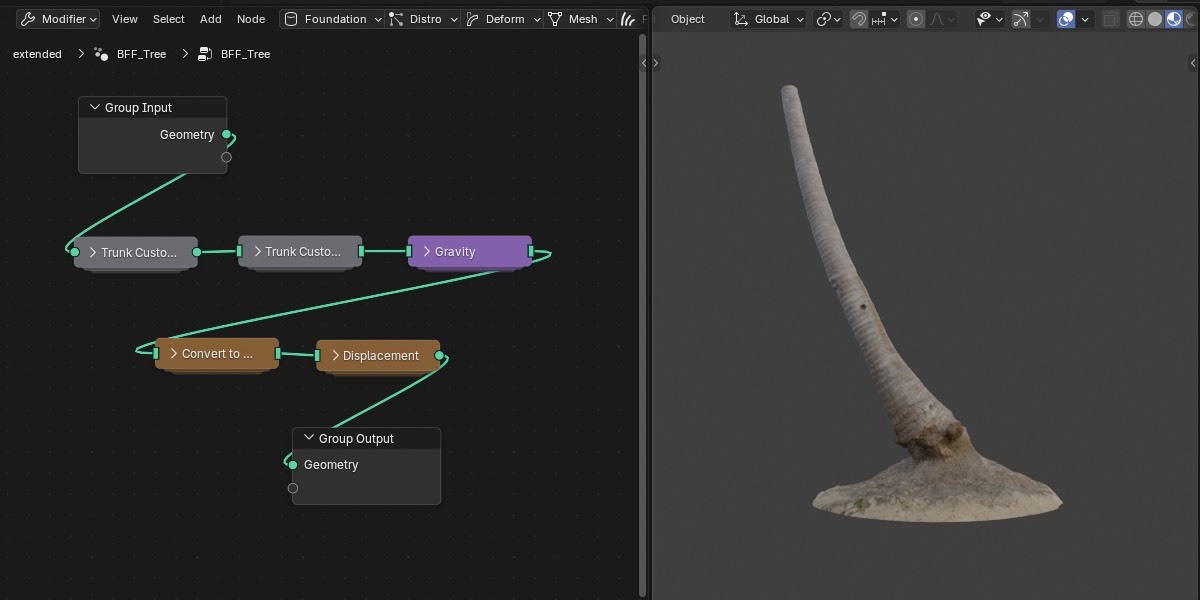
Connect it to a distribution tile, or straight to Branch Curve if you already know where branches go. A photo scan uses Trunk Custom Mesh instead. A curve you drew uses Trunk Custom Curve.
2.2 Trunk Custom Mesh
This tile starts from a scanned trunk mesh. Pick Trunk Mesh and set Base Scale. The scan keeps its materials when it passes through Convert to Geo. Name the scan’s UV map UVMap, Blender’s default. The main axis is what later tiles treat as “up” the trunk: Axis Rotation, Axis Length (0 lets the mesh decide), and Show Axis Guide while you line it up.
Adding this tile also drops a Trunk Custom Extension beside it, already linked. That extension is how scanned wood grows into procedural branches. Radius by Tree Height still shapes anything the extension builds on top. Bark for the scan is Bark From Scan, not a setting on this tile.
2.3 Trunk Custom Curve
Draw a curve object from base to tip and pick it as Trunk Curve. Length comes from that curve. Length Segments, Base Radius, Tip Radius Multiplier, and Radius by Tree Height match the generated Trunk.
Use this when the stem should lean, fork once, or follow a silhouette you drew. Distribution and Branch Curve still come after it.
2.4 Trunk Custom Extension
Extension continues a photo trunk into procedural wood. The splines are the source of truth. Show Extension Preview is optional and off by default. The finished surface comes later, through Gravity and Convert to Geo.
More than one extension, for a second hole or another limb, goes in series: Trunk Custom Mesh, then the first extension, then the next one. Each extension passes the scan on once and adds its own wood. Do not branch Trunk Custom Mesh into two extensions side by side and join them afterwards. Each wire carries its own copy of the scan, so you get two trunks.
Count As Trunk makes this length part of tree height, so curves that read height still reach 1 at the real top. Extension Anchors are the empties the new wood grows from. Match Trunk Radius lines the new base up with the scan. Extension Length, Base Overlap, and Procedural Top Length set how far the new wood runs and how it overlaps the scan. Branch Segments, Branch Base Radius, and Tip Radius Multiplier shape that wood.
Cap Join is the blend at the scan: Cap Morph Length, Collar Thickness, and Cap Morph Strength. A harsh collar means the overlap is too short or the morph is too sharp. Pull Base Overlap and Cap Morph Length until the seam sits in the bark, then leave the preview off.
2.5 Area
Area scatters points on a patch of ground. Radius X and Radius Y set the oval. Density, Seed, and Random Yaw fill it. Spawn Radius keeps points off the exact center if you need a clearing. Density by Area thins the rim or the middle.
Connect it to Delete Distro Points, Branch Curve, or Foliage Scatter. This is the start of grass, ground cover, or a shrub that has no trunk. It is not a second trunk.

Area, then Branch Curve and Gravity. The patch is grass.
2.6 Branch Curve
Branch Curve turns spawn points into branches. It is the wood of the crown. Put it after Whorled, Opposite, Spiral, Crown, or Area. Another Branch Curve can follow, to grow twigs on those branches. Gravity and Noise can sit before it or between two of them.
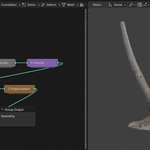
Geometry is the output you use for the chain. It carries the parent plus the branches this tile just grew, so the trunk stays in the stream and the next distribution can grow on the new branches.
Branches Only is those new branches alone. The parent is left behind.
Use it with a custom trunk mesh. The scan stays on its own wire. Branches Only goes through Gravity and Convert to Geo, and a Join Geometry puts the meshed branches back on the scan. Geometry on that side chain would drag the scan along with the branches.
The other case is a side chain for that generation only. Curve to Fronds, for example, can hang off Branches Only while Geometry continues as the wood.
Angle: Radial Outward pushes growth out from the parent. When you are making grass or a shrub, you will usually want it on. Starting Angle is the lift, Starting Roll twists, Angle Random spreads them. Curves cover angle, roll, and length by tree height and by position on the parent. Length: Branch Length Multiplier and Length Random %. Radius: Radius Multiplier, Tip Taper, Surface Offset Mult, and Radius by Tree Height. Add Tip Branch plus Tip Length Multiplier puts one more branch on the end of the parent. Resolution is the curve density. Collar Thickness and Collar Length swell the joint where the branch leaves the parent.
Disable Bones, on this tile, keeps the branch in the mesh and leaves it off the skeleton. Use that on twigs that should ride a parent bone. In a Foliage Assembly this tile is base geometry, welded to the trunk, unless you later treat a whole branch as one instanced kit.
2.7 Whorled
Whorled places rings of branches around the parent. It is the spruce and pine pattern. Connect it to Delete Distro Points or straight to Branch Curve.
Whorl Count and Branches per Whorl set the rings. Both have a curve by tree height, so the crown can carry more rings than the base. Branch Count Random % jitters the count. Spawn Start and Spawn End limit the band. Spawn on Tips adds a ring at the end. Z Offset Random % and Radial Offset Random break the perfect ring. Next Whorl Rotation spins the next ring so branches do not stack. Whorl Mask by Tree Height can mute a band entirely.
2.8 Opposite
Opposite places branches in pairs, left and right. Use it for maple-like twigs and for decussate shrubs. Connect it the same way as Whorled.
Density and Density by Tree Height set how often pairs appear. Spawn Start, Spawn End, and Spawn on Tips work as on Whorled. Alternate Stagger slides one of the pair. Decussate Angle turns the next pair. Flatten to Ground lays them toward the soil. Pitch Random and the radial random break the mirror.
2.9 Spiral
Spiral walks up the parent and drops one branch at a time, turning as it goes. Use it for a loose crown, a vine-like stem, or anywhere a ring would look too even.
Base Density and Density by Tree Height set the count. Spiral Angle is the turn from one branch to the next. Angle Spread opens that turn into a wider fan. Spawn Start, Spawn End, and Spawn on Tips limit the run.
2.10 Crown
Crown fills a volume with spawn points instead of walking up the trunk. Generate Crown Helper drops an empty. Its +Z is the capsule axis and its location is the center. Pick that collection as Crown Anchor. Pattern, Count, Spread, Divergence, Next Pair Rotation, Yaw, and Seed arrange the points. Radius X, Radius Y, Height, and Taper size the volume. Angle Random and Height Random loosen it.
Height for anything downstream is 0 at the bottom of that capsule and 1 at the top. Show Guide while you place it. Turn Show Guide off before Convert to Geo, or the guide geometry rides into the mesh. You can stack more than one Crown tile.
2.11 Delete Distro Points
Put this after a distribution tile when a band of spawns should disappear. It deletes points. It does not hide branches that were already built. If Branch Curve is already in the chain, put Delete before it.
Delete Start and Delete End mark the height band that may lose points. Keep Start and Keep End protect a band inside that. Delete % is the random chance, Seed picks which points, and Delete by Tree Height scales that chance from base to tip. You can stack more than one of these tiles. This is the direct way to cut instance count before foliage ever appears.
2.12 Gravity
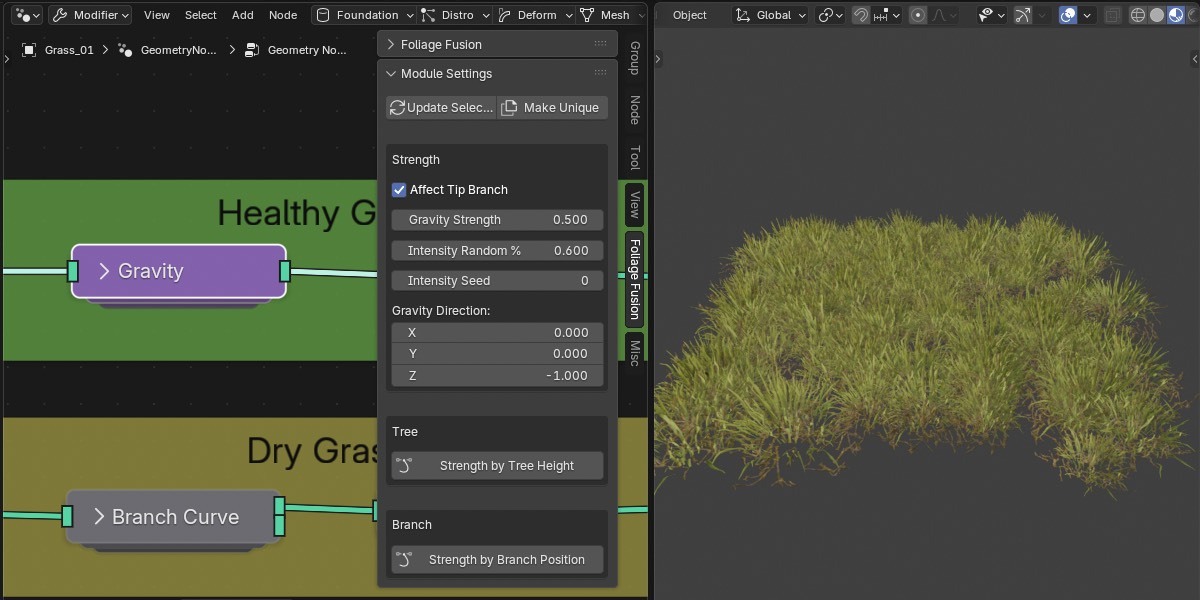
Gravity bends branches along Gravity Direction. Strength is the amount. Strength by Tree Height and Strength by Branch Position let the tips droop and the base stay stiff. Intensity Random % and Intensity Seed vary it per branch. Affect Tip Branch includes the extra tip from Branch Curve.
Place it after the branches exist as curves, and before Convert to Geo. You can use more than one Gravity tile. A photo-trunk extension relies on this bend before the mesh is built.
2.13 Noise
Noise pushes the curves off a perfect arc. Noise Type, Seed, Noise Scale, and Noise Strength are the look. Contrast and Steps harden it into facets when you want a broken stem instead of a smooth wander. Affect Tip Branch matches Gravity.
Put it next to Gravity, still before Convert to Geo. Small strength reads as bark tension. Large strength moves the whole crown and will fight a careful whorl pattern.
2.14 Convert to Geo
Convert to Geo turns the curves into a mesh. A photo trunk already in the chain passes through with its materials. Put it after Gravity and Noise, and before Branch End, Displacement, and Foliage Scatter.
Resolution, Material, UV X, and UV Y are separate for the trunk, for L2, and for L3. Columns splits the UV into vertical stripes. Stripe picks which column that level uses. Keep UV X at 1 to stay inside the stripe. UV Shear on the trunk skews U by height. UV Rotate turns the trunk’s U the way a seam angle turns a bark tile. Branch UVs stay put when you shear or rotate the trunk.
Weld Strength pulls the branch joint into the parent so the mesh does not show a gap. This resolution is the triangle count of the wood. Foliage cards are separate. Raise resolution here only while the Geometry Budget on Exporting says the trunk is the cheap part.
2.15 Branch End
Branch End sits directly after Convert to Geo. It caps an open branch end with a broken, splintered face. Enable turns it on. Branch Level chooses which wood. Min End Radius, in meters, leaves thinner tips open, so a live taper stays a point and a cut stub gets the cap.
Keep Start and Keep End limit the effect to a height band. When End is less than or equal to Start, the band is off and every end of that level is eligible. Seed changes the splinter. You can stack the tile if trunk and twigs need different caps.
2.16 Displacement
Displacement pushes bark out of a height map after Convert to Geo. The trunk can subdivide. L2 and L3 have their own maps and stay on the vertices Convert to Geo already made. Enable on L2 or L3 is off until you assign a map. An empty map does nothing. Height images are treated as Non-Color.
Leave the live preview off while you work on the crown. Export, Bake to Single Mesh, and Geometry Budget still apply the bark, so the triangle count you read includes it. Strength and Midlevel match a normal displacement. UV Tile X and UV Tile Y repeat the map. Height bands, in meters, decide where the extra subdivision fades out.
This is the expensive triangle lever on the wood. A hero trunk can carry it. A mid-distance tree often wants a lighter map or none. Weld from Convert to Geo still protects the joint, so the seam does not tear open when the bark moves.
2.17 Curve to Fronds
Curve to Fronds lays a mesh along the branch curves. A palm leaf, a long frond, a grass blade, or a weed all fit. Cards Collection takes flat cards or an ordinary solid mesh, such as a modeled branch.
Make that mesh 1 m long. Orientation is the same as Foliage Scatter: origin at the base, length along +Y, width along +X, face along +Z. Name its UV map UVMap, Blender’s default.
Base Width Mult and Width by Area set the silhouette. Width Random varies it. Keep Start and Keep End drop fronds outside a height band.
Fold Strength, Fold Random, and Fold Profile curl the leaf. Curve Resample is the ribbon’s resolution. Flip Tangent and Invert Along Curve fix a leaf that grows backwards. Sun Align (Z-Up) and Roll Phase aim the face. The result is mesh, so it counts as frond triangles, and Custom Normals can still aim it.
2.18 Foliage Scatter
Foliage Scatter instances kits along the wood. This is the leaf and needle layer, and in a Foliage Assembly it is the part list. Connect it after Convert to Geo, or after Curve to Fronds. One scatter tile is the usual setup. Dead Foliage, Custom Normals, Vertex Color, or UV Wind Mask follow it.
Prepare every kit the same way. A card and a branch kit share the axes.
Origin at the base, where the kit should touch the wood.
Length along +Y.
Width along +X.
Face along +Z. On a card that is the face normal. On a branch kit it is up.
A card that lies on its side in the viewport was modeled on the wrong axis. Name the kit’s UV map UVMap, Blender’s default. Branch Kit, when on, places that +Y outward along the branch and that +Z toward world up. It hides Sky Influence and Angle, because the mesh already has its shape.

Base at the origin, length along +Y. A frond and a scatter kit use the same axes.
With Height Layers off, one collection feeds the whole plant. Density by Tree Height and Density by Branch Position thin it. Turn Height Layers on and the sidebar splits into Bottom, Mid, and Top, each with a collection and a start and end scale. That split is by height of the tree. It changes which kit is used. It does not turn a branch into a single merged mesh.
Branch Layers looks inside each of those collections for nested collections named Long, Mid, and Short. The same parent branch then carries long kits near the base and short kits near the tip. The sidebar reports how many meshes it found. If a nested collection is empty, that class stays empty. A duplicate is still read. Long.001, Mid.002, and Short.003 match Long, Mid, and Short. The .001 and .002 Blender adds are ignored. Spawn on Tips and Enable Tip give the end of a branch its own kit.
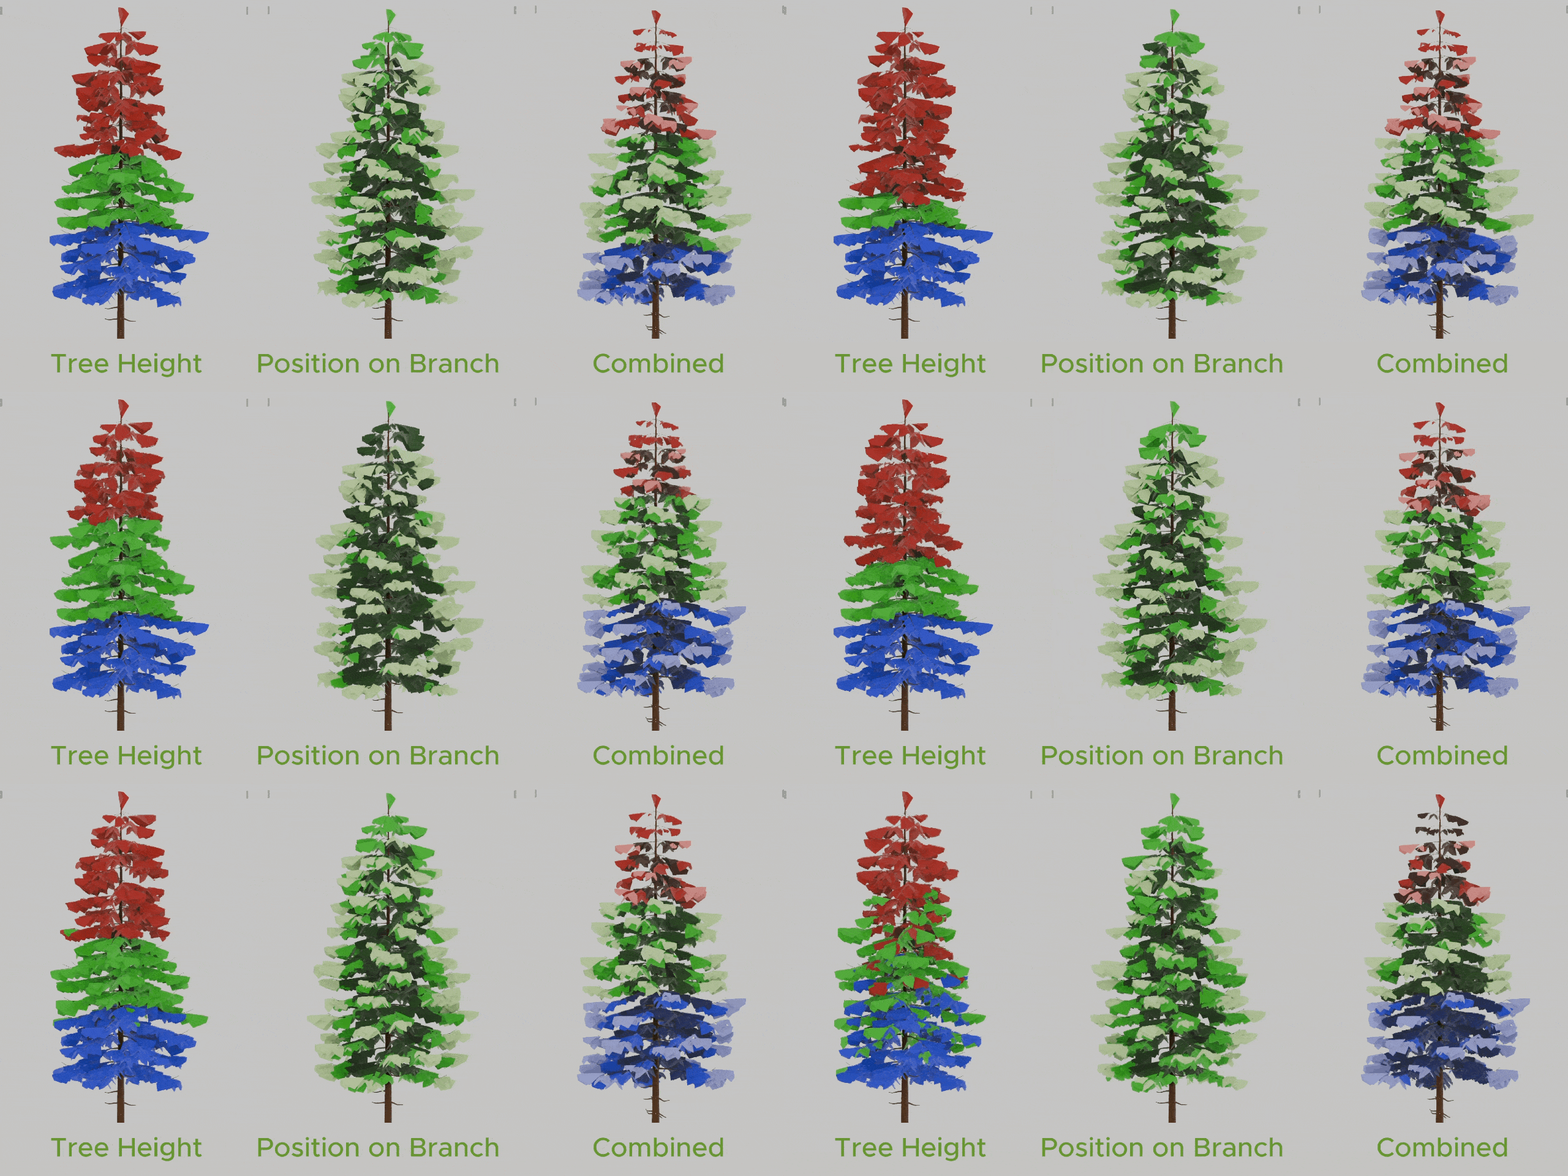
Height Layers run up the tree. Branch Layers run along each branch. Combined is both.
Base Scale and Scale Rand % size the kits. Sky Influence, with its curve by tree height, rolls cards outward. Start Angle for pitch, yaw, and roll, plus Angle Rand %, aim a card. Those curves are by branch position and by tree height.
When Assemblies is on, this tile outputs instances. Fold, curl, twist, and custom normals on the cards turn off, so the viewport matches a rigid part in Unreal. Bake to Single Mesh still realizes them into one mesh.
Bones, at the bottom of this tile, decide which cards get their own bone. Disable Bones binds every card on this tile to the nearest branch or the trunk. Alternate Bones keeps a bone on every other card and binds the rest to the parent. With Branch Layers on, Disable Long, Mid, and Short Bones are separate. With Enable Tip on, Disable Tip Bones is there too. Merge into Base, under Base Mesh, realizes this whole tile into the trunk mesh. Those cards leave the instance count and their triangles move onto the trunk. The total triangle count stays the same.
2.19 Dead Foliage
Dead Foliage sits after Foliage Scatter, or after a Join. It replaces some live kits with meshes from Dead Collection. Preview Selection shows which cards are chosen. Pick Mode and Seed decide the pattern.
Enable Inner eats cards inside the crown. Inner Intensity and the two curves, by tree height and by position on the parent, weight that. Enable Branch kills a whole branch of kits at once. Branch Level chooses L2 or L3, and Branch Intensity is how often. You can stack the tile if inner deadwood and a few fully dead limbs need different collections. The swap does not run the scatter’s fold and curl on the dead meshes.

Enable Inner clears the shaded crown. Enable Branch replaces whole limbs.
2.20 Custom Normals
Custom Normals aims the shading of cards and fronds. Wood keeps the normals it got from Convert to Geo. Put the tile after Foliage Scatter or after Join, and before Vertex Color. With Assemblies on, scatter cards stay instances and this tile does not restyle them. Turn Assemblies off while you judge the shading, then turn it back on for the Unreal viewport.
Mode is the aim. Preserve keeps the mesh normal. World Up stands grass upright. Frame Up uses the card’s own up, or a stable up on a frond. Radial (Axis) points out from the branch like a cylinder. Radial (Pivot) points out from the spawn point.
Sphere (Grouped) builds a ball, a stretched oval, or a capsule around a group. Sphere Scope picks the group: the whole tree, one L2 branch, one L3 twig, one spawn, or one card. Shape is Sphere, Stretched, or Capsule. Width and Sphere Scale size it. Sphere Scale only applies when Shape is Sphere. A spruce reads well as a capsule along the branch. A broadleaf crown reads better as one sphere for the whole tree, or one per L2.
2.21 Vertex Color
Vertex Color fills the color attribute the shader will read. Put it after Join, once wood and foliage are one stream. Each of R, G, B, and A has its own mode. The viewer at the top of the tile shows that color in the viewport. It does not change the data. In Blender 4.5 the viewer uses Raw. In 5.0 and later it pins the display so a value of 1 stays white.
None writes 0. White writes 1. Tree Gradient is one ramp from the base of the plant to the tip. L2 Gradient is a ramp along one branch and everything that grows on it, base at 0 and tip at 1. L3 Gradient is that ramp on a twig. Foliage Gradient runs along a card or a frond. L2 Random, L3 Random, and Foliage Random give each branch, twig, or card its own flat value. All Gradients uses the trunk ramp on the trunk, the branch ramp on branch wood, and the foliage ramp on cards.
A typical shader packing is tree height in R, a branch id in G, and a gradient along the twig in B. The wind UV is a different tile. This color is for masks. It is not the skeletal wind.
2.22 UV Wind Mask
UV Wind Mask writes a second UV for a wind shader that reads phase from the UV layout. It does not move the mesh. Put it after Join. The default map is UVMap2, so the bark UV from Convert to Geo stays on UVMap. You can switch the target to UVMap or UVMap3.
Branch Level decides who shares a column: Trunk, L2, or L3. U sits in one of 16 phase columns. A whole branch family shares a column, so the shader can scroll that family together. V runs along the family, from base toward tip. More than 16 families reuse columns. That is expected. This UV is for a material that knows the packing. Skeletal wind for a Foliage Assembly is the Skeleton tile and the wind file, described in 2.25.
2.23 Human Scale
Human Scale draws a person in the viewport so you can judge height. Show turns it on. Side picks left or right of the camera. Height and Offset place the figure. The default figure is about 1.8 m.
The figure is an overlay. It is absent from Bake, from Export, from the skeleton, and from Geometry Budget. Put the tile anywhere in the chain.
2.24 Spawn Preview
Spawn Preview fills the viewport with copies of the finished plant so you can see a stand without duplicating the object. Preview shows them. Skip Center leaves the original in the middle. Area X, Area Y, and Spacing set the field. Jitter, Scale Min, Scale Max, Random Yaw, and Seed vary the copies.
The copies stay on this graph. Change any earlier tile and the stand updates in the viewport. That is why the tile exists. The copies are viewport only. Bake, Export, the skeleton, and Geometry Budget ignore them. Put the tile near the end of the chain, before Skeleton and Exporting.
2.25 Skeleton
Skeleton sets bone spacing for the export. Trunk Bone Spacing and Branch Bone Spacing are distances along the wood. Larger spacing means fewer bones. Preview Skeleton builds an armature you can inspect. Clear Preview removes it. Bones Budget, on this tile, counts the bones after a refresh.
The tile stores the spacing. The Skeleton switch on the Exporting tile is what includes the rig in the file. Bone count is in 3.7.
Wind Preview plays a pose on a copy of the mesh. It does not write the wind file.
Play Wind — starts it.
Stop Wind — ends it.
Preset Foliage Fusion — a sine wave, with Intensity and Speed for trunk, branches, and foliage.
Enable 4th Group — cards on the trunk and cards on branches swing apart.
Preset PVE Default — approximates Unreal’s Dynamic Wind. Wind Speed defaults to 15. Intensity scales the amplitude.
Nothing in that box is written to wind.json. The file only assigns bones to groups. Unreal’s foliage wind actor supplies strength and direction, and one shared wind drives the trees. The Blender preview is a look, not a recording of that shader. If the bend in Unreal comes out reversed after a re-import, that is 3.17.
Use it to check that the tree still looks natural after you cut bones and instances. It is a viewport check. If a version you could render with would be useful, write to [email protected].
On a very heavy tree, watch Wind Preview in Shaded. It runs much more smoothly there. Textured shading is heavy on this preview.
Spawned branches that were themselves built in Foliage Fusion, on a dense graph, can come apart during Wind Preview. In Unreal they behave normally. See 5.2.
2.26 Exporting
Exporting is the last tile. It does not change the plant. Assemblies and Skeleton, under UE Nanite Foliage, choose the file the header Export writes. Folder, Set Name, and Variant Name choose the path. Geometry Budget counts triangles and instances. Bake to Single Mesh collapses the graph into one mesh in the scene.
Both switches on: a Nanite assembly with the rig.
Put it after Skeleton if you use bones, and after Spawn Preview so the preview copies stay out of the file. A Foliage Assembly export can take several seconds. A heavy tree can take minutes. The rest of the export is section 3.
Foliage Assembly
A Nanite Foliage Assembly is one plant made of a base mesh, a skeleton, and many instances of a few small parts. Unreal 5.8 draws the parts. The cost is not one number. Read the four bills below before you chase a single slider.
3.1 Four separate costs
Keep four counts apart. Mixing them is how a forest blows the budget while a single tree still looks fine.
Unique kits. Each different mesh is loaded once and reused. A dozen light twigs is cheap. A hundred heavy unique branches stays in memory for the whole set. Share kits across the species. Eight to fifteen branch meshes, instanced many times, is the right shape. A unique mesh per branch is the expensive shape.
Bones. Bones cost when they are evaluated, and when their motion forces shadow maps to redraw. A few hundred bones on a tree that is actually near the camera is a normal forest. A thousand-plus on every tree in the level is a cinematic that leaked into gameplay. Wind only where you can see the flutter.
Part instances. Each instance is a transform Unreal culls and draws, in the game view and again in reflections and shadows. The mesh itself is shared, so the GPU is not loading it again. Two thousand parts on one tree is fine when only a handful of those trees are close. Two thousand parts on every tree in the level is the bill that grows. From far away Nanite collapses an assembly into one cluster. Trees that are only a silhouette should be a billboard, with no bones.
Triangles. This is the size of the meshes: wood resolution, fronds, and the kits. An instance does not multiply the total. The count is one realized tree. A hero sits around 10 to 30 million. A regular forest tree sits around 1 to 10 million. Displacement and Convert to Geo resolution move this number.
3.2 Published numbers
These are public figures for a hero tree and for a forest, from the Unreal Nanite foliage talks. Use them as a ceiling and a floor. A demo is not a license to spend the same budget on a whole biome.
A hero close-up that has been shown in public sits around 41 million triangles, about 12 unique parts, about 2160 part instances, and about 850 bones. A forest tree in the same material sits around 1 to 10 million triangles and a few hundred bones. One species can be built from a few dozen small shared pieces, instanced thousands of times, with hundreds of thousands of trees in the world because most of them are far away.
What has not been published is the exact instance count of one background tree. Do not invent that number, and do not copy the hero’s 2160 onto the trees along a path. Publish and defend triangles and bones. Those are the figures that were actually given.
3.3 Two instance levels: blue and green
The instance level is what one instance is. There are two levels that stay attached to the wood.
Blue, L3. One small twig, with its needles, is one instance. The pivot sits at the base of that twig, on the branch it grew from. The twig can bend on its own. A full tree at this level lands at up to about 2500 instances if every twig is its own instance, and the bone count follows. This is Trunk plus Branch Curve as the base, and Foliage Scatter as the parts.
Green, L2. One whole branch, wood plus needles, is one mesh and one instance. The pivot sits where that branch leaves the trunk. The branch moves as a board. The instance count drops to the number of those branches. You get there by modeling or baking the branch as a kit, origin at the base, length along +Y, and scattering it with Branch Kit on. The needles no longer have their own bones.

The cut on a regular forest tree is that line. Blue L3 twigs only on the wood the player can see. Green L2 branches above it. A hero stays blue from base to tip. The numbers are in 3.5.
3.4 What not to build
A part is rigid. It rotates around one bone. If the mesh contains several twigs whose bases are in different places, and the mesh does not include the wood between them, those bases swing off the branch. The twigs look like they lift away from the bark. That is the failure to avoid.
Three builds do that. A kit of loose twigs with no piece of the parent branch in the mesh. Several twigs bound to one bone that sits on a card, or at the middle of the branch, while their attachments are spread along the wood. A bouquet of loose twigs welded into one mesh with no wood in it.
The build that does work is a piece of branch wood plus the needles that grow on that piece, cut on the wood, pivot on the cut. The whole piece is stiff. Nothing inside it floats. Binding several separate twig instances to one bone that actually sits on the wood is a different choice: the instances stay separate, and a close camera may see them orbit that bone a little. That is a budget trade on the lower branches of a regular forest tree. It is not a bouquet mesh.
3.5 Hero, regular forest tree, background
Build three assets. They are different plants, on purpose. They are not three LODs cross-fading in one shot.
| Profile | Instances | Bones | Triangles |
|---|---|---|---|
| Hero | Blue L3 twigs, the whole tree. Up to 2500. | Up to 1000 | 10–30 million |
| Regular forest tree | Lower wood the player can see: blue L3. Above that: green L2. 300–600. | 200–300 | 1–10 million |
| Background | None | None | A card, or a simple static mesh |
Hero is blue from the base to the tip. A regular forest tree keeps blue L3 only on the wood a player can see, and uses green L2 above that line. Background has no instances.
3.6 Where to read the numbers
Select the Exporting tile. Geometry Budget is the triangle and instance readout. Refresh it after a change. It evaluates the plant the way a bake does, including displacement even when the live preview is off, and it mutes Spawn Preview so the copies are not counted.
The mesh split is trunk and branches, fronds, and scattered foliage. Instances are counted once each. They are not multiplied by the triangle count of the kit. A scatter tile with Merge into Base moves its triangles onto the trunk and drops out of the instance count. The total triangle count does not change.
Select the Skeleton tile for Bones Budget. Refresh after you change spacing or the bone toggles on Foliage Scatter. Read unique kits, bones, instances, and triangles as four numbers. A win on one can be a loss on another.
3.7 Bones
Wood bones come from spacing. On the Skeleton tile, raise Trunk Bone Spacing and Branch Bone Spacing until Bones Budget hits the profile. A regular forest tree wants about 200 to 300 bones. A hero can go up to 1000. Disable Bones on a Branch Curve tile drops that branch’s own chain. The mesh stays. Children can still hang from the parent bone.
Foliage bones are per scatter tile. Leave them on for a hero, where each card can flex. Disable Bones binds every card on that tile to the nearest branch or the trunk. The cards stay in the assembly. They swing with the wood. Alternate Bones keeps a bone on every other card, in the order the tile is gathered, and binds the rest to the parent. With Branch Layers, long, mid, and short each have a disable. The tip has its own. Disable wins over Alternate.
Merge into Base removes those cards from the bone list entirely, because they are no longer instances. Use that for cards that should be bark-stiff. Do not try to save bones by welding loose twigs onto one bone that sits on a card. That is the float in 3.4. Sharing a bone is allowed when the bone sits on the wood.
3.8 Instances
Instance count is how many parts the assembly lists. Cut it at the source. Fewer whorls, a shorter Spawn End, Delete Distro Points on a band you will never see, and a lower scatter density all remove spawns before they become cards. Height Layers and Branch Layers change which kit is used. They do not, by themselves, reduce the count. Use their density curves to thin Bottom, or Short, where the camera will not stop.
Merge into Base takes a whole scatter tile out of the instance list and into the trunk mesh. That is the right move for a coarse inner card. It spends the same triangles on the base instead.
The large cut is the instance level. Blue, L3, keeps one instance per twig. Green, L2, Branch Kit on a baked branch, keeps one instance per branch. A regular forest tree runs both: blue on the wood the player can see, green above that. A hero stays blue. Unique kit count stays small either way. Reuse the same twig meshes across variants of the set.
3.9 Tris
Triangles come from three places. The wood: Trunk and Branch Curve resolution, then Convert to Geo resolution per level, then Displacement’s subdivision on the trunk. The fronds: Curve Resample and the card meshes. The kits: the triangle count of each scattered mesh, times nothing. Instances do not multiply the budget’s triangle total. The total is one realized tree, the same shape Bake to Single Mesh would produce, plus a separate instance count.
A hero at 10 to 30 million is the close tree. A regular forest tree at 1 to 10 million means the kits and the wood are both lighter. Drop Displacement first on the regular tree. Then lower Convert to Geo resolution on L3, then on L2. Then use simpler kits. A kit that is only seen from a distance does not need the hero’s needle mesh.
Merge into Base does not lower the total. It moves that tile’s triangles onto the trunk line. Read the total after the move. If the total is the problem, the kits or the wood resolution have to come down.
3.10 What has to sit on the tree
The object needs a Geometry Nodes modifier and the Foliage Fusion chain on it. Exporting is the last tile. It holds the two switches, the folder, and the names. Skeleton sits just before it when you want bones. Its spacing is what the rig uses. The Skeleton switch on Exporting is what puts the rig in the file.
A 3D Viewport has to be visible when you export. Spawn Preview can stay in the chain. Its copies are muted for the write. Human Scale never enters the file.
3.11 The Assemblies switch
On the Exporting tile the switch is labeled Assemblies. Off, the scatter tiles realize their cards and can fold, curl, and twist, and Custom Normals can aim them. On, every Foliage Scatter tile in that tree outputs instances. Deform and custom normals on those cards turn off. The viewport is the rigid plant Unreal will draw. The sidebar says so when you have a scatter tile selected.
The switch lives on Exporting so you cannot forget it on one scatter and remember it on another. Bake to Single Mesh ignores it and still realizes the cards. Export on the header, while it collects instances, forces that instance view for the write and then restores the switch.
3.12 Folder, Set Name, Variant Name
Folder is the parent directory. Empty means a folder named B- Export next to the blend file. Pick it with the folder icon. That opens Blender’s file browser, filtered to directories. Variant Name is this plant. Empty uses the object’s name. Set Name is the shared set. Several variants with the same Set Name share one parts folder.
Both names filled: files are prefixed with Set Name and Variant Name. Set Name empty: the folder and the prefix are the variant, one plant per folder. A part file is named from the kit object. The same object name overwrites that part. Other variants’ parts are left in place.
3.13 The Export button on the header
Export sits on the Geometry Nodes header, next to the module menus. It writes the plant in the editor. The two switches on Exporting decide the format.
Both off: one FBX mesh, face smoothing. Skeleton on, Assemblies off: an FBX with the rig. Assemblies on: the Nanite assembly, USD, with foliage as parts. Skeleton on in that mode includes the rig.
The button does not bake a copy into the scene. Bake to Single Mesh does that, and it stays a mesh even when Assemblies is on. With Assemblies on, the write can take several seconds, and a heavy tree can take minutes.
3.14 What lands on disk
An FBX is one file, named from the variant, inside the set folder. An assembly is a folder.
The file you import is the set’s root .usda. Next to it, base holds the trunk and branches, parts holds the shared kits, and assemblies holds one layer per variant plus that variant’s wind.json. A manifest sits beside the set folder. When Set Name is empty, the variant name is used in place of the set name.
Import that root file, into an empty folder in Unreal. The parts are referenced, not copied into every variant. Drag the root file, not a single layer from assemblies.
3.15 Static or skeletal
Skeleton off and Assemblies off writes a static FBX. There is no rig to wind. Vertex color and the wind UV are the motion, if the material uses them.
Skeleton on and Assemblies off writes an FBX with the rig. Use this when the engine wants a skinned mesh and you are not building a Nanite assembly.
Assemblies on writes the Nanite assembly. With Skeleton on, the base and the parts are bound to the rig, and wind.json lists each bone in a wind group: trunk, branch, and foliage. Cards you disabled still exist. They are bound to the branch or the trunk instead of a bone of their own. With Skeleton off, you still get the assembly’s parts, without that rig.
3.16 Import in Unreal
Use Unreal 5.8. In Edit, Plugins, show experimental plugins. These three are off on a new project. Restart after you enable them.
USD Core — the USD library.
Interchange OpenUSD — the importer for the .usda. Enabling it also turns on the Interchange plugins it depends on.
Procedural Vegetation Editor — experimental, under Other. The assembly draws with this on, and the wind comes with it. Wind Transform Provider is the Transform Provider you assign later. You still build the plant in Blender.
Nanite and Nanite Foliage sit in Project Settings, Rendering. Nanite Foliage is off on a new project. Restart again after that checkbox. Without it, Unreal warns when it meets an assembly.
Drag the set’s root .usda into an empty Content Browser folder. Interchange should open. Leave its options at the defaults, and turn on Identify Duplicate Materials and Create New Materials. Create New Materials has to be on. If it is off, the assembly does not show every material slot. Unreal cuts part of that list. An empty folder matters, because a material that already has the same name gets reused. Importing one layer from assemblies skips the shared parts.
If the older Legacy USD importer opens instead, open the console and run Interchange.FeatureFlags.Import.USD 1, then import again. To keep Interchange for this project, add these two lines to Config/DefaultEngine.ini and restart:
[ConsoleVariables]
Interchange.FeatureFlags.Import.USD=1
On the tree’s skeletal mesh, run Import Dynamic Wind Data and choose that variant’s wind.json. Values you then edit on the mesh are replaced the next time you import the wind file. Change the plant in Blender and export again.
A skeletal mesh dropped in the level does not move. Add a Blueprint Class and pick Actor. On that Blueprint, add an Instanced Skinned Mesh. Assign the tree, set Transform Provider to Wind Transform Provider from Procedural Vegetation Editor, and add at least one instance. Place the global foliage actor and raise its wind speed. Gust and influence on the mesh are worth setting after the import. Gust attenuation in particular resets when the wind file is imported again.

Add the component, assign the tree, set the provider, then add one instance.
3.17 Re-importing
Change the geometry or the skeleton, then import again on top of the same plant, and Unreal can keep the old bone transforms. The bones bend at a bad angle, or the opposite way, relative to the wind.
Clear Unreal's cache for that asset and import again, or bring the plant in under a new name and point the Blueprint at the new mesh, with its own wind.json.
Either way the stale skeleton sits in Unreal Engine. The file from Foliage Fusion is fine.
3.18 Bake to Single Mesh
Bake to Single Mesh is on the Exporting tile, under Baking Graph. It applies the graph, realizes instances, and joins everything into one mesh. Cards, fronds, and wood become a single object. Vertex color and the wind UV are on that mesh. Spawn Preview copies are not. Human Scale is not.
Assemblies can stay on in the viewport. The bake still realizes the cards, with their deform. Use the bake when the destination is any engine that reads a mesh. Use Export when the destination is a Foliage Assembly or an FBX of the live graph.
Bark From Scan
Bark From Scan lives in the 3D View sidebar, on the Foliage Fusion tab. It is not a Geometry Nodes tile. It turns a band of a photo trunk into tileable albedo, normal, and height, then lays that tile back on the scan.
4.1 What it is for
A scanned trunk is unique. The bark on it does not repeat, and the top of the scan, where Trunk Custom Extension takes over, needs a texture that can tile. This tool bakes a rectangular band of the scan into maps that repeat, builds a material from them, and can paint that material back onto the upper part of the scan.
The scan mesh stays the source. The cage that catches the bake is a helper. It is hidden from render. You can use the resulting tile on the extension and on Displacement as well, by assigning the material and the height map yourself.
4.2 Source mesh and axis
Pick the scanned trunk as Source Mesh. Axis Rotation, in degrees, spins the up axis the same way Trunk Custom Mesh does. The cage is built around that axis, from the object’s origin. Show Axis is the trunk tile’s guide. Here, Show Cage shows the bake surface.
The cage has no caps. U runs around the trunk. V runs along the band, with V at 0 at the bottom of the band. Get the axis straight before you care about resolution. A tilted axis bakes a spiral into the tile.
4.3 Cage length, shift, and resolution
Length, in meters, is how tall the band is. Shift, in meters, slides it along the trunk. The band is clamped to the scan, so a shift that walks off the mesh stops at the bark. The stretch readout tells you whether the band is being pulled out of proportion. Match Cage to Resolution lines the cage density up with the map size.
Width and Height are the map, from 512 up to 4096. Radial Segments and Length Segments shape the cage, not the texels. The defaults are 64 around and 32 along. Cage Smooth, default 3, averages neighbors so the cage follows the trunk’s oval and ignores the high-frequency bark. That bark is what the bake is for. If the cage is bumpy, the tile doubles the detail.
Seam Angle picks where the U seam sits, so the cut lands on the back of the trunk. Ray Distance, default 0.02 m, is how far the bake looks for the scan, both outward and back through the cage. The preview draws a green shell outside and a red shell inside. If the red and green miss the bark, raise the distance before you bake.
4.4 Bake albedo, normal, and height
Set Output folder in Blender’s file browser, and set Name. That name is the material and the file prefix. A bake with no folder stops. The bake switches the scene to Cycles and the viewport to Solid, then restores both. Choose Albedo, Normal, or Height.
Albedo reads the scan material’s base color and writes a 16-bit PNG. Normal and Height each offer Geo, Shader, or Combine. Geo is the scan mesh against the cage. Shader is the normal map or the height already plugged into the scan material. Combine is both. Combine is the usual choice. A missing shader map contributes a flat normal, or a mid gray height.
Files land next to each other as Name_Albedo, Name_Normal, and Name_Height. After the save, the add-on builds a tiling material with that name and points Overlay Source Mat at it. The temporary bake images are cleared from the file. The PNGs stay on disk.
4.5 Make it tile
Make It Tile runs on the maps you just wrote, with one mask, so the seam in albedo, normal, and height lands in the same place. Around the trunk, U is always blended. Along the trunk, V uses Blend Width. Raise it until the top and bottom of the tile meet. There is no noise in this blend. The seam is a straight band.
Judge the tile on the material, repeating, before you overlay it. A seam you can see on the material will show on the trunk. Move Seam Angle if the blend crosses a knot you wanted to keep whole.
4.6 Overlay on the scan
Overlay paints the tile onto the top of the scan, on the scan’s own UVs. Overlay Source Mat is the material the bake just filled. Show Overlay is a viewport preview. It mixes the tile into the base color from the top of the cage downward. Overlay Blend, in meters, is how soft that edge is. Overlay Size scales the repeat. The viewport switches to Material Preview while the overlay shows. The original scan materials are copied for the preview. The source material on disk is left alone.
Apply Overlay bakes that mix to a 16-bit PNG, Name_Overlay_Albedo, in the same folder. It does not overwrite the scan’s old textures. A new material, named from the overlay, is assigned to the trunk. The previous material stays in the file. Show Overlay turns off. A second Apply starts again from the original scan material, so you do not stack the overlay on itself.
Length, Shift, and Seam Angle frame the overlay the same way they frame the cage. Show Cage can be off. The overlay still follows the band. This pass writes albedo. Normal and height stay as the tiled maps you assign on the material yourself.
Known issues, and working on it
These are real, and they are on the list for the next updates. The plant you export is still the one to use.
5.1 Wind bends the wrong way
In Unreal the trunk and the branches can bend against the wind, the opposite way from the foliage actor. The file and the skeleton are fine. The bend direction is the part being fixed.
Until that ships, multiply the wind by −1 on the Blueprint that places this tree. A reversed bend after a re-import is a different problem, the stale skeleton in 3.17.
5.2 Dense branches in Wind Preview
Spawned branches that were themselves built in Foliage Fusion, on a dense graph, can come apart during Wind Preview. In Unreal they behave normally. The preview is the part being fixed.
Have questions about this product?
Login to message
| Blender Extension Compatible | Yes |
| Dev Fund Contributor | |
| Published | 5 days ago |
| Blender Version | 4.5 - 5.2 |
| Extension Type | Add-on |
| Render Engine Used | Arnold, Blender-Internal, Blender-Game-Engine, Cycles, Eevee, Freestyle, Luxrender, Mental-Ray, Octane, Vray, Yafaray |
| License | GPL |
Discover more products like this
unreal foliage assembly plants #nature grass tree speedtree procedural Generator foliage vegetation geomentrynodes