B-Renderon [Standalone Render Manager]
 BlenderGilads







B-renderon
How
it works
B-renderon is a stand-alone render manager for Blender. It strives to give a simple to use and flexible interface to accommodate a wide variety of rendering workflows and needs in an as straightforward way as possible.
The actual rendering of each job in the queue is done by Blender itself, which is called by B-renderon via command line in background mode. This has a few implications:
-
B-renderon will always respect you blender, blend’s and scene’s settings and properties, unless specifically told not to. That is, if you don’t change a property from B-renderon’s interface, it will render using it as it was when the blend file was saved. Thus, if your blends are all set and ready to render, you can just drop them in B-renderon and hit render.
-
The changes you make in B-renderon can’t affect in any way the blends or blender settings (the only exception being if you make B-renderon run a script that makes and saves changes). You can change the range of frames to render, which camera(s) to use, which scenes, which render devices, etc., from B-renderon, and those changes will only affect the jobs you set up in B-renderon. Your actual blend files and blender settings will remain intact.
-
B-renderon isn’t tied to Blender versions. Though B-renderon gets regular updates, those generally aren’t needed to keep it functional with new Blender releases, since Blender command line is rather stable across releases.
-
Once a render starts, B-renderon has no influence on the process other than the ability to stop the renders before they are finished if the user hits stop.
First
launch: main settings
When
you launch B-renderon for the first time, you’ll be met with the
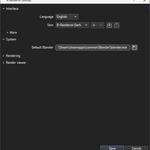
settings window:
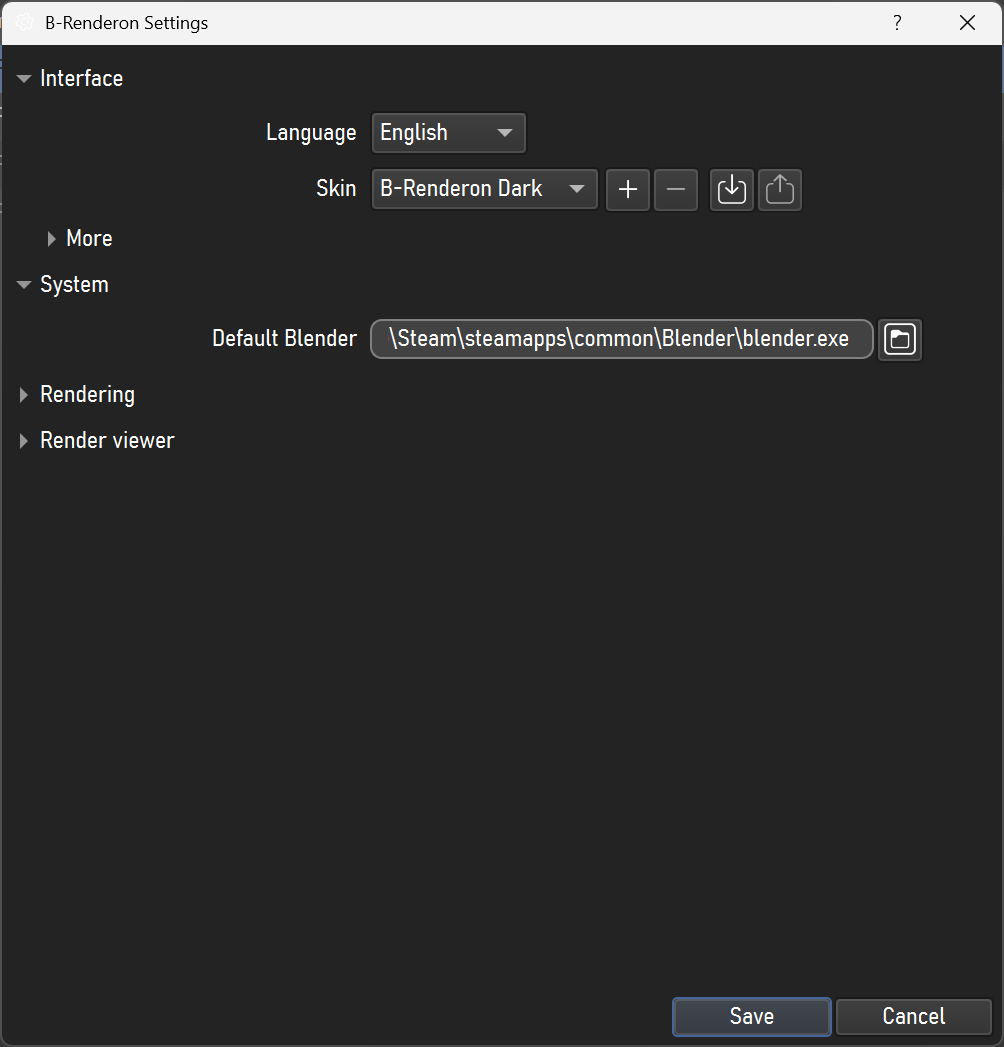
We’ll go over all settings later, but for now the most important thing here is to choose the default Blender executable, which is the Blender version that is going to be used by default for rendering. Depending on the platform B-renderon might guess and prefill the path field with an appropriate one. Of course you can assign different Blender builds to different jobs in your queue, and we’ll go over how to do that later, but B-renderon won’t let you go past this screen if you don’t set a valid path for the default one.
The
main window in B-renderon, when the queue is empty, looks like this
by default:
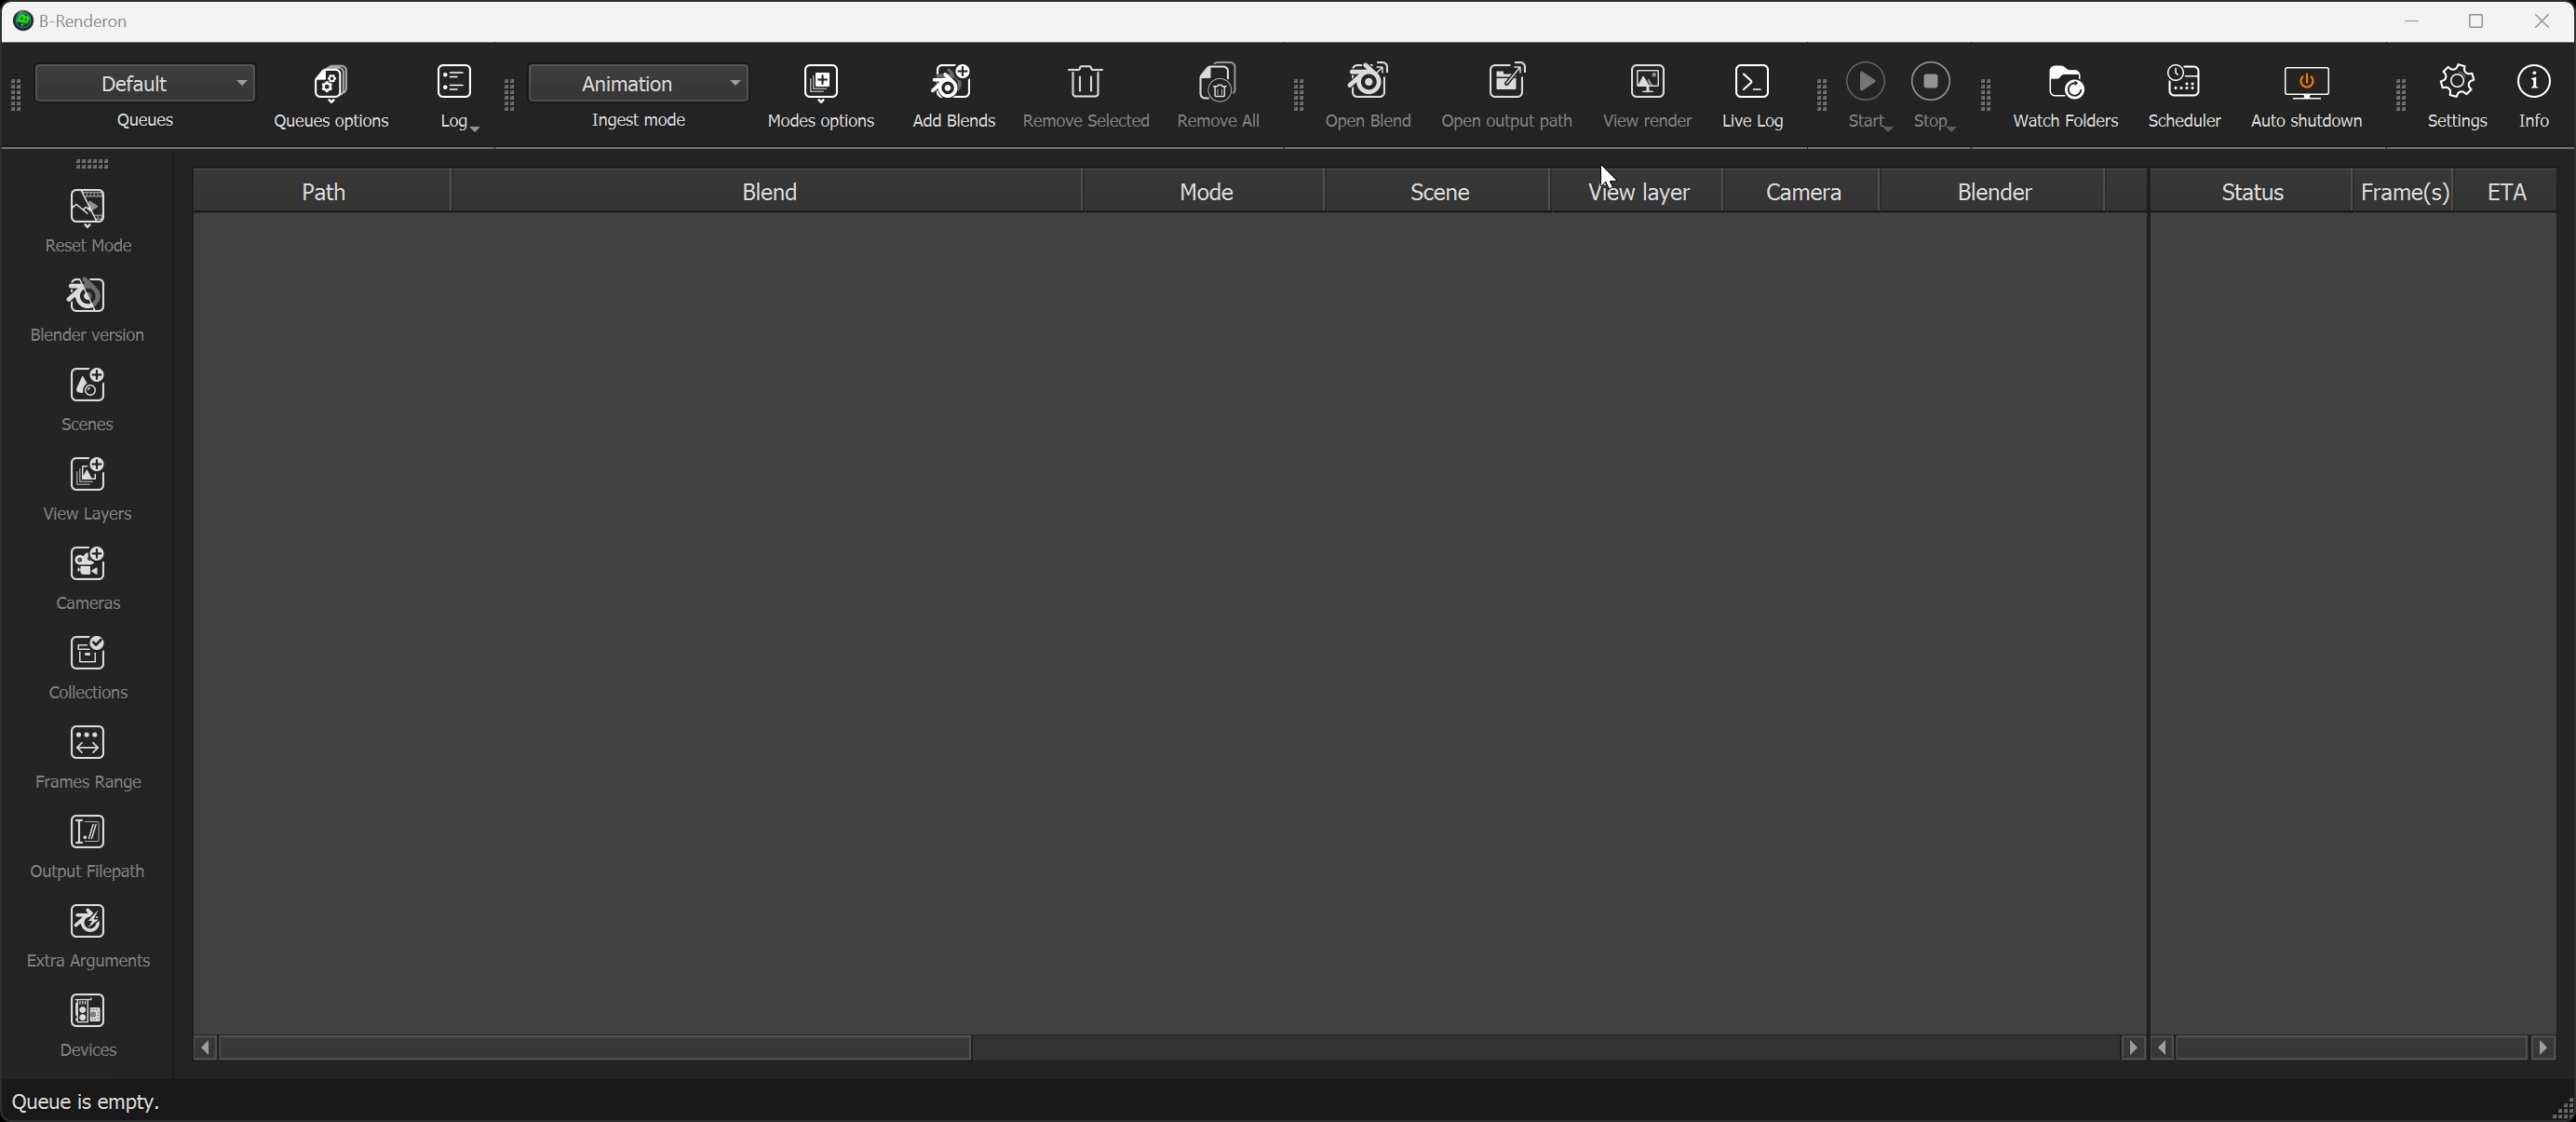
Buttons/Widgets
are grouped in sections
(most of them draggable
toolbars) by
functionalities:
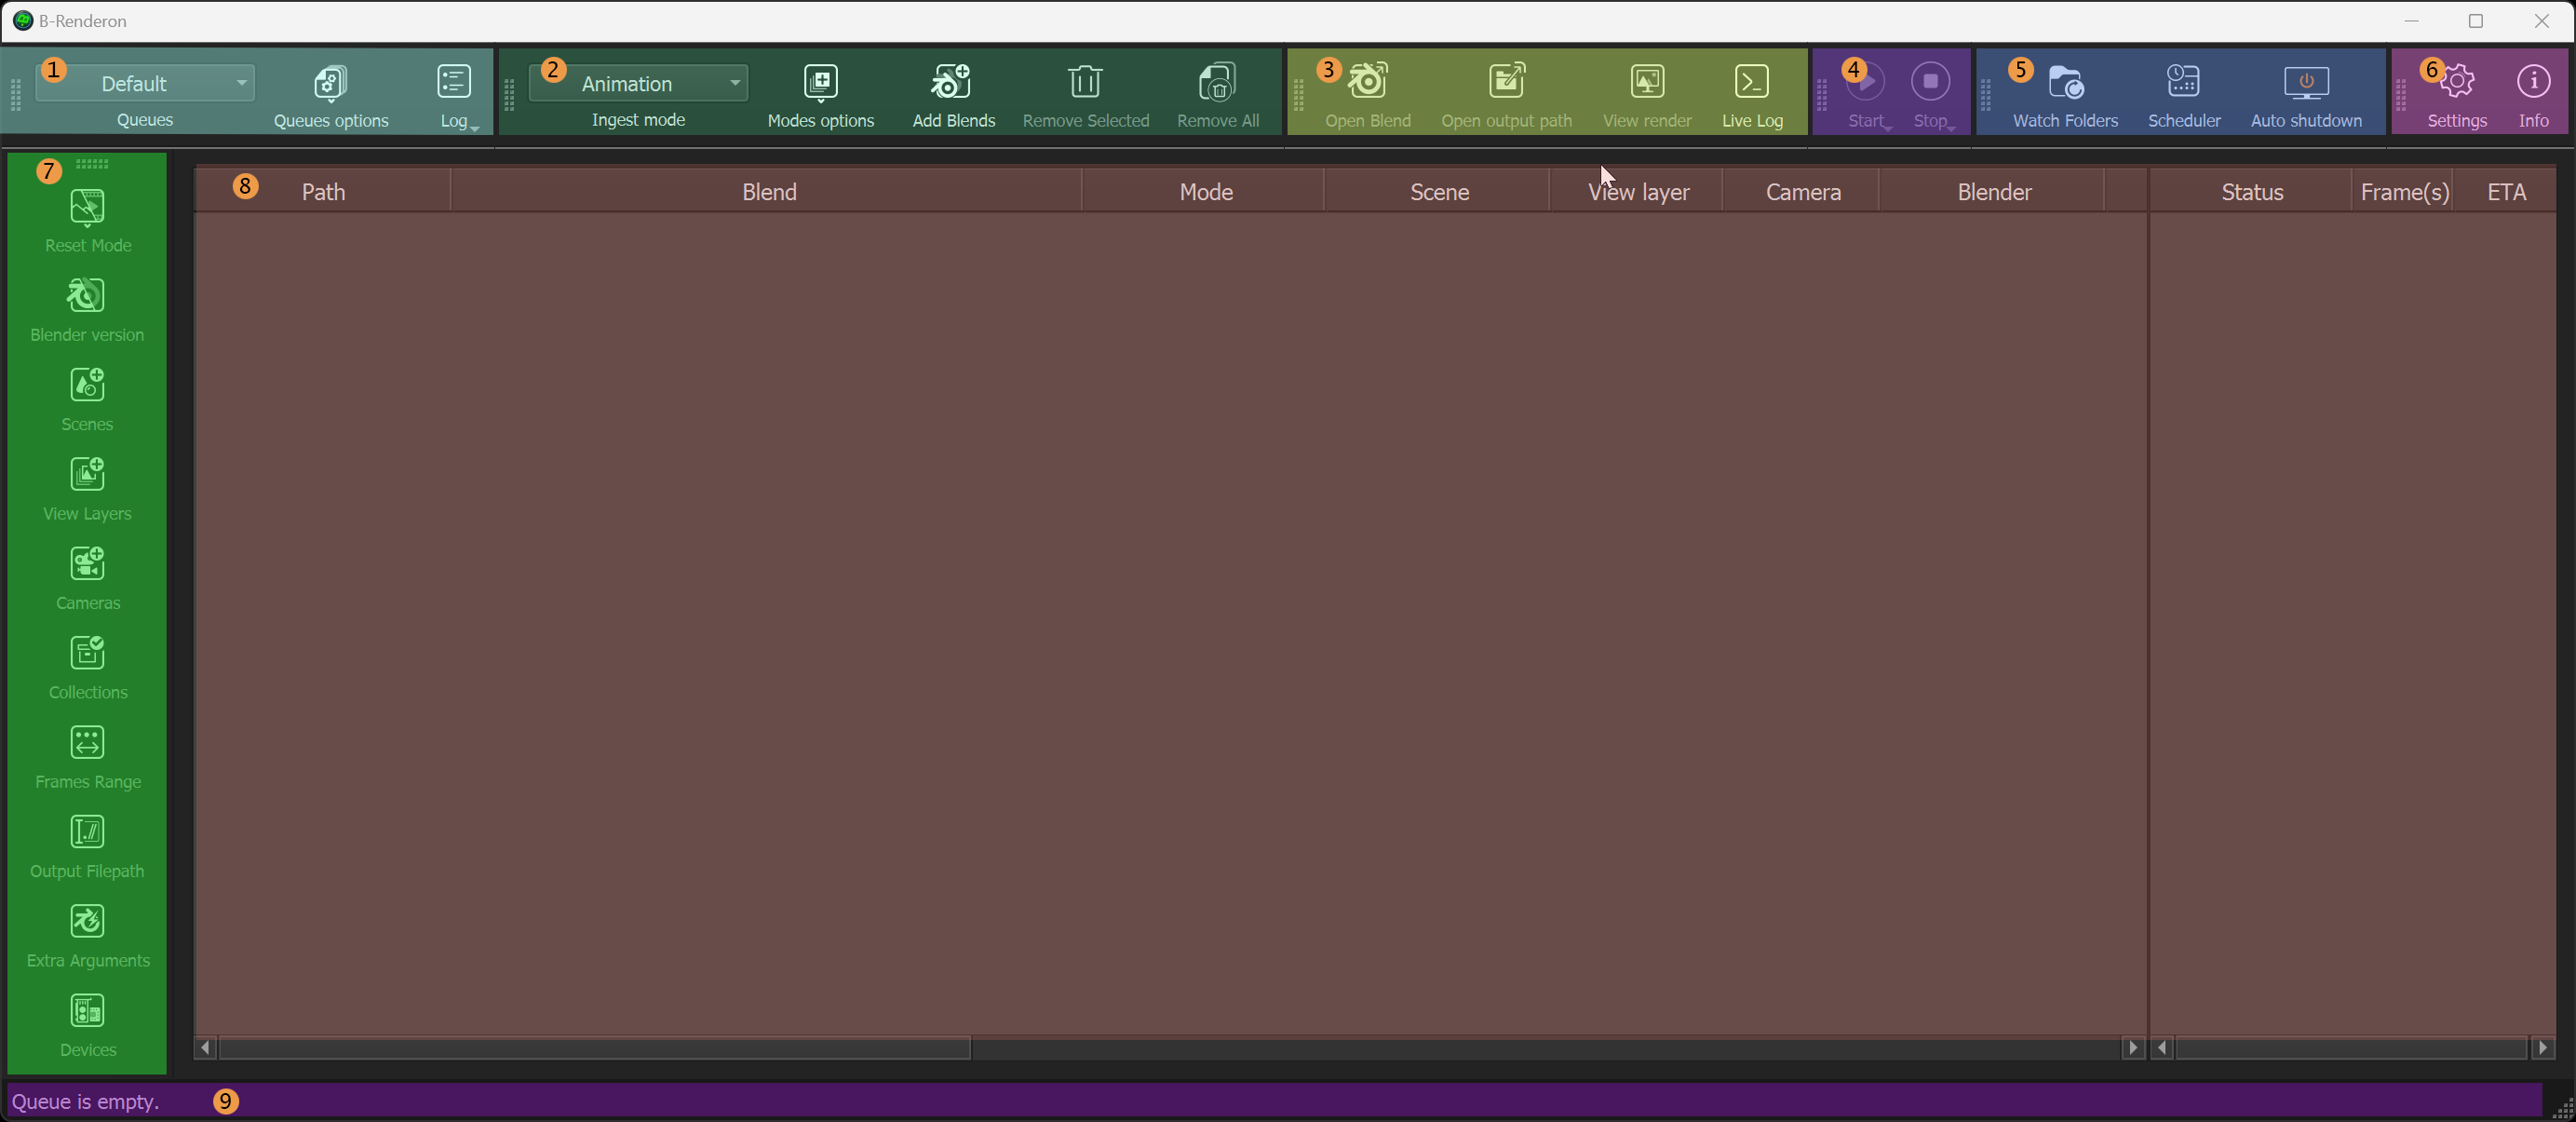
Toolbars
can be repositioned by dragging, as indicated by the dashed rectangle
to the left/top of each. They can also be hidden/restored by right
clicking on any of them and
checking/unchecking them from the list that pops up.
This toolbar consists of:
A drop-down list of Queues that allows users to switch between all their queues.
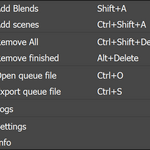
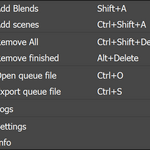
A “queues options” button that opens a menu with options to manage queues.
A “log” button that opens the processing text log for the active queue. Clicking and holding or right clicking this buttons brings up a menu with options.
While many users may probably not need to ever create or use other queues than the “default” one, some may find it useful to handle different concurrent projects or parts of a big project in separate queues and quickly switch between them, or be able to quickly switch back to an old queue without loosing newer ones, and that’s what this feature is for.
The options for managing queues are:
New named queue: asks for a name for a new queue, creates it (empty) and switches to it
Open queue file: imports a queue file to the list of available queues and opens it
Add from file: adds jobs from a queue file to the present queue
Rename: let’s user rename current queue
Remove: deletes current queue
Clear list: deletes all queues
Export queue file: save the current queue externally to open it in another B-renderon installation
-
Post render tasks: advanced feature that let’s users assign some tasks to be run after each job in the queue is processed and/or after the whole queue is processed. “Tasks” are executable files that can be run with parameters
These buttons provide functionalities related to building the queue. The “Ingest mode” drop-down sets the default mode for jobs when they are added to the queue (either via the add blends button, dragging them from a file explorer and dropping them on B-renderon, or by double clicking on empty space in the queue). By default the available modes are:
“Animation”: this mode corresponds to blender’s Ctrl+F12 shortcut or the Render menu “Render animation” operation. Jobs with this mode will be rendered from the start to end frames set in the active scene or the scene the user chooses, or the start/end frames the user sets.
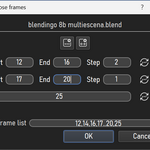
“Frames”: corresponds to the shortcut F12 (but saving the rendered frame(s)). When this mode is active, when adding items to the queue a little window pops up allowing the user to enter a frame, list of frames (separated by commas) or frame range to be rendered for the jobs being added
“Script”: an advanced option that lets users choose a script to take charge of the rendering or other processes.
Parallel GPU: Upon first use this mode will ask the user to choose the devices to be used for rendering. When adding a blend in this mode, it will be added to the queue as many times as the number of chosen render devices. Each one of the jobs corresponding to the same blend will be rendered with one of the devices, in parallel. This can speed up rendering significantly on systems with multiple GPUs.
Viewport animation: this is a limited special mode that uses the “render viewport animation” operator. Since blender doesn’t support that operator in background mode, instances of blender will be visible in this case.
Ask on add: show a pop-up to select the mode each time when adding jobs
Extra optional modes: There are some extra optional modes users can download and install. They help to work with some particular 3rd party add-ons. You can find their usage explanation in the readme that comes along with those modes.
Next
to the drop-down there’s a “mode options” button. It opens a
pop-up mode manager where users can reorder modes, rename them, add
new modes, edit a mode, delete them, import and export modes, and
restore built in modes.
Ingest mode editor
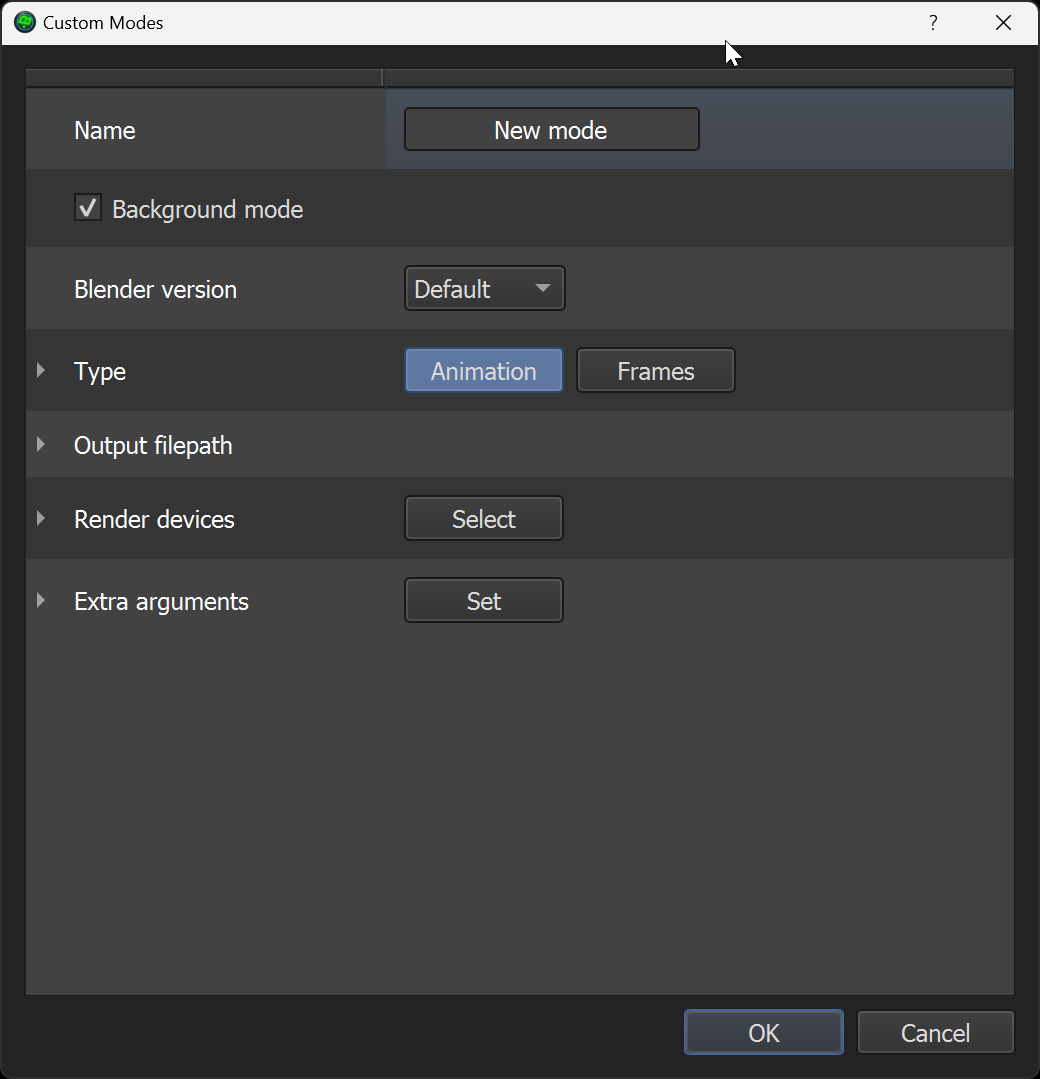
The
modes editor allows the user to set:
Name: give the new/edited mode a new name
Background mode on/off: define weather blender will be opened in background mode (i.e. without UI) as it normally does in B-renderon. Generally you’ll want to leave this on. Reasons to have a mode with this off are if it’s meant for viewport rendering, or because you are using an add-on that requires Blenders UI to be present in order to render
Type: define weather this mode is to use the -a tag (render as animation from start frame to end frame), the -f tag (render some specific frames) or none (in case a python script will take charge of the rendering or any other process this mode is supposed to do). When choosing frames, there’s an option to have predefined frames (for example, always assign frame 1 as the frame to be rendered for jobs added in this mode), or ask the user to enter the frames to be rendered when adding the job to the queue.
Output file path: allows users to set up an output file path with a tokenized pattern to be assigned automatically upon adding jobs to the queue. How to set up a pattern will be explained in the output file path window section.
-
Render devices: assign certain GPU devices automatically to jobs added in this mode. The select button opens the devices window to let users choose among available devices. Below the list of devices there’s two checkable options:
Force render engine: when this option is checked, jobs in this mode will render with the engine that corresponds to the selected devices (either Cycles or Eevee), despite which engine was selected in the active scene.
-
Parallel processing: jobs with this setting on will be rendered with one of the selected devices as soon as it is not being used by any previous job in the queue, in parallel with any renders being processed with other devices. There’s two sub-options for this: auto duplicate jobs makes it so when adding jobs in this mode they automatically get added as many times as devices assigned to the mode, so the same blend is rendered in parallel using a different device per job; overwrite off – place holders are options blender provides per scene for outputting image sequences. Overwrites off means blender will skip frames that are already present, and place holders on means as soon as a frame starts rendering, it’s output file will be created. These options combined give us an easy way to go about parallel rendering of image sequences: when each instance finishes a frame it will try to render the next one. If another instance is already rendering that one, there will be a file already created, because of the placeholders option, and since overwrites are off, blender will skip it, until it finds a frame that hasn’t been processed yet. So each instance renders the next frame that’s not being rendered, until all frames are rendered. The only caveat with this is that if the user needs to re-render a sequence, they need to delete or rename the files before hitting render, otherwise blender won’t render any frames since their files will already be there.
Extra arguments: this allows users to define some default extra command line arguments to be added to items in this mode. The “set” button opens the extra arguments window which will be explained in it’s corresponding section. Below, there’s a checkbox reading “ask for a script”. If activated, upon adding an item to the queue a pop up will ask for a script to be run for this item when it’s rendered.
This section is for reviewing purposes. The buttons are:
Open blend: Open the selected/active blend with the blender version assigned to it
Open output path: open the output path in the default file explorer
View render: after finished rendering, open the render with the application defined in the settings (by default, B-renderon’s built-in viewer for stills/image sequences, and blender video player for videos)
Live log: if the selected job is being or has been rendered, or if no items are selected but one is being rendered, it will open a dock at the bottom of the window (which can be detached) that will show blender’s render console. This can be very useful for diagnosing problems.
This section contains two buttons: start and stop. Start launches the queue processing and stop halts it. Both icons have a downward arrow indicating they have context menus which can be brought up by clicking and holding or right clicking. For the render button, the context menu has only one option: “render selected blend(s)”. This allows the user to only render a selected set of blends instead of all of the available ones in the queue. (An alternative to this is disabling the blends not wanted to be rendered, by selecting them and pressing M or right clicking and selecting “Disable/Enable”). As for the stop button, context options include: stop after current job(s), stop after current frame is saved and stop selected blend(s). The last one is the equivalent to “render selected blend(s)” but for stopping selected blends that are currently being rendered. The other two options allow to set a delayed stop so as not to loose the progress done on the current frame or file.
This
has control
options
that can be activated / deactivated at any point.
-
Watchfolders
Users can set one or more “watch folders” so that B-renderon keeps an eye on them and whenever a blend is added or changed, it will add it to the queue and process the queue. When the button is not previously activated and is clicked the watch folders window pops up to set things up. When it’s already activated and is clicked again, it will be deactivated and watch folders will be ignored.
-
Scheduler
Here users can set absolute or relative start and or end times to automatically start / stop queue processing. At the left there are “start at” and “stop at” counters to set absolute hours, and to the right counters to set the start time relative to the moment the user clicks ok, and to set the end time relative to the time of starting. In the same way as with watch folders, the button needs to be activated (highlighted) to work.
-
Shutdown PC
When this button is activated, pc will shutdown upon queue processing completion.
Settings
The
settings window consists of four panels: Interface, System, Rendering
and Render Viewer.
INTERFACE
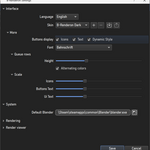
The main settings to define here are Language and Skin. Currently the available languages are English, Spanish and Chinese. Built-in skin options include a dark one and having no skin, which means the o.s. theme will define the colors in the UI. To the right of the skins selector there are options to create a custom skin, remove the current custom skin, import skin(s) or export the current skin.

Below, there’s a “More” panel, collapsed by default:
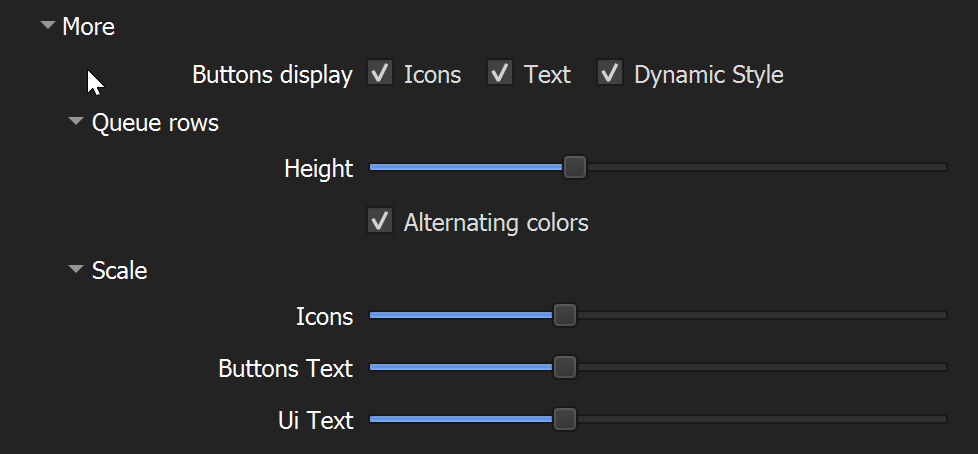
These
options allow users to control the general appearance of the queue
and general UI. Buttons can show only text, only icons, or both
combined. By default both are active, but once users are familiar
with the interface and the different options available, disabling
text in buttons can give a nicer and more compact look. “Dinamic
style” refers to the behaviour of buttons highlighting: when on,
button boxes will not have discernible limits until highlighted.
SYSTEM
As
mentioned earlier, B-renderon needs a default blender path. Here’s
where it is set.
RENDERING
Stuck render timeout: if B-renderon doesn’t detect any progress signal for more than the chosen number of minutes, it will force quit blender and proceed with the next job in the queue
Use blender factory settings: this will make blender launch without reading user preferences for rendering (equivalent to the command line argument “-factory-startup”). It will still respect the scene’s settings and properties. This option will bypass third party add-ons, and thus, it is useful for users that have some add-on that is not compatible with command line rendering or has some bug or is not updated to work with the present Blender version trough command line, which causes problems when using B-renderon (because, as said earlier, B-renderon uses command line rendering in the background). Most add-ons, even if used for creating a scene, don’t need to be activated during rendering, so for most cases this option will not affect the result of the renders. There are some exceptions though, especially with some lightning add-ons, so if this option is to be used, it’s advisable to run some tests first to make sure results are as expected. Another thing to consider when enabling this option is that Cycles user preferences will also be ignored and the default ones used. So if you need to use a device selection other than the default one, then when you activate this option in the settings it’s a good idea to choose the rendering devices in B-renderon’s device selection window for the items to be rendered with Cycles. Or you can change the default devices for the current ingest mode or the ingest modes you use frequently so you don’t have to set it again every time you add an item to the queue.
Try to detect and resume failed renders: when enabled, B-renderon will, after blender quits for a specific render, check to see if the number of rendered frames is the expected one, and if not, try to render again starting after the last saved frame.
Default parallel rendering instances: make B-renderon process more than one job at the same time. (This option is independent from parallel rendering modes which allow to easily render different jobs/frames with different GPU’s at the same time).
Keep pc awake during rendering: prevents PC entering into suspended mode during rendering.
Play sound when processing is completed: there’s an included sound that can be set to be played when processing is finished, or users can choose their own sound file.
Auto-shutdown action: choose weather auto shutdown functionality shut downs the pc or suspends it
Previously processed jobs
Options for what to do about files that were previously rendered and finished or interrupted, when processing the queue again.
RENDER VIEWER
Options
for what programs to open renders with when pressing “view render”,
for images/sequences and videos.
INFO
The
info button opens the info window, which consist of a tab with the
list of keyboard shortcuts and an “about B-renderon” tab.
This area contains buttons that allow the user to “override” rendering properties. As explained in the intro, it’s not necessary to use any of these options unless one has a reason to. B-renderon will respect blend’s and scene’s settings and properties unless specifically told not to, so users only have to change these when they want to render with different values than those saved in the blend file.
The buttons are:
Reset Mode: this allows to reset the ingest mode
-
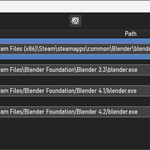
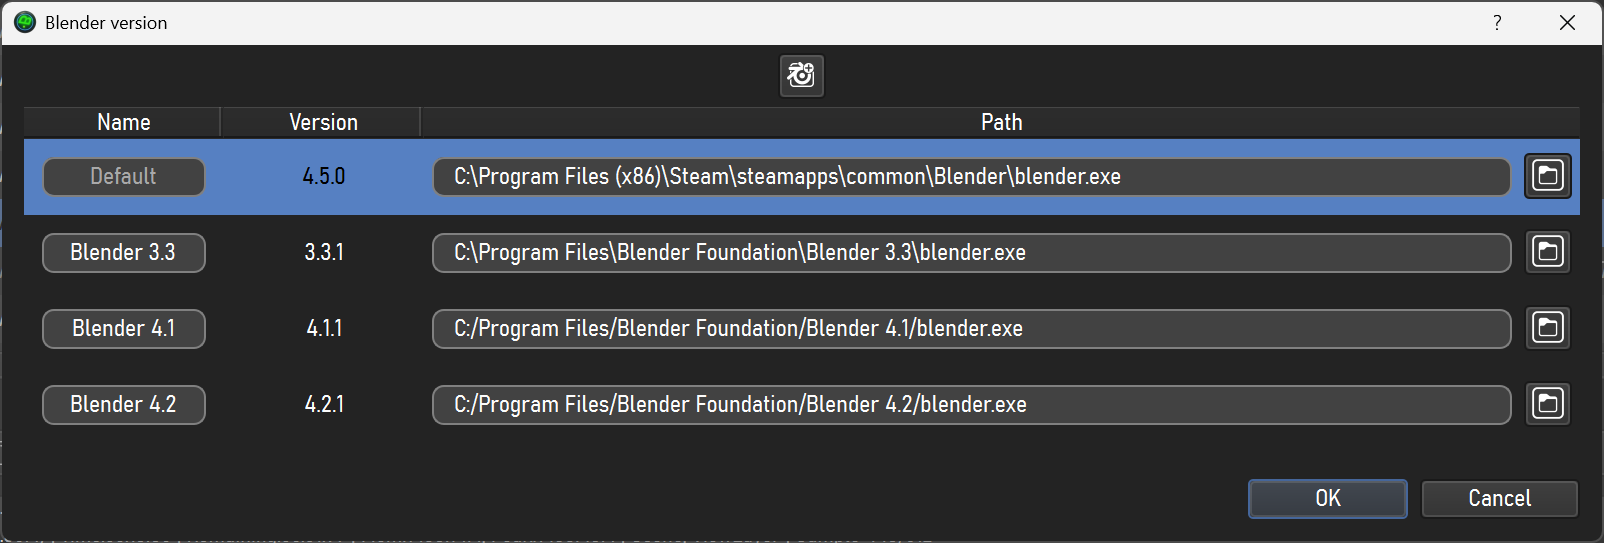
Blender version: this opens the blender versions pop up that allows you to assign a different blender version/build to selected items. For example, if you saved a blend with a special blender branch, you can here set that blend to be rendered with that branch. It also contains a “distribute” option that let’s you automatically assign different blender executables to different items in the queue. Blender versions can be added to the list by dropping their executables onto this window or by clicking the button at the top-center of the window.
-
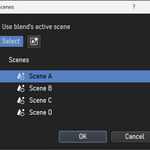
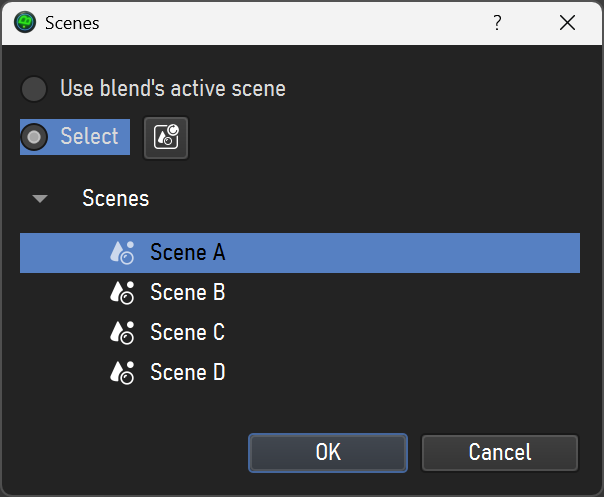
Scenes: This opens a scenes management pop up that lets the user change the scene to be rendered for selected jobs, or add more of their scenes to the queue. When multiple items are selected, the list of available scenes will show combined results, merging scenes with the same name into one item so they can be selected and added for all selected jobs.
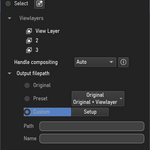
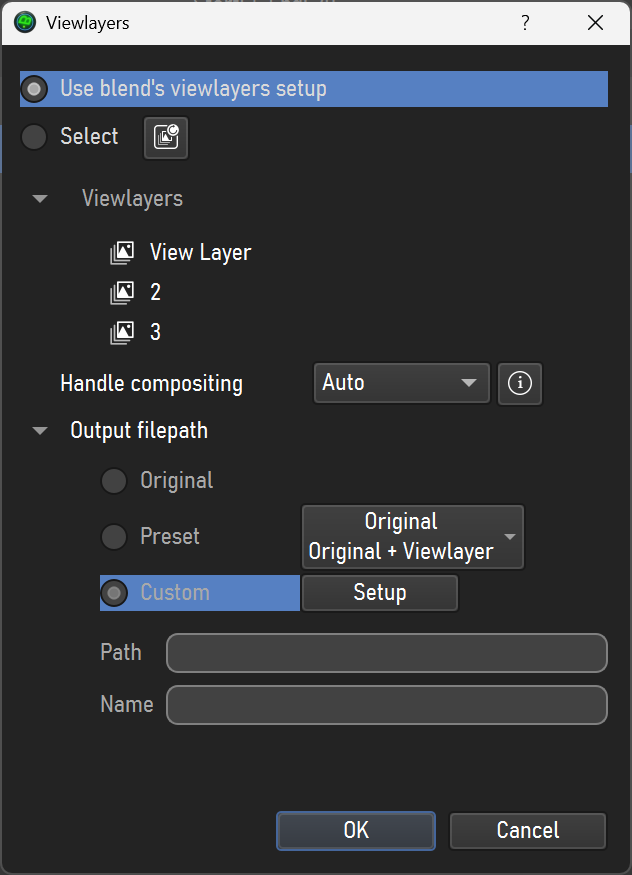
View Layers: This is similar to the scenes option but for view layers. It also includes an automatic output naming section (because when rendering more than one view layer of a scene, output files would overlap if their paths/names were not set appropriately).
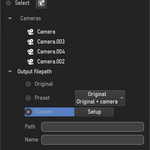
Cameras: Very similar to view layers but for cameras.
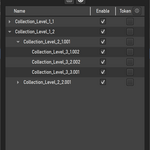
Collections: Allows to enable/disable collections for rendering.
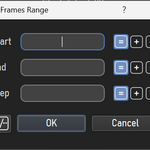
Frames range: For items to be rendered in animation mode, this allows to change start and end frames. By leading with a + or – sign you can shift the previous value, so if you select multiple jobs with different start and end values, you can shift their values by a same amount that way. You can also set the step value (to render 1 frame every n frames). And there’s an option to split a range of frames as evenly as possible between selected jobs, or split the current job into several jobs with a part of the range each. For items in frames mode this button let’s the user re-enter the frames to be rendered.
-
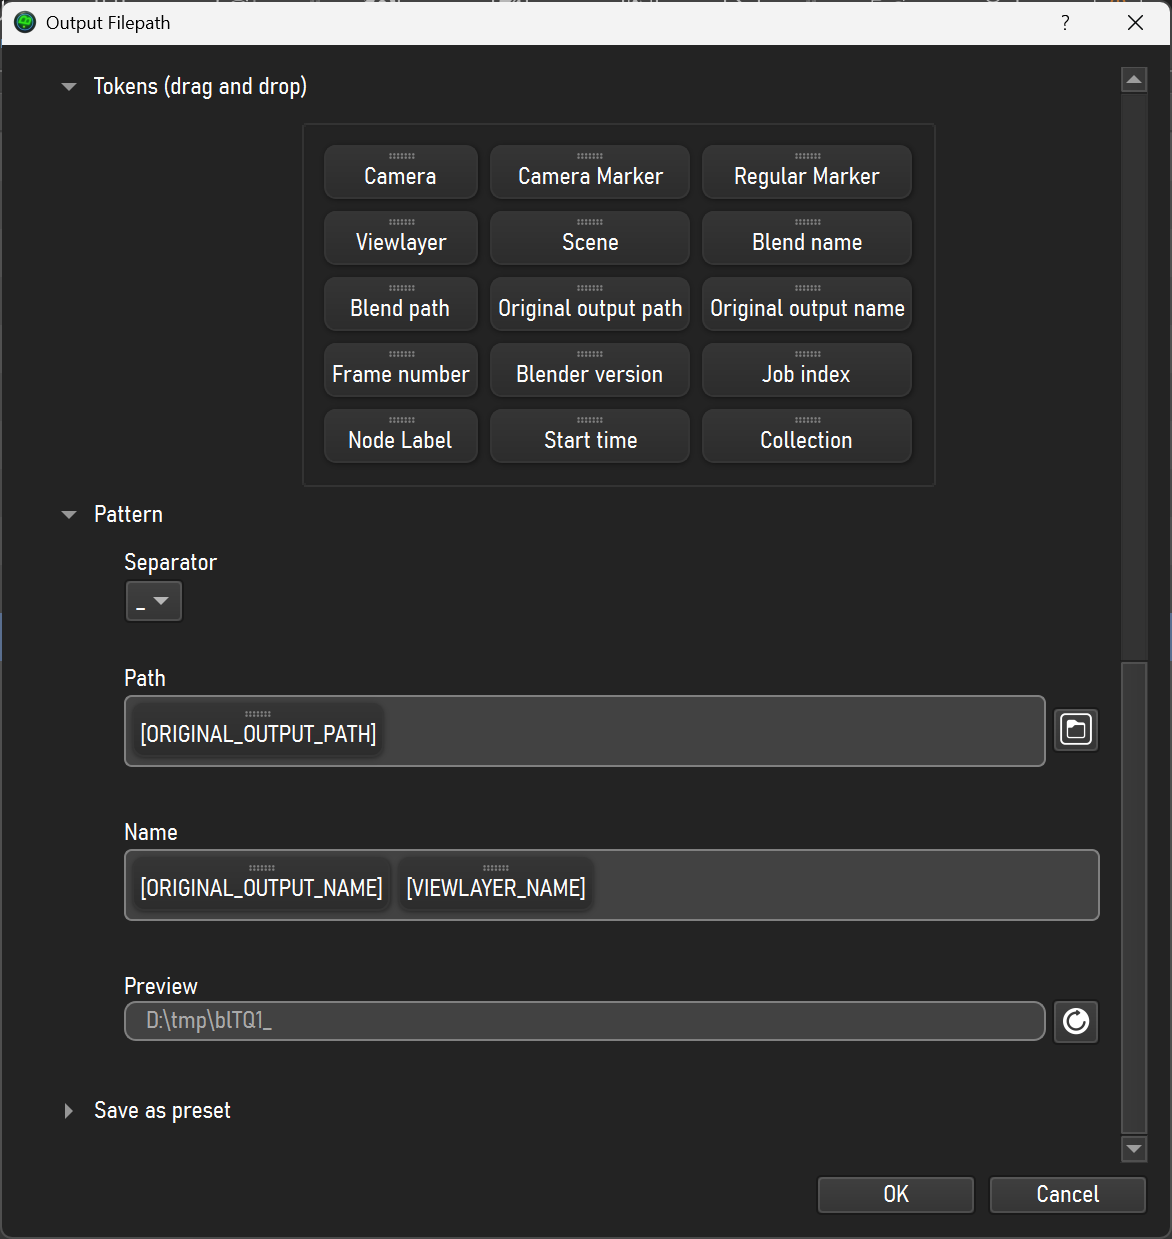
Output Filepath: This opens the output naming window that lets the user create patterns for the output path and/or filename using tokens. There’s a presets section, where you can click on a preset and the output path and name pattern fields will be automatically filled, and then there’s a tokens section from which you can drag tokens into the path and name fields. You can also write on the fields, and browse for an absolute path, and combine that with tokens.
Extra arguments: This opens the extra arguments window. There you can choose among some common useful blender command line arguments to use with the selected items when rendering, some built-in presets, or create your own. This is mainly used to override special scene properties not covered in the other options mentioned before, such as the resolution. The arguments that will actually be used are the ones in the “Arguments” field at the bottom of the window. Clicking on the argument name button will add the argument to the extra arguments field. If there is any data field to the right of the argument button, it’s important to fill it before pressing the button, so the argument get’s added with the appropriate parameter.
-
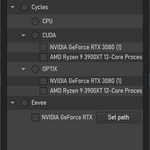
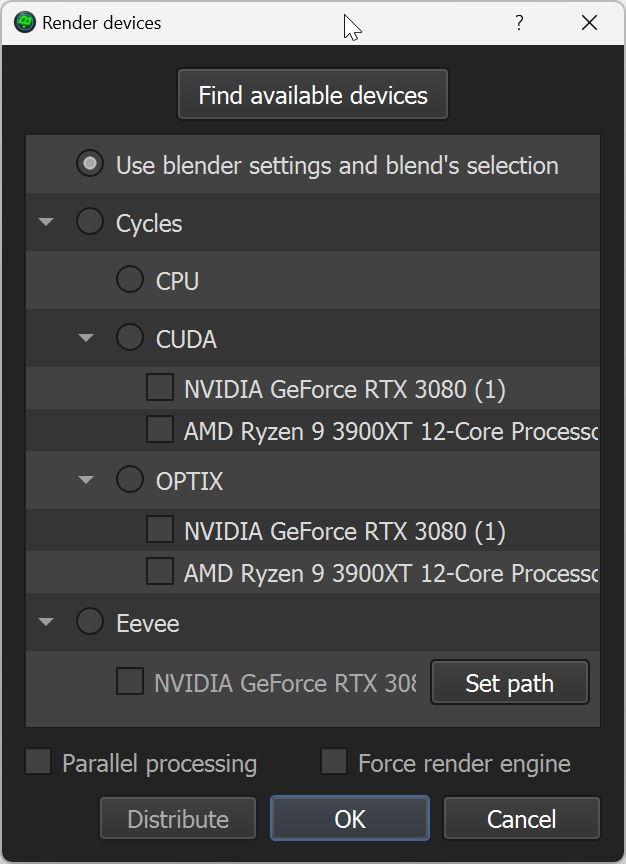
Devices: This let’s you select which device(s) to use for rendering the selected jobs. First thing to do when first using this feature for a blender version is clicking “find available devices” so available devices for cycles are discovered by B-renderon. For Eevee, some GPUs official software allows users to assign different GPUs to different executables. So to render different blends/frames with different GPUs with Eevee, users first need to duplicate the blender executable and assign those different GPU’s to the different copies of the blender executable, and then assign those different executables to different GPU’s in this window.
Jobs with the “parallel processing” option checked, will start rendering in a new parallel rendering instance whenever there is a GPU in the selected list available. Jobs with the “force render engine” option checked will use the selected engine even if another one was selected in the scene.There’s also a “distribute” button similar to the one in the blender version’s pop up but in this case it distributes the selected devices among the selected jobs.
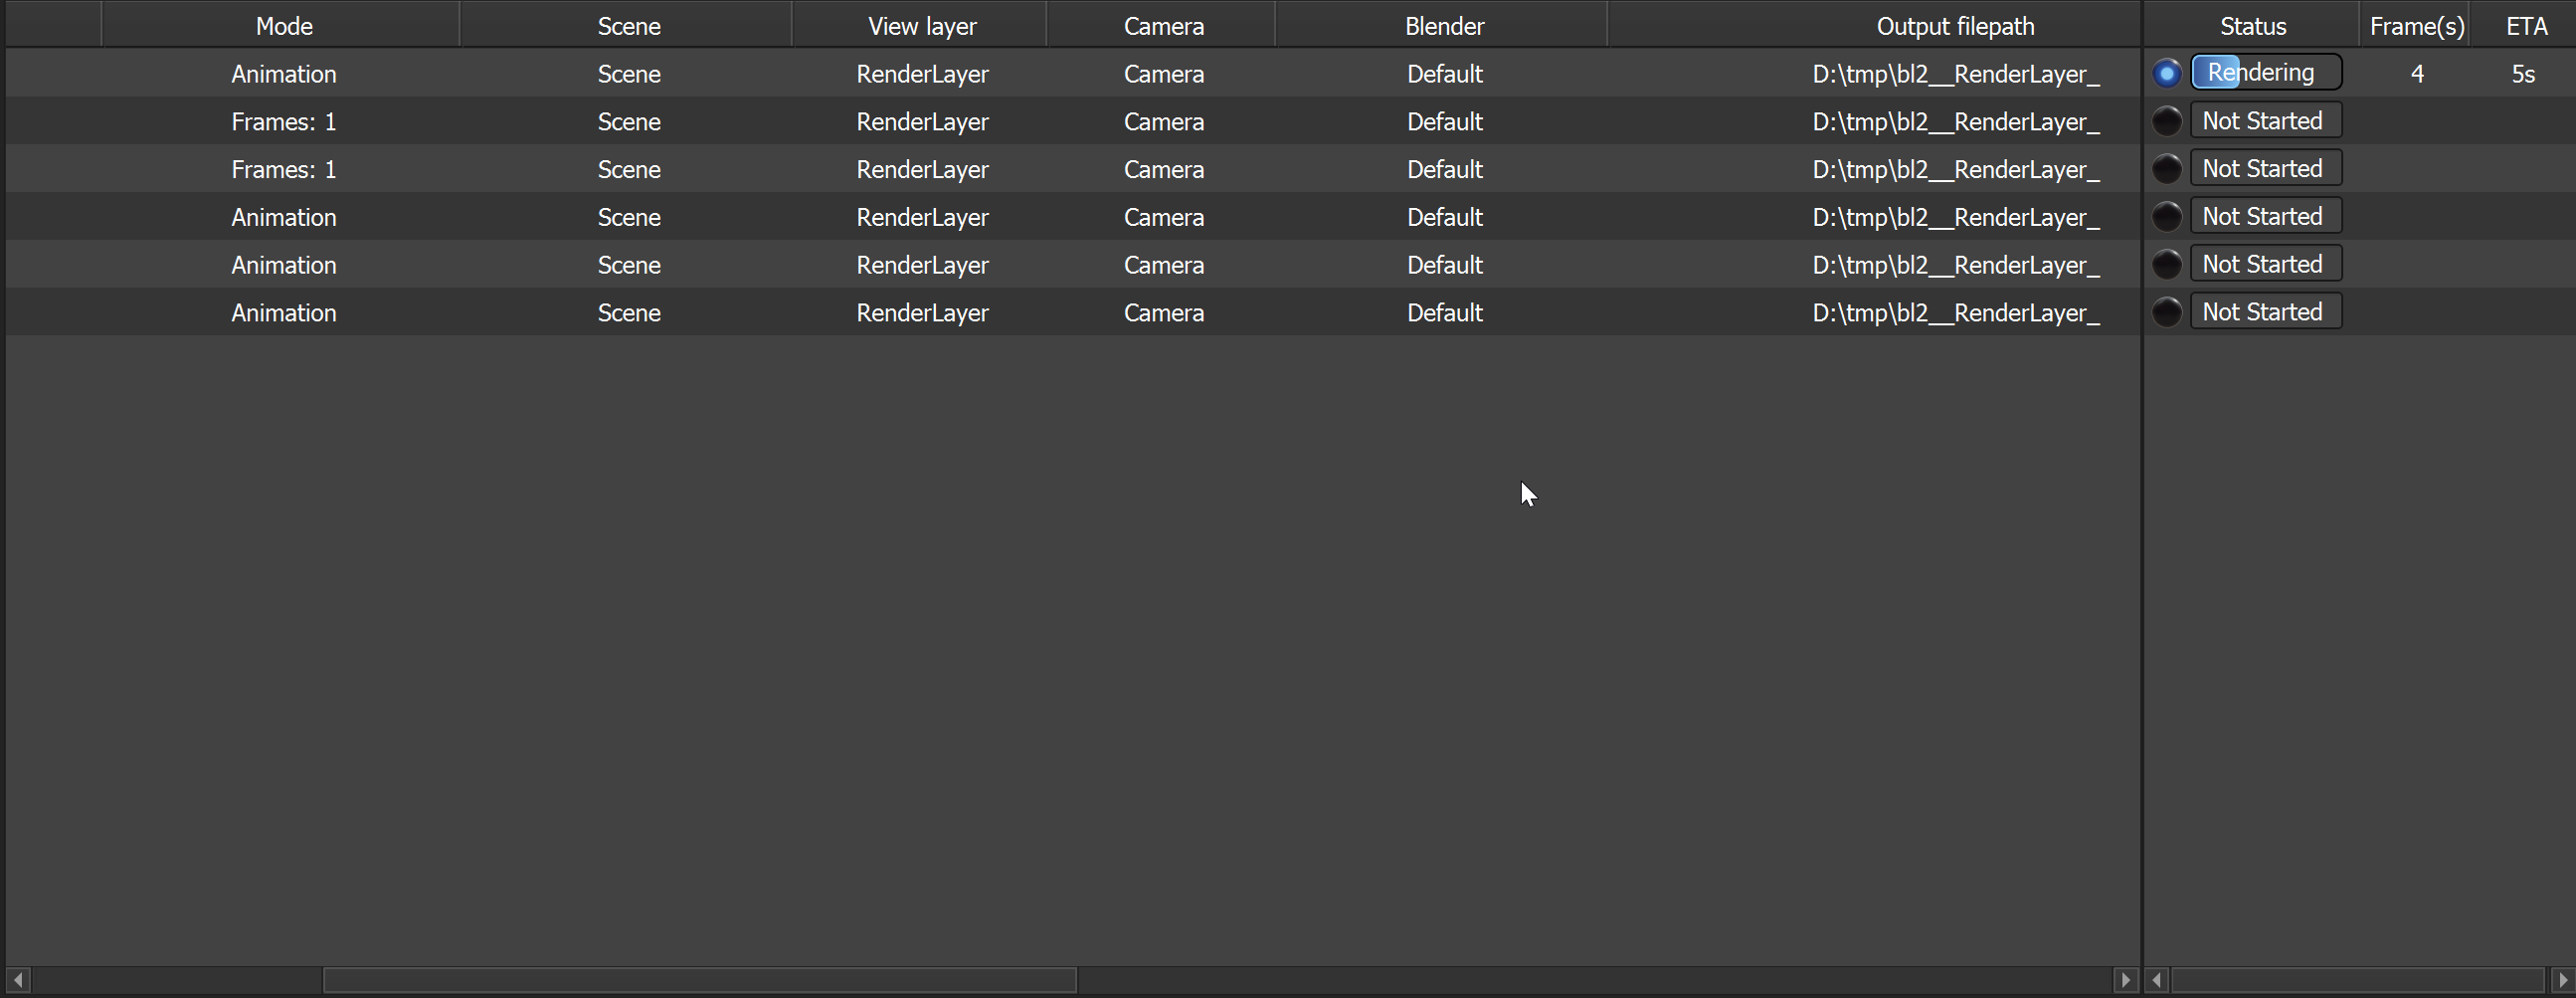
The
queue is composed of a table split into two sections. Each job added
to the queue becomes a new row. Each column exposes a relevant
property, such as blend
path, rendering mode, scene, rendering device, etc.
The section to the right contains columns with info related to the
rendering status: the status itself (not
started, rendering, finished, etc),
the amount of rendered frames, and the estimated time
remaining.
Columns can
be reordered by dragging them around from the header,
which also has a context menu with options for
hiding or changing the
column’s content’s
alignment.
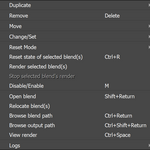
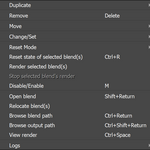
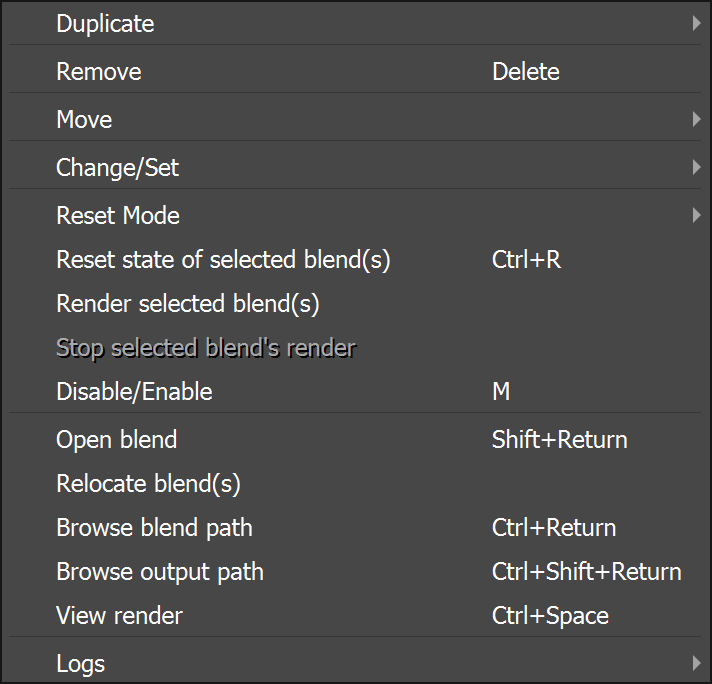
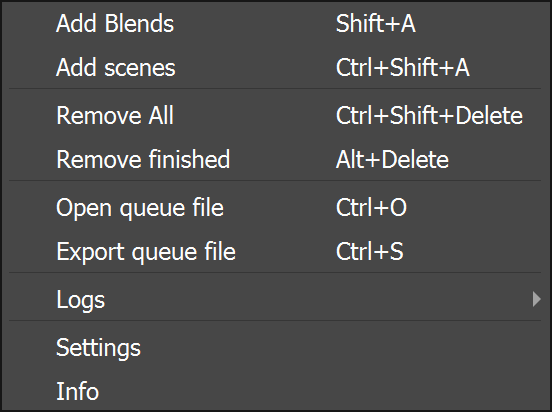
Jobs can reordered by dragging, or via operators
shown in the context menu. There’s two different context menus: one
for selected items and one for the empty space. Most
(but not all) operators in the context menus correspond to buttons in
the interface.
9)
Status bar
This
shows relevant info of the state of the queue and, if a job is
selected, also info of it’s state.
Hopefully
B-renderon will never close unexpectedly or stop responding, but if
it did happen, please contact me via p.m. at the blender market /
superhive or via email at [email protected]
to report the issue. Also don’t hesitate to write if you have any
question, comment or suggestion, or any problem not solved after
trying the suggestions here.
Problems that can happen
during rendering usually have to do with:
Some third party add-on not updated to work properly with the present Blender version, or that contains some bug that causes problems with command line rendering
The system running out of GPU ram
Blender crashing, which could be caused by a number of reasons including, again, an add-on misbehaving, a blender version mismatch between the one used for rendering and the one used to create the blend, or the scene being too heavy
Lack of file writing permission in the intended output folder
Render settings too heavy
Checking the livelog can usually help identify the root of the problem. Start by looking for any messages at the beginning of the log or at the end.
If you suspect a problem may be caused by some add-on you can try updating suspect add-ons or activating the “use blender factory settings” setting in B-renderon to bypass third party add-ons as explained in the settings section.
If the scene you are trying to render is very heavy and Blender is crashing or running out of GPU memory, make sure you aren’t running any other programs that can dispute resources during rendering time (such as Blender itself, except the background blender instances launched by B-renderon to render). If that doesn’t solve the problem the scene may need to be optimized if it’s to be rendered in the current system. Also, make sure you are using the intended rendering device.
Have questions about this product?
Login to message
| Sales | 1200+ |
| Rating | 85 ratings |
| Dev Fund Contributor | |
| Published | over 7 years ago |
| Blender Version | 2.8 - 5.2 |
| Extension Type | N/A |
| Render Engine Used | Cycles, Eevee, Luxrender, Octane |
| License | GPL |
Discover more products like this
RenderManager blender-render-queue multiple files queue batch loveblender winter24 command line summer23 rendering standalone render manager