Baga River Generator
 antoine bagattini



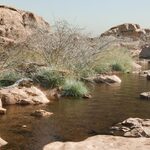
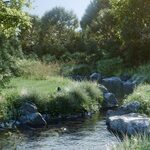
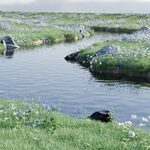
VIDEO TUTORIAL HERE
Editing the River Material
Follow these steps to customize your river material in BagaRiver:
1 - Check the Material Name
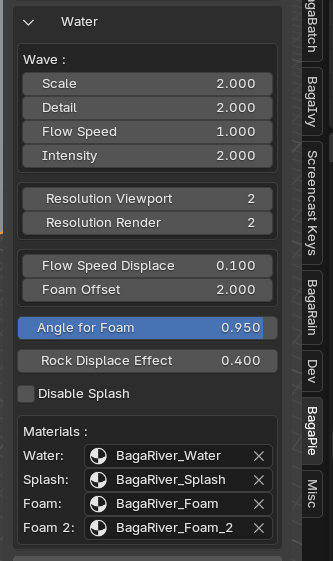
- Select the river in the 3D Viewport.
- Press N to open the side panel.
- Go to the BagaPie tab and open the Water sub-panel.
- Note the name of the material used for the water.
2 - Assign the Material to the Curve
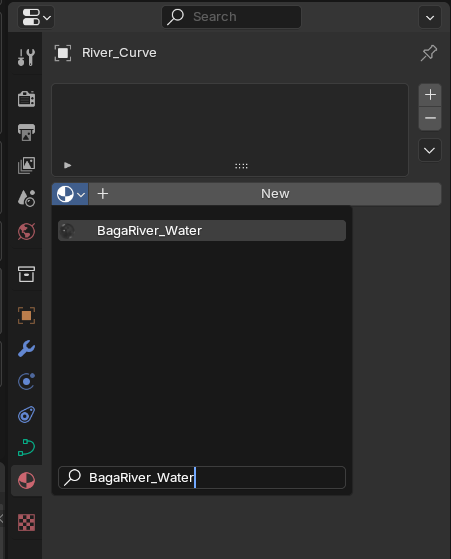
- Select the RiverCurve object (the curve controlling the river path).
- Open the Properties Panel > Material Tab.
- Add a new material slot if needed.
- Paste the copied name (Ctrl+V) into the slot and assign it.
3 - Edit in the Shader Editor
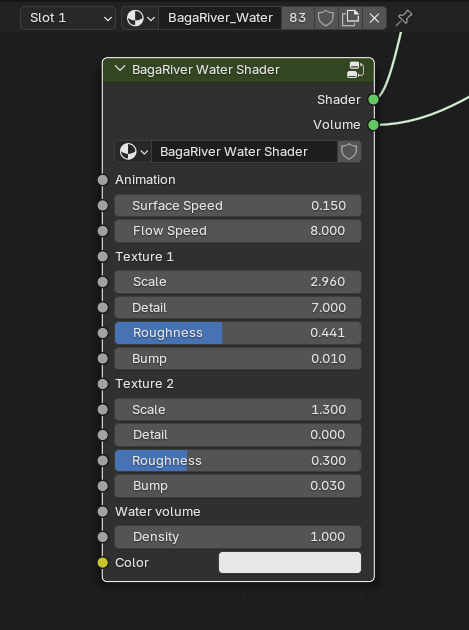
- With the RiverCurve selected and the material assigned, open the Shader Editor.
- Modify the material’s nodes to achieve your desired look.
Documentation
Introduction
BagaRiver is a procedural tool for Blender that allows you to create rivers quickly and intuitively. This documentation will guide you through the process of creating, customizing, and optimizing your rivers.
Requirements
-
Blender 4.2 or later
-
BagaPie 11.0.6 or newer (free) Get it HERE !
-
.geopackfile for BagaRiver (from Gumroad or Superhive)
Install BagaPie
- Open Blender, go to Edit > Preferences > Extensions.
- Search for BagaPie in the list and Install.
- Enable it by checking the corresponding box.
- Click Save Preferences to keep it activated for future sessions.
Install BagaRiver
- Open the BagaPie preferences (In Edit > Preferences > Addons)
- Inside the GeoPack section, click Install Pack
- Select the
BagaRiver_XX.geopackfile - BagaRiver is now installed and accessible from the GeoPack pie menu (
Vshortcut)
Create a River
-
Press
Vin the 3D Viewport - Choose one of the BagaRiver presets ('Insert' for terrain blending versions)
- Draw the river by clicking and dragging in the viewport
- It will generate the terrain, river mesh, water, rocks, and vegetation automatically
1 - Setting Up the Scene
1.1 - Preparing the Terrain (V2 only)
In BagaRiver version 2, the river is drawn directly on an existing terrain. The mesh you use as the base should have enough subdivisions to allow proper embedding. You can add a Plane and subdivide it (for example, using a temporary Subdivision Surface modifier or via right-click > Subdivide).
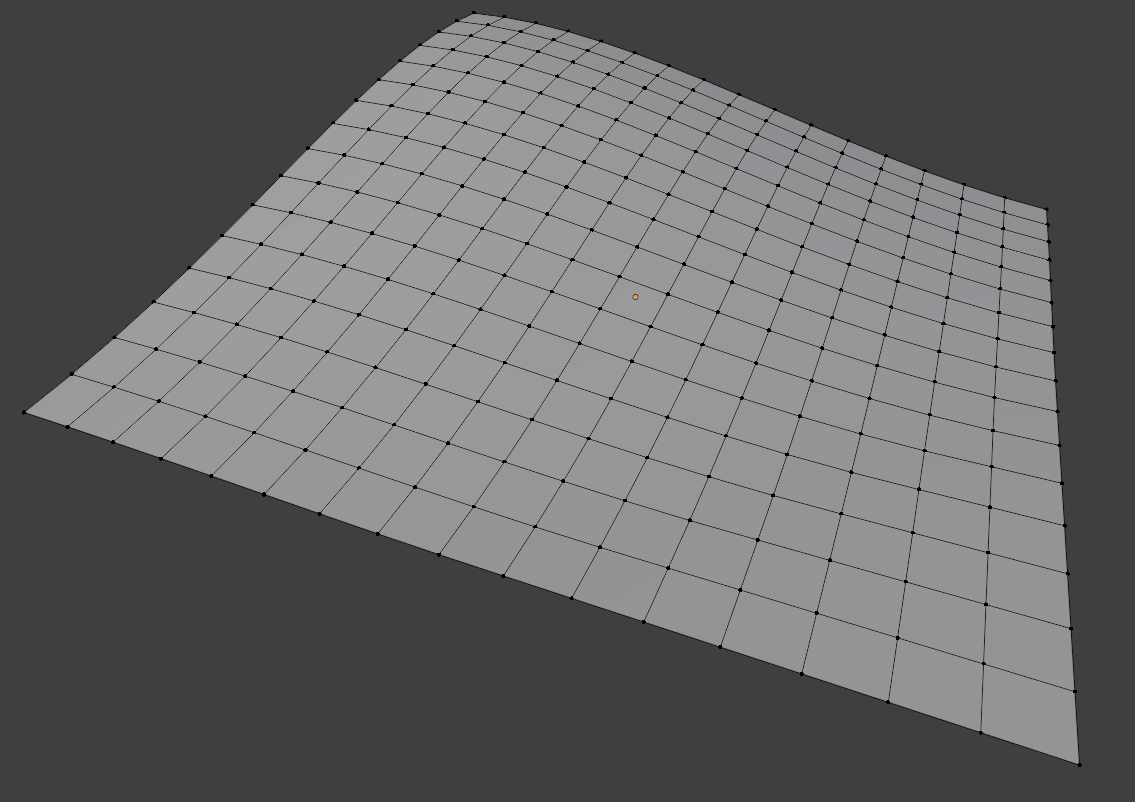
Next, select your terrain before activating the tool.
1.2 - Adding a River
Press V to open the GeoPack quick menu. Choose BagaRiver. You will see two types of presets:
- V2 presets (TOP), made to be embedded into the terrain. They have a specific icon in the menu.
- V1 presets (BOTTOM), based only on an independent curve (they don't require a selected object).
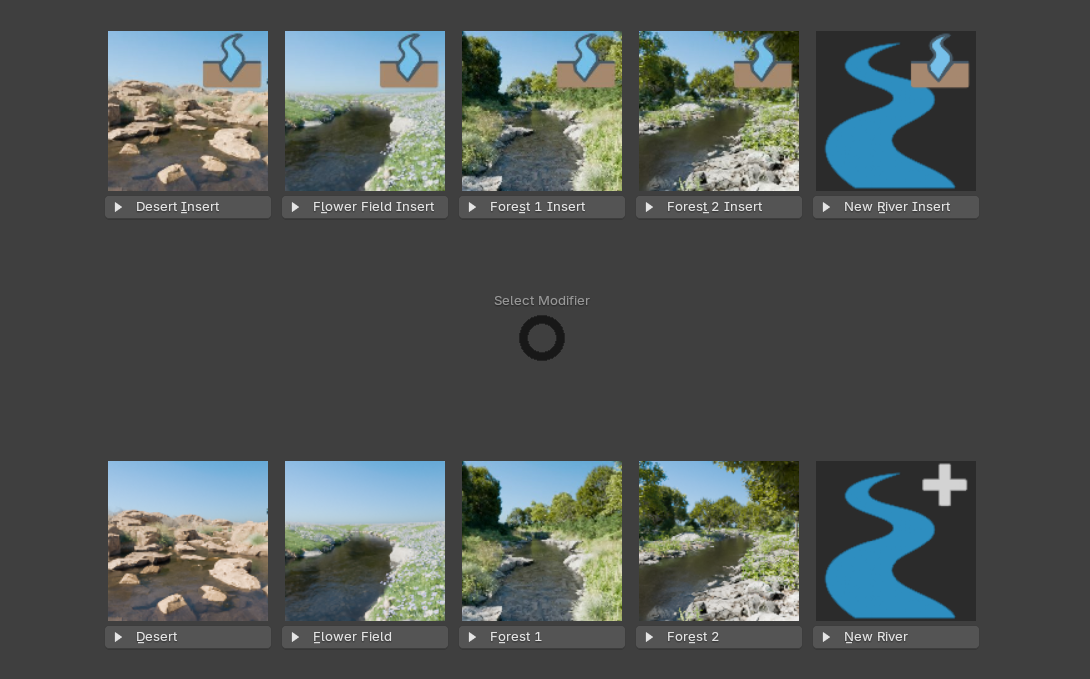
In V2, the curve you draw defines the path of the river and is actually embedded into your terrain. This is a major change from V1, where the curve was only a guide for a floating mesh.
2 - Drawing the River Path
Once the preset is launched from the GeoPack menu (V key), the BagaRiver add-on will automatically configure everything for you. You'll be directly placed in Edit Mode of a Curve object, in Draw mode.
2.1 - Drawing the Path
- If you selected a terrain-embedded preset, the curve will be drawn directly on the selected geometry.
- If you use a classic preset, the river will be drawn based on the 3D cursor position and the user view angle.
You can draw one or several rivers. However, avoid curve intersections, which are not supported yet.
2.2 - Tips
- To improve visibility while drawing, temporarily hide scatter objects (rocks, trees, etc.) before launching the tool.
- You can adjust the width of a curve point by modifying its radius: this lets you create wider or narrower river zones.
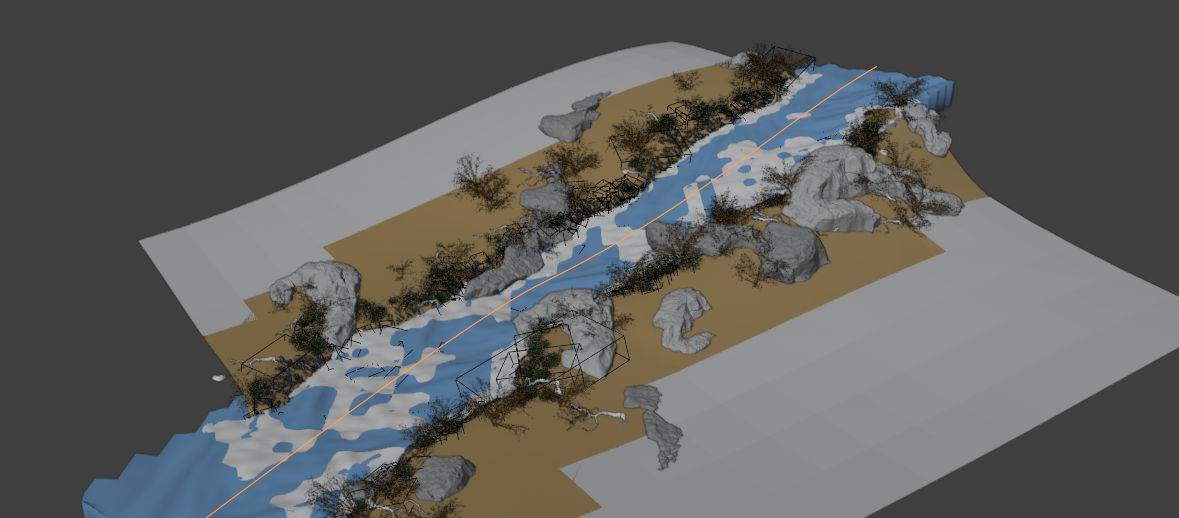
3 - Back to Object Mode
Once the path is complete, switch back to Object Mode.
4 - Customization
To customize your river, open the BagaRiver panel in the BagaPie tab of the sidebar (N key).
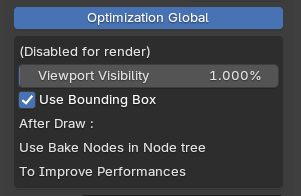
4.1 - Global Optimization
At the top of the panel, you'll find a Global Optimization button. When enabled (highlighted in blue), it will:
- Dynamically reduce the number of instances displayed in the viewport
- Show only the elements visible inside the bounding boxes
This button only affects the viewport display. At render time, everything will be shown in full quality. It's a great way to improve scene performance.
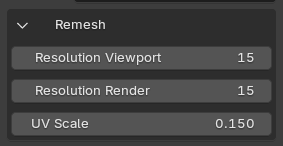
4.2 - Remesh
This section controls the mesh resolution of the river water.
- Resolution: default is 15, adjust based on your needs (quality vs. performance)
- UV Scale: scale of the water texture UVs
4.3 - River Profile
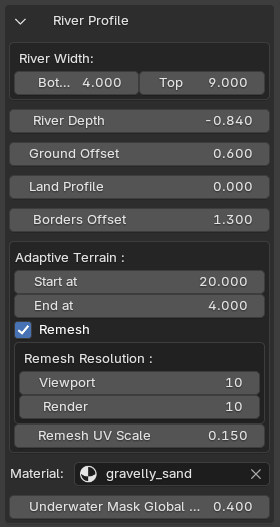
This section lets you fine-tune the river’s shape:
- River Width: overall width of the river
- Bottom: width at the bottom of the river (base of the slope)
-
Top: width at the top of the banks (top of the slope)
→ Bottom should always be smaller than Top - River Depth: depth of the river
- Ground Offset: how deep the river embeds into the terrain
- Line Profile: river cross-section curve (rarely used)
- Border Offset: rounding and offset of river edges
Adaptive Terrain
This section handles terrain deformation if you're using a V2 preset.
- Start: distance where the deformation begins
-
End: maximum distance of deformation influence
→ The closer to the End value, the stronger the deformation. - Remesh (button): remeshes the existing terrain. Must be enabled for deformation to work correctly.
- UV Scale: UV scale for the remeshed terrain
- Material Slot: assign a custom material for this remeshed terrain (procedural mapping recommended)
4.4 - Terrain
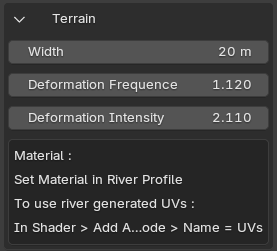
Controls natural variation along the river:
- Wide: width affected by the remesh
- Frequency: frequency of lateral variations
- Intensity: strength of the deformation
→ This helps break the linearity of the river and simulates natural meanders.
4.5 - Camera Culling Terrain
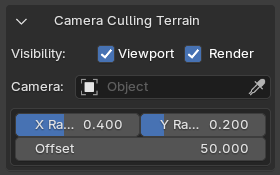
- Set a reference camera
- Adjust X and Y ratios
→ This dynamically hides terrain parts outside of the camera's view to improve viewport performance.
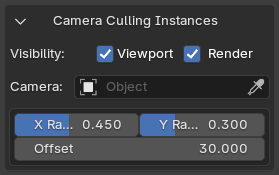
4.6 - Camera Culling Instances
- Only applies to viewport-visible instances
- Allows dynamic disabling of out-of-view instances
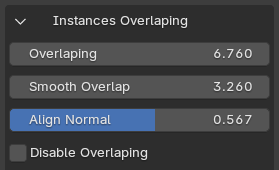
4.7 - Instance Overlapping
Useful if your terrain already has scatter instances (e.g. using BagaPie Scatter):
- Overlapping: defines how much river instances can overlap existing ones
- Smooth Overlap: smoothens the transition between the two
- Align Normal: realigns existing instances based on the new deformed terrain topology
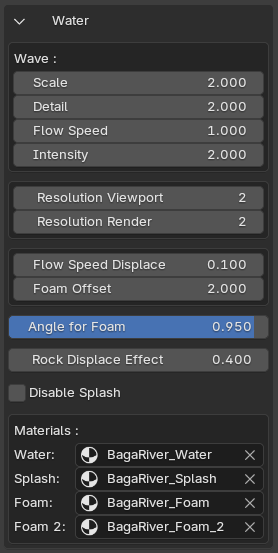
4.8 - Water
This section controls the water materials:
- Four material slots are used to build the full water shader
- To edit them, select the river’s Curve object, assign materials, and tweak them in the Shader Editor like any other Blender object
5 - Editing Scatter Layers
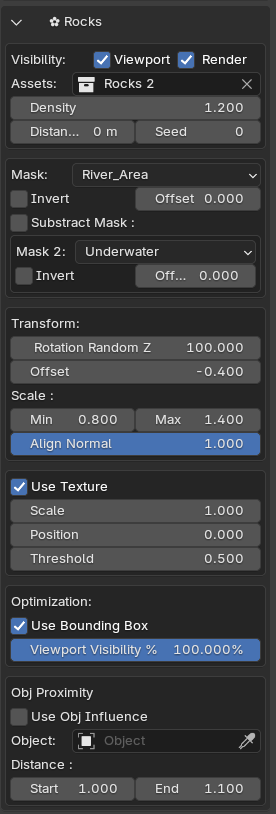
Scatter Layers let you automatically add elements like plants, rocks, or trees around the river. They can be identified by the flower icon in their names.
Each layer follows a similar structure:
5.1 - General Settings
- Density: controls how many objects are scattered
- Collection: lets you choose the asset collection used
- Visibility: toggle the layer's visibility on/off
5.2 - Masking
This panel is essential: it defines where objects appear in relation to the river.
- Select a Mask (e.g. Underwater, Shore, etc.) to target a specific area
- Use Invert to flip the masked area
- In V2, you can also use Mask 2 to subtract a zone from the first one
→ These combinations allow for very precise placement of elements
5.3 - Transform
Adjust the random scale and rotation of the instances for more variety.
5.4 - Use Texture
- Lets you use a density texture to control how instances are distributed
- Very useful for grass or high-volume assets
5.5 - Optimization
- Same as the Global Optimization button, but applied only to this layer
- Uses bounding boxes to limit what is shown in the viewport
→ Like global optimization, these settings have no impact on the render: everything will be shown at full quality
5.6 - Object Proximity
- Allows you to hide elements close to a specific object (e.g. a tree trunk or existing rock)
- Enable Use Object Influence and select a reference mesh
- Then set the influence distance
All layers share this structure and these functionalities.
6 - Adding New Scatter Layers
To add a new Scatter Layer, you need to go through the Geometry Node Editor. Here are the detailed steps:
6.1 - Locate the Layers Area
In the BagaRiver preset Node Tree, the layout is as follows:
- Bottom Left: base mesh generation (gray frame labeled “do not edit”)
- Bottom Right: water generation and optimization (also “do not edit”)
- Top Center: clearly marked zone dedicated to Scatter Layers
This is where you will make your changes.
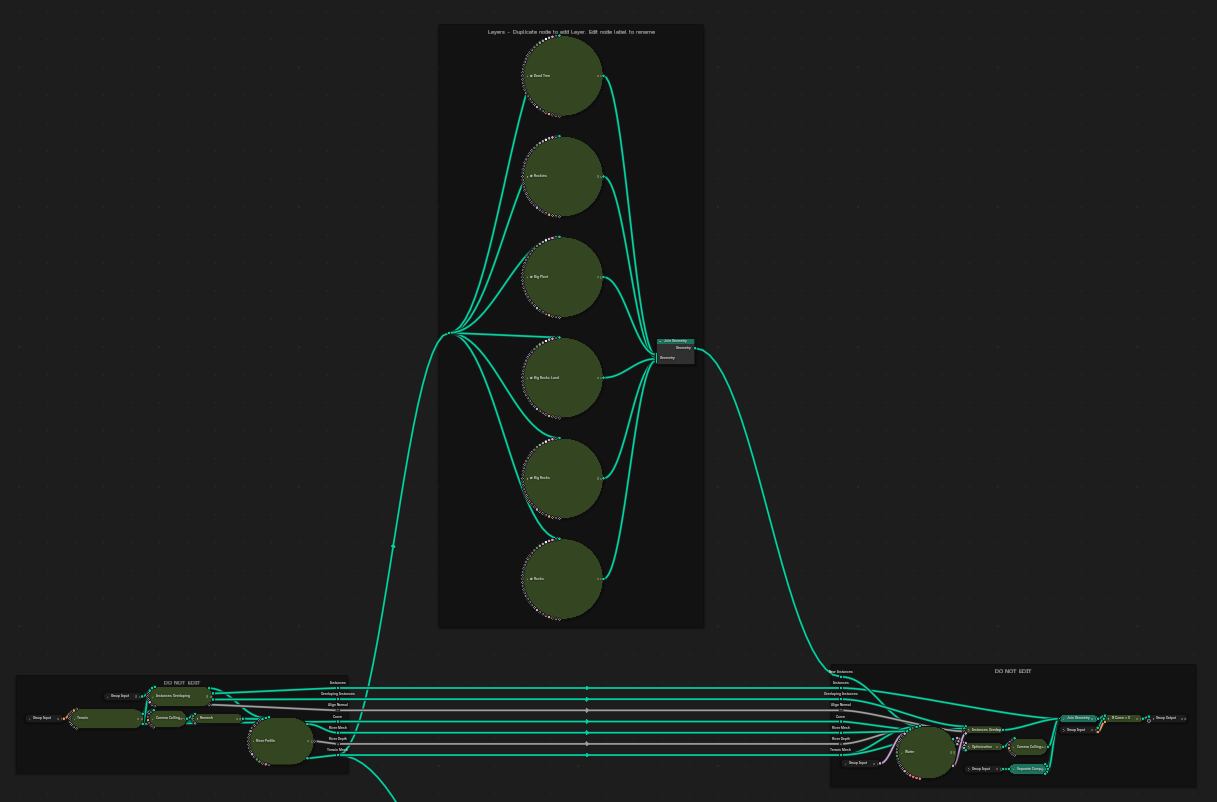
6.2 - Add a New Layer
- Locate an existing Scatter Layer (found inside the “Layers” frame).
- Duplicate a layer. It’s best to duplicate one that already has settings similar to what you need (e.g., duplicate a tree layer for another vegetation type).
- Connect the new node group’s Mesh input to the main geometry (just like the other layers).
- Connect the Instance output to the main Join Geometry node.
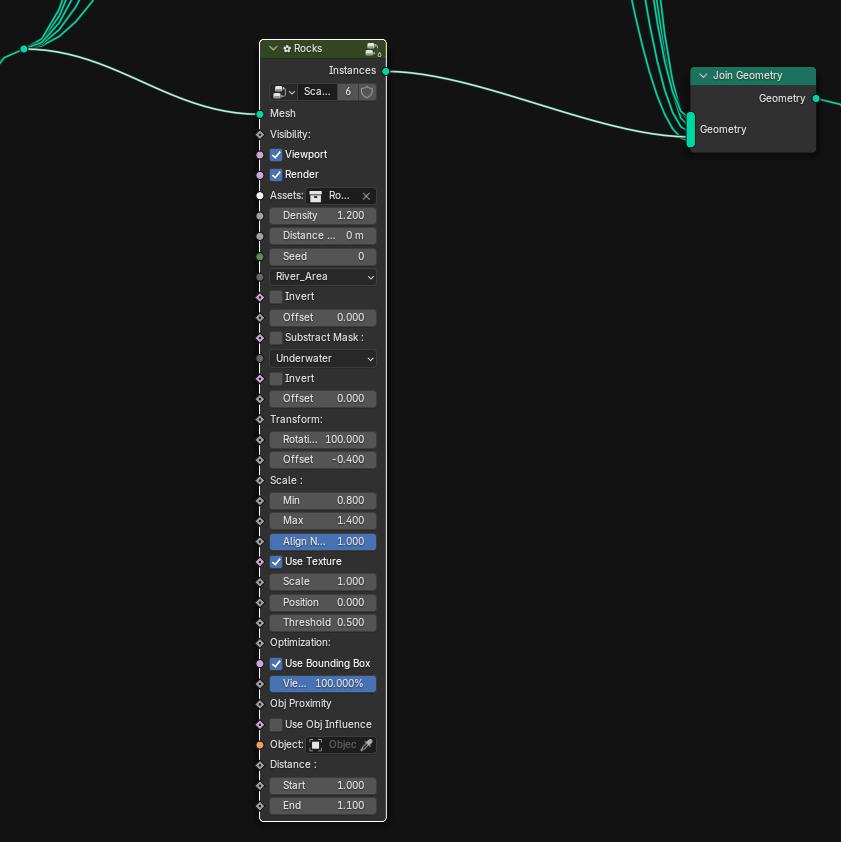
You can then open its panel in the N-panel to:
- Change the collection
- Adjust other settings like density or masking
7 - Saving a Custom Preset
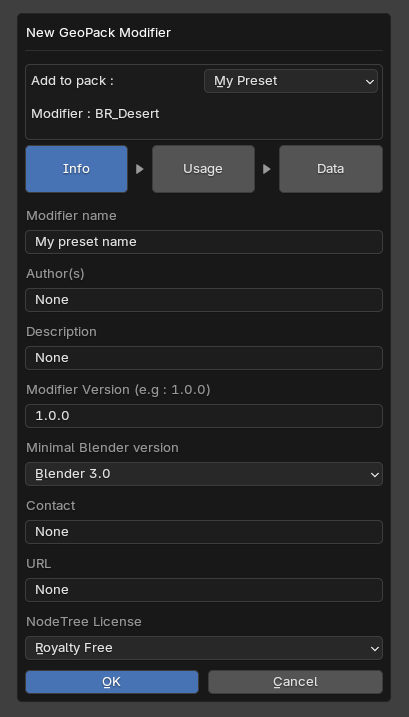
If you modified an existing preset or used the NewRiver or NewRiverInsert presets, you can save your work as a reusable preset using GeoPack.
Steps:
- In the N-panel > BagaPie tab, click Save as GeoPack Modifier.
- A popup will appear. Go to the Info tab.
- Pack: choose the pack where the preset will be saved (e.g., BagaRiver).
- Modifier Name: give your preset a name (required).
- The rest is optional.
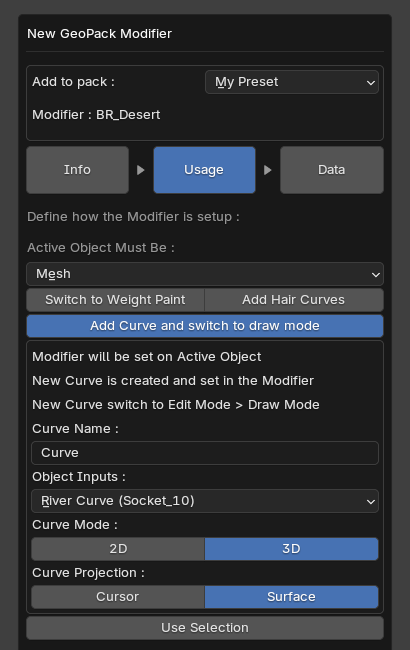
For a terrain-embedded preset (V2)
- Active Object Must Be: Mesh
- Enable Add Curve and Switch to Draw Mode
- Make sure socket 10 is used in Object Input (this corresponds to the River Curve)
- Curve Mode: 3D
- Curve Projection: Surface
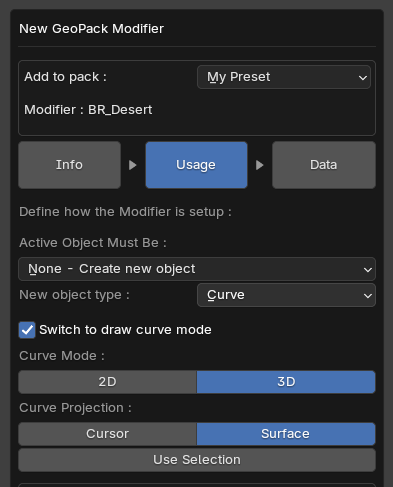
For a curve-only preset (classic - V1)
- Active Object Must Be: None - Create New Object
- New Type: Curve
- Enable Switch to Draw Mode
- Curve Mode: 3D
- Curve Projection: Surface
Finalization
Click OK. Your preset will now appear in the V > BagaRiver menu, ready to use just like any other preset!
Learn more about BagaPie GeoPack
-
$19
-30% BagaPie Assets Owners, code BAGAOFF
Have questions about this product?
Login to message
| Sales | 1000+ |
| Rating | 5 ratings |
| Dev Fund Contributor | |
| Published | over 1 year ago |
| Blender Version | 4.2 - 5.2 |
| Render Engine Used | Cycles, Eevee |
| License | Royalty Free |
Discover more products like this
River Generator procedural-river desert preset forest #nature forest preset blender addon nature asset Blender landscape bagariver geopack stream geometry nodes river brook flower field creek environment design bagapie