Bildeform | Bas Relief Maker From Your Images And 3D Models
 Giambattista Von Nettesheim




Bildeform - Bas Relief Generator Documentation
Table of Contents
- Hardware & Software Support
- Installation
- Overview
- Quick Start
- Workflow: Generate With 3D Model
- Workflow: Generate With Image
- Integration Settings
- Layer Settings (Frequency Separation)
- Bas Relief Settings (Modifiers)
- Mesh Reconstruction (MoGe-2)
- Performance Tips
- Best Results: Image & Scene Guidelines
- Troubleshooting
- Changelog
Hardware & Software Support
- Blender version: Blender 5.1.1 or later.
- Windows (tested): Extensively tested on Windows 11 x64 with an NVIDIA GeForce RTX 3050 (6GB VRAM) and 24GB of RAM.
- macOS (supported and tested): We added support for macOS 13+ on ARM64 (Apple Silicon). We have tested it in a Macbook Air M3 16 GB and it works fine.
Installation
- Open Blender 4.2 or later
- Go to Edit > Preferences
- Go to Get Extensions
- Click Install from Disk and select the Bildeform package
- Save preferences
Overview
Bildeform generates professional bas-relief sculptures inside Blender from two sources:
- Generate With 3D Model: Captures a 3D object using the camera.
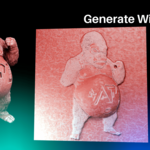
- Generate With Image: Uses AI to estimate some maps from a 2D image.
What makes Bildeform different is not a single "magic algorithm", but the orchestration of data into layers. A bas relief is a compressed sculpture: it needs structure, softness, and detail. Bildeform prepares these "ingredients" and lets you control them artistically.
Watch Bildeform in action:
Quick Start
-
Choose Generation Mode
- Use Generate With 3D Model if you have a model in the scene.
- Use Generate With Image if you start from a photo / artwork.
-
Set Layer Settings
- Pick a Depth Model (Large is best, Small is faster).
- Adjust Curvature (SKO) and Cavity Map (SKI) settings for fine detail control.
-
Choose Integration Settings
- Select your Mode Generation algorithm.
- (Optional) Select Falloff Method if you need cleaner borders. But this only works for Frankot-Chellappa and Kernel-Approach.
-
Generate
- Click Generate Bas Relief.
- After it finishes, use Bas Relief Settings to tune the modifiers.
Workflow: Generate With 3D Model
-
Set Camera
- Click Set Camera to create and frame the camera automatically.
- Choose your Target object.
-
Camera Settings
- Adjust Resolution X/Y (higher resolution = more detail, slower processing).
- Adjust camera Focal Length for the desired perspective compression.
-
Important: Safe Zones
- Try to keep a clear margin / safe space around your subject in the camera frame.
- If you have multiple objects in the scene, hide them from the camera as soon as possible. Otherwise, they may interfere with the capture.
Workflow: Generate With Image
-
Choose a Source Image
- Select a high quality image. 2K or higher is recommended for clean details. Generally, 2K images are sufficient, because once all the settings from the add-on have been applied, the distortion will be minimal. However, if we do this with a lower resolution image, the details of the curvature will most likely introduce a very ugly mesh that will require more manual work. For best results, use images with good lighting and clear subject separation. Avoid images with harsh shadows or overexposed areas that might confuse the estimation process.
- If the background is visible, avoid pure white backgrounds. A white background will prevent the object in the image from being properly isolated, resulting in a degenerate bas-relief and the images that make it possible.
-
MoGe-2 Settings
- Model: Large models are more accurate but slower. If you only have CPU, use smaller models.
- Detail Level: Higher values add more detail but increase time and memory usage. For the best height map results regardless of which Mode Generation you choose, we recommend using the best model (Large) with the maximum Detail Level (3600). This ensures the normal map captures the finest details from your image, which directly translates to a more accurate and detailed bas relief.
- With Borders: Adds safe borders. Useful when the subject touches the edges, but it may change the mask behavior and the ridges of the bas-relief will be very pronounced, so you will have to do much more manual work.
- With Nodes?: Uses Blender compositor blur. If disabled, Bildeform uses a high-quality filter internally(recommended).
- Mask?: Applies the generated mask to make background black. Recommended for clean results and recommended especially for images that have a subject with plenty of safe spaces; however, disabling it does nothing if it is a complete image, as the mask will be complete, so always try to leave it enabled.
- Tangent Space?: Produces industry-standard tangent normals (recommended).
- Reconstruct Mesh?: Creates a 3D mesh from the image (imported hidden by default).
-
Safe Zones and Mask Quality
- The less safe space your image has, the harder it is for the AI to create a precise mask.
- Whenever possible, choose images where the subject is clearly separated from the borders.
Integration Settings
-
Falloff Method
- Use this when you need smoother borders and cleaner transitions at the edges.
- Important: When Mode Generation = DGP, the global Falloff Method has no effect on the result.
-
Mode Generation
- Frankot-Chellappa: Fast and smooth.
- Kernel Approach: Balanced result with strong detail preservation.
- DGP: Strong feature preservation with its own border options in DGP Settings. It is the most accurate method, but it is also the slowest. We recommend using it primarily if the time is not inconvenient for you. Generally, with it selected, the process takes no more than two minutes.
- Convolutional (NEW): Uses an advanced FFT convolution approach that produces height maps with a very even, emboss-like displacement — no excessive peaks or valleys, just a uniform and consistent relief. It is faster and lighter on system resources compared to the other methods. The height map it generates is highly faithful to the original image details, especially when you use good MoGe-2 parameters (Large model, Detail 3600). Important: Although Convolutional works with both generation workflows, in our testing it performs significantly better with Generate With Image than with Generate With 3D Model. We recommend its primary use with images.
- NI: DCT (NEW): A fast method that solves the height map by assuming the edges reflect (Neumann boundaries). It is generally good for full images that touch the borders. Note: The NI methods (DCT, DST, FFT) are very fast but they are not always perfect; occasionally, they can create a flattened or cut-off effect on the very highest peaks of your bas-relief.
- NI: DST (NEW): A fast method that forces the edges of the image to gradually drop to zero (flat background). It is ideal for isolated subjects (like a coin, a face, or a character) with clear empty space around them. Like DCT, it may flatten the highest parts.
- NI: FFT (NEW): The classic Frankot-Chellappa algorithm, but running under a more modern and robust framework. It is fast, but like the other NI methods, it may flatten the highest peaks.
- Fuzzy (NEW): A highly advanced method that uses "fuzzy logic" to interpret the normal map. It essentially treats the pixel data as flexible rather than absolute, allowing it to gracefully ignore noise, errors, or artifacts in the image. It produces very clean, smooth, and robust height maps, especially when the input has imperfections.
-
Convolutional Settings (when Convolutional is selected)
- Backend: Choose between the Python Binding (faster, runs in-memory) or the CLI (runs as a separate process, useful as a fallback). The Binding is recommended for most cases.
- Samples: Controls the number of sampling points used during height map generation. Higher values produce smoother and more accurate results, while lower values are faster. The default (50,000) works well for most images. For very large or highly detailed images, you can increase this value for a slight quality improvement.
- Weight: Controls how sample influence is distributed across the height map. We recommend using Power (default) or Cos — these two produce the best results in practice. The other options (Linear, Smoothstep) do not produce the desired emboss effect and can generally be ignored.
-
NormalIntegration Settings (when NI: DCT, NI: DST, or NI: FFT is selected)
- Backend: Choose between the Python Binding (faster, runs entirely in memory) or the CLI (runs as a separate program). The Binding is recommended for most users.
-
Fuzzy FC Settings (when Fuzzy is selected)
- Lambda: Think of this as the "fuzziness" amount. A higher value allows the algorithm to be more flexible and ignore more noise, smoothing out the surface. A lower value keeps things stricter and sharper. The default (0.10) is a great balance.
- Adaptive?: When enabled, the algorithm intelligently decides how much to trust each pixel based on how noisy that area is. If a part of the image is noisy, it adapts; if it's clean, it stays sharp. We recommend leaving this enabled for the best results.
- F-Transform?: A preprocessing step that acts like a gentle filter. It cleans up harsh, high-frequency noise before the height map is generated. It's excellent for very noisy or low-quality images, but for very clean, high-resolution images, you might want to leave it off to preserve maximum sharpness.
-
DGP Settings (when DGP is selected)
- Iterations: Controls how many refinement passes DGP performs. More iterations can improve the result, but it will take longer to compute.
-
Solver: Controls how the main solve step is computed.
- LU (recommended): Usually the fastest option.
- CG: A good fallback for large images, but slower.
- Direct: Can be fast on small images, but it may use more memory.
- Blur Radius: A high-quality anti-aliasing blur for the DGP height map edges (Mitchell-Netravali). Higher values create smoother borders but may soften details. This control is used when Falloff? is enabled.
- Falloff? Creates a refined border mask (vector-like clean silhouette) and applies it to smooth edges. Use this when your borders look jagged or unstable.
- Falloff Alt? (recommended): Creates a smooth, natural edge falloff using gradient diffusion. In most cases this option is superior to Falloff? because it preserves detail better while still producing clean borders.
- Important: Falloff? and Falloff Alt? are mutually exclusive. You can keep both disabled if you want no edge smoothing.
- If you enable either option, assume the final result will include black safe spaces (similar to the safe zones you get in Generate With 3D Model).
- In Generate With Image, if the image already fills the entire frame (no holes / no background), you usually do not need DGP falloff unless you used With Borders or you want a deliberate edge fade.
Layer Settings (Frequency Separation)
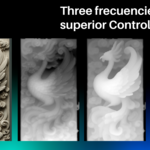
The strength of Bildeform is that it separates the bas relief into layers (modifiers). Instead of forcing a single map to contain everything, Bildeform combines different types of information so you can sculpt the final result with full control.
-
Height Map (Primary Relief)
- Main surface shape reconstructed from normal integration.
-
Depth Map (Low-Frequency Structure)
- Generated using AI depth estimation. Adds global volume and avoids “flat” results.
- Tip: Use Large for best quality, Small for speed (especially on CPU).
-
Curvature Maps (High-Frequency Detail)
- These maps add fine detail, textures, and engraved-like information.
- Warning: At low resolutions (around 1K or below), curvature details can introduce noise. At 2K+ the results are usually cleaner, but processing is heavier. If the noise is unacceptable in some areas, I recommend using Blender's Sculpt Mode to manually smooth the surface.
-
Curvature (SKO)
- Controls the blur radius for the SKO curvature map. This setting determines how much the detected surface edges are smoothed. The blur is proportional to the image dimensions.
- Recommendation: We recommend using values between Smallest and Medium. Higher values (Large, Larger, Largest) may over-smooth the curvature and lose important detail.
-
Cavity Map (SKI)
- Radius: Controls the sampling distance used when computing surface concavity from the normal map. Lower values capture finer details; higher values detect broader surface variations. Recommended range: 1.0–8.0. Default: 3.5.
- Blur: A subtle smoothing applied to the cavity map output. We recommend keeping the default value (0.0004), as changing it significantly may degrade quality.
-
Filter (Anti-aliasing) & Filter Radius
- The Filter (Anti-aliasing) checkbox enables a Mitchell-Netravali filter on the curvature maps (BGP, SKO, SKI) to reduce noise and aliasing artifacts.
- The Filter Radius slider controls how strong the smoothing is. Higher values produce stronger noise reduction but may soften important details.
- Recommendation: We strongly recommend using input images of 2K resolution or higher. With high-resolution inputs, you can use a lower filter radius (3-5) and preserve more detail. With lower resolution images (1K or below), you may need higher filter radius values (10-15), but this can blur important details. Quality input = quality output.
Bas Relief Settings (Modifiers)
After generation, Bildeform creates a Bas Relief plane with multiple modifiers. The final look is achieved by tuning these layers.
-
Height Map Layer
- This should usually be the strongest layer.
- Try switching Color Space between Linear Rec.709 and sRGB if displacement feels wrong.
-
Depth Map Layer
- Adds the large-scale volume that a single normal integration may not capture.
-
Curvature Layer
- Choose the type (BGP / SKO / SKI) and tune strength carefully.
-
Recommended Strength Hierarchy
- As a starting point: Height > Depth > Curvature.
- This is not a rigid rule: every image and model is different. Always test and refine.
-
Export Maps
- Bildeform exports up to 17 different maps as 16-bit PNGs for maximum quality and flexibility:
-
Individual Maps (5):
- Height Map, Depth Map, Curvature BGP, Curvature SKO, Curvature SKI
- These are designed to be used together as layers, just like the Bas Relief modifiers. You can import them into other software and stack them with multiply/overlay blending to recreate the frequency separation workflow.
-
Combined Maps (12):
- Combined SKO 100%, 75%, 50%, 25% — Height × Depth × SKO curvature at different intensities
- Combined BGP 100%, 75%, 50%, 25% — Height × Depth × BGP curvature at different intensities
- Combined SKI 100%, 75%, 50%, 25% — Height × Depth × SKI cavity map at different intensities
- These are pre-blended single images that combine all three layers into one. They are ideal when you want to use a single displacement instead of multiple layers. The results can be surprisingly good, often with cleaner borders than the multi-layer approach because you avoid the complexity of calibrating multiple strength and color space parameters.
-
Why different intensity levels?
- The 100% combined maps can sometimes produce overly strong details, especially on images with sharp, high-contrast features. The 75%, 50%, and 25% variations reduce the curvature influence progressively, giving you softer detail options to choose from.
- If the full-strength combined map looks too aggressive in your displacement, try the lower percentages first before resorting to manual sculpting.
-
When to use Combined vs Layers?
- Use Combined maps for quick, single-displacement workflows with clean borders and less parameter tuning.
- Use Individual layers when you need precise artistic control over each frequency band.
- Note: If combined maps still produce overly prominent details, we recommend adjusting the displacement strength and using Blender's Sculpt Mode to manually smooth or refine specific areas.
-
Viewport Visibility Toggle
- Each modifier layer has an eye icon (👁) to the left of its Strength slider. Click it to show or hide that modifier's effect in the viewport in real time. This is useful for isolating individual layers to see their contribution.
- Note: When using Convolutional mode, the Depth Map and Curvature layers are hidden by default, because the Convolutional height map already captures sufficient detail on its own. To re-enable them, simply click the eye icon next to each layer's Strength slider.
-
Apply Settings
- Opens a confirmation dialog where you can choose which modifiers to apply to the mesh. Checked modifiers are applied permanently (baked into the geometry), while unchecked modifiers are removed. Use this when you are satisfied with your result.
Mesh Reconstruction (MoGe-2)
-
What it does
- Creates a 3D mesh from the MoGe-2 point cloud and imports it to Blender.
- The imported reconstruction is hidden automatically so your viewport stays clean. You can unhide it in the Outliner when needed.
-
Geometry limit
- Mesh density depends on image resolution, but Bildeform limits reconstruction to 3 million vertices for stability.
-
Best inputs for reconstruction
- Reconstruction works best on images that occupy most of the frame (no isolated subject with large black background). Therefore, we recommend activating it when you want results for a complete image, as shown in the video tutorial for the Bildeform version.
Performance Tips
-
GPU recommended
- AI inference is significantly faster on GPU. If you only have CPU, prefer smaller models.
-
Resolution matters
- 2K+ gives better details and cleaner curvature layers, but increases processing time.
-
Detail Level (MoGe tokens)
- Higher detail = more time. Use a lower value for previews and increase for final results.
Best Results: Image & Scene Guidelines
-
Safe zones / margins
- Safe borders reduce edge artifacts and improve mask accuracy.
- In Image mode, With Borders can help, but it does not guarantee perfect results on every input.
-
Background considerations
- If the background is visible, avoid pure white.
-
Choose the right kind of image
- High contrast subjects, clear silhouettes, and good lighting usually work best.
- If your image has almost no safe space, the AI mask may become inaccurate (too white or distorted).
-
Aspect ratio tip: Scale the plane to match your image
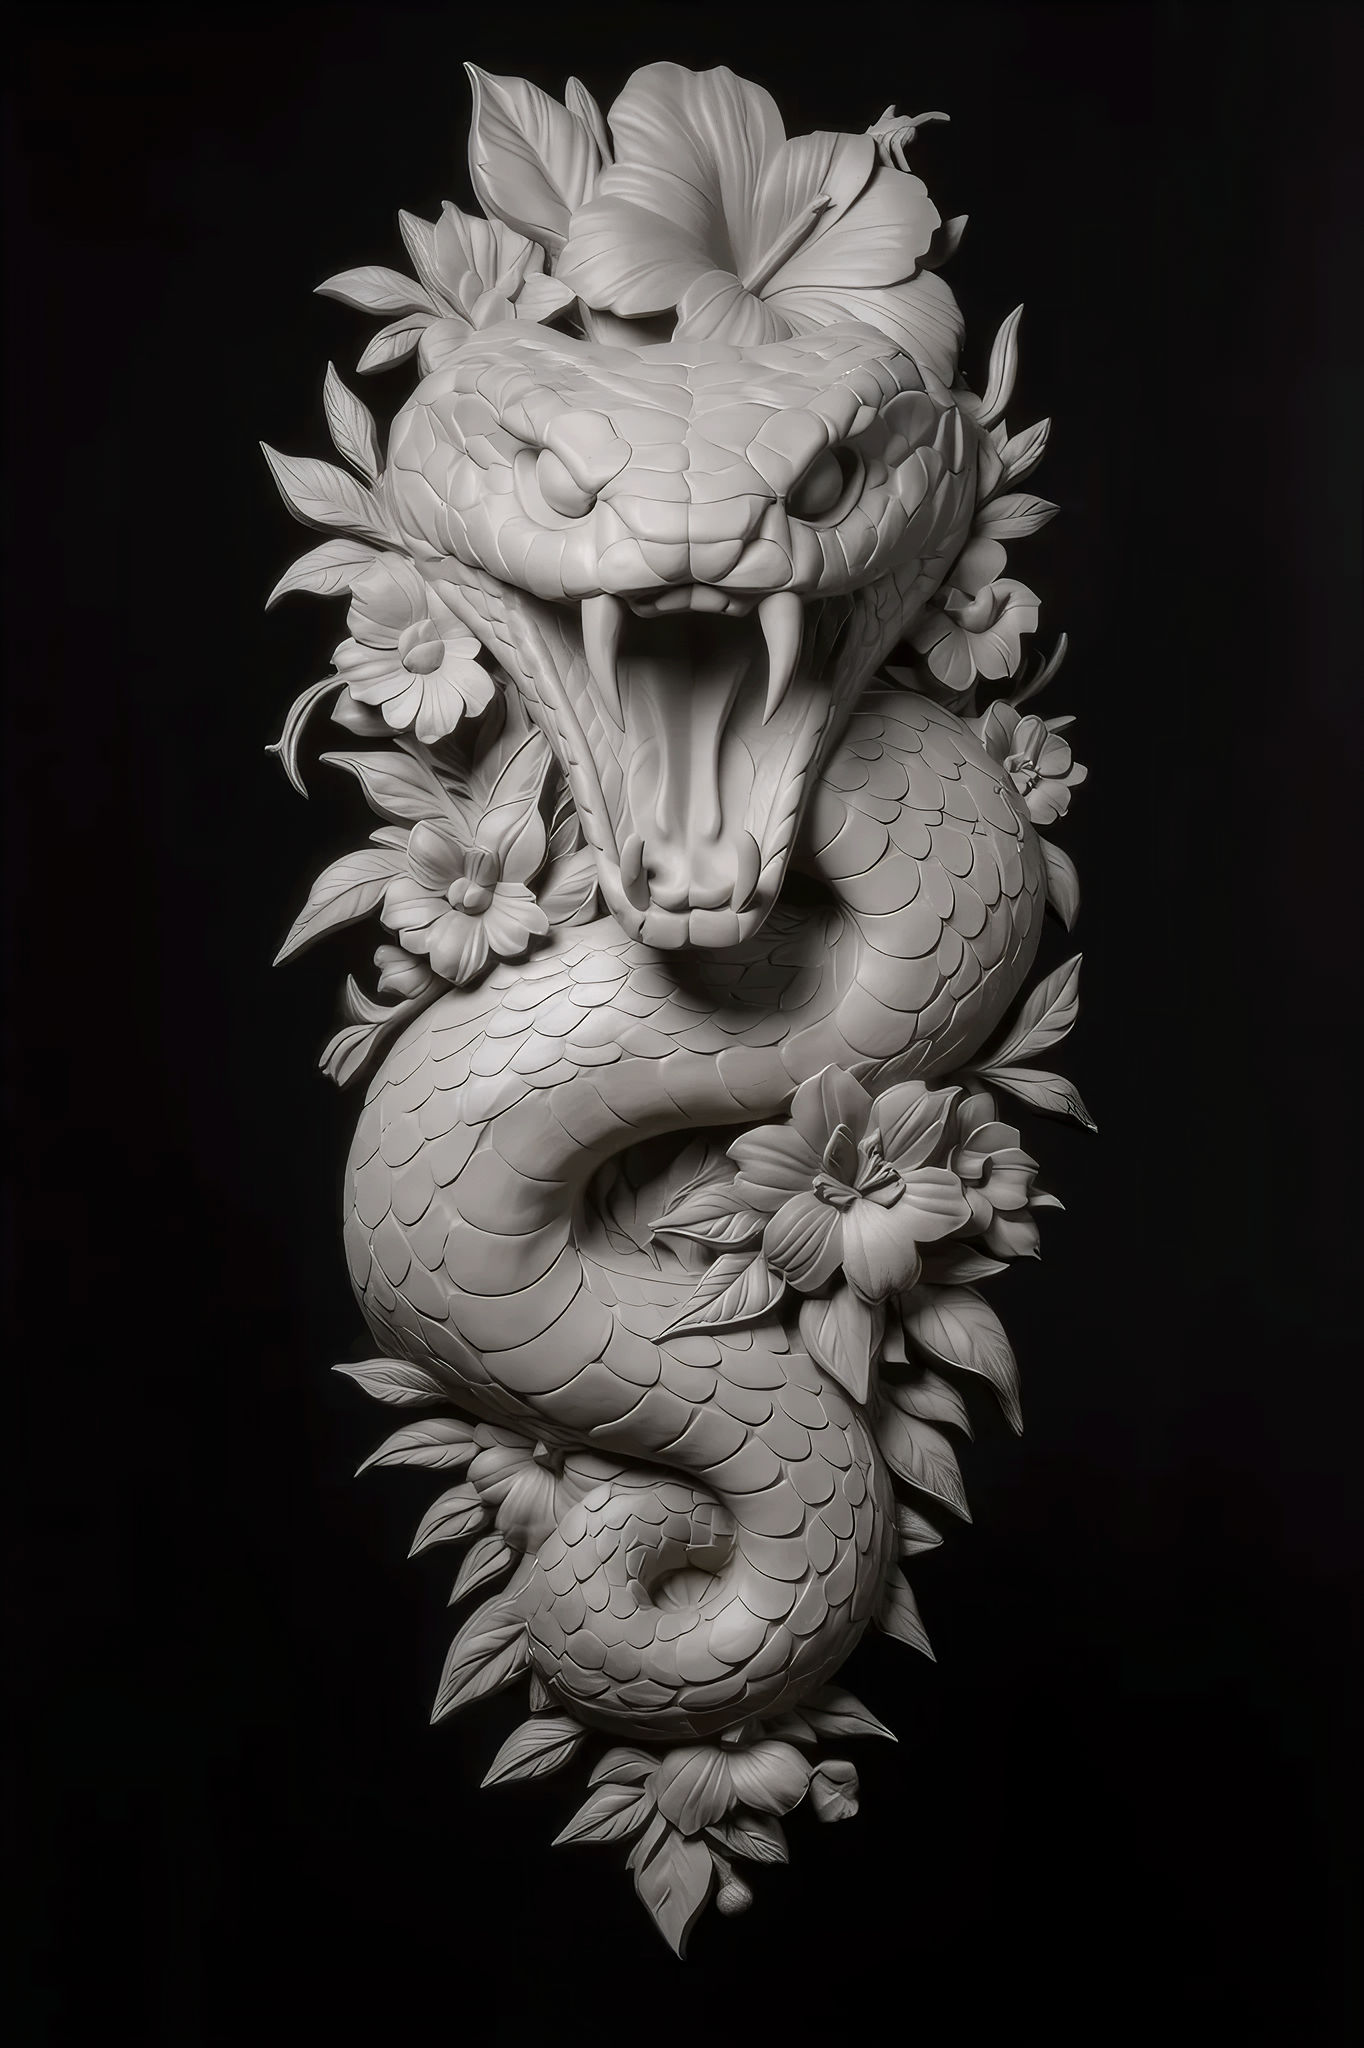
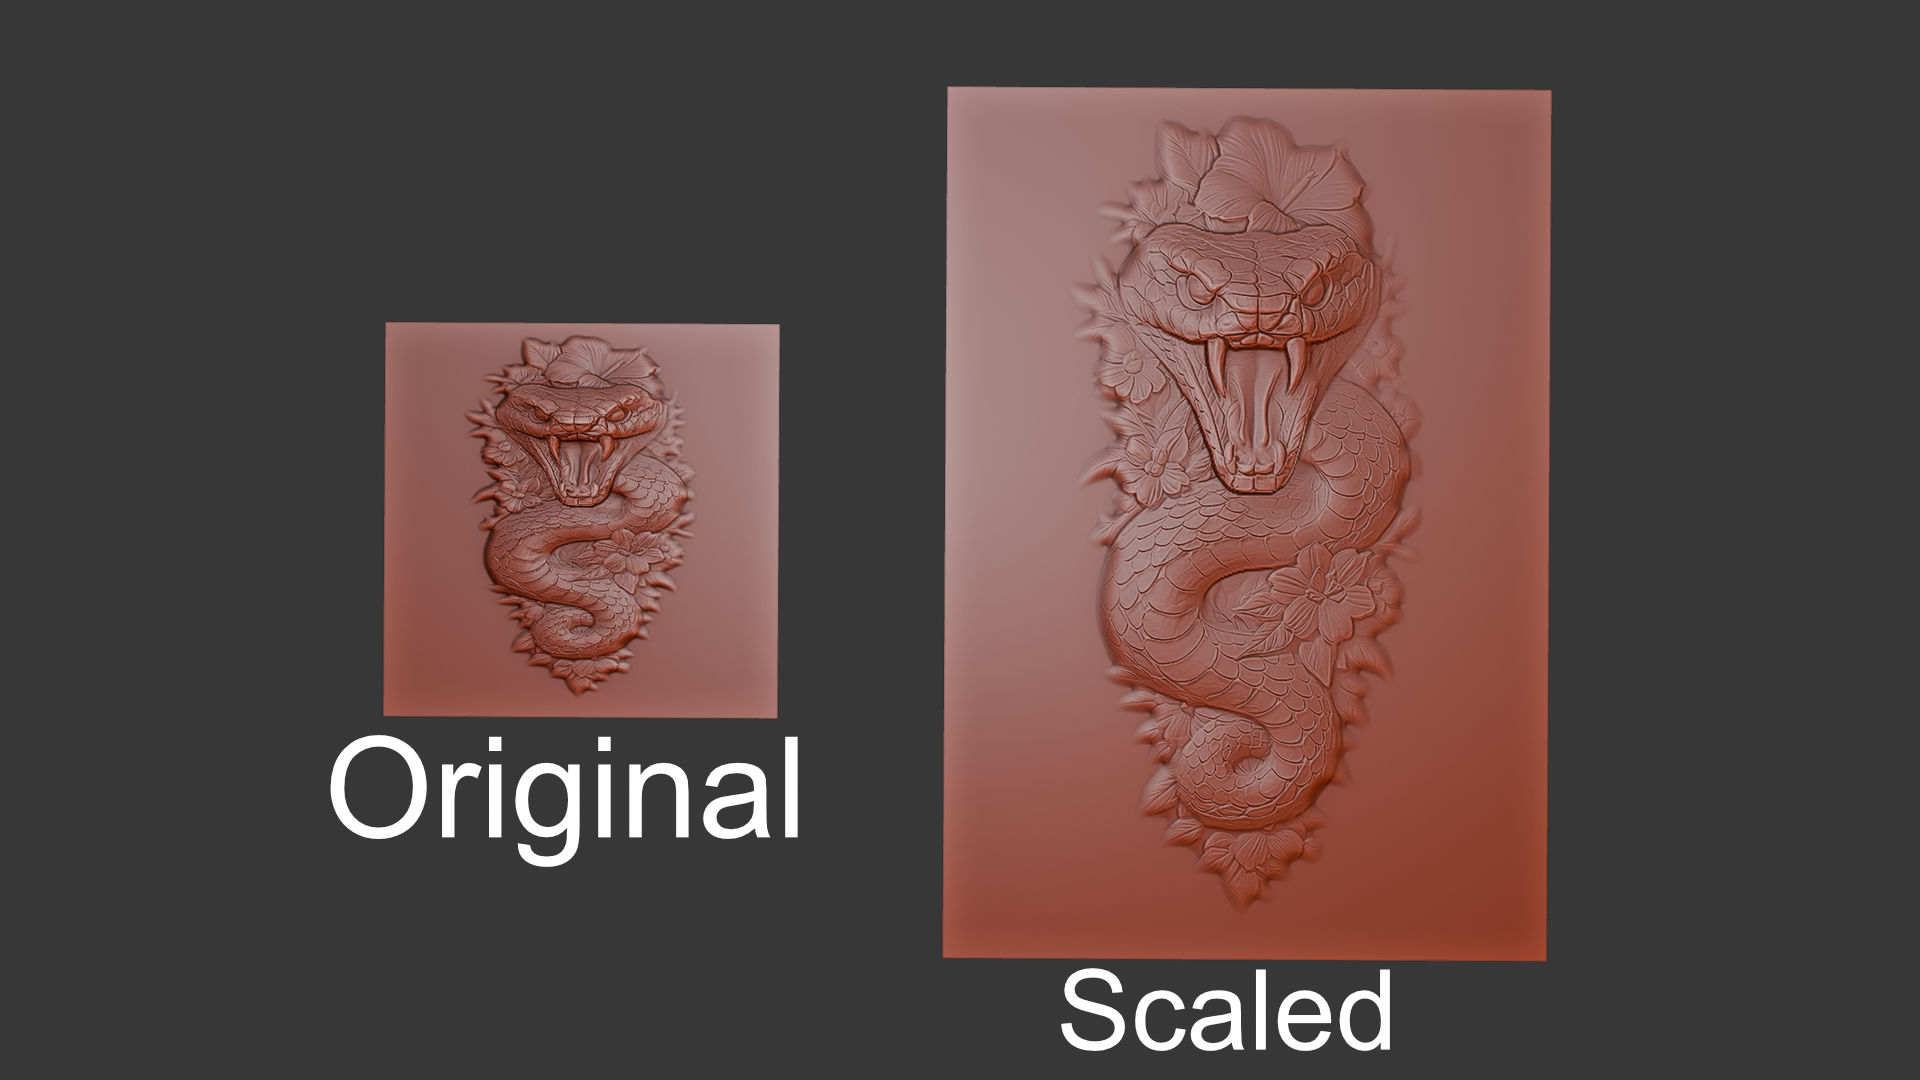
- When using Generate With Image, the Bas Relief plane created by the addon is square by default. If your input image has a 1:1 (or near-square) aspect ratio, the displacement will look correct right away. However, if your image has a tall or wide aspect ratio (e.g. 9:16 for Instagram/TikTok-style portraits, or 16:9 for landscapes), the displacement will appear compressed and distorted on the square plane because the texture is squeezed to fit the UV space.
- This is not a bug — it is simply how UV mapping works on a square plane. The fix is straightforward: scale the Bas Relief plane in Edit Mode or Object Mode so its proportions approximate the aspect ratio of your input image. For example, for a 9:16 portrait image, scale the plane's Y axis to be taller than its X axis.
- Below you can see the difference. On the left is the default square plane with the displacement compressed; on the right, the same plane scaled to match the input image's tall aspect ratio — the relief looks correct and proportional:
Input image (9:16 portrait):
Result comparison — Original square plane vs. Scaled plane:
-
Advanced: Hybrid workflow for perfecting bas reliefs from 3D models
- When working with Generate With 3D Model, you can significantly improve the final quality of your bas relief by combining Bildeform with a few extra steps in Blender. We highly recommend following this community tutorial step by step:
Improving bas relief from 3D Models using Bildeform, Blender add-ons and Photo Editing (by Art Squirrel Digital Art Blog) - The video covers two key techniques:
- Custom Cavity Map: Instead of relying solely on the curvature map generated by Bildeform, you can create your own cavity map directly in Blender's viewport using a specific MatCap and render settings. This produces smoother, more visually pleasing surface details that can replace or complement the default curvature layer.
- White Silhouette Trick: When your 3D model has fine edge details (teeth, horns, thin protrusions, etc.), these can sometimes get lost against a dark background during capture. The solution is to add a white border/silhouette around the model before processing it with Bildeform. This helps the depth map capture edge details much more accurately. The video shows how to achieve this using free Blender addons such as Camera Plane, Tessellate Texture Plane, and Trace Genius Ultimate.
- Why this matters: The author compares results between Bildeform (using the Kernel Approach) and a competing software called Relief Maker. Bildeform maintains a more uniform height across the entire model, while the competitor tends to deform or flatten certain areas when managing depth. The hybrid workflow shown in the video adds extra refinement steps for users who want maximum control over the final result.
- Bottom line: Bildeform handles the heavy lifting of generating the height map, depth map, and layer separation. These optional techniques let you fine-tune the last mile of detail, especially for complex 3D models with intricate silhouettes.
- When working with Generate With 3D Model, you can significantly improve the final quality of your bas relief by combining Bildeform with a few extra steps in Blender. We highly recommend following this community tutorial step by step:
Troubleshooting
-
My bas relief looks flat
- Increase Depth Map layer strength slightly, then adjust Height Map strength.
-
Too much noise / messy details
- Reduce curvature layer strength in the Bas Relief Settings, or try a higher SKO blur radius value in Layer Settings. At low resolutions (1K or below), noise is more likely. The final result can be refined by post-processing the surface in Blender's Sculpt mode, although you run the risk of losing detail if it is not done carefully.
-
Edges look harsh or cut
- Use safe borders, or enable falloff options when using DGP.
-
Generation is slow
- Use smaller AI models and lower MoGe detail for previews. Use GPU when possible. However, we cannot guarantee optimal and fast CPU performance.
Changelog
Version 2.5.3
- IMPROVED: Stability and Blender 5.2+ compatibility — internal update that makes the addon more stable and ensures full compatibility with Blender 5.2 and later versions. No new features or workflow changes.
NEW Version 2.5.1
- NEW: Four new Mode Generation algorithms:
- NI: DCT, NI: DST, and NI: FFT: Fast spectral solvers with different behaviors at the edges (perfect for general images or isolated subjects). Note that these methods may sometimes flatten the highest peaks of the resulting height map.
- Fuzzy: An advanced, noise-robust algorithm that uses fuzzy logic to handle imperfections in the normal map, resulting in very clean and smooth bas reliefs. Includes customizable parameters (Lambda, Adaptive, F-Transform).
- IMPROVED: SKO Curvature Map — Replaced the previous curvature generation method with a new algorithm that produces cleaner, more precise surface detail with significantly less noise. The old method tended to introduce excessive noise, especially at lower resolutions. The new approach captures edges and surface variations more faithfully, resulting in better detail for your bas reliefs.
- IMPROVED: SKI Cavity Map — Replaced the previous inverted sketch method with a dedicated cavity map algorithm that extracts surface concavity directly from the normal map. This produces smoother and more accurate fine detail compared to the old approach, which was prone to noise artifacts.
- NEW: Curvature (SKO) setting in Layer Settings — A new blur radius selector that lets you control how much the SKO curvature edges are smoothed. Choose between Smallest and Largest; we recommend values between Smallest and Medium for best results.
- NEW: Cavity Map (SKI) settings in Layer Settings — New Radius and Blur controls for fine-tuning the cavity map generation. Radius controls sampling distance; Blur applies subtle smoothing to the output.
- NEW: Combined SKI export — Added Combined SKI maps at 100%, 75%, 50%, and 25% intensity to the Export Maps dialog, bringing the total number of exportable maps to 17.
- Important: As with every part of Bildeform's workflow, the quality of the curvature and cavity maps depends directly on your input. Higher resolution images (2K+), using the best MoGe-2 model (Large), and the maximum Detail Level produce the best results.
Version 2.5.0
- NEW: Convolutional mode generation — a new height map algorithm based on FFT convolution that produces even, emboss-like displacement with faithful detail preservation. Faster and lighter than other methods. Works best with Generate With Image.
- NEW: Convolutional Settings panel with Backend, Samples, and Weight parameters for fine-tuning the convolutional algorithm.
- NEW: Viewport visibility toggle (eye icon) for each displacement layer. Quickly show or hide individual modifier effects in the viewport.
- NEW: Apply Settings confirmation dialog — select which modifiers to apply or discard before finalizing.
- When Convolutional mode is selected, Depth and Curvature layers are hidden by default (can be re-enabled via the eye icon).
Version 2.0.1
- Fixed critical macOS ARM64 compatibility issue with OpenCV
- Forced PNG 16-bit output format during rendering to prevent errors when other formats like OpenEXR are selected
- NEW: Added Filter Radius control for curvature maps anti-aliasing filter. Allows fine-tuning noise reduction while preserving details
- NEW: Extended export system to 13 images total:
- 5 individual maps: Height, Depth, Curvature BGP, SKO, SKI
- 8 combined maps: Height×Depth×Curvature at 100%, 75%, 50%, and 25% intensity for both SKO and BGP variants
- Combined maps provide single-displacement workflow with cleaner borders and less parameter tuning
- Different intensity levels (75%, 50%, 25%) help control overly strong details on high-contrast images
Version 2.0.0
- Two generation modes: Generate With 3D Model and Generate With Image (MoGe-2)
- NEW: Introduction of a new mode generation called DGP. It is much better than the other two, as it generates more realistic and accurate height maps. We recommend its primary use.
- Frequency separation workflow with multiple displacement layers (Height + Depth + Curvature)
- Depth map generation using Distill Any Depth (Large/Small)
- Curvature layers (BGP, SKO, SKI) with adjustable intensity
- Improved border handling and safe zone options
- MoGe-2 mesh reconstruction (imported hidden by default) with a 3M vertex limit
- Export system for Height, Depth, and Curvature maps
-
$28
All features included. Up to 5 members.
-
$39
All features included. Teams of more than five members. Purchasing it helps us with ongoing support and development.
Have questions about this product?
Login to message