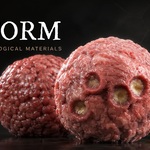
Bioform - Procedural Biological Materials
 Limitless Creative


1 · Installation
- Download the Bioform .zip from your Superhive downloads. Do not unzip it.
- In Blender, open Edit → Preferences → Add-ons → Install… and select the .zip.
- Tick the checkbox next to Bio Materials to enable it.
- In the 3D Viewport, press N to open the side panel and select the Bio Materials tab.
2 · Quick start
- Select the mesh object you want to shade.
- Open the Bio Materials panel and click a material thumbnail to apply it.
- Adjust the material's exposed parameters to taste (see the engines below).
- Render in Eevee or Cycles.
Bioform uses displacement-based shaders — the fine surface relief comes from true displacement, not just a normal map. To see it:
- Give the object enough geometry — add a Subdivision Surface modifier, or enable Adaptive Subdivision (Cycles, Experimental feature set).
- Set Material Properties → Settings → Surface → Displacement to “Displacement and Bump”. Without this, relief falls back to bump only.
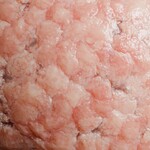
The Skin Engine
| Subsurface | Depth and softness of light penetration beneath the surface. |
| Pores | Density and depth of pore structure across the surface. |
| Vascularity | Strength and spread of the underlying vascular tint. |
| Tone | Overall skin colour. |
| Undertone | Warm/cool cast layered under the base tone. |
| Blemishes | Amount of imperfections, freckling and irregularity. |
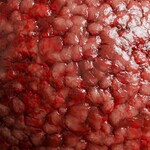
The Tumour Engine
| Growth / spread | How far the mass extends and how aggressively it spreads. |
| Irregularity | Lumpiness and asymmetry of the surface. |
| Vascularisation | Density of feeding vessels across the growth. |
| Necrosis | Amount of dead/decaying tissue and discolouration. |
| Scale | Overall size of the surface features. |
3 · The material library
Beyond the two engines, Bioform ships with a growing library of ready-to-use biological materials. Apply, tweak, render. Coverage spans tissue and organs, bone and cartilage, fluids, and a wide range of pathology. Each material is procedural, so every parameter stays editable and resolution-independent.
4 · Tips for close-up renders
- Keep the object's scale applied (Object → Apply → Scale) so procedural detail sits at the intended size.
- For extreme close-ups, increase subdivision so displacement stays crisp.
- Cycles gives the most accurate subsurface and displacement; Eevee is faster for look-dev and previews.
- Light with an HDRI for believable skin and wet tissue.
5 · Compatibility
| Blender | 5.x |
| Render engines | Eevee & Cycles |
| Material type | Displacement-based shaders |
| OS | Windows · macOS · Linux |
6 · Troubleshooting
Displacement isn't active. Add a Subdivision Surface modifier and set Material Properties → Settings → Displacement to “Displacement and Bump”.
Apply object scale, then use the material's Scale parameter to match your subject's real-world size.
Confirm Bio Materials is enabled in Preferences → Add-ons, then press N in the 3D Viewport and open the Bio Materials tab.
Lower the subdivision level for look-dev, and switch to Eevee while adjusting; raise subdivision again for the final Cycles render.
Support
For questions or issues, reach out through your Superhive purchase and we'll get you sorted.
-
$2.55 $3
Access to 3 Materials
-
$75.65 $89
Procedural Biological Materials
-
$101.15 $119
Full Library + Dermaform and Teraform Engines
Have questions about this product?
Login to message