 Ihlo
Ihlo


BlendFlow Documentation & User Guide
Welcome to the official documentation for BlendFlow. This guide will walk you through the installation, registration, and core workflows to master your animation timing and spacing directly in the viewport.
1. System Requirements & Quick Start
- Blender Version: Blender 4.2, 5.0, 5.1, or newer (Extensions format is required).
- Operating System: Windows, macOS, or Linux.
- Internet Connection: Required only once for initial license key activation.
Installation
- Download the
BlendFlow_v1.8.0.zipfile from your purchase page. - In Blender, go to Edit > Preferences > Add-ons.
- Click Install..., select the downloaded ZIP file, and enable the add-on.
Registration & Activation
- Once enabled, open the BlendFlow preferences card in the Add-ons menu.
- Enter your Gumroad license key or Superhive Order ID in the License Key field.
- Click Verify License to securely activate your device.
- (Alternatively), you can activate the add-on directly from the 3D Viewport sidebar (N-panel) under the BlendFlow tab.
2. Easing HUD Controls & Keyboard Shortcuts
To open the interactive Easing HUD, select any animated object or bone and press Alt + E in the 3D Viewport or Graph Editor. Below is the full shortcut layout:
| Shortcut / Action | Context | Description |
|---|---|---|
| Alt + E | Viewport / Graph | Open interactive Easing Curve HUD Editor (Modal Mode) |
| Alt + T | Viewport / Graph | Open interactive Tween HUD Slider (Modal Mode) |
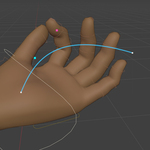
| Alt + E (on Path) | 3D Viewport Only | Activate/Deactivate Spatial Curve Edit Mode (Motion Path) |
| Alt + I | Path Edit Mode | Insert a new keyframe point at the cursor location on the curve |
| Alt + Backspace | Path Edit Mode | Delete the selected keyframe point from the path |
| Alt + R / Alt + S | Path Edit Mode | Interactive Rotation and Scaling of the Motion Path curve |
| Left Click (on path point) | 3D Viewport Only | Select point and jump playhead directly to its frame |
HUD Editor Modal Shortcuts
When the Easing HUD is active, use these keyboard modifiers to adjust the tangents:
- Mouse Scroll: Cycle through easing presets (Bezier, Elastic, Bounce, Linear, Constant).
- R: Reset handles to default tangents (0.25, 0.25 and 0.75, 0.75).
- M: Toggle Auto-Mirror (symmetric handles).
- S + Drag Mouse: Edit Easing Strength.
- Shift (Hold): Enable high-precision dragging.
- O: Toggle Allow Overshoot (bypasses boundary checks).
3. Spacing Marks & Speed Visualizer
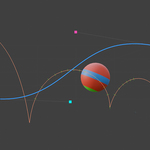
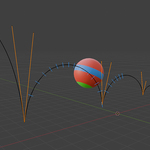
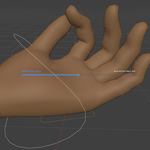
Spacing marks are visual ticks drawn along your 3D motion path. They show you exactly how fast your object is moving.
- Cluttered ticks: The object is moving slowly (ease-in / ease-out).
- Spread out ticks: The object is moving fast.
Adjusting Spacing Ticks
You can customize the appearance of the spacing guides inside the Viewport Interface Settings in the Add-on Preferences:
- Playhead Frame Range: Choose how many frames before/after the current frame will show ticks.
- Spacing Mark Size: Adjust tick line length.
- Spacing Mark Color & Thickness: Customize look to fit your viewport background.
4. Troubleshooting & FAQ
Once activated, the add-on stores a secure local cache file. You can work completely offline for up to 3 days before the system prompts for a quick background re-verification.
Q: Why does my motion path stop updating?
A: If the viewport freezes or the curve disconnects due to complex rig updates, click the Force Resync / Unlock Path button in the sidebar panel to rebuild the path connection.
Q: Can I use this on multiple computers?
A: Yes. Your purchase supports activation on up to 3 devices (workstation, laptop, home PC) for personal use.
Q: Does it work offline?
A: Yes, as stated in the notice above, the add-on will verify offline for up to 3 days before requiring a quick online verification.
 Included
Includes 12 months of
- Support from Ihlo
- Product updates
Extend this product’s Support Period +12 months: 50% of product price
Have questions before purchasing?
Login to message
| Blender Extension Compatible | Yes |
| Published | 3 months ago |
| Blender Version | 4.2 - 5.1 |
| Extension Type | Add-on |
| Render Engine Used | Cycles, Eevee |
| License | GPL |