Camera Director Pro
 Steven Seidler (Blendscapes3D)



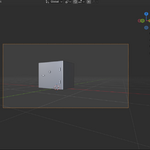
**Cinematic camera setups in one click.** Pick a shot type, click a button, get a perfectly framed camera with the right lens, composition, and physical sensor.
## What it does
| Feature | What it does |
|---|---|
| **Cinematic Presets** | 8 shot types (Close-Up, Medium, Wide, Drone, Dutch Angle, Low-Angle Hero, Top-Down, Over-Shoulder) — each with correct focal length and framing |
| **Rule-of-Thirds Composition** | Subjects auto-placed on thirds intersections (left, right, upper, lower) |
| **Physical Lens Library** | 8 real-world lens presets (24mm, 28mm, 35mm, 40mm Anamorphic, 50mm, 85mm, 100mm Macro, 135mm) — correct sensor + aspect ratio |
| **Camera Shake Library** | 5 shake styles (Subtle, Handheld, Vehicle, Earthquake, Explosion) — additive f-curve noise modifiers, stackable, non-destructive |
| **Auto-Frame Selection** | Reposition active camera to frame selected objects with chosen composition |
| **Multi-Cam Switcher** | Bind cameras to timeline markers → Blender switches automatically during playback/render |
| **New Camera from Viewport** | One click to create a camera matching your current 3D view |
## Install
1. Download `CameraDirectorPro-1.0.0.zip` from your Gumroad receipt
2. In Blender: **Edit → Preferences → Get Extensions → drop-down (top-right) → Install from Disk**
3. Pick the `.zip`
4. Open a 3D Viewport → press **N** → click the **Camera** tab
Requires **Blender 4.2 or later**. Tested through 5.1.
## Usage
### Quick cinematic shot
1. Select your subject object(s)
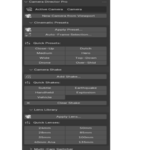
2. N-Panel → **Camera** tab → **Cinematic Presets** section
3. Click one of the quick buttons (Close-Up / Medium / Wide / Drone / Dutch / Hero / Top-Down / Over-Shld)
4. A new camera appears, framed correctly, with the right lens — done
### Precise framing
1. Click **Apply Preset...** for the full dialog
2. Choose preset, distance multiplier, rule-of-thirds toggle
3. Choose "Create New Camera" or reposition the active one
### Add shake
1. Set the active camera
2. **Camera Shake** section → click a quick button (Subtle / Handheld / Vehicle / Earthquake / Explosion)
3. Or click **Add Shake...** for intensity slider and optional frame range with auto blend in/out
### Swap lens
1. **Lens Library** section
2. Click the focal length you want (24mm through 135mm) — sensor and aspect adjust automatically
### Multi-cam setup
1. Create multiple cameras (use presets + viewport)
2. Jump to a frame, set the camera you want active, click **Bind Here**
3. Repeat for every cut point
4. Blender will automatically switch cameras during playback and render
## Configuration
**Edit → Preferences → Add-ons → Camera Director Pro**
- **Default Framing Distance Multiplier** (default: 1.0) — global zoom-out if you want everything further back
- **Insert Keyframes When Applying Presets** (default: OFF) — turn ON to auto-keyframe transform
- **Auto-Bake Shake** — reserved for future versions
## Compatibility
- Blender **4.2** through **5.1+**
- Windows, macOS, Linux (pure Python)
- Works with Eevee, Cycles, and Workbench
- Non-destructive: all shake modifiers can be removed with one click
## Support
Email: [email protected]
## License
GPL-2.0-or-later. See `LICENSE`.
$6.49
Have questions about this product?
Login to message
| Blender Extension Compatible | Yes |
| Sales | 10+ |
| Published | 5 months ago |
| Blender Version | 4.2 - 5.1 |
| Extension Type | Add-on |
| Render Engine Used | Blender-Game-Engine |
| License | GPL |