| Thank you for using Camera & Render Suite!
This guide will walk you through installation, workflow, and the advanced features of the 7 modules. 1. Installation
- Go to Edit > Preferences > Add-ons.
- Click the Install... button at the top right.
- Navigate to where you saved the Camera_Render_Suite.zip file and select it.
- Enable the add-on by ticking the checkbox next to its name.
- The panel will appear in the 3D Viewport Sidebar (Press N) under the tab Camera Suite.
|
2. Quick Start Guide
| Create a professional product shot in under 60 seconds: -
Setup World: Open the "Studio Setup" panel and click
Setup HDRI World. This creates a clean background and lighting environment. -
Frame Subject: Select your object. In "Camera Control", click
Center Model to instantly frame it. -
Add Lighting: In "Light Tools", click
Create 3-Point Lights. Key, Fill, and Rim lights will be generated targeting your object. -
Animate: Open "Animation", select a template like Spinning, and click
Create Animation. -
Render: Go to "Batch Render Manager", switch to the Settings tab to set your path, then click
Render All Checked. |
3. Modules Explained
01. Studio Setup Controls for the environment, background, and diagnostic views. -
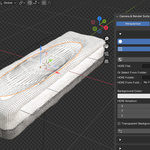
Clay Render Mode: Overrides all materials with a grey clay shader. Check Show Wireframe to add a technical wireframe overlay.
-
HDRI Management: Select a folder to auto-populate the list. Changing the HDRI Rotation slider rotates the environment in real-time.
-
Shadow Catcher: Select the floor plane and toggle this to make it transparent but receive shadows (ideal for compositing).
|
02. Light Tools Interactive placement and management of scene lights. Interactive Placement (Point, Spot, Area, Sun) When you click one of the light buttons, a temporary "Placer" object appears at your mouse cursor.
Controls during placement: -
Mouse Move : Move light over surface (snaps to normal).
-
Scroll : Adjust distance from surface.
-
Left Click : Lock Position. Enters rotation mode.
-
Scroll (Locked) : Rotate/Tilt the light.
-
Left Click (Locked) : Confirm and create light.
-
Right Click : Cancel.
|
Light List Use the list to toggle visibility, select, or delete lights without using the Outliner. The sliders below the list (Energy, Radius, Size) affect the active light in the list. |
03. Photography DSLR-style controls for the camera. -
Exposure: Controlled via
ISO, Aperture, and Shutter Speed. Uses real-world math. -
White Balance: Enable to tint the render. Useful for correcting warm/cool HDRI lighting.
-
Depth of Field:
Focus on Active sets the focus distance to the origin of the selected object. -
Motion Blur: Linked to the Shutter Speed. A speed of
1/50 yields more blur than 1/500. |
04. Object Rotation & 05. Camera Control -
Object Rotation: Rotates the selected object in Local Space relative to the camera view. Use
Reset to clear these specific rotation tweaks. -
Controller Presets: Saves the Camera transforms, Light transforms, and Object transforms into a JSON file. Use this to save "Angles" or "Setups" that you can swap between instantly.
|
06. Animation System The core procedural animation engine. Templates & Workflow - Select the object(s) you want to animate.
- Choose a Template (e.g., "Spinning") or configure settings manually.
- Click
Create Animation. This creates a Rig Object (Empty) as the parent. The animation lives on this Rig. Key Features -
Speed Multiplier: Adjusts the duration. 2.0x makes the animation twice as fast.
-
Boomerang: Appends a return animation (A -> B -> A).
-
Track Target: Forces the camera to track the pivot/object.
Path Animation Enable Use Path Animation and select a Curve object. The Rig will travel along this curve. -
Fixed Position: The object slides along the path based on the animation percentage (0% to 100%).
-
Follow Curve: The object rotates to face the direction of travel.
-
Boomerang Flip: If using Boomerang, the object will physically turn 180° to face backward on the return trip.
Camera Sequencer Allows switching between multiple cameras during a single animation timeline. -
Bind Checked: Adds markers to the timeline for selected cameras.
-
Mirror Checked: Adds a second marker for the return trip (if using Boomerang logic).
| Timing Pro-Tip: With 3 cameras on a 120-frame timeline, avoid dividing by 3. Since the first camera starts at frame 1, divide the sequence by 2 (e.g., set markers at frame 50 and 100). This ensures proper spacing and leaves a buffer for the final shot. |
|
07. Batch Render Manager Automate rendering multiple angles or animations. Interactive Crop Click the Crop icon (magnifying glass) in the panel. -
Draw Box: Click and drag in the 3D Viewport to draw a rectangle.
-
Release: The camera will move and the resolution (X/Y) will automatically update to match the box aspect ratio.
Render Queue - Click
Sync Scene Cameras to populate the list. - Check the boxes for cameras you want to render.
- Choose Mode: IMAGE (Single Frame) or ANIMATION (Frame Range).
- Go to Settings tab to set the output path.
- Click
Render Checked. |
4. Troubleshooting & FAQ
- Q: My objects flew away when I clicked "Create Animation".
A: This happens if objects already have parent inverses or constraints. Select the objects, press Alt + P > Clear and Keep Transformation before creating the rig. - Q: The Render Queue is empty.
A: Click the "Sync" button (refresh icon) next to the list to detect all cameras in your scene. - Q: How do I delete an animation rig?
A: Select the Rig (the Empty object) or any child object and click Delete Animation in the panel. Do not just delete the object, or constraints may remain on the camera. - Q: Path Animation is sliding sideways.
A: Try changing the "Forward Axis" or "Up Axis" in the Path Animation settings until the orientation is correct. |
5. Support
| If you encounter a bug or need help, please contact the developer. Email: [email protected] |
|
 MarkoPetrush