 SpiffyJon


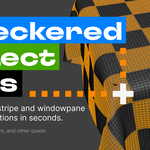
What does Checkered Select Plus do?
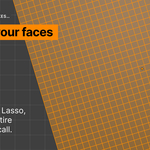
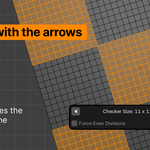
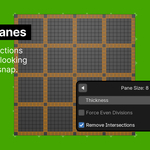
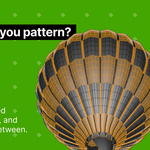
It selects faces in a repeating pattern across an area you specify. Checkerboard, stripes, or a windowpane grid. The addon lets you control how big the pattern is, and your selection/pattern updates live as you adjust it. From there you can do anything Blender lets you do with a face selection. Assign materials for a tablecloth or a tiled floor, extrude for quilting or panelling, inset for tile grout, delete faces for a lattice or a grille, or hand the selection off to a modifier.
How is this different from Blender’s other selection tools?
Blender gives you Select Random, Select Mirror, Select All by Trait, Select Similar, and Checker Deselect. Those either work one face at a time or pick faces based on something the faces already share, like material or size. None of them let you lay down a repeating pattern of your own across an area. Checkered Select Plus lets you decide the pattern and its scale.
How is this different from Blender’s built-in Checker Deselect specifically?
Blender’s default Checker Deselect works face-by-face, so your checkers are always single faces. This tool makes patterns out of multiple faces, so a single checker can be 5 x 5 or 20 x 20 faces for example. That’s what you need for a real checkerboard look on a dense mesh, and the addon creates stripes and windowpane patterned selections just as easily.
Can I make other patterns besides checkers?
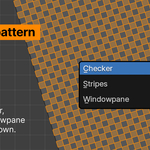
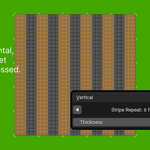
Yes. Checker gives you alternating squares. Beyond that, stripes give you parallel bands, either horizontal or vertical. Windowpane gives you crossing horizontal and vertical lines, like a grid laid over the surface.
Where do I find it?
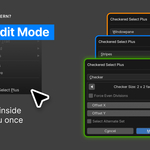
In Edit Mode, go to the Select menu. It’s at the bottom.
Does it work on deformed meshes, like a cloth simulation?
Yes. Because the tool follows the mesh’s own grid rather than its position in space, the pattern stays correct no matter how bent the surface is. Re-unwrapping the mesh doesn’t break it either.
Do I need to UV unwrap my mesh first?
No. The tool reads your mesh’s own structure, meaning how the faces connect to each other, so it works on any grid of quads whether or not it has a UV map.
Does it modify my mesh?
No. It only changes what you selected. Your geometry, materials, and UVs are untouched, and Cancel reverts your original selection back exactly as it was.
Does it work on triangles or n-gons?
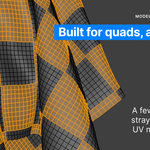
It’s built for quads. Stray triangles and n-gons get skipped rather than breaking anything, but a mesh that’s mostly non-quads won’t work as well.
Does my selection have to be a perfect rectangle?
No. Holes, ragged edges, L-shaped regions, etc. all work. If your selection covers two separate patches, it patterns the larger one and tells you how many faces it skipped.
Can I use it on several objects at once?
Checkered Select Plus works on the active object only. If you’re in multi-object edit mode, it’ll tell you which object it’s using.
What are Offset X and Y for?
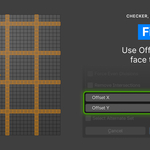
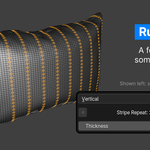
They slide the whole pattern selection over one face at a time. Useful when you want the pattern to start at a particular corner, when it just looks off center, or when a pattern wrapping a rounded shape like a pillow doesn’t line up at the seam. Nudging the offset shifts where the pattern sits until the two sides meet cleanly.
How do I make my pattern perfectly even, or line up correctly?
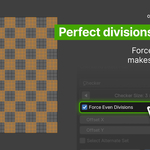
There are two things people usually mean here. If the checkers or stripes come out different sizes, with a half sized one stranded at the edge, turn on Force Even Divisions. The arrows will then only offer sizes that fit your selection exactly, so every checker, stripe, or pane comes out identical and the pattern repeats cleanly all the way across.
If the pattern is even but doesn’t wrap neatly around a rounded shape like a pillow, where the two sides meet at the seam, use Offset X and Y instead. Nudging the offset a face at a time shifts the whole pattern until the seam lines up the way you want. Force Even Divisions is switched off on wrapped shapes like these, since there is no flat edge for it to work against, so offset is the tool for lining those up.
Why is Force Even Divisions greyed out?
Force Even Divisions keeps a pattern from leaving a partial checker at the edge of your selection. A wrapped surface like a pillow has no edge for that to happen at, so the option doesn’t apply and is switched off. The regular size arrows still work as normal.
Why do the left and right arrows stop?
You’ve reached the smallest or largest size available for your selection. If both are greyed out at once, turn off Force Even Divisions. That setting limits you to sizes that divide your grid perfectly, and some grids only have one such option.
Nothing happens, or I get an error. What's wrong?
Usually one of three things. You’re not in Edit Mode, you haven’t selected any faces yet, or your selection is smaller than 2 x 2 faces. If it says it can’t read a grid, press Shift + N to recalculate normals, which fixes it most of the time. The error messages tell you what to try in each case.
How do I actually apply material to a selection?
Checkered Select Plus only makes selections. It never applies materials or changes anything on its own. Once you make a selection, what happens next is entirely your choice. You might assign a material, modify the geometry, delete faces, extrude, or anything else Blender lets you do with selected faces.
$7.99
 Included
Includes 12 months of
- Support from SpiffyJon
- Product updates
Extend this product’s Support Period +12 months: 50% of product price
Have questions before purchasing?
Login to message
| Blender Extension Compatible | Yes |
| Published | about 2 months ago |
| Blender Version | 4.2 - 5.2 |
| Extension Type | Add-on |
| Render Engine Used | Cycles, Eevee |
| License | GPL |