CoreTools - MKit
 WalkingAloneStudio


Addon
Installation:
To
install the addon simply follow the default procedure for Install
from Disk
If
tool doesnt appear on toolbar in mesh edit mode - check Add-ons tab
in preferences and search for "Loop Cut". Make sure what
addon is enabled.
2 Point Align / 3 Point Align
Activate
the tool by pressing a button. Hover mouse over object you want to
align, and start picking 2 points by pressing LMB. You can freely
rotate your camera, or enable X-Ray mode during points picking.
When
2 points on source mesh is set, pick 2 other points on any other
meshes in the scene. Then 4th point will be set - aligment would happen automatically.
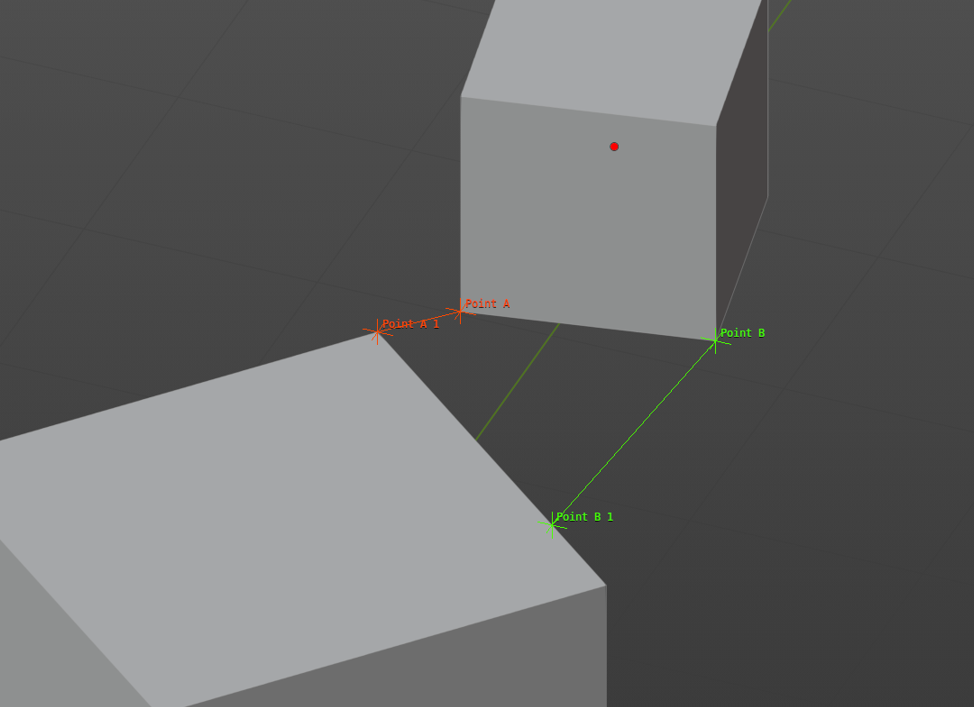
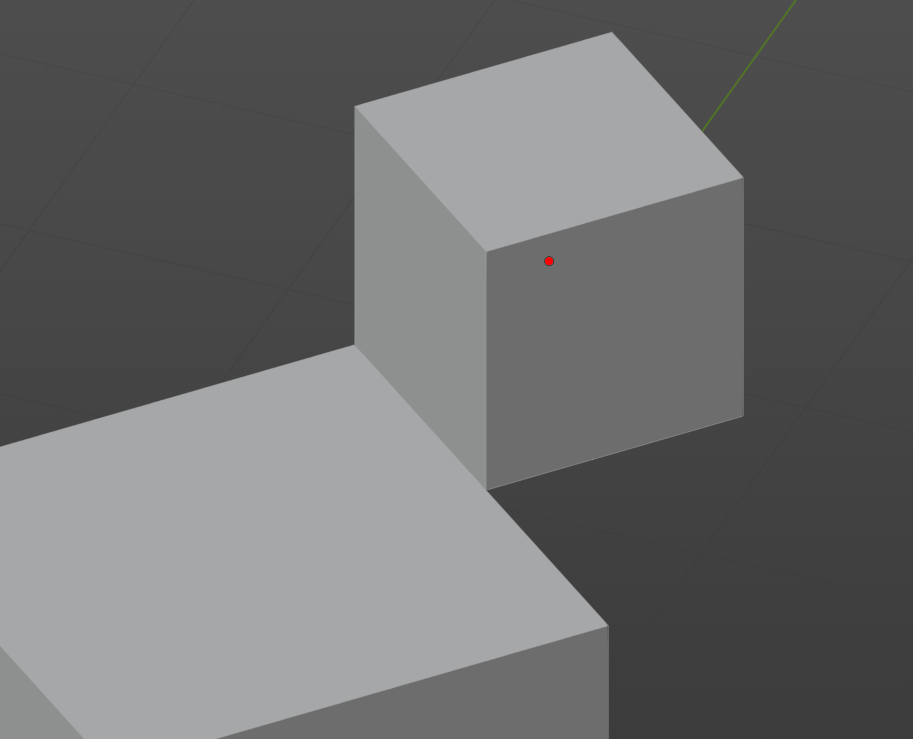
Notice what after alignment, “Point A” and “Point A 1” positions will be matched precisely. Points "B" and "B 1" only define rotation which would happen around "Point A".
3 Point Align
Pick 3 points on a source mesh, and then 3 points in any meshes in the scene to perform a full aligment. “Point A” and “Point A 1” positions will be matched precisely the same was as for 2 Point Align.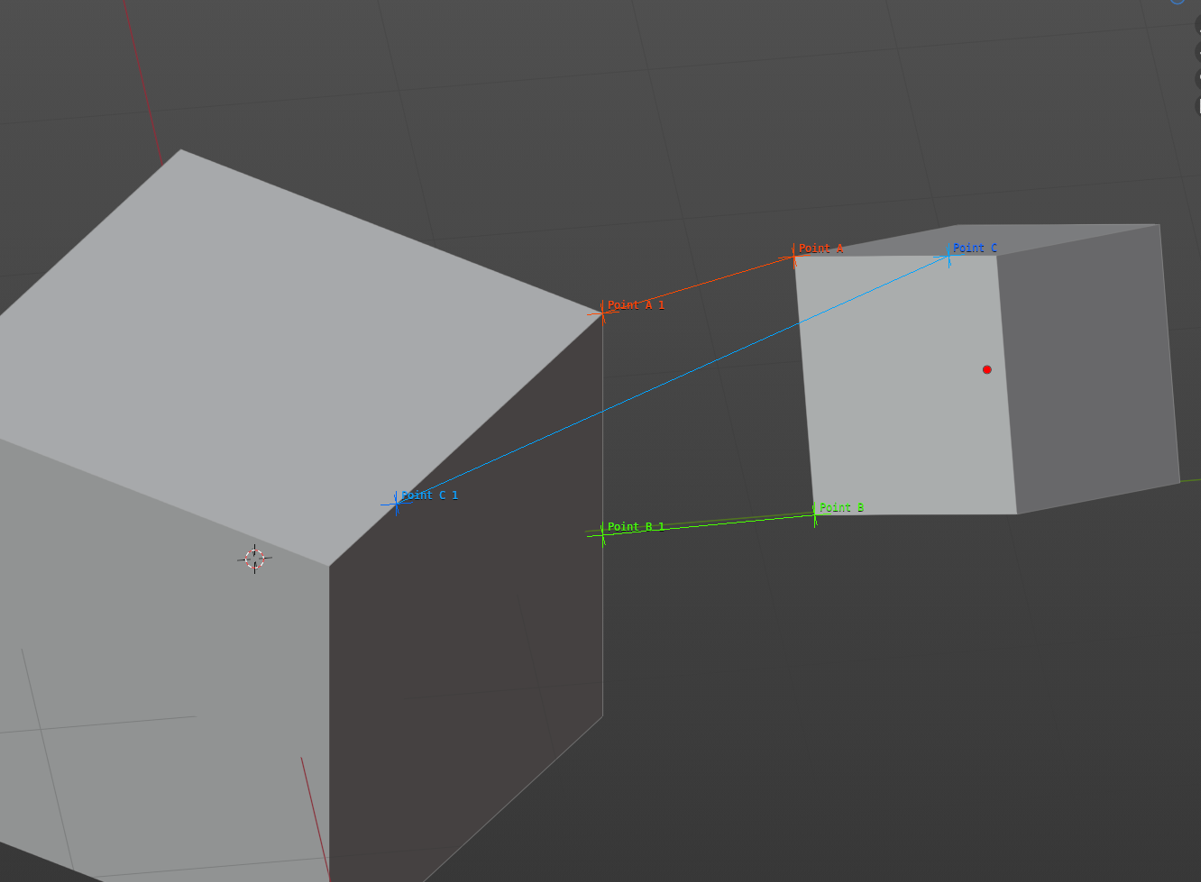
Look At Align / Look At Axis
Select objects you want to align, then select target ("Active" object) mesh and press "Look At Align" button. Object will be rotated in a way their picked forward axis is look toward target object Origin.
"Forward Axis" - is determine in which direction your object are looking at. Example: If you have a car model and fron of the car are looking to Y positive axis, then Forward Axis for your car modes is - "Y".
"Lock Up Axis" - if enabled, then your object rotation will be restricted to this specific axis. Example: If your car model roof is looking to Z positive axis, then Up Axis for your car is - "Z", and after aligment, can will be rotated only around its "Z" axis like if it would be a door hinge.
"Use Target Z" - if enabled, then target object local "Z" axis will be used instead of World Z axis.
"Look At Cursor" - perform the same aligment for all selected objects (including "Active") but using 3D Cursor location instead of other objects.
Look At Axis
"Lock Up Axis" - if enabled, then your object rotation will be restricted to this specific axis.Performs alignment in a way when selected objects look perpendicular to axis defined by 2 picked points.
Place Highlight
Pick any light source you want to align, activate the tool by clicking "Place Highlight" button. Hover mouse over any mesh in the viewport and press'n'drag LMB. Selected light source will be aligned in a way when specular highlight will appear right under mouse cursor position.Place Object
Pick any object which can be Mesh, Empty, Curve or Light, and activate the tool. Object will be placed on the surface under mouse cursor. You can use Ctrl+Z to undo object spawn.Replace Objects
Select objects you want to replace, then select a source ("Actrive" object) and press "Replace Objects". Selected objects will be replaced."Linked Duplicate" - create a Linked duplicates instead of regular copies.
Spawn on Faces
Go to "Edit Mode", select faces on which you want to spawn an objects. Hold "Ctrl" and LeftClick on any mesh in the viewport, then press "Spawn on Faces" button."Use Tangent" - align spawned objects to faces tangents.
"Linked Duplicate" - create a Linked duplicates instead of regular copies.
"Scale by Face Area" - try to match spawned objects to the size of the faces.
Vertex Bisect
Go to "Edit Mode", select faces which you want to bisect and press "Set Faces" button. If you not sure which faces are currently picked for bisecting, press "Retrieve Faces" which will clear all current selection and select all faces which is currently set for bisection.
Then switch to "Vertex" mode and select some vertices. Press "Bisect" button to see the result. Mesh will be bisected by multiple invisible planes based on selected vertices.
Change "Plane" and "Space" setting in Undo-Redu panel as needed.
"Plane" - XY, YZ, XZ set virtual planes normal. View V (V - Vertical) / View H (H - Horizontal) - orient planes vertically or horizontally in screen-space.
"Space" - Local is using object local rotation. World - use world axis.
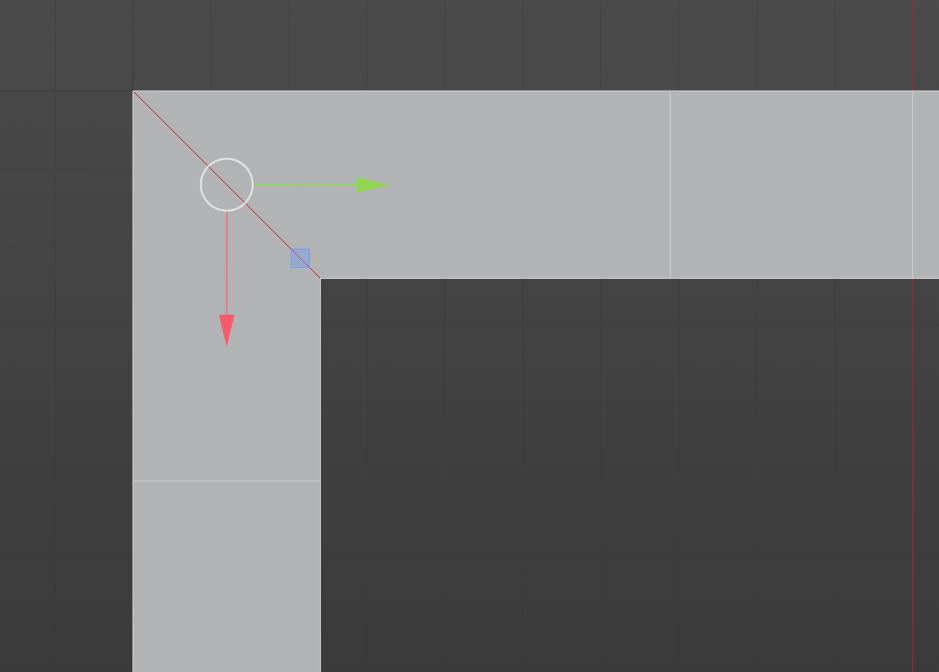
Fix Corner / Create Corner
Go to "Edit Mode", select edge which form a "corner":
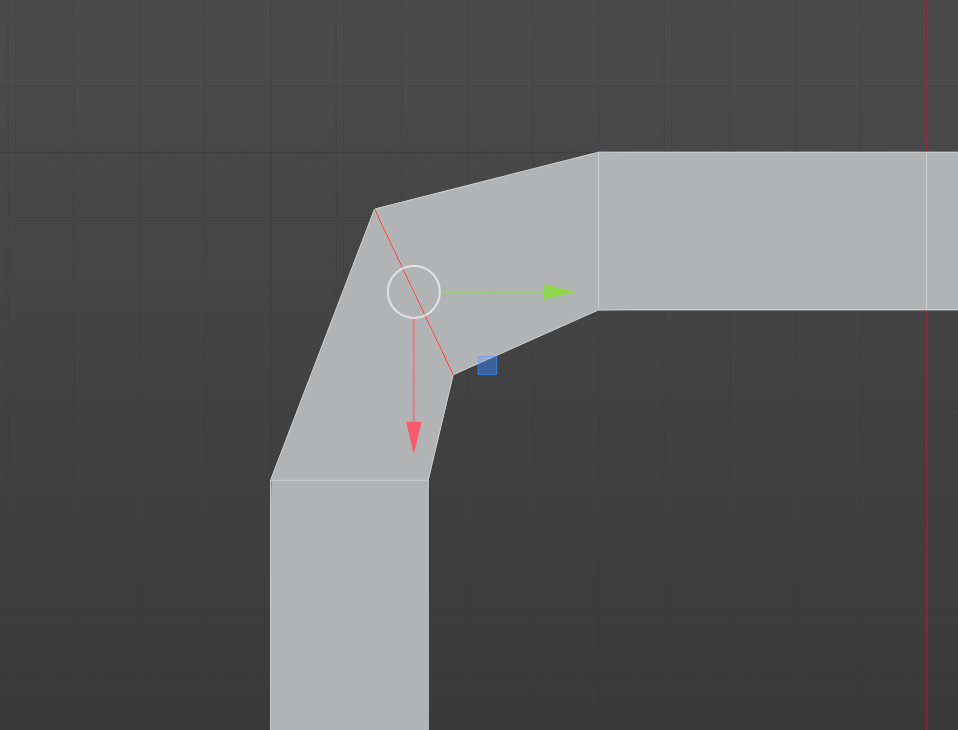
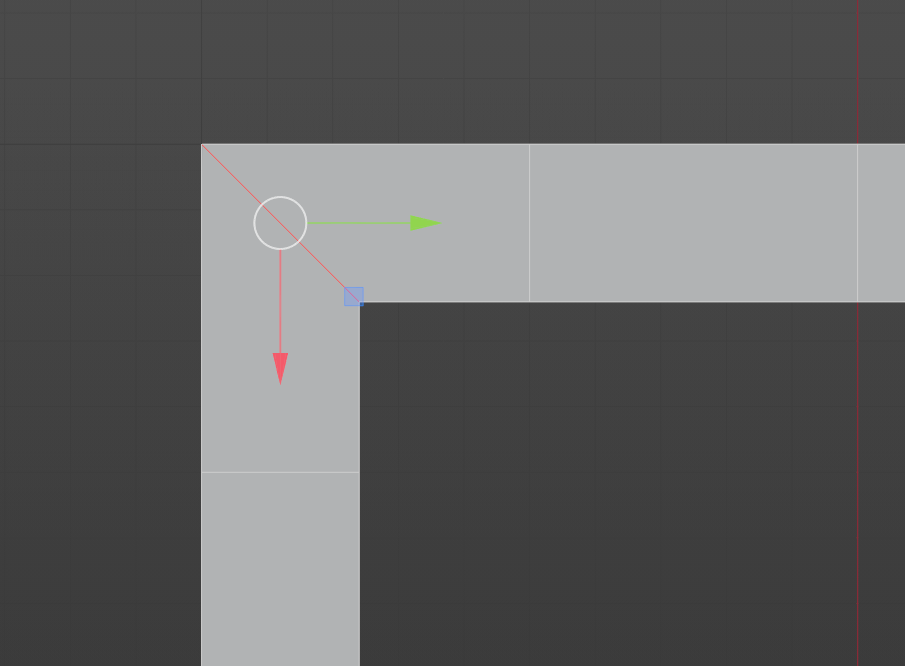
You can create new "corner" by using "Create Corner" function.
Select 2 non-connected edges:
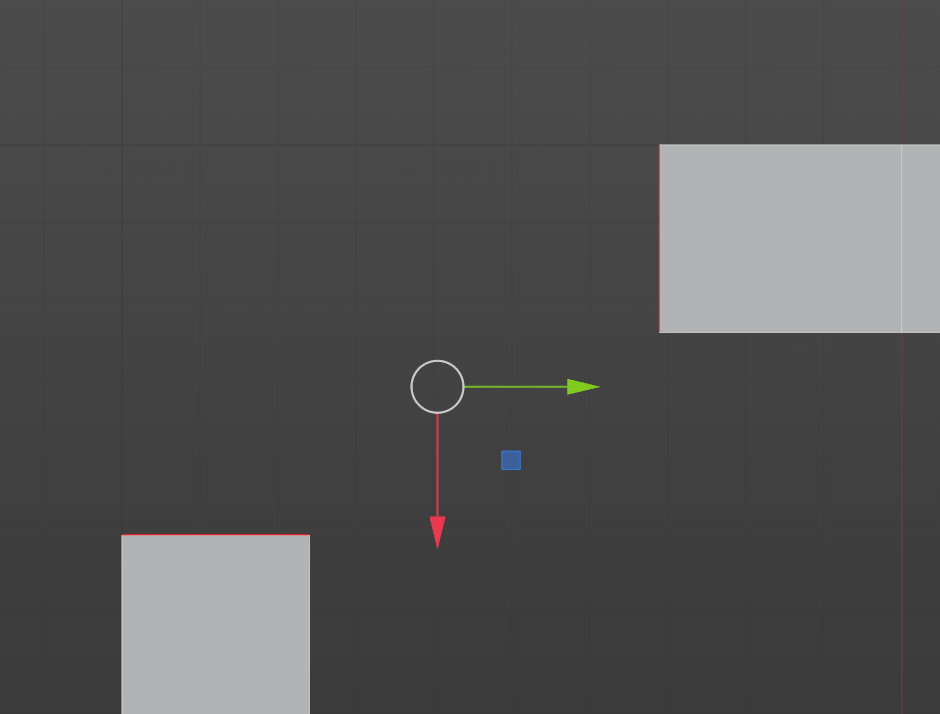
And press "Create Corner":
The new 2 faces will be created and "bridge" 2 edges automatically.
Edge Length
"Add or Subtract" - where each edge length will became larger or smaller.
"Set" - where length for each edges will be replaced by new value.
"Scale" - where edges will be scaled.
"Offset" - where edges will be moved/"shifted". Notice what "offset" mode are mandatorily require edges to have a "Pins" on one side which is needed to determine direction for offsetting.
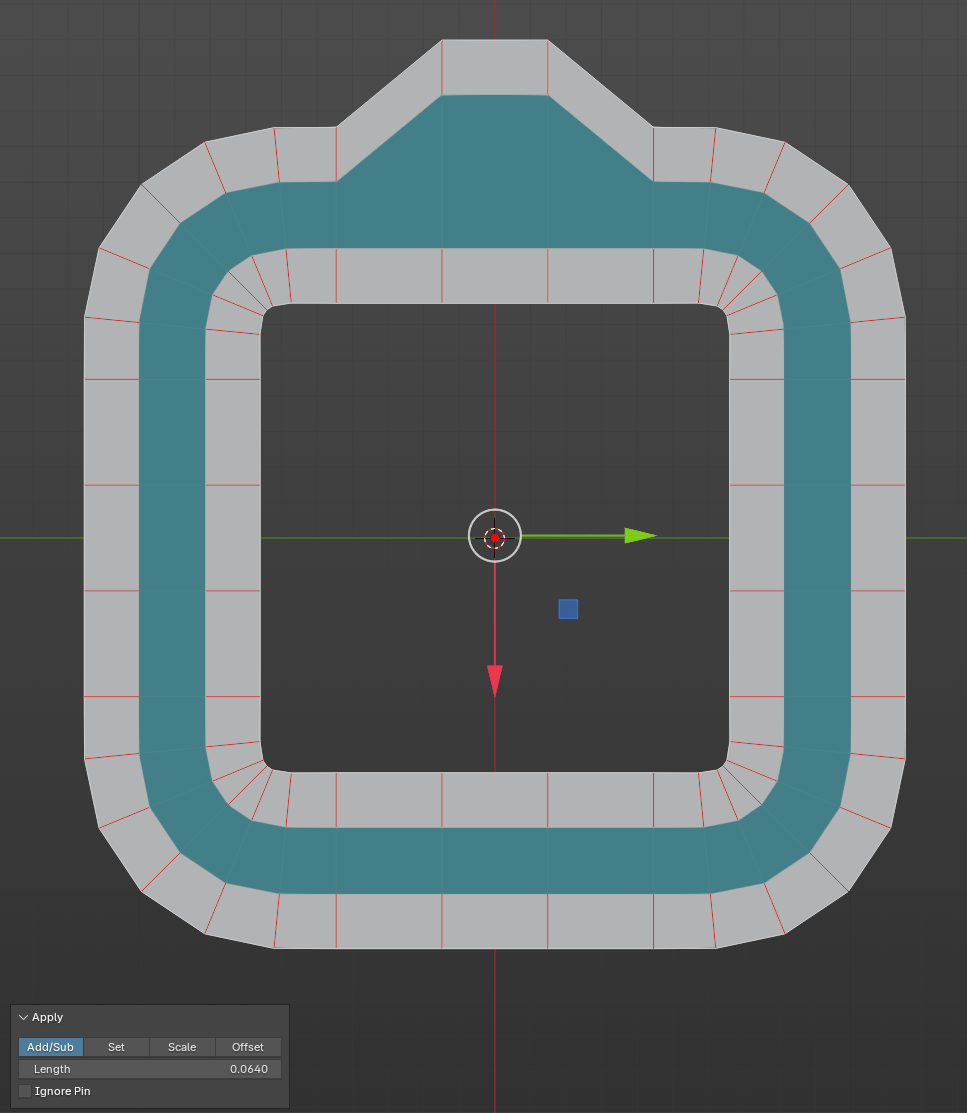
By default without "Pins" all operations (excluding "Offset") would change edges length from their center, i.e. the center between each edge vertices:
Here a "blue" object represent original mesh, and "white" was altered by using "Add/Sub" mode. No "Pins" was used.
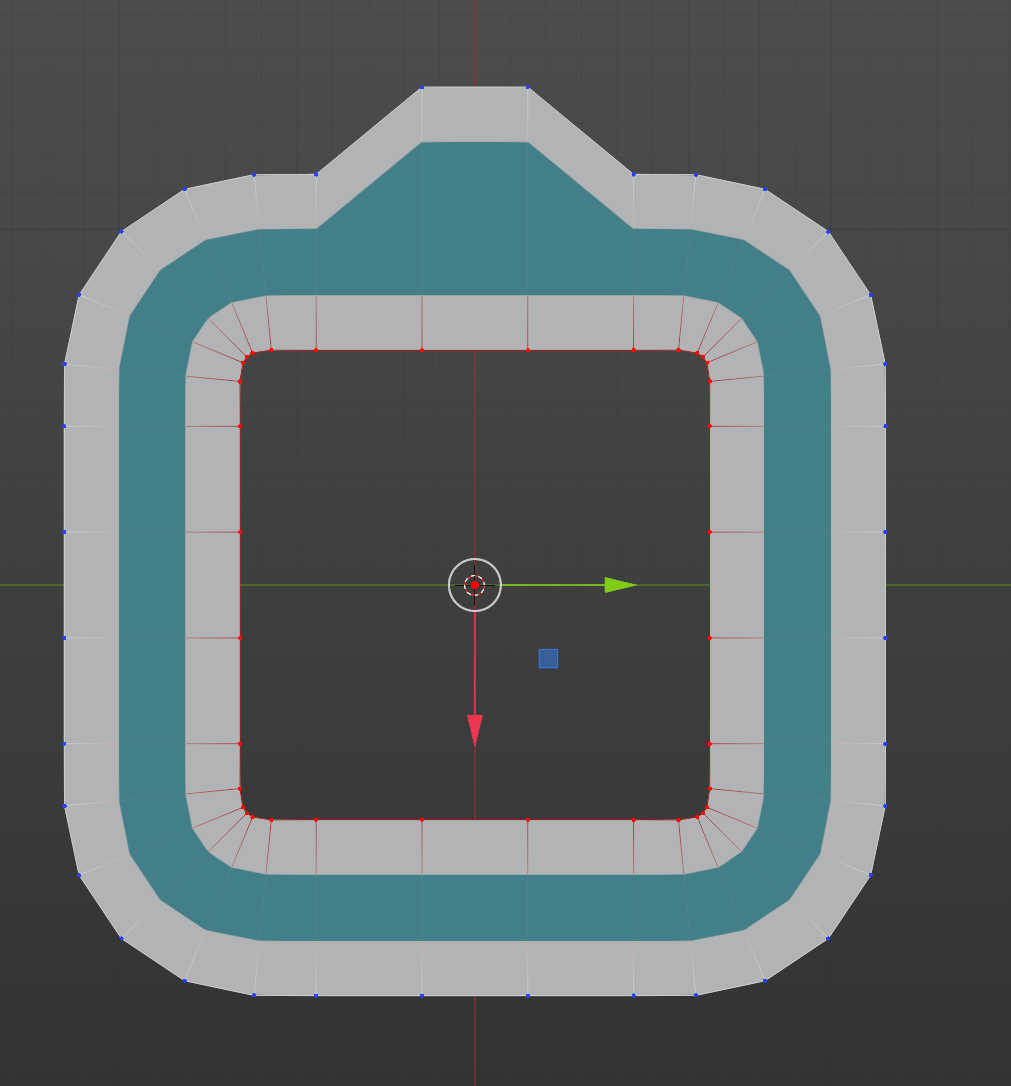
To perform changing of length in certain direction we can select some vertices and press "Pin":
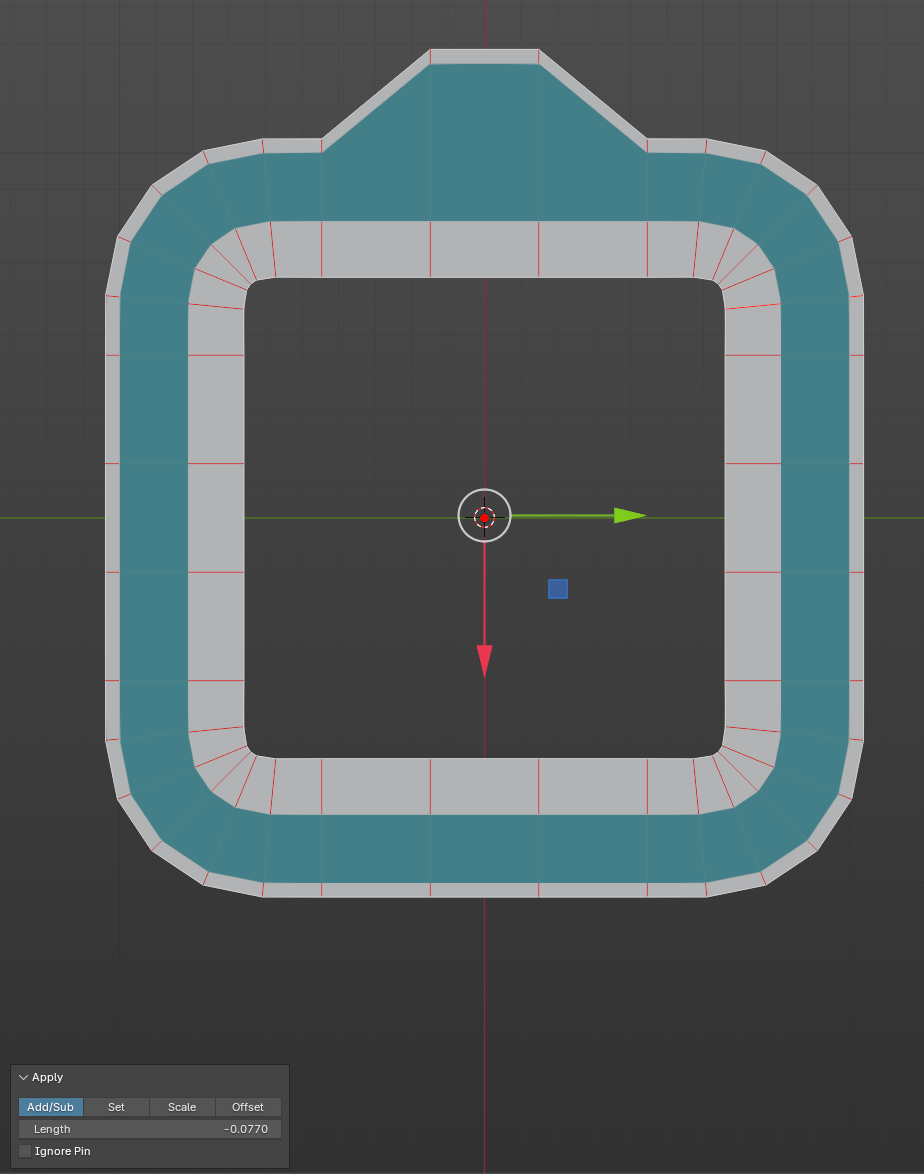
Now performing the same "Add/Sub" operation will keep "Pinned" vertices in place, but the "free" ends of the edges will be moved:
Interactive mode
Perform the same operations with a modal operator which also allow you to visually see "Pinned" vertices.
Delimit & Select
"Edge Loops / Edge Rings" - perform a regular loop selection, but propagation of selection is limited/"terminated" by picked "delimits", such as edges marked as: Sharp, Crease/Bevel Weight (any value bigger than 0), UV Seams.
"Flood" - perform a selection similar to "Select Linked" but allow you to pick extra "delimits", such as Bevel Weigth or Creased edges.
"Connected" - perform a selection of any directly connected edges which have the same attributes, such as: Sharp, Seams, Bevel Weight, Crease, Border (border of the mesh). Any other edges on the mesh which have the same picked attribute but not directly connected to initial selected edge - will be ignored.
"Rings to Loops" / "Loop to Polystrip" - extra helpers to perform selections. Rings to Loops - will turn edges in a way they will form a loops. Loops to Polystrip - will turn selected edge rings to polygons.

Discover more products like this
look at align edge length Bisect modo conditional select Precise Alignment edge offset 3 point align 2 point align edge rings select Selection loop select