 za studio





BLENDER EXTENSION · ZA STUDIO
Cream Painter
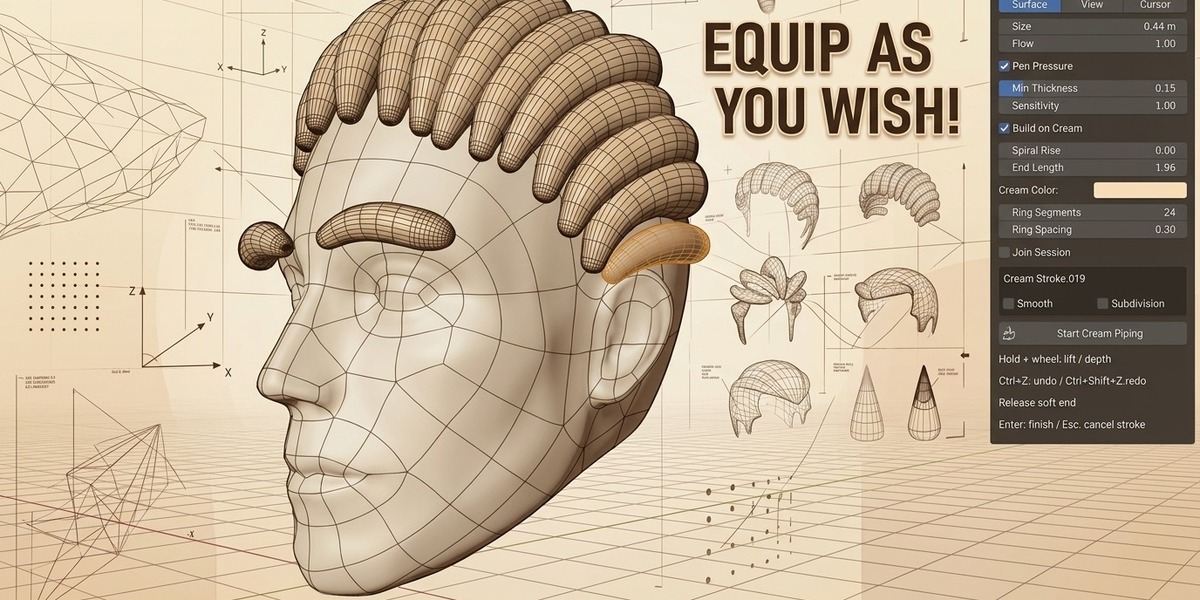
Pipe, stack and shape cream-like 3D meshes directly in the viewport. Draw frosting swirls, borders, stacked decorations and organic forms with a mouse or tablet.
Version 1.0.0 · Blender 4.2+What Cream Painter does
Cream Painter converts a freehand viewport gesture into a closed, editable swept mesh. Hold the mouse button to extrude, pause to build volume, and release for a soft rounded finish. It is a modeling tool, not a fluid simulation.
|
Freehand 3D piping Draw on surfaces, view planes, the 3D Cursor plane or a fixed world Z plane. |
Natural volume growth Hold the pointer still to swell the cream in place. Growth accelerates while you wait. |
Editable results Radius, ring density, Smooth and Subdivision remain editable after creation. |
Live center curves Control the linked mesh from a 3D Curve without leaving the main CP panel. |
Installation
- Download Cream_Painter_v1.0.0.zip.
- In Blender, open Edit > Preferences > Add-ons.
- Open the Preferences menu and choose Install from Disk.
- Select the ZIP file. Keep it compressed; do not install a nested folder.
- Enable Cream Painter if Blender does not enable it automatically.
- In the 3D Viewport, press
Nand open the CP tab.
Quick start
- Choose Surface, View, Cursor or Z. Position the 3D Cursor first for plane-based drawing.
- Set Size, Flow, color and ring detail. Enable Pen Pressure for tablet-controlled thickness.
- Enable Build on Cream when the new strand should climb over existing cream.
- Click Start Cream Piping, then hold the left mouse button and drag in the viewport.
- Pause without moving to build volume. Move again to continue the same strand.
- Release the left mouse button for a rounded end. Press again for another stroke.
- Right-click or press Enter to finish the session. Join Session determines whether the strokes become one final mesh.
Drawing modes
| Mode | Guide and behavior |
|---|---|
| Surface | Projects the nozzle onto visible scene surfaces and can climb over completed cream when Build on Cream is enabled. |
| View | Draws on a plane through the 3D Cursor, facing the view when the stroke starts. |
| Cursor | Draws on the 3D Cursor's local XY plane. The Cursor's local Z defines the lift direction. |
| Z | Locks the path to a fixed world XY plane at the 3D Cursor's Z height. Perspective changes cannot move the path above or below that plane. Spiral Rise, wheel input and Build on Cream are deliberate height exceptions. |
Surface contact and Build on Cream
Surface mode samples the complete pointer interval in small screen-space and world-space steps. A fast mouse event therefore follows the surface instead of drawing a straight chord through it.
- The contact test includes the current cream radius. The strand is placed outside the radius-offset surface instead of cutting into the base or a support.
- At sharp cream/base transitions, short depth hysteresis prevents the nozzle from switching between two sides of a corner. Outward fairing removes small dents and zigzags after smoothing.
- If a fast pointer briefly loses contact, the stroke stays held at its last valid position. It does not finish and does not create a hidden bridge. When a nearby surface is detected again, piping resumes on the same stroke.
- A distant or unreachable layer is not selected automatically. Release the mouse when you intentionally want to end the stroke.
- Build on Cream works in Surface, View, Cursor and Z modes. The unfinished tail is excluded from self-support to prevent feedback zigzags, while completed cream remains climbable.
Panel settings
| Control | How it works |
|---|---|
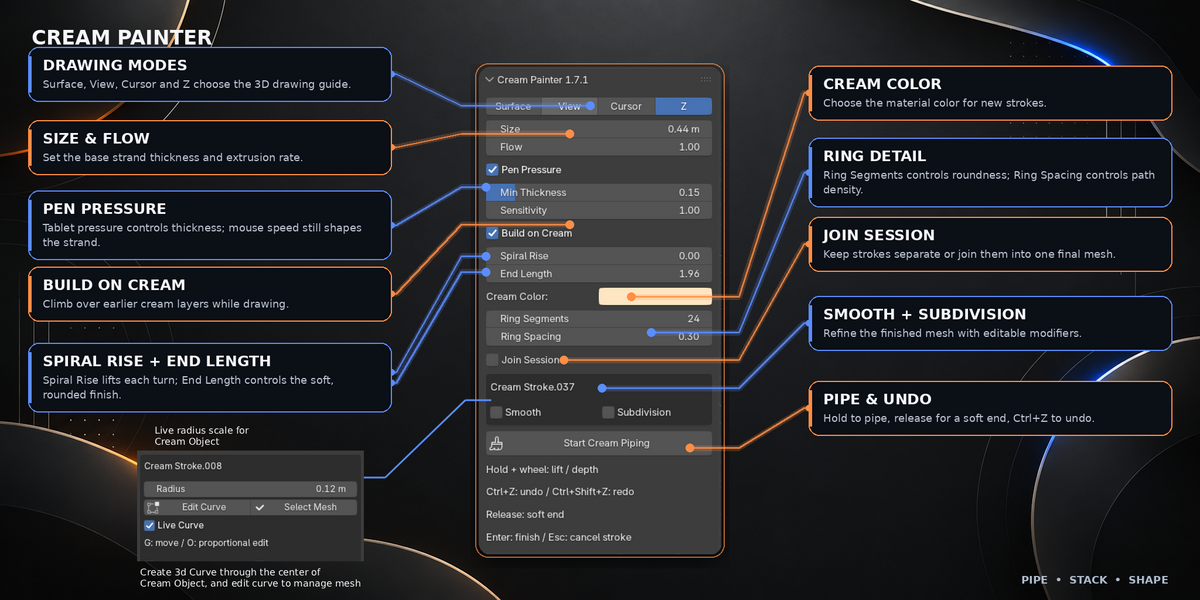
| Size | Base strand radius in scene units. With Pen Pressure disabled, Size is a fixed radius while drawing. |
| Flow | Controls extrusion and the rate of stationary dwell growth. |
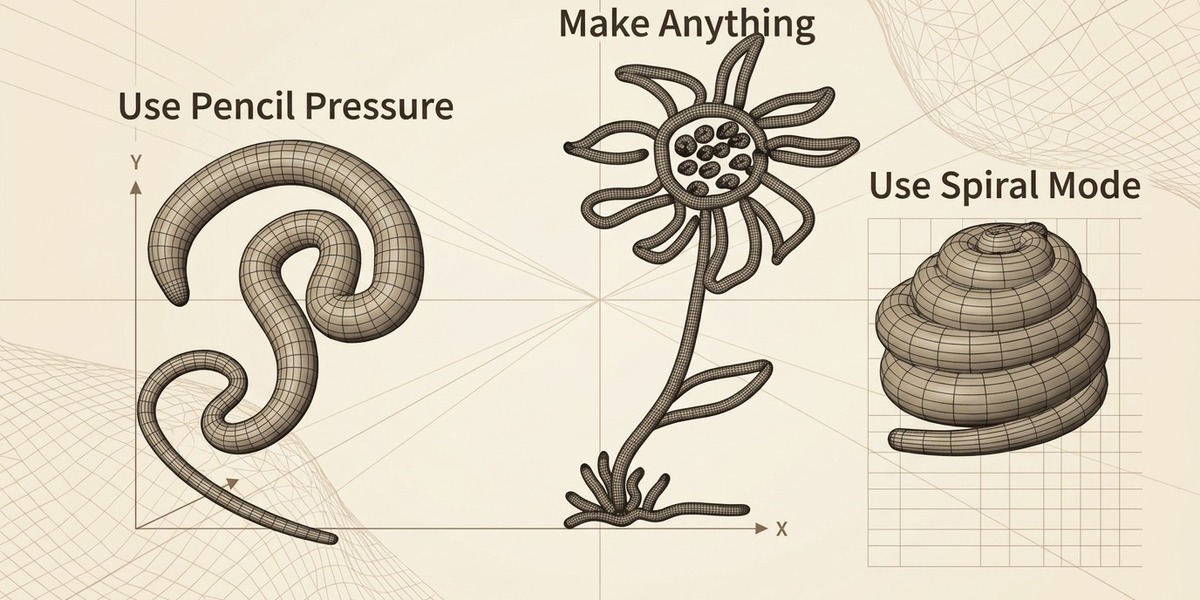
| Pen Pressure | Uses supported tablet pressure to scale thickness. Disable it for a consistent Size radius. |
| Min Thickness | Minimum radius at light tablet pressure, relative to Size. |
| Sensitivity | Controls how quickly pressure reaches the full radius. |
| Build on Cream | Lets the nozzle climb over earlier completed cream in every drawing mode. |
| Spiral Rise | Adds controlled lift per unit of travel. Set to zero for a flat path. |
| Start Length | Controls the length of the rounded start cap. It is shown when Pen Pressure is off, where Size is the fixed radius. |
| End Length | Controls how far the strand tapers into its soft, rounded finish relative to the final radius. A larger value creates a longer, gentler end. |
| Cream Color | Material color assigned to new strokes. |
| Ring Segments | Vertices around each cross-section. Default 16; range 8–64. |
| Ring Spacing | Distance between rings relative to Size. Default 0.50; minimum 0.05. |
| Join Session | Joins strokes on right-click or Enter and applies finishing options to the final mesh. Leave it off to keep strokes separate. |
Editing a finished mesh
Select a Cream Painter mesh in Object Mode. The same CP panel exposes live object controls; there is no separate controller-only panel.
- Radius: changes the complete stored cream profile live while preserving the centerline.
- Ring Segments / Ring Spacing: rebuild the saved stroke data so roundness and path density can be adjusted after creation.
- Smooth: adds an editable Smooth modifier. Enabling it starts Repeat at 1; the checkbox is the on/off control.
- Repeat: clamped from 1 to 50 and scaled as 1 = 4 iterations, 20 = 80, 50 = 200.
- Factor: controls Smooth strength. The default is 0.20.
- Subdivision: adds editable Catmull-Clark subdivision after Smooth. Levels 1–3 control viewport and render output.
Live Curve control
- Select a finished cream mesh and click Create Curve. A linked 3D Curve is created through the center of every saved stroke, including joined sessions.
- Click Edit Curve or press Tab. Move points with G; press O for proportional editing. Bezier handles provide smooth control.
- Keep Live Curve enabled (default). Moving a curve point updates the linked mesh in real time while staying in Curve Edit Mode. Radius, ring settings and finishing modifiers remain in the main CP panel.
- Use Finish Curve / Select Mesh in the same panel to return to the cream mesh and continue piping.
Mouse and keyboard reference
| Input | Action |
|---|---|
| Hold LMB | Pipe cream and draw the path. |
| Release LMB | Finish the current stroke with a rounded end. |
| Wheel while holding LMB | Lift or lower the path. Hold Shift for a smaller step. |
| Ctrl+Z | Undo the latest active-path edit or completed stroke in this session. |
| Ctrl+Shift+Z or Ctrl+Y | Redo within this session. |
| Backspace between strokes | Remove the last completed stroke. |
| Right-click or Enter | Finish the session and join strokes when Join Session is enabled. |
| Esc | Cancel the active stroke and close the session. |
Tips for better results
- Use Ring Spacing 0.05–0.25 for detailed paths and 0.50 for a lighter, faster mesh.
- Use 16–24 Ring Segments for most work; increase it for close-up renders.
- Keep Start Length short to avoid a bulbous beginning. Increase End Length for a longer, softer finish.
- Enable Build on Cream for stacked piping and rising spiral forms.
- Use Create Curve to correct crossings, drive another object, add a bevel profile or use the centerline as an animation path.
Frequently asked questions
Why does my Surface stroke pause?
A fast pointer can briefly leave the visible surface or pass a grazing edge. Cream Painter holds the last valid contact and waits for a nearby surface instead of ending the stroke. Move back toward the surface to resume, or release the mouse to finish intentionally.
Can I edit the mesh by moving its curve?
Yes. Create a linked Curve, enable Live Curve and move its Bezier points in Edit Mode. The mesh updates in real time in the same CP panel. Finish Curve / Select Mesh returns you to the mesh; a Recreate Mesh button is not needed.
How do I stop dents when piping over another object?
Enable Build on Cream for climbable supports and use Surface mode when you need scene contact. The nozzle checks clearance using its radius, samples fast movement between events and applies short edge hysteresis plus outward fairing at support/base transitions. This keeps the strand outside the surface and avoids branch-switching dents.
Requirements and limitations
- Blender 4.2 or newer, Object Mode and one active 3D Viewport.
- Long strokes are limited to 4,000 raw path samples.
- High ring resolution, many Smooth iterations and Subdivision increase processing time.
- Existing cream is modeled mesh geometry; it is not a fluid simulation or Boolean union.
- Curve changes are free 3D corrections. They are not automatically snapped back to an arbitrary surface.
Cream Painter 1.0.0 · Developed by Zekeriya AYAN / ZA Studio · GNU General Public License, version 3 or later.
Have questions about this product?
Login to message
| Blender Extension Compatible | Yes |
| Published | 15 days ago |
| Blender Version | 4.2 - 5.2 |
| Extension Type | Add-on |
| Render Engine Used | Blender-Internal |
| License | GPL |
Discover more products like this
organic modeling stylized modeling character design Cream Piping 3D Sculpting 3D drawing 3d modeling blender tools surface Blender Add-on Cake Decoration