 Layerform



Installation
Blender 4.2 and above:
- Do NOT unzip the downloaded file
- Go to Edit → Preferences → Get Extensions
- Click the dropdown arrow in the top-right corner → Install from Disk
- Select the .zip file — the add-on enables automatically and persists across restarts
Blender 3.x:
- Do NOT unzip the downloaded file
- Go to Edit → Preferences → Add-ons → Install…
- Select the .zip file and click Install Add-on
- Tick the checkbox to enable it
- Click the hamburger menu (bottom-left of Preferences) → Save Preferences
To open the panel: press N in the 3D Viewport and click the Curve tab.
Getting Started
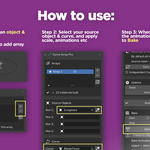
Click + in the Arrays list to create a new array. You can have as many arrays as you need — each is independent with its own settings and curve. Click an array to make it active. The dot on each row shows whether it has been built, and the number shows how many instances exist.
Set Slot 1 to your source object and Curve to your curve, then press Build Array.
Multiple Object Slots
Fill Slots 2, 3, and 4 with additional objects to distribute more than one type along the curve. When multiple slots are filled, choose a Distribution Mode:
- Alternating — cycles through in order: 1, 2, 3, 1, 2, 3…
- Random — picks randomly per instance (controlled by Seed)
- Weighted — Slot 1 appears most, Slot 4 least
Curve Controls
Curve Offset shifts the entire array along the curve from 0 to 1. Keyframe this value to animate objects flowing along the path.
Trim Start and Trim End restrict the array to a portion of the curve. Both values are animatable — keyframe Trim End from 0 to 1 to reveal the array growing along the path progressively.
Offset, Rotation and Scale
Offset moves instances away from the curve in X, Y, and Z. Add random scatter per axis using the Random Offset fields.
Follow Curve aligns each instance to the curve tangent. Up Axis controls which direction is treated as up — use Z for flat curves in the XY plane, Y for curves in the XZ plane, X for curves in the YZ plane. This also controls the direction of wave and bounce preset animations.
The Scale slider is a uniform multiplier across all axes. The X, Y, Z fields give independent per-axis control — the uniform slider multiplies these. Scale Jitter adds random size variation. Change Seed to get a different variation instantly.
Taper
Enable Taper to scale instances from one size at the start of the curve to another at the end. Start Scale and End Scale set the values. Enable Smooth for an ease-in/out transition instead of a linear ramp.
Animation Presets
Select a preset from the dropdown to apply a procedural animation that runs automatically off the timeline.
- Scale In — a sweep front travels along the curve, revealing instances as it passes
- Scale Out — the reverse; instances disappear as the front moves through
- Wave — a sine wave travels along the curve displacing instances in the Up Axis direction
- Bounce — each instance bounces independently, staggered by position
- Spin — instances spin continuously, staggered along the curve
- Grow Loop — all instances pulse in size together on a loop
- Stagger In — instances pop in one by one along the curve over time
- Product Reveal — smooth staggered scale-in with a slight lift, built for product and hero shots
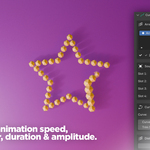
All presets share four controls: Speed, Amplitude, Phase Offset, and Reverse.
Materials and Modifiers
All instances share the source object's mesh by default. Add a material, modifier, or bevel to the source and every instance updates immediately — no extra steps needed. Use Sync from Source to relink any instances that have become detached.
Enable Independent Copies only if you need to edit instances individually. This uses significantly more memory.
Bake Animation — Essential for Performance
For any scene with more than 20 instances or any animation preset, always bake before rendering.
Set your Start frame, End frame, and Step (1 = every frame, 2 = every other frame), then click Bake Animation. The add-on steps through the entire range, writes real Blender keyframes onto every instance, and disables Auto Update automatically. From that point Blender plays back standard keyframes with zero overhead — no lag, no crashes, renders correctly as an MP4 or image sequence.
To make changes after baking: re-enable Auto Update, adjust your settings, then bake again.
Freeze to Objects takes a static snapshot at the current frame with no keyframes. Use this for export to Unreal Engine, Unity, or sharing files without the add-on.
Keyframing Any Parameter
Right-click any slider in the panel and select Insert Keyframe. With Auto Update enabled the array rebuilds on every frame to match the animated value. Always bake after keyframing parameters before rendering.
Tips
- Keyframe Curve Offset from 0 to 1 to make the entire array flow along the path like objects on a conveyor belt
- Use Phase Offset to stagger two arrays that share the same preset for more complex motion
- Change Seed while keeping all other settings the same to quickly audition different random variations
- The Bake section defaults to frames 1–250 — check your scene's actual frame range before baking
- After baking, re-enable Auto Update to make further edits, then bake again
Support
Email: [email protected] Website: www.layerform.com
We aim to respond within 24 hours. Please include your Blender version and a brief description of the issue.
Have questions about this product?
Login to message
| Blender Extension Compatible | Yes |
| Published | 5 months ago |
| Blender Version | 3.0 - 5.1 |
| Extension Type | Add-on |
| Render Engine Used | Cycles, Eevee |
| License | GPL |