Customisable Male + Female Basemesh Bundle - Blender 5.0+
 Vertex Arcade


Getting Started
When you first open the Blender file, you may see a script warning. This happens because Rigify is a built-in Blender addon that runs Python scripts to set up the rig, and Blender is simply warning you that a script is being executed.
For now, you can click Allow Execution. Since this warning will appear every time you open the file, you can also choose Permanently Allow Execution to avoid seeing it again.
Just be aware that Python scripts can be used maliciously, so always make sure you only open Blender files from trusted sources.
Once the file opens, you’ll see the basemesh in the scene. Switch to Material View, and it may take a moment for the materials to load, as Blender needs to initialise all of the textures. After this, you’re free to start interacting with the character.
Posing/Animating
If you want to pose or animate the character, select the rig and switch to Pose Mode. Rigify uses Inverse Kinematics (IK) by default, so you can pose the character by moving or rotating the hips, chest, shoulders, hands, or feet. The rig will automatically calculate natural bends for the elbows and knees.
One of the main benefits of Rigify is that it gives you easy access to Bone Layers while using the Rig. So in the properties panel, you can see the Rigify menu and all of the Layers. You can enable all of these and your rig will become quite messy because you’re seeing every single control, however, you can just choose the ones you want to work on and that’s all you’ll see. It’s very convenient for making more advanced poses/animations as you can get into really fine details but when you’re finished, you can hide those details and make the bigger motions.
Installing the Addon
To customise the basemesh, you’ll need to install the included addon. Go to Edit > Preferences, open the Addons section, click the small arrow in the top right corner, and choose Install from Disk. Locate the file named
customisable_basemesh_addon.zip and click Install from Disk.
Once installed, the addon will appear on the right hand side of the viewport under Customisable Basemesh. You can start experimenting with the settings right away, but the following sections will explain each option in detail.
Addon Menu
The add-on only works on the currently selected mesh, which allows you to work on multiple characters independently, so make sure to select a mesh before changing settings.
Main Menu
The Main Menu is your central hub for quickly experimenting with and shaping your character. It allows you to randomise or reset selected parts of the model.
This is very useful for quick prototyping. You can choose exactly which sections are affected, such as the face or body, so randomising or resetting only applies to those sections. If you want to reset everything and go back to default, you can select all of the sections and press Reset.
For example, you might randomise both the face and body to generate new designs, then lock in a body shape you like and continue randomising the face. The Main Menu lets you iterate quickly without diving into individual sliders, making it a quick way to play around with character designs.
You can also choose which Eyelid mode you’d like to be in from this menu. By default, the addon controls the eyelids to create wide eyed or squinted eyes, but you can toggle this back to Manual mode and this will allow you pose the eyes normally.
Presets
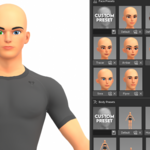
The Presets Menu lets you create a character instantly, without adjusting any sliders or settings. Simply click one of the preset buttons and it will affect your character’s face OR body.
Presets only affect the character’s Body and Face, so you’re free to customise the skin, eyes, clothing, and other details afterwards.
You can choose to apply only the Face or Body for any of the presets, this allows you to mix and match different faces with different bodies.
You can Save your Custom Presets. The first element in the Grid is the Custom Preset section. You can give your Preset a name if you like and then press Save. If you don’t give it a name, it will just give it a number.
Saving a Preset will Render an image from one of the Preset cameras in the scene.You can see these in the Outliner, we have Body Preset Camera and Face Preset Camera. And these will always follow your character’s body and face. If you want to use the Custom Presets, just make sure not to delete these Cameras.
If for whatever reason your image didn’t render how you’d like or maybe you want to change the lighting or skin colour, you can Re-Render ANY of the icons.
Simply just change your model, you can change the lighting or materials and then you can click the Camera icon on any of the Presets and it will Re-Render that icon for you.
If you want to just have your own presets, you can actually Delete all of the presets by clicking the X button beside them, now you can have your own library of custom Faces and Body types.
If you ever want to Restore the Default settings you can click the Restore Default Presets button and this will replace all of the current presets with the original ones, so just be careful that you don’t lose any presets you want to keep.
Body Settings
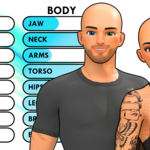
The Body Menu allows you to adjust the overall weight, proportions, and scale of the basemesh. Here, you can change the character’s height as well as the size and shape of individual body parts.
At the top of the menu, you can Randomise the body proportions to generate completely new variations, or Reset everything back to the default values at any time.
Each slider can be locked, which excludes it from randomisation. This is useful when you want to experiment with proportions while keeping certain features consistent and preventing things from getting too extreme.
To adjust a value, click and drag the slider left or right. To reset an individual slider, hover over it and press Backspace. You can also adjust multiple sliders at once by clicking and dragging vertically to select several sliders, then dragging left or right. This is especially useful for changing the overall weight of a character without breaking the existing proportions.
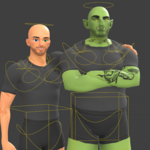
The addon also supports working on multiple characters at the same time. You can duplicate a character’s rig and mesh using Shift + D, and the Body sliders will automatically update whichever character/rig is currently selected.
Face Settings
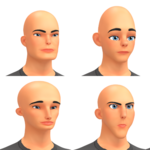
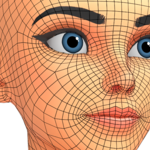
The Face Menu lets you adjust each part of the face individually, with over 60 different controls for creating a wide range of character designs.
Similar to the Body, you can also have more control over the Randomisation of your character’s Face with the Randomise Range slider. This slider lets you control how Extreme the Randomness is. If you want subtle changes, keep the Range low, but if you want something more extreme, turn it all the way up to 1.
One of the most powerful ways to use the addon are the Lock features. You can lock and unlock any of the Facial features and the randomisation will only affect the Unlocked options.
So one way I like to use this is Randomise a few times or use a Preset, and then go through each section and see what you do and don’t like.
Now if we press Randomise it will only affect the unlocked sections.
When Randomising, sometimes the results can be very extreme, but you can use the new Soften Features button to bring it back to neutral a small bit and this will usually fix any issues.
You can also choose to Exaggerate features if you want to push your character a little bit more.
Skins
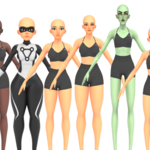
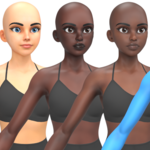
The Skins Menu lets you change the character’s skin texture. There are 4 skin textures to choose from: Caucasian, Black, and realistic versions of each. In addition to these, there is a Coloured Skin option that allows you to choose any skin colour using a colour wheel.
You can also Randomise the Skin. If the Coloured Skin option is selected during randomisation, it also chooses a random colour. At any time, you can Reset the skin to its default state.
If you want to work on multiple characters, you can duplicate both the mesh and rig using Shift + D. By default, duplicated characters share the same materials, meaning changes to one will affect all linked characters. To give each character their own unique skin, use the Make Unique Materials button. This separates the materials so each character can have independent skin textures and colours.
The Make Unique Materials button will also allow you to change the Eyebrows, Makeup and Clothes separately as these are all part of the Skin material.
Eyes
The Eyes section lets you customise your character’s eye texture. You can adjust the colour of each part of the eye individually, Sclera, Iris, and Pupil, allowing for a wide range of eye designs.
You can Randomise the eyes to quickly generate new variations. This will randomly choose between Toon, Realistic or Snake eye textures, enable or disable the Iris or Pupil, and generate random colours for each part of the eye.
The Iris and Pupil can be enabled or disabled using their respective buttons. You can also use the colour wheels to choose the colour of each part of the eye separately.
Like the Skin materials, eye materials are shared when duplicating the mesh and rig. If you want characters to have independent eyes, use the Make Unique Eye Materials button to separate them so each character’s eyes can be edited individually.
New in v2.1 is the ability to add bloodshot eyes, and change the size of the Iris and Pupil for an even greater range of styles.
You can also now have two completely different eyes. At the top of the menu, you can select which eye you want to change. If both eyes are selected, the eyes will be synced, but if you only select one of the eyes, now any changes you make will only apply to that eye.
Eyebrows
The Eyebrows section allows you to change the character’s eyebrow style. There are 7 different eyebrow textures, as well as an option for no eyebrows. Eyebrows play a huge role in character design, so trying out different eyebrow styles can be helpful when designing characters.
You can now also change the colour of the eyebrows.
You can Randomise the eyebrows and this will choose one of the 8 eyebrow options.
Eyebrows are part of the Skin material. If you duplicate the character or rig and have already made the Skin material unique, you do not need to make it unique again to edit the eyebrows. A unique Skin material allows you to independently modify the skin, eyebrows, makeup, and clothing for each character.
Overlays
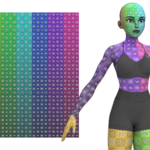
The Overlays section (previously Makeup) allows you to change the character’s body or face overlay. There are 25+ different overlays. The Body Overlays range from simple Freckles, to Scars, to some Tattoos. The Face overlays range from different Makeup styles to different Facial Hair styles.
You can Randomise the Overlays to select one of the options at random.
Makeup is part of the Skin material. If you duplicate the character or rig and have already made the Skin material unique, you do not need to make it unique again to change the makeup. A unique Skin material allows you to independently modify the skin, eyebrows, makeup, and clothing for each character
Clothes
The Clothes section allows you to change the character’s clothing. There are 7 clothing options, as well as a nude option. The clothing options are designed to provide a simple, neutral outfit, which can be helpful when working on things like hair, outfits, or weapons, because sometimes a fully nude model can be distracting.
You can Randomise the clothing, which will choose one of the clothing options. The Nude option is intentionally excluded from randomisation, so when randomising the entire character you won’t unexpectedly end up with a nude model.
When Resetting, the Female character will default to the Gym Clothes, and the Male character will default to the Gym Clothes W/ Shirt.
Clothing is part of the Skin material. If you duplicate the character or rig and have already made the Skin material unique, you do not need to make it unique again to change the clothes. A unique Skin material allows you to independently modify the skin, eyebrows, makeup, and clothing for each character.

Discover more products like this
3d-female customizable model 3D model customization 3dbasemesh 3d-male