 TheVinLab


Overview
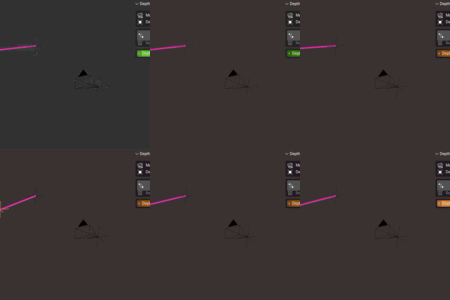
Depth Locator creates depth-controlled empties on the ray between your camera and any target object. It uses Blender's scripted drivers to position empties along this ray at any distance you specify.
What Problem Does It Solve?
When working with VFX, camera matching, or layout, you often need to place objects at specific depths relative to your camera and a target. Depth Locator makes this fast and intuitive.
Common use cases:
- Quick VFX reference positioning
- Focal length and lens testing
- Depth validation and camera/object relationship testing
- Animation reference and keyframing
- Scene layout and composition planning
System Requirements
- Blender: 3.6.0 or higher (3.6, 3.7, 4.0, 4.1, 4.2, 5.0, 5.1+)
- Python: 3.10+ (built-in with Blender)
- OS: Windows, macOS, Linux
- Disk Space: < 50 KB
- GPU: None required
Quick Start
Get up and running in 5 minutes.
Step 1: Open the Panel
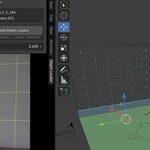
Press N in the 3D Viewport to open the sidebar. Look for the "Depth Locator" tab on the right.
Step 2: Set Up Your Scene
You need:
- A camera (set as the active scene camera)
- A target object (any mesh, empty, light, etc.)
Make sure your camera is set in Scene Properties > Camera.
Step 3: Create a Locator
- Select the target object you want to measure to
- Make sure your camera is set as active
- Click the "Create Depth Locator" button in the panel
An empty will appear on the ray from your camera to the target.
Step 4: Adjust Depth
Use the "Depth" slider in the panel to move the empty along the ray:
- Left (0): At the camera position
- Middle: Halfway to the target
- Right (500+): Beyond the target
The empty updates in real-time as you adjust.
How It Works
The Formula
Depth Locator calculates position using this formula:
world_position = camera_position + normalize(target_position - camera_position) × depth
Breaking it down:
- camera_position — Where the camera is in 3D space
- target_position — Where the target object is
- normalize(...) — Creates a unit direction vector
- × depth — Scales along that direction by the depth value
Implementation
The addon uses Blender's scripted drivers on the empty's location:
- Three drivers (one for X, Y, Z)
- Each evaluates the position formula every frame
- Updates automatically when camera or target moves
- Keyframeable for animation
Why Pure Drivers?
Instead of constraints, Depth Locator uses drivers because:
| Feature | Drivers | Constraints |
|---|---|---|
| Rotation | Clean (0,0,0) | May rotate |
| Performance | Fast | Slower |
| Stacking | Simple | Complex |
| Keyframing | Direct | Limited |
| Debugging | Easy | Hard |
Usage Guide
Creating Locators
Basic Creation
- Select your target object
- Ensure camera is active scene camera
- Click "Create Depth Locator" in the panel
- Adjust the Depth slider
Creating Multiple Locators
You can create as many as needed
Depth_Locator (first)
Depth_Locator.001 (second)
Depth_Locator.002 (third)
... etc
Each is independent and has its own Depth property.
For Different Cameras
If you have multiple cameras:
- Set Camera A as active scene camera
- Create locators (they use Camera A)
- Set Camera B as active scene camera
- Create new locators (they use Camera B)
- Switch between cameras to see different locators
Adjusting Depth
Using the Slider
Find the Depth_Locator in the panel and use the slider:
- Soft range: 0 to 500 scene units
- You can exceed this range by typing directly
Using Numeric Input
Click on the depth value and type directly:
- Negative values place the locator behind the camera
- Large values extend far beyond the target
- Decimal values for precise positioning
Real-Time Updates
As you adjust depth:
- The empty moves immediately
- Camera/target movement updates automatically
- All locators update in real-time
Selecting Locators
Find them in the Outliner under "Depth_Locators" collection:
- Expand "Depth_Locators" in the outliner
- Click the locator you want to select
- Its Depth property appears in the panel
Deleting Locators
Delete Individual:
- Select the locator
- Press
X→ Confirm Delete
Delete All:
- Right-click "Depth_Locators" collection
- Delete Collection
Advanced Features
Animating Depth
Create motion along the camera ray:
- Select Depth_Locator object
- Frame 1: Set depth to 0, right-click Depth property → "Insert Keyframe"
- Frame 100: Set depth to 500, right-click → "Insert Keyframe"
- Play animation to see smooth motion
Using with VFX
Position reference points for effects:
- Create locators at key distances
- Use them as guides for effect placement
- Animate depth to match character movement
- Delete after you're done with reference
Combining with Other Tools
With Constraints:
- Create locators first
- Use them as targets for other objects
- Constrain cameras/lights to locators
With Drivers:
- Link depth to other properties
- Create complex relationships
- Automate scene setup
With Animation:
- Keyframe depth for smooth motion
- Create depth-based motion graphics
- Animate multiple locators together
Have questions about this product?
Login to message
| Blender Extension Compatible | Yes |
| Dev Fund Contributor | |
| Published | 3 months ago |
| Blender Version | 3.6 - 5.2 |
| Extension Type | Add-on |
| Render Engine Used | Cycles, Eevee |
| License | GPL |
Discover more products like this
depth 2.5d depth-control-empty camera-depth-empty depth-locator