 LemonEdge
Dope Track Quick Start & Documentation
Dope Track is a node-based camera tracking and matchmoving add-on for Blender. It connects footage preparation, automatic and manual tracking, lens work, masking, reconstruction, object solving and final output in one visual workflow.
This page is a practical introduction to help you get started. Dope Track also has a dedicated documentation website with detailed instructions for every node and workflow:
Open the complete Dope Track documentation
Before You Begin
Please check the full installation guide for supported Blender versions, platform requirements and optional components.
Some features require additional tools:
Auto Track downloads and installs its required reconstruction tools through the add-on.
AI Mask requires a one-time AI runtime and model download.
GPU acceleration depends on your hardware and the feature being used.
2D/3D Constraints is currently a beta feature and should be checked carefully before production use.
Understanding the Node Workflow
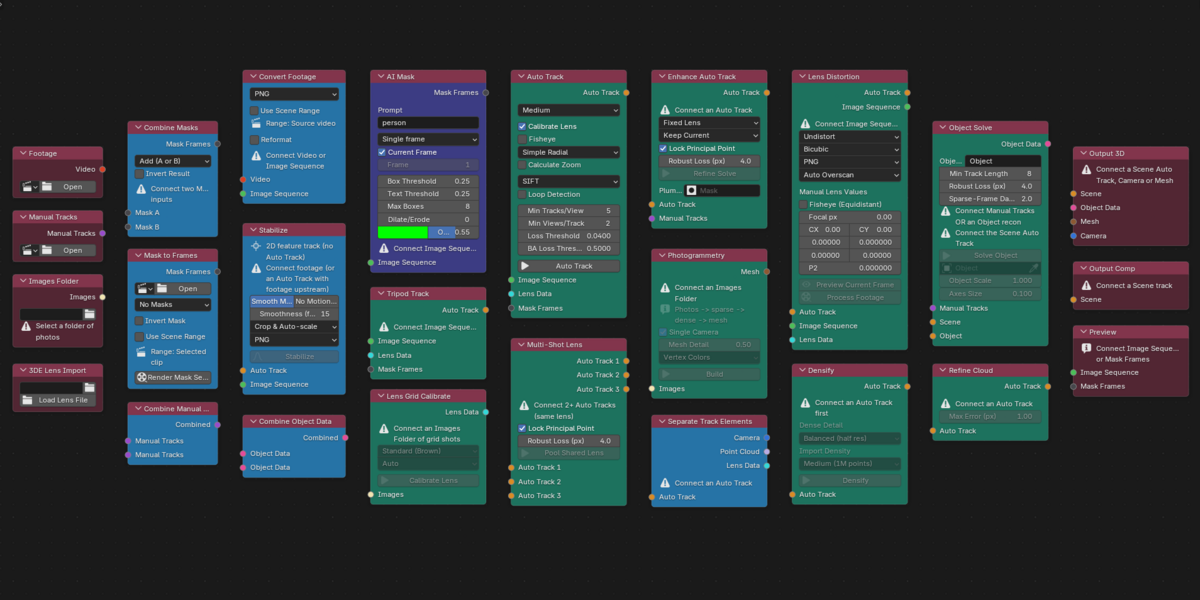
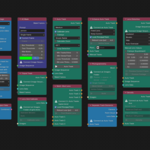
Dope Track uses its own node editor inside Blender. Instead of performing every step from unrelated panels, you create a graph that shows how the shot moves from footage to the final result.
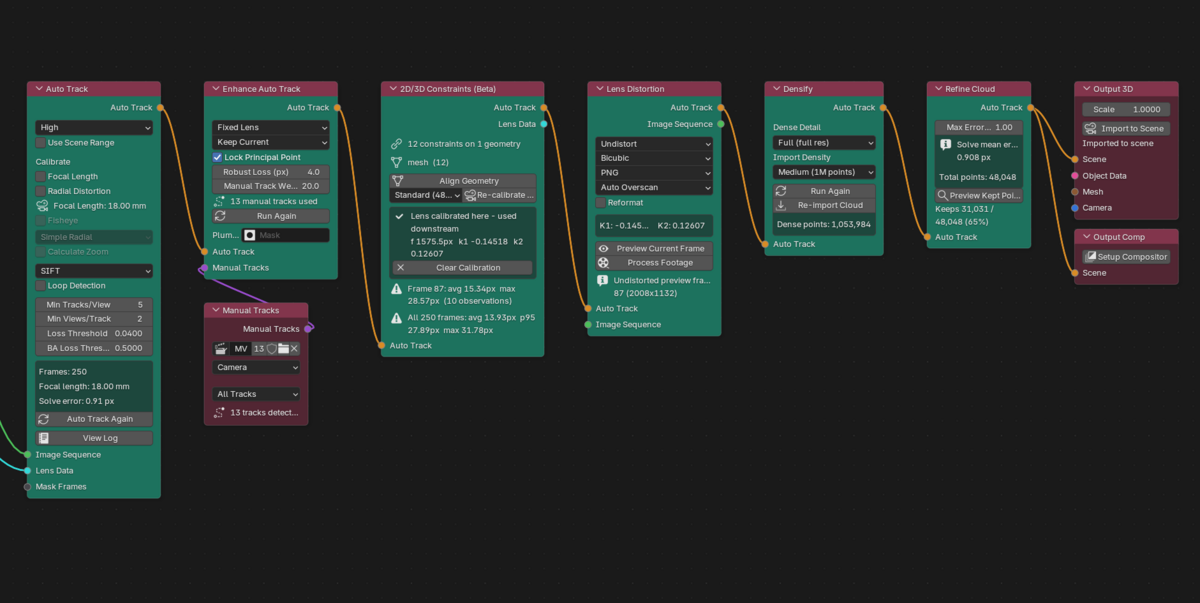
A typical camera-tracking graph looks like this:
Footage → Auto Track → Enhance Auto Track → Lens Distortion → Output 3D / Output Comp
Other nodes can be inserted when needed for masking, manual tracks, lens calibration, point-cloud refinement or moving-object solves.
If this is your first time using the editor, read Understanding the Node Graph.
Basic Camera-Tracking Workflow
1. Prepare the Footage
Add a Footage node and select your Blender Movie Clip.
If the source is a video, connect it to Convert Footage to create a numbered image sequence. Processing nodes work with image sequences because they are more dependable for tracking, masking and reconstruction.
Use the Footage node to copy the plate’s frame range and image format into the Blender scene.
2. Mask Unwanted Movement
This step is optional but can greatly improve difficult shots.
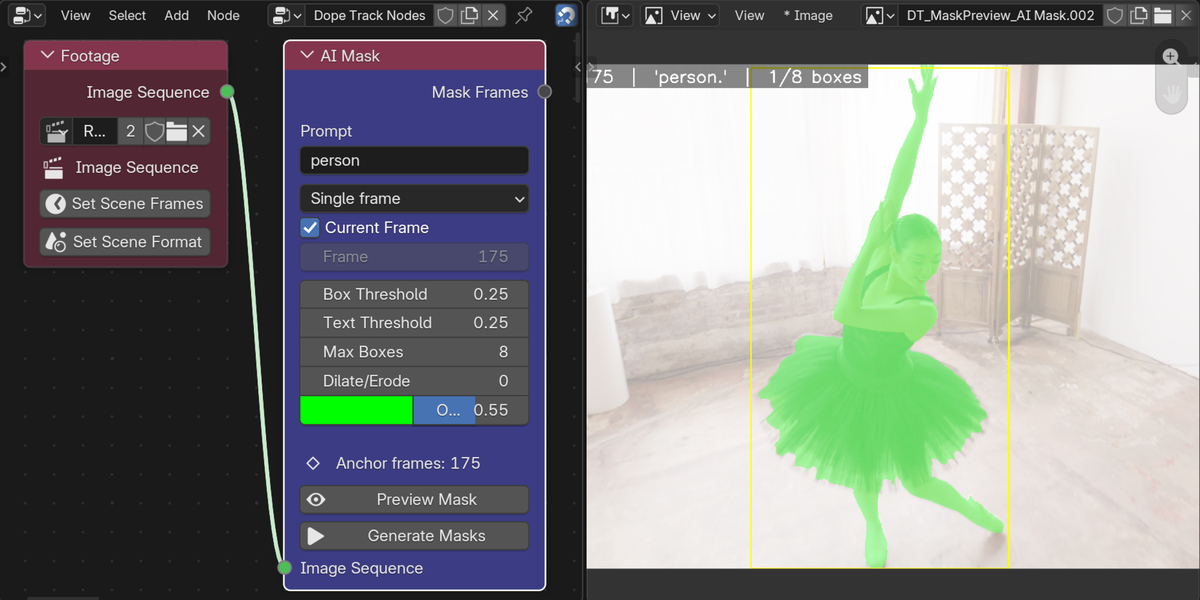
Moving actors, vehicles, reflections and foreground objects can create features that fight the real camera motion. Connect an AI Mask or rendered Blender mask to Auto Track and choose whether the masked area should be included or excluded.
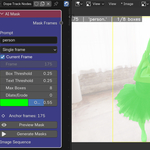
AI Mask accepts a text prompt such as “person,” “car” or “red bag.” Preview the result on an anchor frame before generating the full sequence. Additional anchor frames can help when a subject becomes occluded, changes appearance or enters later in the shot.
Read the complete AI Mask workflow.
3. Run Auto Track
Connect the prepared Image Sequence to Auto Track.
Auto Track detects features, matches them through the sequence and reconstructs the camera together with a sparse 3D point cloud. Start with the default quality settings, then increase the feature quality or change the matching method if the shot needs more coverage.
For detailed advice on masking, loop detection, LightGlue and improving difficult solves, see Advanced Tracking.
For tripod shots or nodal pans with very little camera translation, use Tripod Track instead of forcing a standard reconstruction onto footage without enough parallax.
4. Review and Refine the Solve
After tracking, check:
How many frames were successfully registered
The solved focal length and camera model
The reported reprojection error
Whether the point cloud matches recognizable parts of the footage
Whether the camera movement looks stable when viewed in 3D
A low average error is useful, but it is not the only sign of a good track. Always test the solve by placing simple geometry into the scene and checking it throughout the shot.
If part of the solve needs more control, add Blender tracking markers through the Manual Tracks node and connect them to Enhance Auto Track. These artist-placed tracks act as stronger constraints while the camera poses, focal length and distortion are refined.
Use Refine Cloud to remove unreliable reconstruction points, or Densify when you need a fuller point cloud for modelling and alignment.
The complete introductory process is covered in Basic Tracking.
5. Bring the Result into Blender
Connect the finished solve to Output 3D and choose the import scale.
The node creates the solved camera and reconstruction as Blender scene data. You can then place geometry, add lighting and begin integrating the CG.
Connect the same solve to Output Comp to prepare a compositor setup using the original plate and available lens information.
Lens Calibration and Distortion
Lens distortion is part of the matchmove, not something that should be ignored after tracking.
Dope Track can:
Calibrate a lens from grid images
Import compatible lens data from 3DEqualizer
Refine focal length and distortion with the camera solve
Handle fixed and variable focal-length workflows
Undistort footage before CG work
Re-distort the rendered result for the final composite
Add overscan to preserve pixels moved outside the original frame
For the complete workflow, read Lens Distortion.
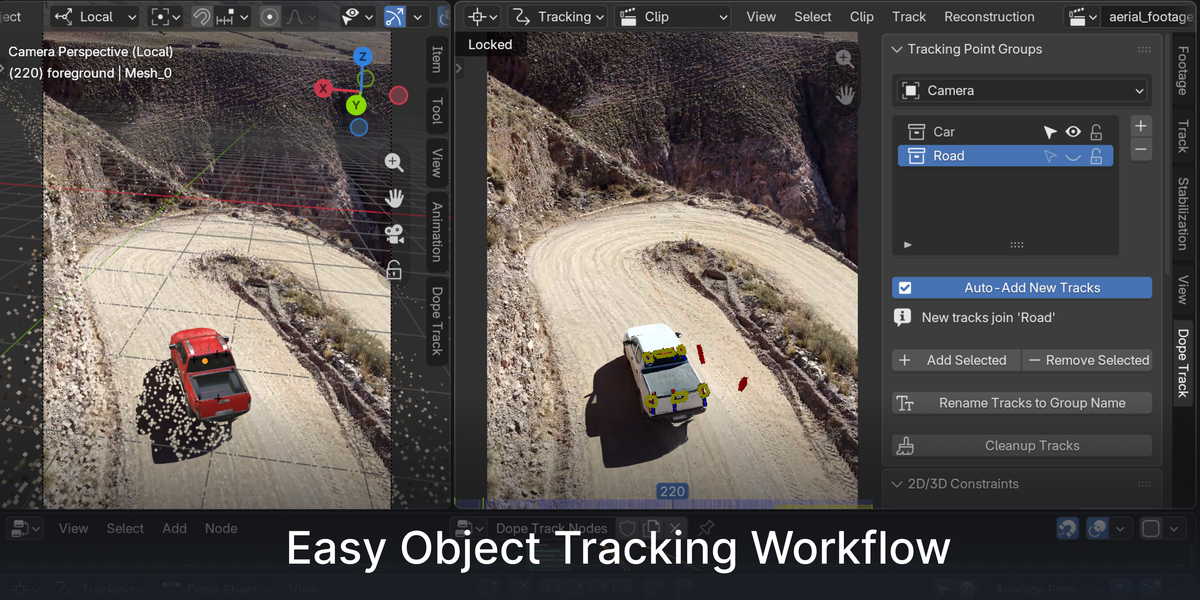
Moving-Object Tracking
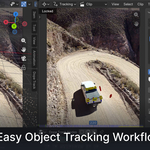
Dope Track can solve a rigid object moving independently inside a moving-camera shot.
First solve the camera. Then create a separate group of tracks for the moving subject and pass them to Object Solve. The camera reconstruction remains fixed while the object’s movement is calculated separately.
This gives you independent camera and object animation, making it possible to attach CG to a vehicle, prop or other moving object.
Read the step-by-step Object Tracking workflow.
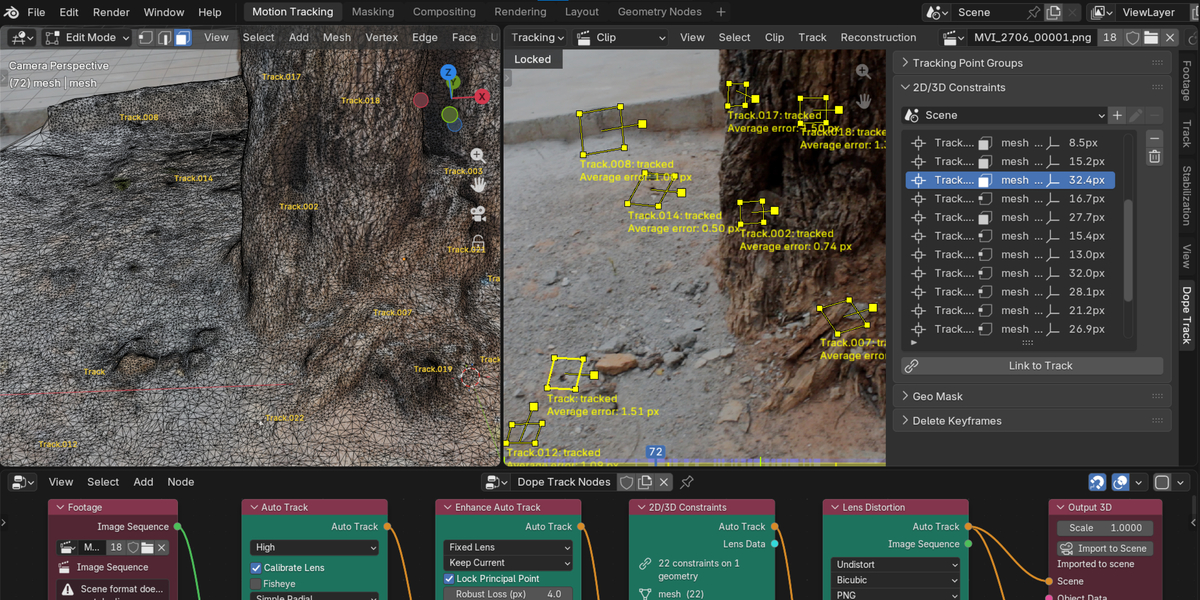
2D/3D Constraints (Beta)
The 2D/3D Constraints workflow connects tracked image points to vertices, edge midpoints or face centres on a model.
It can be used to:
Align finished geometry with the reconstructed scene
Validate alignment using lens-aware reprojection errors
Assist with lens calibration from known stationary geometry
Align an asset to a separately solved moving object
This feature is currently in beta. Always inspect the alignment and reprojection results across the complete shot before using them in production.
Read 2D/3D Constraints and Lineup.
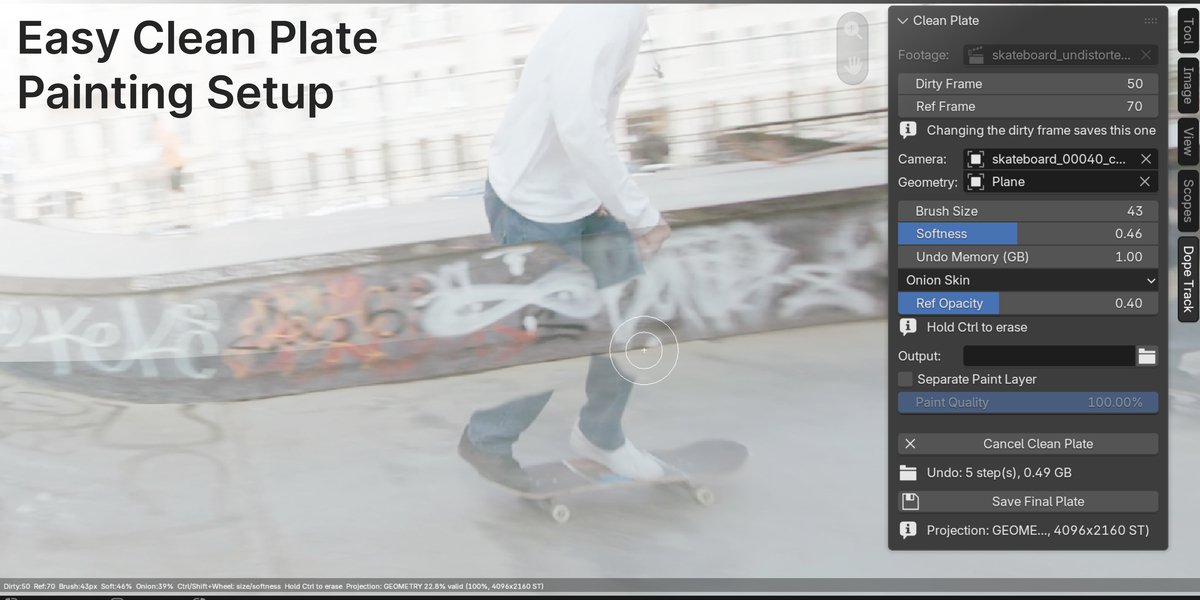
Clean Plate
Clean Plate helps remove markers, objects and unwanted details from a shot without leaving Blender.
Choose a dirty frame and a cleaner reference frame, then project the reference through the solved camera onto simple proxy geometry. This creates an aligned clone source that follows the perspective of the surface.
You can adjust the reference overlay, paint with a soft clone brush, erase back to the original frame and save the finished plate at full projection quality.
Read the complete Clean Plate workflow.
Geo Mask
Geo Mask connects Blender mask shapes to tracked geometry.
Draw a mask on a reference frame, select the solved camera and geometry, then link the shape to the surface. Dope Track projects the mask through the camera across the shot, allowing the 3D movement to carry the shape.
If the projection needs adjustment, move the mask points on the problem frame and create a correction keyframe. Corrections blend between neighbouring keys while the underlying geometry motion continues.
Read the complete Geo Mask workflow.
More Help
The dedicated Dope Track website contains the full node reference, complete workflows, installation instructions and troubleshooting information.
Full documentation:
https://dopetrack.lemonedge.cc/
When asking for help, please include your Blender version, Dope Track version, operating system, the node that failed and any error or log shown by the add-on.
-
$45
To be used in single computer. For Individuals and Freelancers.
-
$100
For a team of 3 professionals.
-
$300
For a studio of 10 artists.
Have questions about this product?
Login to message
| Blender Extension Compatible | Yes |
| Dev Fund Contributor | |
| Published | 9 days ago |
| Blender Version | 5.1 - 5.2 |
| Extension Type | Add-on |
| Render Engine Used | Arnold, Blender-Internal, Blender-Game-Engine, Cycles, Eevee, Freestyle, Luxrender, Mental-Ray, Octane, Vray, Yafaray |
| License | GPL |
Discover more products like this
cleanplate lens distortion non-destructive matchmoving 3d tracking node-based rotoscoping photogrametry VFX camera-tracker reconstruction