Dynamic Decal - Hassle Free Decal & Stamp System For Blender
 Polymorph Studio


Installation and Set-up
Follow these steps to get Dynamic Decal working in your Blender project.
Step 1: Append Node Groups and Decal Target
First, you need to append the necessary components from the dynamic_decal_1.1.0_importer.blend file into your scene.
- Go to File > Append.
- Navigate to and select the dynamic_decal_1.1.0_importer.blend file.
- A folder structure will appear. Navigate to the NodeTree folder.
- Select the following three node groups:
- Decal Target Direction
- Decal Mapping
- Decal Mask
- Click Append. This will automatically import the Decal Target object.
Step 2: Shader Editor Setup
Please note: The following node setup is just one example of how to use the decal system. You can adapt it to your specific needs. For instance, you could use the final decal mask to mix between two entirely different shaders (e.g., a base material shader and a decal shader) using a Mix Shader node.
Now, set up the material on the object that will receive the decal.
- Select your target object and go to the Shader Editor.
- Create or select the material you want to add the decal to.
- Add the appended node groups to your node tree using Shift + A > Group, and select Decal Mapping node and Decal Mask node.
- Add the following nodes: Texture Coordinate, Image Texture, Attribute, Mix and Diffuse BSDF.
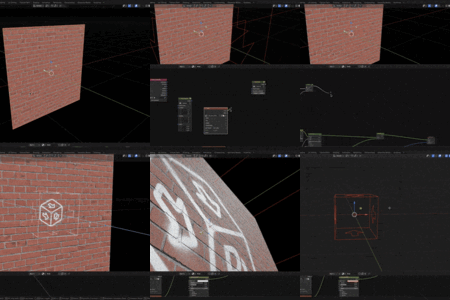
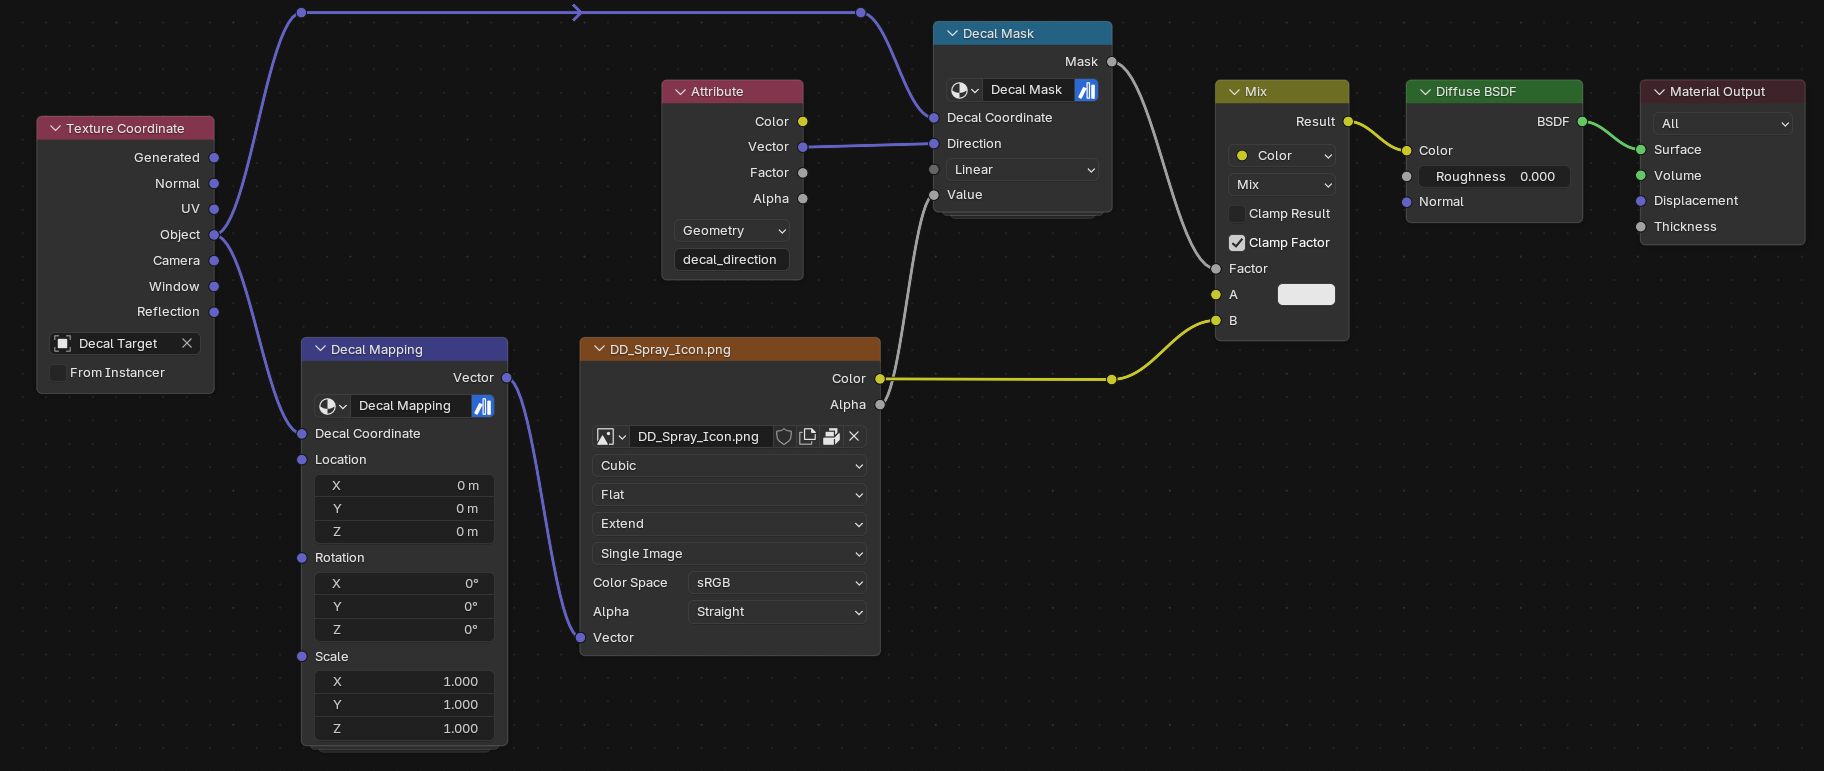
- Connect the nodes as shown in the image below:
-
Texture Coordinate:
- Select the Decal Target object in the Object field.
- Connect the Object output to the Decal Coordinate input of the Decal Mapping node and also to the Decal Coordinate input of the Decal Mask node.
-
Decal Mapping:
- Connect the Vector output to the Vector input of the Image Texture node.
-
Image Texture:
- Load your decal image. Ensure it has a transparent background.
- Connect the Color output to the B input of the Mix node.
- Connect the Alpha output to the Value input of the Decal Mask node.
-
Attribute (Optional):
- In the Name field, type "decal_direction". This must match the name in the Decal Target modifier.
- Connect the Vector output to the Direction (Optional) input of the Decal Mask node.
-
Decal Mask:
- Connect the Mask output to the Factor input of your Mix node.
-
Mix:
- Set your base color in input A.
- Connect the Result output to the Color input of the Diffuse BSDF node.
-
Diffuse BSDF:
- Connect the BSDF output to the Surface input of the final Material Output node.
-
Texture Coordinate:
Step 3: Geometry Nodes Modifier Setup (Optional)
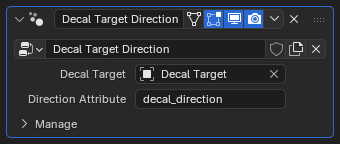
To enable the decal to mask based on surface normals (preventing stretching on sides), you need to add and configure the Decal Target Direction modifier.
- With your target object selected, go to the Modifiers tab and add a Geometry Nodes modifier.
- Click the dropdown and select the Decal Target Direction node group.
- In the modifier's inputs, you will see a Decal Target field. Use the eyedropper to select the Decal Target object from your scene.
- In the Direction Attribute field, type "decal_direction". It is crucial that this name is identical to the one used in the Attribute node in the Shader Editor.
Your dynamic decal is now set up. You can move, rotate, and scale the Decal Target object in the 3D Viewport, and the decal will update on your model in real-time
Node Group Reference
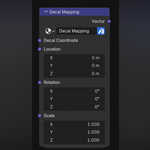
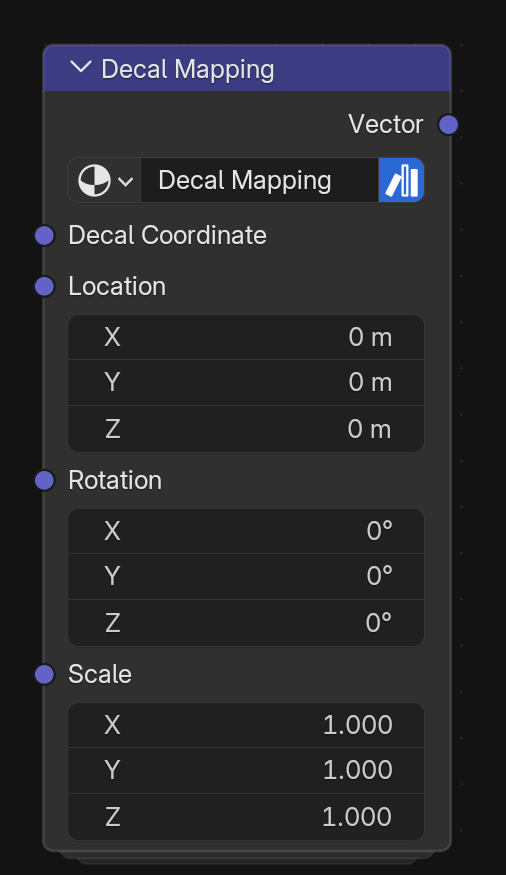
Decal Mapping
-
Inputs:
- Decal Coordinate: The decal coordinate to be transformed.
- Location: The amount of translation along each axis.
- Rotation: The amount of rotation along each axis (XYZ Euler order).
- Scale: The amount of scaling along each axis.
-
Outputs:
- Vector: The transformed vector for your decal texture.
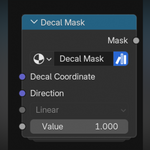
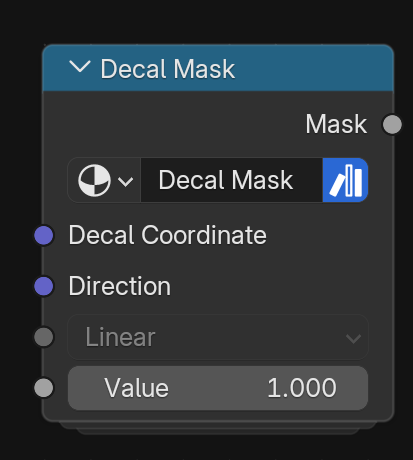
Decal Mask
-
Inputs:
- Decal Coordinate: The transformed vector from the Decal Mapping node.
- Direction (Optional): Accepts the direction attribute from the Decal Target Direction modifier. This is used to perform a dot product calculation inside the node to mask the decal based on surface normals.
- Value: The input for the decal's alpha channel, typically from an Image Texture node.
-
Outputs:
- Mask: The final mask to be used as the mix factor between your base material and the decal material.
Decal Target Direction
-
Inputs:
- Decal Target: The object used to control the decal's projection.
- Direction Attribute: The text name for the output attribute (e.g., "decal_direction"). This name must match the one used in the Attribute node in the Shader Editor.
Have questions about this product?
Login to message
| Sales | 10+ |
| Rating | 2 ratings |
| Dev Fund Contributor | |
| Published | about 1 year ago |
| Blender Version | 4.0 - 5.0 |
| Render Engine Used | Cycles, Eevee |
| License | Royalty Free |