Dynamic Decal - Hassle Free Decal & Stamp System For Blender
 Polymorph Studio


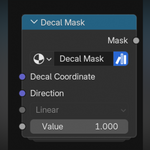
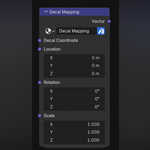
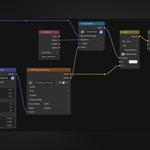
What is the main advantage of this shader-based system over other methods, like using the Shrinkwrap modifier?
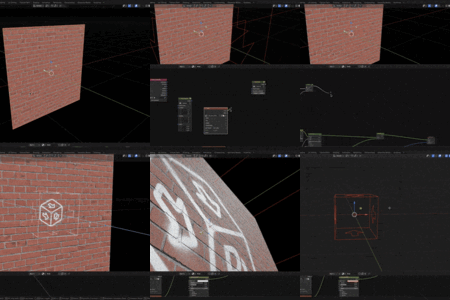
The primary advantage is workflow speed and non-destructive flexibility. With a shader-based approach, you don't need to create, manage, or UV unwrap separate geometry for your decal. The entire effect is handled within the material, making it incredibly fast to place, adjust, and iterate. This avoids potential issues like z-fighting or complex topology management that can come with shrink-wrapped decal planes.
Does Dynamic Decal work with both Cycles and Eevee?
Yes. Since the system is built entirely on Blender's native shader nodes and an optional Geometry Nodes modifier, it is fully compatible with both Cycles and Eevee render engines.
Can I use the decals I create in commercial projects?
Absolutely. The product is sold under a Royalty-Free license, which means you can use it in any of your personal or commercial projects without any additional fees.
Will I receive future updates for free?
Yes, all future updates to Dynamic Decal are included with your purchase on the Blender Market.
The decal is projecting all the way through my model to the other side. How do I stop this?
This is the intended function of the normal-based masking. To prevent projection on back-facing or steep-angled surfaces, you must use the Decal Target Direction modifier. Follow Step 3 in the setup guide to add the modifier to your target object and connect the resulting attribute in your shader tree. This will mask the decal so it only appears on surfaces facing the Decal Target.
My decal looks stretched or distorted on the sides of my model. How can I fix it?
Similar to the question above, this stretching occurs when the projection hits a surface at a very sharp angle. The best way to fix this is by using the Decal Target Direction modifier setup. The normal-based masking generated by this setup will fade out the decal on these steep surfaces, eliminating the visible distortion.
Do I need to append the nodes for every new Blender project?
Yes. To use Dynamic Decal in a new project, you need to append the three node groups from the dynamic_decal_importer.blend file. A quick way to speed up this is to add these node groups to your Asset Browser for easy drag-and-drop access in any project.
Can I project more than one decal onto a single object?
Yes, and it's very easy to do. Simply duplicate your first Decal Target object in the 3D Viewport (e.g., Decal Target.001). Then, in the Shader Editor, duplicate the decal node group (Image Texture, Decal Mapping, Decal Mask) and use another Mix node to layer the new decal on top of the previous result. Make sure to point the new Texture Coordinate node to your new Decal Target.001 object. You can chain as many decals as you need this way.
Can I use procedural textures (like a Noise or Voronoi texture) instead of an image for my decal
Yes. Instead of an Image Texture node, you can plug any procedural texture's Color or Fac output into your material setup. The Decal Mapping node will correctly project its coordinates, allowing you to place procedural effects like grime, patterns, or damage just as you would with an image-based decal.
Can I animate the decal's position?
Absolutely. Since the decal's placement is controlled by the Decal Target object, you can keyframe the Location, Rotation, or Scale of the Decal Target just like any other object in Blender to create animated effects.
$4.99
Have questions about this product?
Login to message
| Sales | 10+ |
| Rating | 2 ratings |
| Dev Fund Contributor | |
| Published | about 1 year ago |
| Blender Version | 4.0 - 5.0 |
| Render Engine Used | Cycles, Eevee |
| License | Royalty Free |