Easy B2U - Easy Blender To Unity Export
 300Mind


Introduction
The Easy B2U add-on is a specialized Blender-to-Unity integration tool designed specifically for projects utilizing Unity's Universal Render Pipeline (URP). Tailored for 3D artists, Easy B2U streamlines the export process of 3D models, textures, and materials from Blender to Unity. The add-on ensures accurate scaling, supports multiple object exports, and seamlessly handles Level of Detail (LOD) setups.
Key Features
URP Compatibility
Optimized for URP: Tailored to work seamlessly with Unity’s Universal Render Pipeline.
Automatic Shader Assignment: Assigns URP Lit Shader materials automatically in Unity.
Accurate Scaling
Consistent Measurements: Ensures exported models maintain the correct scale between Blender and Unity.
LOD Support
Seamless LOD Integration: Exports objects with Level of Detail (LOD) configurations without issues.
Multiple Object Export
Batch Exporting: Allows exporting multiple selected objects simultaneously.
Automated Material and Texture Setup
Material Extraction: Extracts materials from FBX files in Unity.
Texture Application: Automatically applies textures to their respective materials.
Live Link
Real-Time Synchronization: Keeps Blender and Unity in sync in real-time.
Connection Feedback: Provides real-time feedback on connection and export status.
Install the Unity Package
Before installing the Blender add-on, you need to install the Easy B2U Unity Package.
Open Unity and create a new project or use an existing URP project.
Drag and drop the Easy B2U Unity Package into the Unity project window.
Unity will prompt you to import the package—click Import.
Once imported, you will find the add-on files in:
📂 Path: Assets/300Mind/Easy B2U/Blender Add-On File
Once the package is installed in Unity, proceed with installing the add-on in Blender.
How to Install Easy B2U Add-on in Blender
Follow these steps to install the Easy B2U add-on in Blender:
🎥 Video Guide: Watch on YouTube
Locate the Add-On File:
Ensure you have the Easy B2U add-on files stored in the following directory:
Assets\300Mind\Easy B2U\Blender Add-On File
Open Blender:
Launch Blender on your computer.
Access Blender Preferences:
Click on Edit in the top menu bar.
Select Preferences from the dropdown menu.
Navigate to the Add-ons Tab:
In the Preferences window, click on the Add-ons tab on the left sidebar.
Install the Add-On:
Click the Install... button located at the top right of the Add-ons panel.
Select the Easy B2U Script:
In the file browser that appears, navigate to:
Assets\300Mind\Easy B2U\Blender Add-On FileSelect the EasyB2U.py script file.
Confirm Installation:
After selecting the script, click the Install Add-on button.
Enable the Add-On:
Once installed, locate the Easy B2U add-on in the list (you can use the search bar to find it quickly).
Check the box next to the Easy B2U add-on to enable it.
Save Preferences:
Click the Save Preferences button at the bottom left of the Preferences window to ensure the add-on remains enabled in future Blender sessions.
Verify Installation:
Close the Preferences window.
Press N in Blender’s 3D viewport.
Ensure the Easy B2U panel is visible and accessible.
Workflow for URP Projects
Step 1: Start Unity First
Open Unity.
Navigate to Tools > Easy B2U.
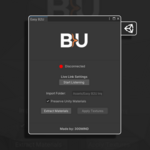
Click the Start Listening button.
Note: Unity must be in listening mode for the live link to function.
Step 2: Enable Live Link in Blender
Open Blender.
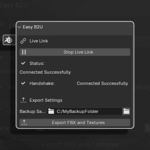
Navigate to the Easy B2U panel under View3D > UI > Easy B2U.
Click Start Live Link.
Wait for the status to display "Connected Sucessfully!."
Step 3: Export Models from Blender
Select Objects:
Choose one or more objects in Blender.
Export:
Click Export FBX and Textures.
The add-on will export:
Selected objects.
Associated textures and materials.
Objects with LOD configurations automatically handled.
Step 4: Process Assets in Unity
Extract Materials:
In Unity’s Easy B2U panel, click Extract Materials after the FBX file is imported.
Apply Textures:
Click Apply Textures to assign textures (e.g., Albedo, Normal, Metallic) to their respective materials.
Exporting LODs
Setting Up LOD Objects in Blender
Name LOD Objects:
Use a consistent naming convention, e.g., Apple_LOD0, Apple_LOD1, etc.
Create an Empty Parent Object:
Add an empty object in Blender and name it appropriately (e.g., Apple).
Parent the LODs:
Make all LOD objects children of the empty parent.
Apple
├── Apple_LOD0
├── Apple_LOD1
└── Apple_LOD2
Exporting with Easy B2U
Select Hierarchy:
Double-click the empty parent object in the outliner to select the entire hierarchy.
Export:
Click Export FBX and Textures in Blender’s Easy B2U panel.
Result: The exported FBX will be compatible with Unity’s LOD system.
Exporting Multi-Part Objects with Different Materials
Organizing Multi-Part Objects
Organize Object Parts:
Ensure each part of the object (e.g., Car_Body, Car_Tires, Car_Lights, Car_Seats) is a separate object with its own material.
Create an Empty Parent Object:
Add an empty object in Blender and name it appropriately (e.g., Car).
Parent the Parts:
Make all individual parts children of the empty parent.
Car
├── Car_Body
├── Car_Tires
├── Car_Lights
└── Car_Seats
Exporting with Easy B2U
Select Hierarchy:
Double-click the empty parent object in the outliner to select the entire hierarchy.
Export:
Click Export FBX and Textures in Blender’s Easy B2U panel.
Result: The object is exported as a single FBX file, preserving individual materials for each component.
Tips and Best Practices
Start Unity Listening First:
Always initiate Unity’s Start Listening mode before activating the live link in Blender.
Apply Scale and Transforms in Blender:
Ensure object scales and transforms are applied in Blender (Ctrl + A > Apply > Scale).
Consistent Naming Conventions:
Use clear and consistent names for objects and textures to avoid conflicts during export and import.
Prepare Materials Properly:
Assign all textures to materials using Blender’s node editor for seamless mapping in Unity.
Use URP-Compatible Textures:
Ensure texture maps (e.g., Albedo, Normal, Metallic) are properly configured for URP shaders.
Naming Conventions for Texture Map Files
To maintain consistency and avoid conflicts during export and import, follow the naming conventions outlined below for your texture map files. Below is a table summarizing the recommended suffixes for different texture types, along with example filenames.
Example Filenames:
Tree_albedo.png
Building_normalmap.png
Vehicle_metallic.png
Terrain_ao.png
Lamp_emissive.png
Rock_roughness.png
Mountain_heightmap.png
Troubleshooting
Connection Issues
Blender Fails to Connect to Unity:
Verify that Unity’s Start Listening is active.
Ensure both Blender and Unity are on the same local network.
Export Issues
Missing Materials or Textures:
Confirm that all textures are assigned in Blender using material nodes.
Verify that texture file paths are correct.
Scaling Problems
Objects Misaligned or Incorrectly Sized:
Ensure that scale is applied to all objects in Blender before export.
LOD or Multi-Part Object Errors
Incorrect LOD or Multi-Part Object Appearance:
Double-check the parent-child hierarchy in Blender to ensure proper setup.
Support and Feedback
We value your feedback and are here to help!
Contact Us: Reach out to 300 Minds via our contact page Or Mail us.
Thank you for choosing B2U to enhance your Blender & unity workflow. We hope this documentation helps you make the most of the add-on.
 Included
Includes 12 months of
- Support from 300Mind
- Product updates
Extend this product’s Support Period +12 months: 50% of product price
Have questions before purchasing?
Login to message
Discover more products like this
live link Export batch-export materials Blender-to-Unity game assets Blender Export asset export LOD unity integration easy-b2u-blender-to-unity-export blender tools