 Chever.3d


================================================================
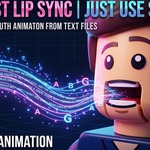
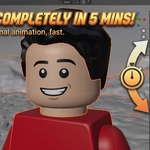
EASY MOUTH ANIMATION — USER GUIDE
A Blender addon for caption-driven mouth animation
Made by chever3d — Instagram @chever3d — www.chever3d.com
================================================================
TABLE OF CONTENTS
----------------------------------------------------------------
SETUP
1. Install
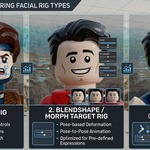
2. Build a Mouth Rig
WORKFLOW
3. Captions
4. Cue List
5. Multi-Speaker Dialogue
6. Capture Viseme Poses
7. Pose Presets
8. Audio-Driven Mouth Intensity (Optional)
9. Bake
REFERENCE
10. Viseme Shape Reference
11. Supported Caption Formats
12. Notes & Limitations
REQUIREMENTS
----------------------------------------------------------------
Blender 4.0 or newer
Input files .srt / .vtt, or a Whisper-style .json transcript
Drive methods Bones, Shape Keys, or both at once
Dependencies None — pure Python, nothing external to install
================================================================
SETUP
================================================================
------------------------------------------------------------
1. INSTALL
------------------------------------------------------------
Step 1 Open Blender.
Step 2 Go to Edit > Preferences > Add-ons > Install...
Step 3 Select easy_mouth_animation.zip
Step 4 Enable the checkbox next to "Easy Mouth Animation"
in the add-ons list.
The panel now appears in the 3D Viewport sidebar. Press N to
open the sidebar if it isn't visible, then look for the
"Mouth Anim" tab.
That's the entire install. Nothing else to download, no PATH
configuration, no separate executable.
------------------------------------------------------------
2. BUILD A MOUTH RIG
------------------------------------------------------------
In the panel's "Target Rig" section, click:
[ Build Starter Mouth Rig ]
This generates a small bone-driven armature, automatically
placed into a Bone Collection named "LipSync":
BONE PURPOSE
---------------------- --------------------------------
MTH-jaw Jaw pivot
MTH-lip.T Upper lip, center
MTH-lip.T.L / .T.R Upper lip, mid-left / mid-right
MTH-lip.B Lower lip, center
MTH-lip.B.L / .B.R Lower lip, mid-left / mid-right
MTH-corner.L / .R Mouth corners
TNG-tongue Tongue
After generating:
1. Move / scale the armature to fit your character's head.
2. Parent your mesh to the armature.
3. Weight-paint as normal.
NOTE: This exact naming convention is what makes Pose Presets
(section 7) portable between characters and projects later.
Building the rig entirely by hand instead is fine too — the
addon only requires that your bones live inside the Bone
Collection named in the panel (default: "LipSync").
================================================================
WORKFLOW
================================================================
------------------------------------------------------------
3. CAPTIONS
------------------------------------------------------------
Point "Caption File" at your .srt, .vtt, or Whisper .json
transcript, then click:
[ Analyze Captions ]
Settings available before analyzing:
Extended Shapes (G,H)
Gives F/V and L/N sounds their own distinct mouth
shapes, instead of folding them into the general
consonant shape (B). On by default.
Silence Gap (seconds)
How long a pause between words must be before the
mouth is keyed back to idle/rest, rather than holding
the last shape. Default: 0.12s.
Normalize Start Timecode
On by default. Shifts the file so the first spoken
word lands at t = 0s. Turn this OFF only if you
deliberately want the file's absolute timecode kept
(some editing software exports captions starting at
01:00:00:00).
What gets handled automatically while parsing:
- HTML tags (, , etc.)
- VTT voice/class tags
- ASS override tags
- YouTube-style embedded per-word timestamps
- Speaker labels, on the same line OR their own line
------------------------------------------------------------
4. CUE LIST
------------------------------------------------------------
Every parsed cue appears in an editable list. You can:
- Change a wrong viseme guess using the dropdown
- Adjust a cue's start / end time by hand
- Add a new cue (e.g. to patch a gap the parser missed)
- Remove a cue entirely
Each row also shows a confidence marker:
WORD LEVEL -> Timing came straight from the source (a
single-word cue, or an embedded per-word
timestamp). Trustworthy as-is.
ESTIMATED -> Timing was apportioned across a multi-word
phrase cue by word length. Worth a quick
spot-check.
------------------------------------------------------------
5. MULTI-SPEAKER DIALOGUE
------------------------------------------------------------
"Multi-Speaker Dialogue" turns ON AUTOMATICALLY the moment
Analyze Captions detects more than one speaker label.
There is NO fixed limit on how many speakers are supported.
Every distinct label found in your captions gets its own row
in the Speakers list — assign it:
- An armature and/or mesh
- A drive method (Bones / Shape Keys / Both)
- Optionally, its own dedicated Pose Set (see section 7)
- An enabled / disabled toggle
Unassigned speakers automatically fall back to the default
Target Rig section, so nothing fails silently.
TIP — Different mouth shapes per character:
If you're hand-posing per character rather than reusing one
shared preset, capture and SAVE a preset for character A
BEFORE switching the Target Rig to character B. Otherwise
the second capture will overwrite the first in memory. Then
assign each character's preset via their row in the
Speakers list.
------------------------------------------------------------
6. CAPTURE VISEME POSES
------------------------------------------------------------
For each of the 9 letters (A through H, and X):
1. Select the letter from the dropdown.
2. Pose your rig by hand into that mouth shape.
3. Click [ Capture ].
Click [ Preview ] any time to re-apply a captured pose and
check it again.
A small grid in the panel shows which of the 9 shapes have
been captured so far, at a glance.
------------------------------------------------------------
7. POSE PRESETS
------------------------------------------------------------
Once all 9 poses are captured for a character:
1. Type a name into the Preset Name field.
2. Click [ Save Preset ] (export icon)
On a new project, or for a different character sharing the
same bone / shape-key naming:
1. Choose the preset from the dropdown.
2. Click [ Load Preset ] (import icon)
This skips hand-posing entirely. Presets are stored as plain
files in Blender's user scripts folder, under:
presets/easy_mouth_animation/
...so they persist across projects and even Blender
reinstalls.
------------------------------------------------------------
8. AUDIO-DRIVEN MOUTH INTENSITY (OPTIONAL)
------------------------------------------------------------
This is an OPTIONAL extra layer. It does NOT affect which
viseme is chosen — only how far the mouth opens.
1. Enable "Audio-Driven Mouth Intensity".
2. Point "Reference Audio" at a PCM WAV file (8/16/32-bit).
3. Adjust:
Min Intensity -> Blend used at the quietest moments
(0 = fully idle, 1 = full captured
shape). Default: 0.5
Max Intensity -> Blend used at the loudest moments
(1 = full captured shape; can be
pushed above 1 to overshoot for
emphasis). Default: 1.0
Smoothing -> Moving-average smoothing on the
loudness envelope, in frames.
IMPORTANT: The WAV file's t = 0 should line up with the
captions' t = 0 (after Normalize Start Timecode, if enabled).
------------------------------------------------------------
9. BAKE
------------------------------------------------------------
Click [ Bake Lip Sync to Timeline ] to convert the cue
timeline into keyframes.
Options:
Start At Current Frame
ON -> bakes starting at the playhead.
OFF -> reveals a Start Frame field to bake at a
specific frame instead.
Hold Frames
Extra hold added to closed-mouth visemes (A, B, X) so
consonants read as a crisp snap instead of a soft
blend.
Bake Into:
>> NEW ACTION + NLA STRIP (default, recommended)
Bakes into a brand-new Action per target, then pushes
it onto its own NLA track/strip, named after "Take
Name" (with the speaker's label appended per
character in a multi-speaker bake).
Nothing existing is touched. Previous takes and other
animation on the rig are completely safe. Multiple
lines of dialogue stack as separate strips instead of
overwriting each other.
>> CURRENT ACTION
Bakes directly into whatever Action is already active.
"Clear Existing Keys In Range" (on by default) removes
stale keyframes belonging ONLY to this addon's own
bones/shape keys, and ONLY within the new cues' frame
range, before writing new ones — so re-baking a
changed take doesn't leave old keyframes behind.
WARNING: Baking into Current Action WITHOUT "Clear Existing
Keys In Range" can leave stale keyframes from a previous,
different take. Leave that option on unless you have a
specific reason not to.
================================================================
REFERENCE
================================================================
------------------------------------------------------------
10. VISEME SHAPE REFERENCE
------------------------------------------------------------
LETTER MOUTH SHAPE
------ --------------------------------------
A Closed (M, B, P)
B Slightly open, clenched teeth
C Open (E/EH vowels)
D Wide open (AA vowel)
E Rounded open (O)
F Puckered (W/OO)
G Teeth on lip (F/V) [extended]
H Tongue up (L/N) [extended]
X Idle / rest
------------------------------------------------------------
11. SUPPORTED CAPTION FORMATS
------------------------------------------------------------
- Word-level or sentence-level .srt / .vtt
- HTML tags: , , etc.
- VTT voice/class tags: ,
- ASS override tags: {\...}
- YouTube-style embedded per-word timestamps
- Speaker labels:
"Speaker 1: ..." (same line, colon)
"[JOHN]: ..." (bracketed)
"- dialogue" (dash-prefixed)
"Speaker 1" / " Hello" (own line, no colon)
- Whisper-style .json transcripts:
openai-whisper, faster-whisper, whisperx,
OpenAI API verbose_json
- Diarization speaker tags inside Whisper JSON
(e.g. "speaker": "SPEAKER_00")
------------------------------------------------------------
12. NOTES & LIMITATIONS
------------------------------------------------------------
ACCURACY
Mouth shape is estimated from spelling patterns, not audio
phonemes — it's an approximation, not a forced alignment.
Combined with real word-level timing from the caption file,
it's close enough for stop-motion-style lip sync in most
cases. Use the Cue List (section 4) to fix anything that
looks off.
MULTI-SPEAKER BAKES
Each enabled, rig-assigned speaker gets its own complete
bake pass. One click covers the whole scene.
RE-BAKING
Prefer "New Action + NLA Strip" when in doubt — it can
never overwrite a previous take. Only switch to "Current
Action" when you specifically want lip sync layered into
an existing action.
================================================================
Made by chever3d — Instagram @chever3d — www.chever3d.com
================================================================
 Included
Includes 12 months of
- Support from Chever.3d
- Product updates
Extend this product’s Support Period +12 months: 25% of product price
Have questions before purchasing?
Login to message
| Published | about 2 months ago |
| Blender Version | 5.2 |
| Extension Type | N/A |
| Render Engine Used | Blender-Internal, Blender-Game-Engine, Cycles, Eevee, Freestyle, Octane, Vray |
| License | GPL |
Discover more products like this
lego animation 2D cartoon face rigging mouth-rig auto lip sync mouth animation auto sync audio 2d-mouth-rig