Everything Everywhere All at Once
 Velvum Inc



EEAO — Everything, Everywhere, All at Once
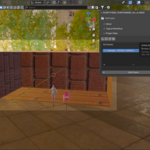
Manage every character, prop, stage set, world and scene in your project without ever leaving Blender. No more File > New, no more File > Open, no more hunting through folders — everything lives in one panel.
NOTE: See the demo video for a
visual walkthrough.
Installation
- Download the EEAO
.zipfile. - In Blender, go to Edit > Preferences > Get Extensions (or Add-ons, depending on your Blender version).
- Click the dropdown arrow in the top right and choose Install from Disk.
- Select the downloaded
.zipfile. - Once installed, make sure the checkbox next to EEAO is enabled.
That's it — no restart needed. Open the 3D Viewport, press N to open the sidebar, and look for the EEAO tab.
Setting Up Your Project
The first time you open the EEAO panel, you'll see two ways to get started:
Open Project Folder Click the folder icon and pick any folder on your computer.
- If it's already a project you've worked in before, it opens right where you left off.
- If it's an empty folder, a new project is set up there automatically.
Either way, it's the same one click — you don't need to know in advance which case you're in.
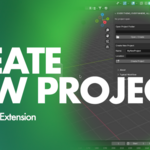
Create New Project Give your project a name and pick a location, then click Create Project. A new project folder is created for you.
Once a project is open, its name is always shown at the top of the panel, with two buttons next to it:
- Refresh — manually re-checks your files (you'll rarely need this; new files show up on their own).
- Close (✕) — closes the current project so you can open or create another one.
Finding Your Way Around
Everything happens inside one panel, split into six tabs:
Characters — your character files. Stage — your 3D sets and locations. Props — prop files, plus any reference images, videos, or other media you want to keep with your project. World — background, lighting and HDRI setups. Scenes — your shot files, tagged with a Scene number and Shot number. Shots — a filtered view showing only the shots you've marked as finished (OK).
At the top of the panel you'll also find two collapsible sections:
- About — a quick reminder of what the addon does.
- Typical Workflow — a step-by-step cheat sheet, always available if you forget what to do next.
Click their little arrow to expand or collapse them.
Adding New Files
Every tab (except Shots) has an Add button at the bottom — Add Character, Add Stage Set, Add Prop, Add World, or Add Scene.
- Click it.
- Type a name.
- Your current file is saved automatically, and the new file is created for you in the background — blank and ready to build, with no default cube or camera cluttering it up.
- Give it a second, and it'll appear in the list on its own — no need to click anything else.
Working With Your Files
Each file in a list has a row of small icons next to it:
- Open (📄) — saves what you're working on, then opens the selected file. Works from any tab, so you never have to leave the panel to switch files.
- Link (🔗) (Characters, Stage, Props) — brings the asset into your current scene as a live reference. If the original file changes later, the linked copy updates too.
- Append (📎) (Characters, Stage, Props) — brings in your own independent copy of the asset, fully editable — assign materials, tweak the mesh, whatever you need.
- Load (🖼) (Props — images and videos only) — brings the image or video into your current file so you can use it as a texture, background reference, or anywhere else Blender lets you pick an image. You choose where it goes.
- Append (📎) (World) — brings in every background/lighting setup from that file at once. Afterward, pick which one to use from Blender's own World dropdown.
- Move to Folder (⇄) (Characters, Stage, Props, World) — organize files and folders however you like. Pick an existing folder, or type one new folder name to create it on the spot.
Organizing With Folders
Characters, Stage, Props, and World each have their own independent folder system — a folder you create in one has no effect on the others.
- The list is shown as an expandable tree, just like Blender's own Outliner. Click the triangle next to a folder to open or close it.
- Click the Move to Folder (⇄) icon on a file or folder to move it. You'll always see exactly where it currently lives before you move it.
- As your project grows, this keeps things tidy without ever touching real folders on your computer — you're just organizing how things are grouped inside the addon.
Working With Scenes and Shots
Scenes work a little differently, since they're organized by Scene number and Shot number instead of folders.
- Click the pencil (✏️) icon on a scene file to set its Scene # and Shot #.
- Click the checkmark (✓) to mark a shot as finished (OK). Click again to mark it back as work-in-progress.
- The Scenes tab shows everything — work-in-progress and finished — with a dropdown to filter down to one Scene # at a time as your project grows.
- The Shots tab shows only the shots you've marked OK, organized by Scene #. This is the place to review a finished shot breakdown, ready to render any time.
A Typical Day
- Open your project (or create a new one).
- Add whatever you need — a character, a stage set, a prop, a world.
- Open a file and build it out.
- While working on a scene, Link or Append in the characters, stage sets, and props you need to assemble the shot.
- Bring in a World to set the mood, then set up your camera and lighting.
- Test-render.
- When you're happy with a shot, tag it with its Scene # / Shot # and mark it OK.
- Find every finished shot waiting for you in the Shots tab, any time you're ready to render.
No file browsers. No remembering where anything is saved. Everything, everywhere, all at once.
NOTE: Refer to demo video to visually connect to this information.
Have questions about this product?
Login to message
| Published | 2 months ago |
| Blender Version | 4.2 - 5.0 |
| Extension Type | N/A |
| License | Mit |