Flux Particle Engine
 R Animation Studios



Flux Particle Studio — Documentation
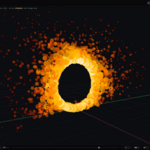
Flux is a browser-based particle simulation tool. You design particle effects visually in the browser and export them render-ready into Blender with one click. The Blender bridge plugin handles everything — unpacking the export, setting up Geometry Nodes, and configuring shaders automatically.
📺 For a complete walkthrough, watch the full tutorial on YouTube:
https://youtu.be/clIKc4SfuCE
What's Inside
- Emitter Shapes — Point, Line, Ring, Disc, Sphere, Box, Hemisphere, Spline
- Forces — Gravity, Wind, Animated Wind, Linear Impulse, Attractor, Vortex, Turbulence, Drag, Curl Wind
- Colliders — Plane (infinite), Sphere, Box
- Drivers — Control size, opacity and color using Lifetime, Randomness, Speed, Distance, Height, Scene Time and Noise
- Keyframes — Animate any parameter with multiple interpolation methods
- Multiple Emitters — Each with completely independent settings
- Live Blender Sync — Draw a curve in Blender, see it update in Flux in real time via Spline emitter
- Presets — Nature & Weather, Fire Pack, Arcane Pack — all fully editable
Installation & Setup
-
Install the add-on — Drag and drop the
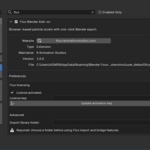
.zipfile directly into Blender. Do not unzip it. - Activate your license — Go to Blender Preferences → Add-ons → search Flux → paste your license key in the input field.
- Set Import Library folder — In the same preferences panel, choose any empty folder on your system where exported effects will be stored.
- Launch Flux from Blender — Press N in the 3D viewport → go to the Flux tab → click Launch Flux. This opens the browser tool in activated mode.
Important: Flux must always be launched from inside Blender using the Launch button. Opening the browser URL directly will show a "Session Required" message and export will not be available.
Claiming Your License (Superhive)
- Click the Claim License button in the Flux header.
- Enter your Order ID, exact purchase date, and the email address where you want to receive your key. This does not need to be the same email you used on Superhive.
- Click Send. Your license key will be emailed immediately.
Note: It may take up to 5 minutes after purchase for your order to appear in our system. If you run into any issues, reach out and we'll assist you right away.
Exporting to Blender
- Once your simulation is ready in Flux, click Export.
- Set your Frames, FPS and Particle Cap, then click Download ZIP.
- Wait for baking to complete — this can take a few seconds to a couple of minutes depending on particle count.
- Back in Blender, click Import ZIP from the Flux panel and select your downloaded file.
- The plugin automatically sets up Geometry Nodes and shaders. Your effect is live in the viewport, ready to render.
You can also swap the Instance Object in the Geometry Node editor to use any custom mesh for your particles.
Requirements
- Blender 4.5 or newer
- Windows, macOS or Linux
- A modern browser (Chrome recommended)
- Internet connection required
Support
For questions, issues or feedback:
- Website: flux.ranimationstudios.com
- Full Tutorial: youtube.com/watch?v=clIKc4SfuCE
Have questions about this product?
Login to message
| Blender Extension Compatible | Yes |
| Published | 4 months ago |
| Blender Version | 4.5 - 5.1 |
| Extension Type | Add-on |
| Render Engine Used | Cycles, Eevee |
| License | GPL |

Discover more products like this
particle system FX flux particles real-time geometry nodes fire forces effects simulation motion graphics VFX