Foliagelab - Cutter
 Michael G. Art


FoliageLab Cutter
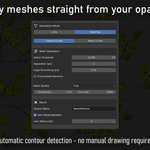
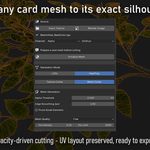
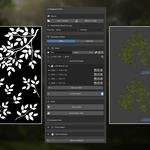
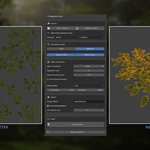
FoliageLab Cutter is a Blender add-on that generates optimised polygon meshes from foliage opacity maps. It detects foliage elements automatically from an opacity texture, lets you define pivot points and growth angles, then builds LOD-ready meshes ready for use in game engines.
Installation
FoliageLab Cutter is distributed as a .zip archive. Do not extract the archive -- install the .zip file directly in Blender.
- Open Blender and go to Edit > Preferences > Add-ons
- Click Install...
- Navigate to the downloaded FoliageLab_Cutter.zip, select it and click Install Add-on
- Tick the checkbox next to FoliageLab Cutter to enable it
- The panel appears in the FoliageLab tab of the N-Panel (press N in the 3D Viewport)
Important: Do not unzip the archive. Installing a folder instead of a .zip will cause Blender to fail to recognise the add-on.
Overview and Workflow
- Load Source - Pick an opacity map from disk or from an image already open in Blender.
- Choose Mode - Select LOD Mode to draw custom hull shapes, or High Poly Mode for automatic high-density meshes.
- Configure - Set mesh quality, alpha threshold, and other options for your target use case.
- Build - Click Build Meshes (LOD) or the relevant button in High Poly Mode to generate geometry.
- LODs and Export - Optionally generate a full LOD chain, add cross meshes, then consolidate and export.
Keyboard Shortcuts
- N - Open / close the N-Panel in the 3D Viewport.
- Left Click - Place a hull point when drawing in the Image Editor.
- Left Click + Drag - Set pivot point and growth angle simultaneously in pivot mode.
Restore Defaults resets all settings to their default values and clears the actor list. Already generated meshes in the scene are not deleted.
Source
Load the opacity texture that FoliageLab Cutter will use to detect foliage elements and generate meshes.
- Input Texture - Open a file browser to pick an opacity/mask image from disk. Supports PNG, TGA, TIFF, EXR, HDR, JPG.
- Blender Image - Pick an image already loaded in the current Blender session instead of browsing from disk.
- Channel - Select which color channel to use as the opacity mask: Luminance, Red, Green, Blue, or Alpha.
- Max Resolution - Internal working resolution for mesh detection. Lower values are faster; higher values preserve more fine detail.
When Mesh Cutter sub-mode is active, an additional button appears: Initialize Mesh duplicates the selected card mesh and separates it into individual parts ready for cutting. Always run this before cutting.
Generation Mode
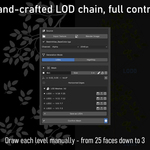
- LOD Mode - Draw custom hull shapes manually in the Image Editor. Gives full control over mesh topology and supports multiple LOD levels per shape.
- High Poly Mode - Generate dense meshes automatically from the opacity map contours. Two sub-modes are available: Texture Cutter and Mesh Cutter.
LOD Mode
In LOD Mode, you draw custom hull polygons directly on the opacity map. Each hull defines a mesh shape and can store multiple LOD snapshots.
Mesh List
- Add Mesh - Add a new empty hull shape to the list.
- Draw - Open the Image Editor and start drawing the hull for the selected shape.
- Name field - Rename the active hull shape.
- Size - Set the real-world size of this mesh in metres.
- Edit - Open the Image Editor to edit the hull of this shape.
- Clear - Erase all drawn points from this hull shape.
- Remove - Delete this hull shape from the list entirely.
Drawing a Hull
When the Image Editor is open, click to place points and draw the hull polygon around your foliage element. Close the shape by clicking the first point again.
- Confirm Mesh - Save all drawn points and close the Image Editor. Required before building meshes.
- Fill toggle - Show or hide the semi-transparent fill inside the hull polygon while drawing.
- Horizontal Edges - Force hull edges to align horizontally. Useful for billboard-style cards.
Pivot and Angle
Each hull can have a pivot point and growth angle, used for cross mesh generation and correct orientation.
- Set Pivot - Open the Image Editor in pivot mode. Click to place the pivot. Click and drag to also define the growth angle.
- Clear Pivot - Remove the pivot and angle. The mesh origin defaults to bounding box center, angle to 90 degrees.
LOD Snapshots
Each hull can store multiple LOD snapshots -- different hull versions for LOD1, LOD2, etc.
- Save as LOD N - Save the current hull as a new LOD snapshot.
- Update - Overwrite an existing snapshot with the current hull state.
- Load - Load a saved snapshot back into the active hull for editing.
- Remove - Delete a LOD snapshot.
Building Meshes
- Build LOD0 - Generate meshes from all hull shapes with at least 3 points. One mesh per hull, placed in the FoliageLab Cutter collection.
- Build Selection Only - When enabled, only the currently selected hull is built instead of all hulls.
- Build Other LODs - Generate meshes for all manually saved LOD snapshots (LOD1 and above).
Exploded View
Spread LOD levels apart in the viewport to inspect each level independently. Does not affect mesh positions for export.
- Mode - Z Stack: stack LODs vertically. Grid: spread LODs in a 2D grid.
- Z Spacing - Vertical distance between LOD levels in Z Stack mode.
- Grid Spacing X/Y - Horizontal and vertical spacing in Grid mode.
Cross Mesh
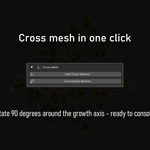
- Add Cross Meshes - Duplicate selected meshes and rotate copies 90 degrees around the growth axis for billboard-style geometry. Set a pivot and angle first.
- Consolidate Meshes - Merge each LOD mesh with its cross companion into a single object, organised into per-actor sub-collections.
LODs Generator
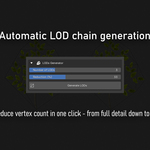
Automatically creates a full LOD chain from selected meshes by progressively reducing vertex count.
- Number of LODs - How many additional LOD levels to generate (LOD1 and above). Maximum 8.
- Reduction (%) - Percentage of vertices removed at each LOD level.
- Generate LODs - Select one or more meshes in the viewport, then click to generate the full LOD chain.
High Poly Mode
High Poly Mode generates dense meshes automatically from the opacity map contours. Two sub-modes are available.
- Texture Cutter - Generates stand-alone high-poly meshes directly from the opacity map contours. No existing mesh required.
- Mesh Cutter - Cuts an existing card mesh in the viewport to follow the opacity silhouette, preserving its UV layout.
Shared Settings
- Alpha Threshold - Opacity cutoff value (0-1). Raise to trim light halos around the foliage, lower to capture thin details like leaf veins.
- Invert Threshold - Invert the threshold. Use when your opacity map stores transparency instead of opacity (white = transparent).
- Separation (px) - Erosion radius applied before actor detection. Increase when actors are very close together and incorrectly merge into a single element.
- Edge Smoothing (px) - Smoothing tolerance applied to the contour. Higher values produce simpler outlines with fewer vertices.
- Prune Small Elements - Ignore foliage elements smaller than the Min Island Size threshold.
- Min Island Size (%) - Minimum element area as a percentage of the full atlas. Elements below this are discarded when Prune is enabled.
- Min Overlap (%) - Minimum percentage of an element's area that must overlap the source mesh UV polygon to be kept. Set to 0 to keep any element whose centroid is close to the polygon.
- Mesh Quality - Quality preset: Draft, Balanced, or High Quality.
- Tris Density - Maximum edge length of generated triangles in metres. Smaller = more triangles and finer detail.
- Vtx Limit - Maximum number of interior triangulation points. Cap this to control mesh complexity.
Texture Cutter
- Output Name - Base name for all generated meshes. Each mesh is suffixed automatically.
- Join Close Elements - Merge foliage elements that are close to each other before contour extraction.
- Join Radius (px) - Dilation radius in pixels applied before contour extraction. Larger values cause nearby elements to merge into one shape.
- Cut Mesh(es) / Update Mesh(es) - Generate the meshes from scratch, or update them if they already exist. Results are placed in the FoliageLab Cutter > HighPoly collection.
- Update Actor Names - Rename all generated HighPoly actors sequentially. Appears after meshes have been generated.
Mesh Cutter
- Atlas Size (m) - Real-world width of the atlas in metres. Used to scale the cut result to match the source card mesh.
- Cut Selected Mesh - Cut the initialized parts using the opacity map contours. Select the parts in the viewport before clicking.
- Consolidate Mesh - Join all selected cut parts into a single object.
Have questions about this product?
Login to message
| Published | 5 months ago |
| Blender Version | 4.2 - 4.5 |
| Extension Type | Add-on |
| License | GPL |
Discover more products like this
opacity-map Billboard Mesh Generation LOD uv Atlas polygon cutting vegetation real-time foliage high poly game ready