 Lumitools



FRAMEFORGE 1.0 DOCUMENTATION
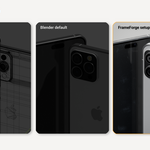
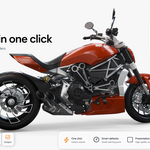
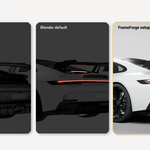
FrameForge is a Blender add-on for quickly creating polished product render setups. It helps with camera framing, studio lighting, HDRI reflections, backgrounds, look controls, surface wear details, saved cameras, and final render settings.
REQUIREMENTS
Blender 5.1 or newer
Windows, macOS, or Linux running a supported Blender 5.1+ build
Install from the original FrameForge 1.0 ZIP file
IMPORTANT INSTALL NOTE
Do not unzip the package before installing.
Install the FrameForge 1.0 ZIP directly inside Blender.
INSTALLATION
Open Blender.
Go to Edit > Preferences.
Open the Add-ons section.
Click the small menu/arrow in the top-right of the Add-ons panel.
Choose Install from Disk.
Select the FrameForge 1.0 ZIP file you downloaded.
Enable the checkbox for FrameForge 1.0.
Close Preferences.
After installation, FrameForge appears here:
3D Viewport > Sidebar > FrameForge
If the Sidebar is hidden, press N while your mouse is over the 3D Viewport.
QUICK START
Open or import your model.
Select the object or objects you want to present.
Open the FrameForge tab in the 3D Viewport Sidebar.
Click Create Render Setup.
Adjust lighting, camera, background, look, wear, and output settings.
Render your final image.
The default setup starts with a classic three-point product lighting setup: key, fill, and rim.
MAIN FEATURES
Create Render Setup
Creates or updates the FrameForge camera, studio lighting, HDRI, shadow catcher/floor setup, and render settings for your selected asset.
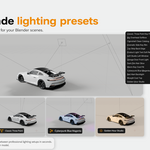
Lighting Presets
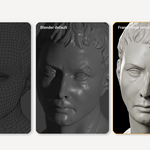
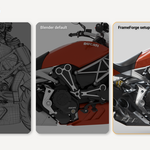
Switch between product lighting setups for clean studio, dramatic, dark, marketplace, clay, and wear-preview scenes. Lighting presets are designed to affect lighting only, so your chosen background is not unexpectedly overwritten.
Camera / Framing
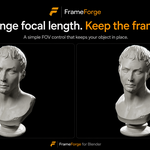
Frame your model automatically, use the current viewport angle, save camera angles, rename saved cameras, switch between cameras, and lock camera views.
Background
Choose solid or transparent background options. Transparent mode is useful when rendering PNG images with alpha.
Look / Color
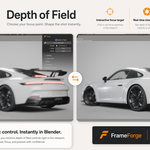
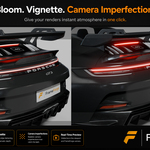
Adjust exposure, contrast, saturation, bloom, vignette, depth of field, and other presentation polish controls.
Wear System
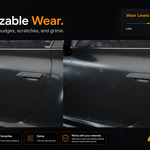
Add optional surface detail such as fingerprints, smudges, scratches, and grime. Each wear layer can be enabled or disabled and adjusted with amount sliders.
Output
Choose common render sizes and sample settings for preview or final product images.
Cleanup
Remove the FrameForge-generated setup while keeping your user objects and assets intact.
COMMON QUESTIONS
Do I install the ZIP or extract it first?
Install the ZIP directly. Do not extract the package before installing it in Blender.
Where is FrameForge after installation?
Open the 3D Viewport Sidebar by pressing N, then click the FrameForge tab.
Create Render Setup says no asset was found. What should I do?
Select at least one visible model or object in the scene, then run Create Render Setup again. Hidden objects are ignored.
Will FrameForge delete my model?
No. FrameForge is designed to create and update its own cameras, lights, floor, helpers, and setup objects. It should not delete your selected model or user objects.
Will Cleanup delete my custom cameras or lights?
Cleanup is intended to remove FrameForge-generated setup objects, not your own manually created cameras, lights, materials, or models.
Can I keep my own scene lights?
FrameForge is designed to create its own presentation lighting setup. For best results, use FrameForge lighting presets, then adjust the scene manually if needed.
Can lighting presets change my background?
No. In FrameForge 1.0, lighting presets are designed to control lighting. Background controls are separate.
Can I render a transparent background?
Yes. Enable transparent background, render to PNG, and use the alpha channel in your image editor or compositing workflow.
How do I add surface wear?
Select your object, open the Wear section, and click Add Wear. Then adjust Overall Wear, Fingerprints, Smudges, Scratches, Grime, and Scale.
Can I remove wear later?
Yes. Use Remove Wear. It is also safe to click Remove Wear more than once.
Does FrameForge apply or reset my object transforms?
No. FrameForge should not automatically apply scale, rotation, or transforms to your asset.
Why can 8K render be slow?
8K output is heavy and depends on your hardware, scene complexity, render samples, and GPU/CPU setup. Use lower preview sizes while composing.
TROUBLESHOOTING
If the add-on does not install:
Make sure you are installing the FrameForge 1.0 ZIP file, not an extracted folder.
Confirm you are using Blender 5.1 or newer.
Restart Blender and try again.
If the FrameForge tab is missing:
Press N in the 3D Viewport to show the Sidebar.
Check Edit > Preferences > Add-ons and make sure FrameForge 1.0 is enabled.
Restart Blender once after enabling.
If your render is black:
Confirm a FrameForge camera exists and is the active camera.
Run Create Render Setup again with your model selected.
Confirm the object is not hidden in viewport or render.
If wear is not visible:
Make sure wear was added to the selected object.
Increase Overall Wear and the layer amount.
Check that Fingerprints, Smudges, Scratches, or Grime are enabled.
Very dark or very glossy materials may need stronger settings to show details clearly.
SUPPORT
If you report an issue, please include:
Blender version
Operating system
FrameForge version
What you clicked before the issue happened
Whether it happens in a clean scene with the default cube
Any visible console error or Python traceback
A screenshot if the issue is visual
Support: [email protected]
PACKAGE CONTENTS
FrameForge_1_0/init.py
The FrameForge add-on code.
FrameForge_1_0/textures/
Wear masks and image-effect textures used by FrameForge.
FrameForge_1_0/hdris/
The included FrameForge Studio HDRI.
FrameForge_1_0/presets/
Packaged FrameForge lighting preset data.
VERSION
FrameForge 1.0
Built for Blender 5.1+
 Included
Includes 12 months of
- Support from Lumitools
- Product updates
Extend this product’s Support Period +12 months: 50% of product price
Have questions before purchasing?
Login to message