Ftw3Dforge Uv Transform
 FTW3DForge


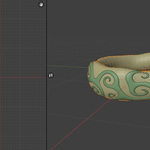
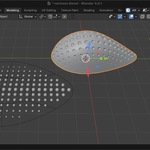
Overview
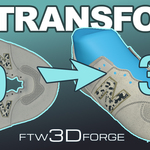
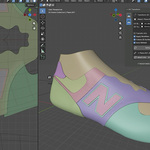
FTW3DForge UV Transform is a powerful Blender addon that allows you to design 2D geometry on a flat UV representation of a 3D surface, then transfer it onto the actual 3D mesh. This is particularly useful for footwear design, product design, and any workflow where you need to create details that conform to curved surfaces.
---
Installation
1. Download the `ftw3dforge_uv_transform.zip` file
2. In Blender, go to **Edit → Preferences → Add-ons**
3. Click **Install from Disk** and select the zip file
4. Enable the addon by checking the checkbox
The addon panel appears in the **3D Viewport Sidebar** (press `N`) under the **UV Transform** tab.
---
Quick Start
Step 1: Create UV Mesh
1. Select your 3D target mesh (must have UVs)
2. Go to the **UV Mesh** tab in the panel
3. Click **Create UV Mesh**
This creates a flat 2D representation of your 3D mesh based on its UV layout.
Step 2: Design in 2D
1. Create or place your 2D geometry on top of the UV Mesh
2. Position it where you want it to appear on the 3D surface
3. The Z height of your 2D geometry controls how far it offsets from the surface
Step 3: Transfer to 3D
1. Select your 2D source geometry
2. Go to the **2D → 3D** tab
3. Set **UV Mesh** to your UV Mesh object
4. Set **3D Target** to your original 3D mesh
5. Click **Transfer**
Your 2D geometry is now mapped onto the 3D surface!
---
Panel Reference
UV Mesh Tab
Sizing Mode
- **Fit to UVs**: Scales the UV mesh to match the average edge length ratio between 3D and UV space
- **Canvas Size**: Creates the UV mesh at a specific world-space size (useful for consistent scale across projects)
Create UV Mesh
Creates two objects:
- **UV_Mesh_[name]**: A flat mesh matching your 3D object's UV layout
- **UV_Plane_[name]**: A reference plane showing the 0-1 UV space (hidden by default)
Toggle View
Switches the UV Mesh display between:
- **Wire**: Wireframe display for easy placement
- **Textured**: Shows the material/texture for reference
Refresh UV Mesh
Updates the UV Mesh if the source 3D object's UVs have changed.
---
2D → 3D Tab
UV Mesh
Select the UV Mesh that defines the mapping space.
3D Target
Select the 3D mesh to map onto.
Options
**Transfer UVs**
Copies UVs from the UV Mesh to both the 2D source and 3D result. Essential for texturing.
**Apply Modifiers**
Uses the evaluated (e.g. subdivided) mesh for more accurate placement on subdivision surfaces.
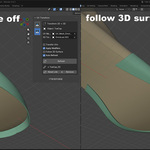
**Follow 3D Surface**
When geometry extends past UV boundaries, follows the 3D surface curvature instead of projecting flat. |
Transfer Button
Creates a new 3D result object from your 2D source.
Refresh Button
Updates an existing 3D result when you modify the 2D source. Appears after initial transfer.
Auto Refresh
Automatically updates the 3D result whenever you edit the 2D source in Edit Mode.
Reset Link
Re-establishes the connection between 2D source and 3D result if something breaks.
Remove
Deletes the 3D result and clears the link.
---
Workflow Tips
Working with Subdivision Surfaces
If your target mesh has a Subdivision Surface modifier:
1. Enable **Apply Modifiers** for accurate placement
2. The UV Mesh automatically inherits subdivision modifiers from the source
3. Your 2D geometry will conform to the smooth subdivided surface
Extending Past UV Boundaries
When your 2D geometry extends beyond the UV island edges:
- **Follow 3D Surface OFF**: Geometry projects flat using the boundary edge's tangent frame
- **Follow 3D Surface ON**: Geometry walks along the 3D surface, following curvature across seams
Custom Normals
The addon respects custom split normals on your target mesh. This is important for:
- Hard surface models with sharp edges
- Models with custom normal editing
- Imported meshes with baked normals
UV Transfer for Texturing
Enable **Transfer UVs** to ensure your 3D result has proper UV coordinates:
1. The 2D source receives UVs from the UV Mesh
2. The 3D result receives the same UVs
3. Any textures applied to the UV Mesh will appear correctly on your result
Performance Considerations
- Large meshes with many vertices may take longer to process
- **Auto Refresh** can be disabled for complex scenes
- Subdivision levels affect processing time
Troubleshooting
"UV Mesh and 3D Target must be set"
Ensure both dropdown fields are filled in before clicking Transfer.
Geometry appears distorted
- Check that your UV Mesh matches the 3D Target's current UVs
- Click **Refresh UV Mesh** if UVs have changed
- Verify the UV Mesh and 3D Target are the same object (by name reference)
3D result doesn't update
- Check that **Auto Refresh** is enabled
- Try clicking **Refresh** manually
- Use **Reset Link** if the connection was broken
Wiggling edges at UV seam boundaries
This can occur when geometry crosses between different UV islands. Try:
- Keeping geometry within a single UV island
- Using **Follow 3D Surface** mode
- Adjusting geometry to not cross seam edges
Wrong surface following with custom normals
Ensure your target mesh has proper custom normals set up. The addon uses corner normals (split normals) which should match your mesh's visual appearance.
Version History
1.0.0
- Initial release
- UV Mesh creation with Fit to UVs and Canvas Size modes
- 2D to 3D transfer with boundary extrapolation
- Follow 3D Surface mode for seam crossing
- Auto Refresh functionality
- Transfer UVs support
- Custom normal support
- Blender 5.0 compatibility
Discover more products like this
Shoe Design conform 3D Footwear Design product Design transform uv projection wrap footwear modeling uv mapping