Gamedev Texture Tools
 Noha Design


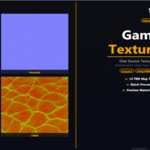

GameDev Texture Tools
User Manual — Version 1.0.0
Norman Fober · NohaDesign · nohadesign.de
Blender Add-on for generating game-ready PBR texture maps
Table of Contents
| 1. | Introduction |
| 1.1 Supported Engines | |
| 1.2 Workflow Overview | |
| 2. | System Requirements |
| 2.1 Supported Input Formats | |
| 3. | Installation |
| 3.1 Step 1: Prepare the ZIP file | |
| 3.2 Step 2: Open the Extension Manager | |
| 3.3 Step 3: Select ZIP and enable | |
| 4. | User Interface |
| 4.1 Areas at a Glance | |
| 5. | Engine-Presets |
| 5.1 Preset Overview | |
| 5.2 Channel Packing Details | |
| 5.3 Example Output: Unreal Engine 5 | |
| 6. | Material-Presets |
| 7. | Input Modes |
| 7.1 Single Texture | |
| 7.2 Batch Folder | |
| 8. | Maps Section |
| 8.1 Engine Preset: Automatic Maps | |
| 8.2 Separate Maps (Generic): Manual Selection | |
| 9. | Output Settings |
| 9.1 Export Folder | 9.2 Output Resolution | 9.3 Bit Depth | 9.4 Open Output Folder | |
| 10. | Settings (Gear Icon) |
| 11. | Step-by-Step Workflow |
| 12. | Preview Material |
| 12.1 Prerequisites | 12.2 What happens on click? | |
1. Introduction
GameDev Texture Tools (GDTT) is a Blender add-on that generates a complete set of game-ready PBR texture maps from a single source texture. The entire process — from normal map calculation to ambient occlusion and engine-specific channel packing — takes place directly inside Blender, without any external software.
GDTT supports the most common real-time rendering pipelines and exports textures in the format and file-naming convention expected by each engine.
1.1 Supported Engines
- Unreal Engine 5
- Unity HDRP
- Unity URP
- Unity Built-in
- Godot 4
- Roblox
- Separate Maps / Generic (manual selection)
1.2 Workflow Overview
The typical workflow with GDTT consists of four steps:
- Select a source texture (single file or batch folder)
- Choose an engine preset and a material preset
- Configure the output folder and resolution
- Click 'Generate Maps' — finished texture files appear in the output folder
Optionally, the generated maps can be applied directly to a selected object in Blender using the 'Preview Material' function.
2. System Requirements
The following requirements are needed to run GDTT:
| Component | Requirement |
|---|---|
| Blender | >= 4.0.0 |
| Operating System | Windows 10/11, macOS 12+, Linux (x86-64) |
| Minimum texture resolution | 256 × 256 px |
| Recommended RAM | 8 GB+ (4K textures require approx. 256 MB RAM per image) |
2.1 Supported Input Formats
.png.jpg / .jpeg.tga.bmp.tif / .tiff
3. Installation
Installation is done via Blender 4.x's built-in Extension Manager.
3.1 Step 1: Prepare the ZIP file
Download the file BlenderGameTextureAddon.zip. Do not unpack the ZIP archive.
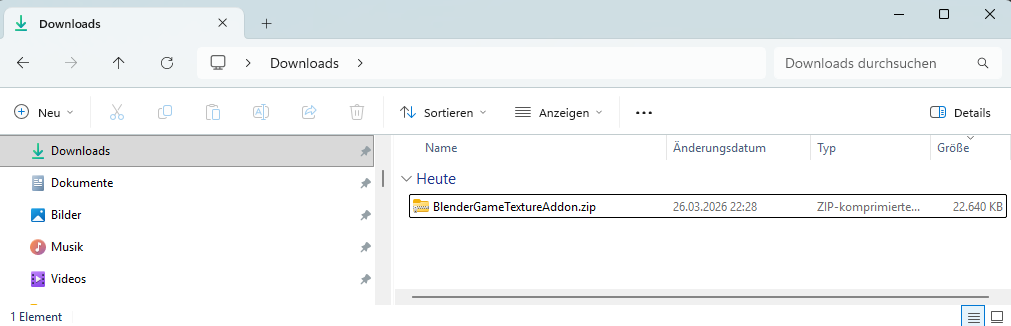
Fig. 3.1 – Downloaded ZIP file in the Downloads folderBild einfüge
3.2 Step 2: Open the Extension Manager
In Blender, open: Edit > Preferences > Get Extensions. Click the Repositories dropdown in the top-right corner and choose Install from Disk…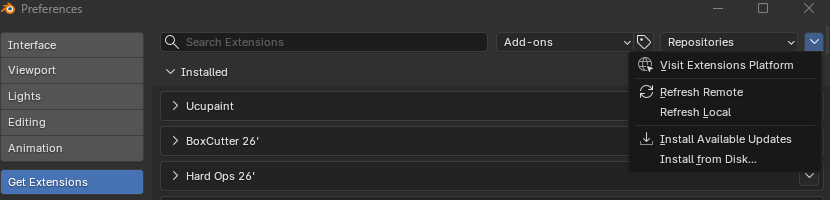
Fig. 3.2 – 'Install from Disk' in the Repositories dropdown
3.3 Step 3: Select ZIP and enable
Navigate in the Blender File View to the ZIP file. Make sure Enable on Install is checked on the right side. Click Install from Disk.
The add-on is now installed and enabled. The GDTT panel is at: 3D Viewport > N-Panel > 'GameDev' tab.
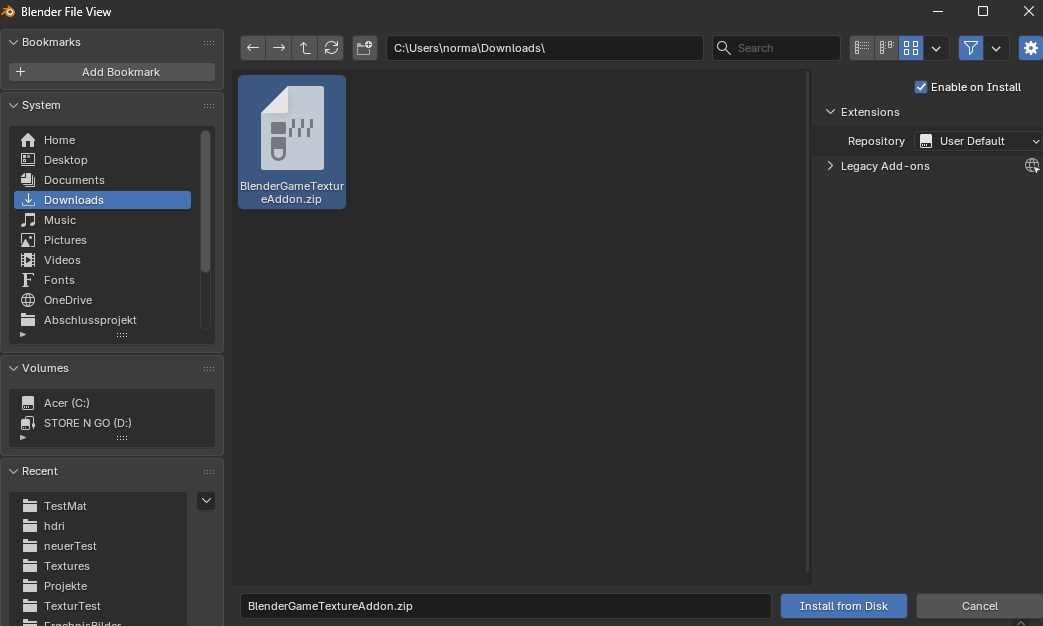
Fig. 3.3 – Blender File View with ZIP and 'Enable on Install' active
4. User Interface
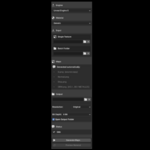
The GDTT panel is located in the 3D Viewport, N-Panel, GameDev tab. The annotated overview below shows all areas at a glance.
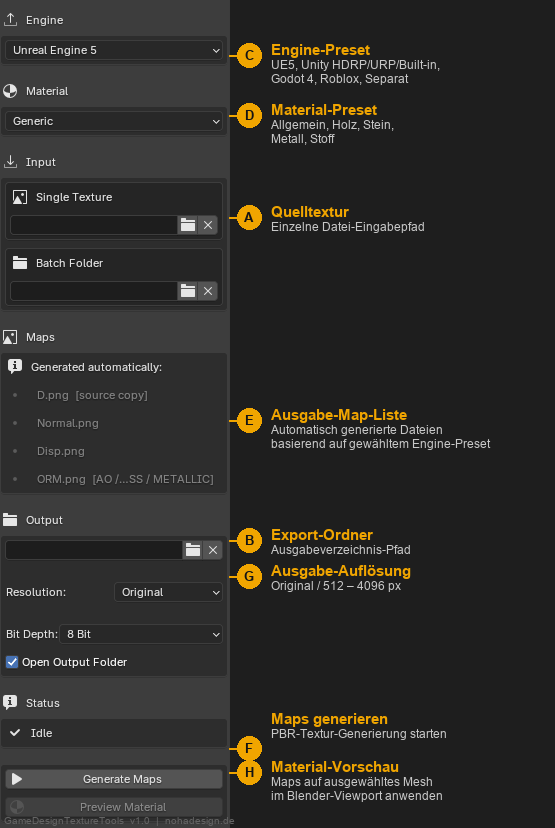
Fig. 4.1 – Annotated overview of the GDTT panel
4.1 Areas at a Glance
| Label | Area | Description |
|---|---|---|
| A | Source Texture | Single file input path |
| B | Export Folder | Output directory path |
| C | Engine | Select engine preset (7 options) |
| D | Material | Select material preset |
| E | Maps | Output map list (automatic) |
| F | Generate Maps | Start PBR texture generation |
| G | Resolution | Original / 512 – 4096 px |
| H | Preview Material | Apply maps to selected mesh |
5. Engine-Presets
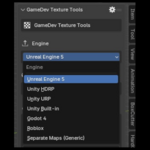
The Engine Preset determines which texture maps are generated, how the files are named, and whether normal maps use OpenGL or DirectX convention. The dropdown in the Engine section offers seven options.
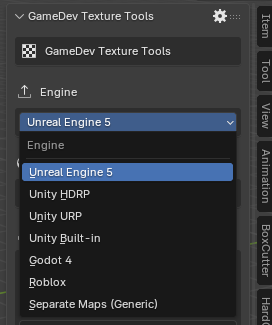
Fig. 5.1 – Engine preset selection
5.1 Preset Overview
| Preset | Normals | Output Files |
|---|---|---|
| Unreal Engine 5 | DirectX (Y−) | T_Name_D, T_Name_Normal, T_Name_Disp, T_Name_ORM |
| Unity HDRP | OpenGL (Y+) | Name_BaseMap, Name_Normal, Name_Height, Name_MaskMap (RGBA) |
| Unity URP | OpenGL (Y+) | Name_BaseMap, Name_Normal, Name_Height, Name_MaskMap (RGBA) |
| Unity Built-in | OpenGL (Y+) | Name_Albedo, Name_Normal, Name_AO, Name_Height, Name_MetallicSmoothness |
| Godot 4 | OpenGL (Y+) |
name_albedo, name_normal, name_height, name_orm (lowercase) |
| Roblox | OpenGL (Y+), max 2048 px | Name_ColorMap, Name_Normal, Name_Roughness, Name_Metallic, Name_AO, Name_Height |
| Separate Maps (Generic) | User setting | 12 individual maps (configurable) |
5.2 Channel Packing Details
Several presets combine multiple maps into one texture (channel packing) to reduce draw calls:
| Preset | Filename | R | G | B | A |
|---|---|---|---|---|---|
| UE5 | T_Name_ORM |
AO | Roughness | Metallic | — |
| Unity HDRP | Name_MaskMap |
Metallic | AO | 1 (white) | Smoothness |
| Unity URP | Name_MaskMap |
Metallic | AO | 0 (black) | Smoothness |
| Unity Built-in | Name_MetallicSmoothness |
Metallic | 0 | 0 | Smoothness |
| Godot 4 | name_orm |
AO | Roughness | Metallic | — |
5.3 Example Output: Unreal Engine 5
T_Name_D (Albedo) · T_Name_Normal · T_Name_Disp (Height) · T_Name_ORM (AO/Rough/Metal)
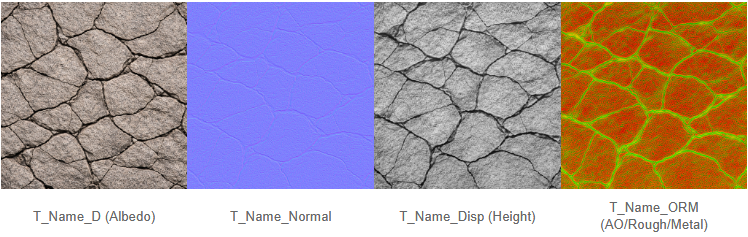
Fig. 5.2 – Example output Unreal Engine 5 (stone texture)
6. Material-Presets
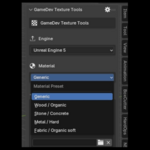
The Material Preset controls the internal algorithm parameters optimised for each material class. It influences the intensity and characteristics of the generated maps, not which maps are generated.
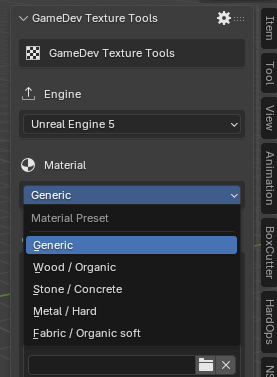
Fig. 6.1 – Material preset selection
| Preset | Optimised for | Characteristics |
|---|---|---|
| Generic | General textures | Balanced default values for all map types |
| Wood / Organic | Wood, bark, organic surfaces | Strong grain enhancement, high normal strength, pronounced AO |
| Stone / Concrete | Stone, concrete, rock | High FC weighting, deep macro AO, pronounced cavity detail |
| Metal / Hard | Metal, hard plastics | Large Gaussian radius, lower FC weighting, metallic detection active |
| Fabric / Organic soft | Fabric, leather, soft organic | Low FC weighting, variance-based roughness, soft AO radii |
7. Input Modes
GDTT offers two input modes: processing a single texture or batch-processing an entire folder. Both modes are mutually exclusive.
7.1 Single Texture
In the Input > Single Texture area, click the folder icon to open the Blender file browser. The × button clears the path.
- Supported formats:
.png, .jpg, .jpeg, .tga, .bmp, .tif, .tiff - Minimum resolution: 256 × 256 px
- The output subfolder is named:
filename_Maps
7.2 Batch Folder
In the Input > Batch Folder area, select a folder containing multiple textures. GDTT processes all supported image files sequentially.
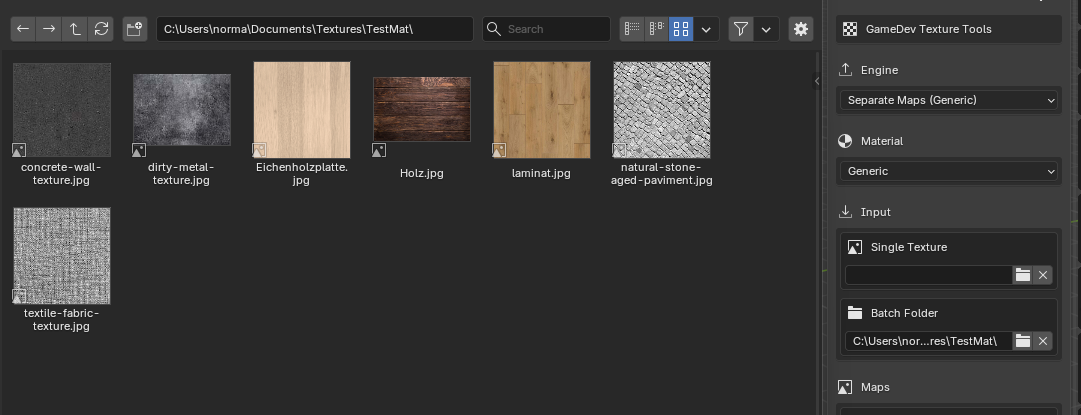
Fig. 7.1 – Batch folder with 7 textures
- A subfolder
Name_Mapsis automatically created per texture in the export directory - Status display: e.g.
'Last Run: 7 / 7' - The Cancel button stops processing after the current image
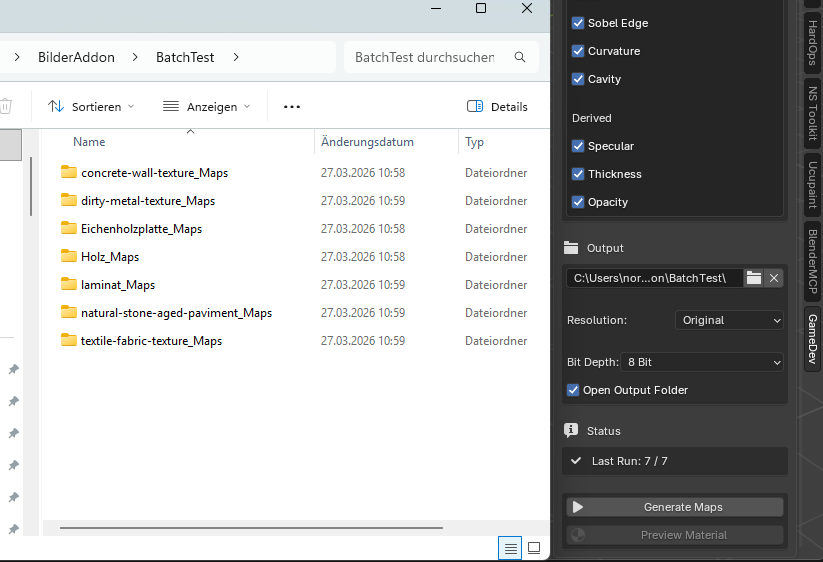
Fig. 7.2 – Result after batch generation: 7 subfolders created
8. Maps Section
The Maps section shows, depending on the selected engine preset, either a read-only list of auto-generated output files, or — when Separate Maps (Generic) is selected — an interactive checkbox list of all available map types.
8.1 Engine Preset: Automatic Maps
For all engine presets except 'Separate Maps (Generic)', the Maps section only shows the output files defined by the preset (read-only). The selection cannot be changed.
8.2 Separate Maps (Generic): Manual Selection
When Separate Maps (Generic) is selected, a full checkbox list of all 12 map types appears, divided into three groups: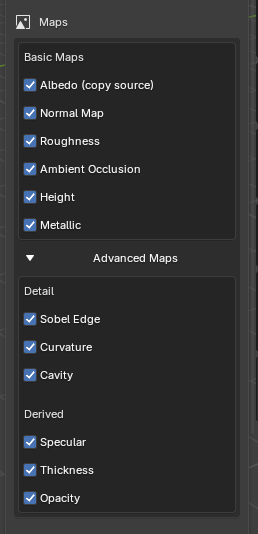
Fig. 8.1 – Separate Maps: all 12 map checkboxes
8.2.1 Basic Maps
| Map | Filename | Description |
|---|---|---|
| Albedo (copy source) | Name_albedo |
Copy of the original colour texture |
| Normal Map | Name_normal |
Tangent-space normals from FC height field + Scharr gradient |
| Roughness | Name_roughness |
Three-signal mix: form + high-frequency detail + variance |
| Ambient Occlusion | Name_ao |
5-scale logarithmic horizon occlusion model |
| Height | Name_height |
Frankot-Chellappa (FFT) + macro Gaussian blend |
| Metallic | Name_metallic |
HSV-based specular lobe detection: V × (1 − S) |
8.2.2 Detail Maps (Advanced)
| Map | Filename | Description |
|---|---|---|
| Sobel Edge | Name_sobel |
Gradient magnitude via Scharr operator on height field |
| Curvature | Name_curvature |
Isotropic 8-neighbour Laplacian operator (surface curvature) |
| Cavity | Name_cavity |
Fine-scale AO for micro-crevices and tight depressions |
8.2.3 Derived Maps
| Map | Filename | Description |
|---|---|---|
| Specular | Name_specular |
(1 − Roughness)^Gamma — specular reflection proxy |
| Thickness | Name_thickness |
Subsurface scattering proxy: blend of height and inverse macro AO |
| Opacity | Name_opacity |
Alpha channel of the source texture (for transparent textures) |
9. Output Settings
The Output section controls where and in what quality the texture files are saved.
9.1 Export Folder
Click the folder icon in the Output section to set the target directory. GDTT automatically creates a subfolder texturename_Maps for each source texture.
9.2 Output Resolution
The Resolution dropdown scales all output maps before saving:
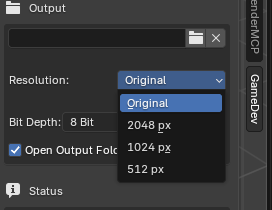
Fig. 9.1 – Resolution selection
| Option | Description |
|---|---|
| Original | No scaling — output at original size of source texture |
| 2048 px | All maps scaled to 2048 × 2048 px |
| 1024 px | All maps scaled to 1024 × 1024 px |
| 512 px | All maps scaled to 512 × 512 px |
9.3 Bit Depth
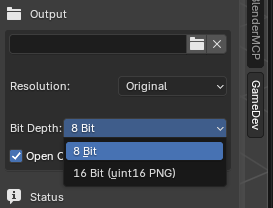
Fig. 9.2 – Bit depth selection
| Option | Format | Description |
|---|---|---|
| 8 Bit | uint8, 0–255 |
Standard for game engines, smaller file size |
| 16 Bit | uint16 PNG, 0–65535 |
Higher precision for height and normal maps |
9.4 Open Output Folder
The Open Output Folder checkbox automatically opens the output folder in the file explorer once generation is complete. Default: enabled.
10. Settings (Gear Icon)
The add-on settings are accessible via the gear icon in the top-right corner of the panel. They appear as a modal popup in the 3D Viewport. All settings are global and persist until manually changed.
| Setting | Range | Default | Description |
|---|---|---|---|
| Normal Strength | 0.1 – 5.0 | 1.0 | Scale factor for the gradient in normal map computation |
| Normal Mode | OpenGL / DirectX | OpenGL | Y+ (OpenGL) or Y− (DirectX). Only relevant for Separate Maps. |
| AO Strength | 0.1 – 3.0 | 1.0 | Multiplier for ambient occlusion intensity |
| PNG Compression | 0 – 9 | 6 | zlib compression level. 0 = fast, 9 = maximum |
11. Step-by-Step Workflow
In the Engine section, select the preset that matches your target platform, e.g. 'Unreal Engine 5'.
In the Material section, select the preset that best fits your source texture, e.g. 'Stone / Concrete' for a stone surface.
Click the folder icon next to Single Texture for a single file. Use Batch Folder to process multiple textures at once.
Enable the desired checkboxes in the Maps section. Not required for engine presets.
Click the folder icon in the Output section and choose a destination directory.
Select an output resolution (default: Original) and bit depth (default: 8 Bit).
Click the Generate Maps button. Generation starts as a modal operator in the background.
The Status section shows progress. For batch jobs e.g.
'3 / 7'. Cancel stops processing after the current image.After completion the export folder opens automatically (if enabled). Optionally use Preview Material to apply the maps to a Blender object.
12. Preview Material
The Preview Material function becomes available after a successful generation. It automatically creates a fully wired Principled BSDF material in Blender and assigns it to the active object.
12.1 Prerequisites
- At least one texture must have been generated with GDTT beforehand
- An object must be selected in the 3D Viewport
- The button is greyed out if no generation has taken place yet
12.2 What happens on click?
GDTT searches the last used export folder for all generated texture maps and creates a Blender material named GDTT_sourcefile. The material contains the following connections:
- Albedo / BaseMap / ColorMap → Base Color of Principled BSDF
- Normal Map → Normal Map Node → Normal input of Principled BSDF
- Roughness → Roughness input
- Metallic → Metallic input
- AO → Mix node (Multiply with Base Color)
-
Height → Displacement node in the output shader
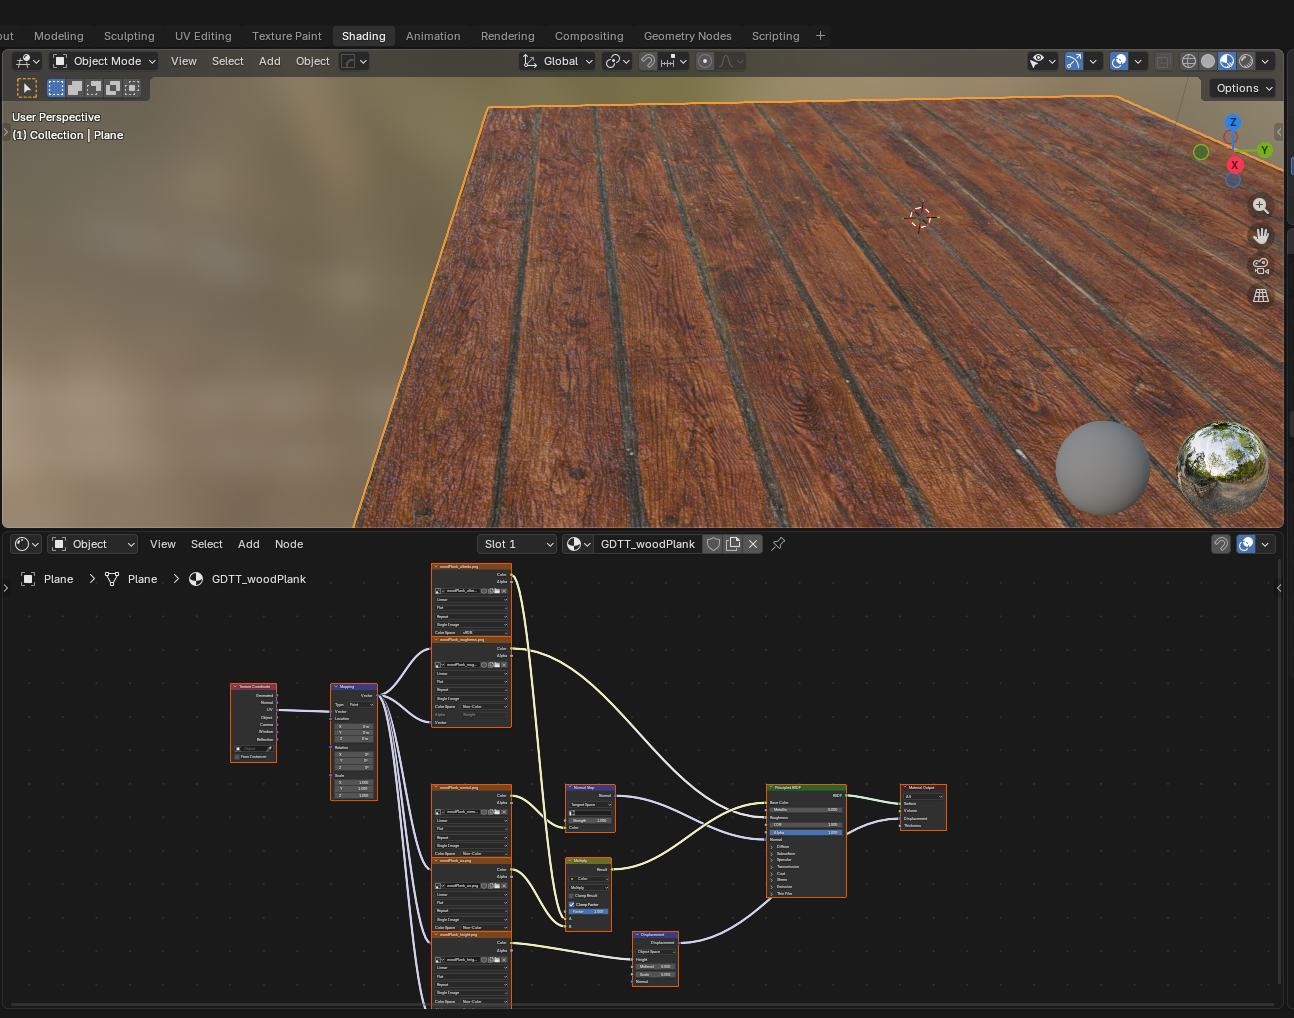
Fig. 12.1 – Automatically created Principled BSDF material (wood texture)
GameDev Texture Tools – User Manual v1.0.0 · nohadesign.de · Pages 1–20
Have questions about this product?
Login to message
| Blender Extension Compatible | Yes |
| Dev Fund Contributor | |
| Published | 5 months ago |
| Blender Version | 4.2 - 5.1 |
| Extension Type | Add-on |
| License | GPL |
Discover more products like this
blender pipeline tools addon blender unity unreal godot Material advanced Blender tools Batch processing automation pbr-generator