Grounded – Smart Scatter for Blender
 Voyde Procedural
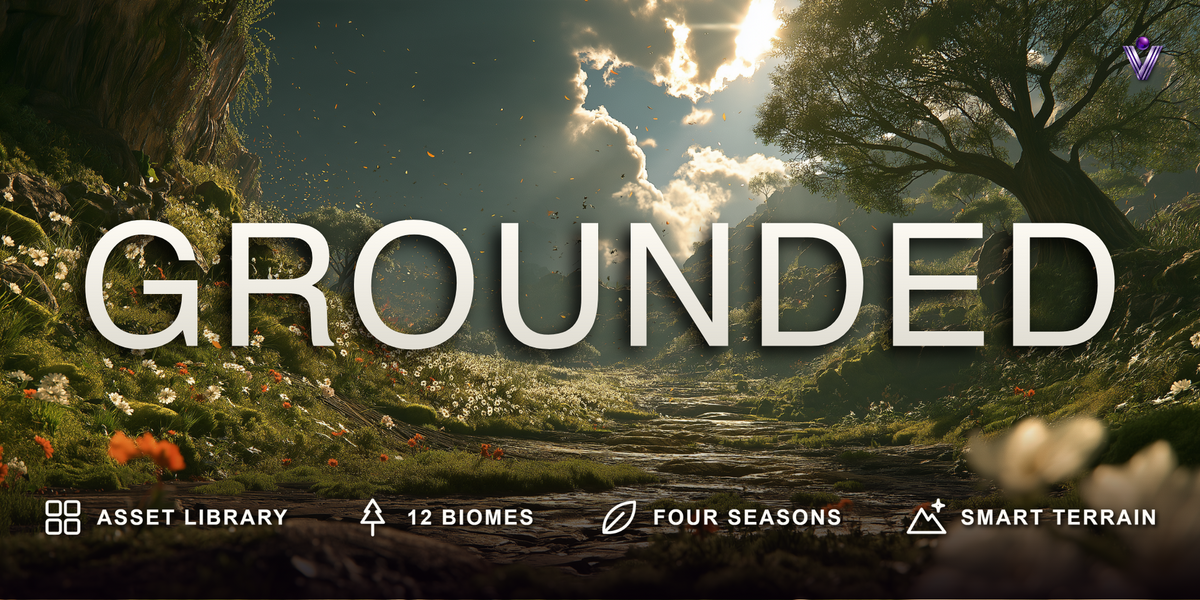
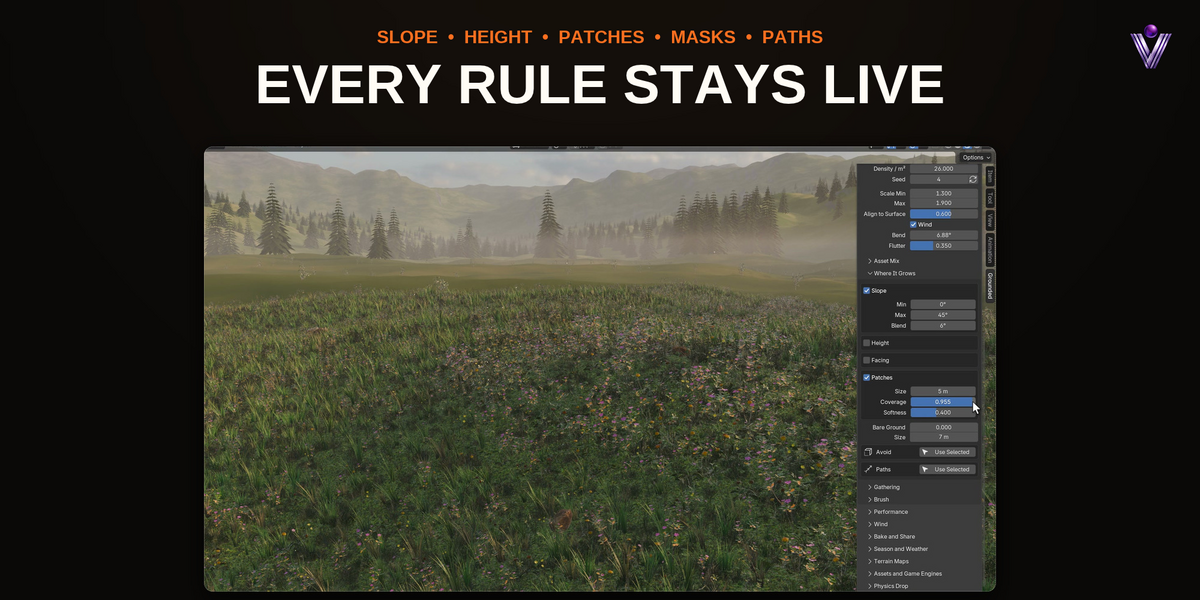
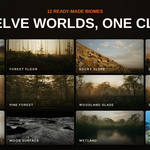
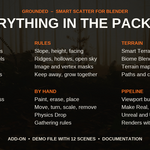
Grounded scatters grass, plants, rocks, leaves and props over any surface with simple rules, ready-made biomes and a paint brush, and keeps the viewport fast on large scenes. Everything runs on Geometry Nodes inside your file, so scenes render without the add-on, on a render farm or on a friend's computer.
- Blender 5.0 to 5.2 (Windows, macOS, Linux)
- Works with Cycles and EEVEE
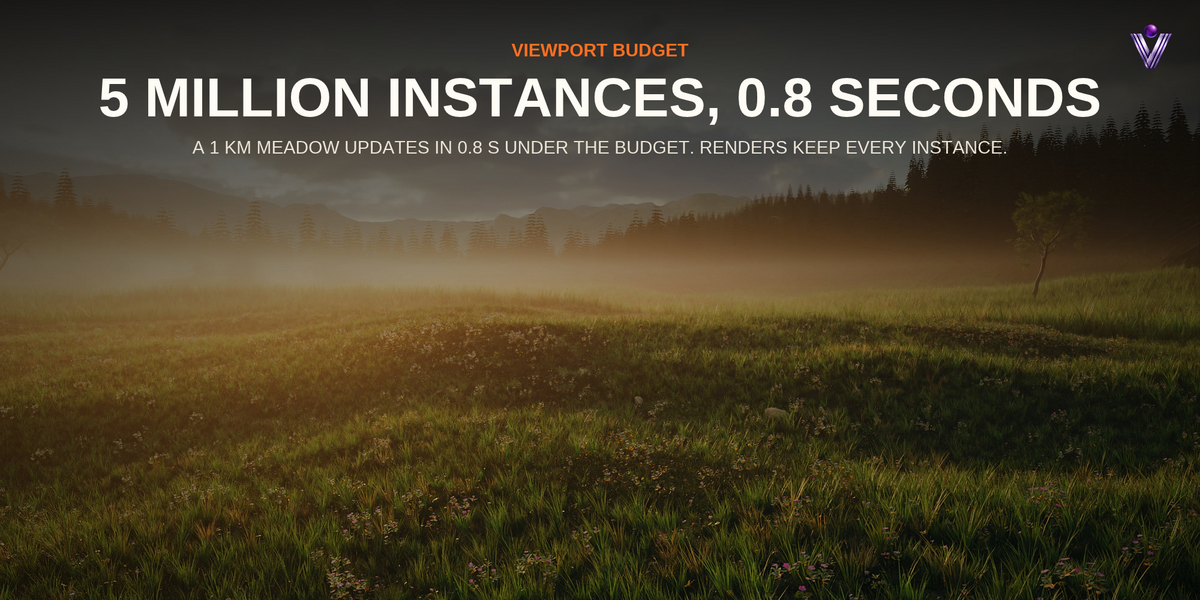
- Fast on big scenes: a 1 km meadow of 5 million instances updates in 0.8 s under the viewport budget, and rules you don't use cost nothing
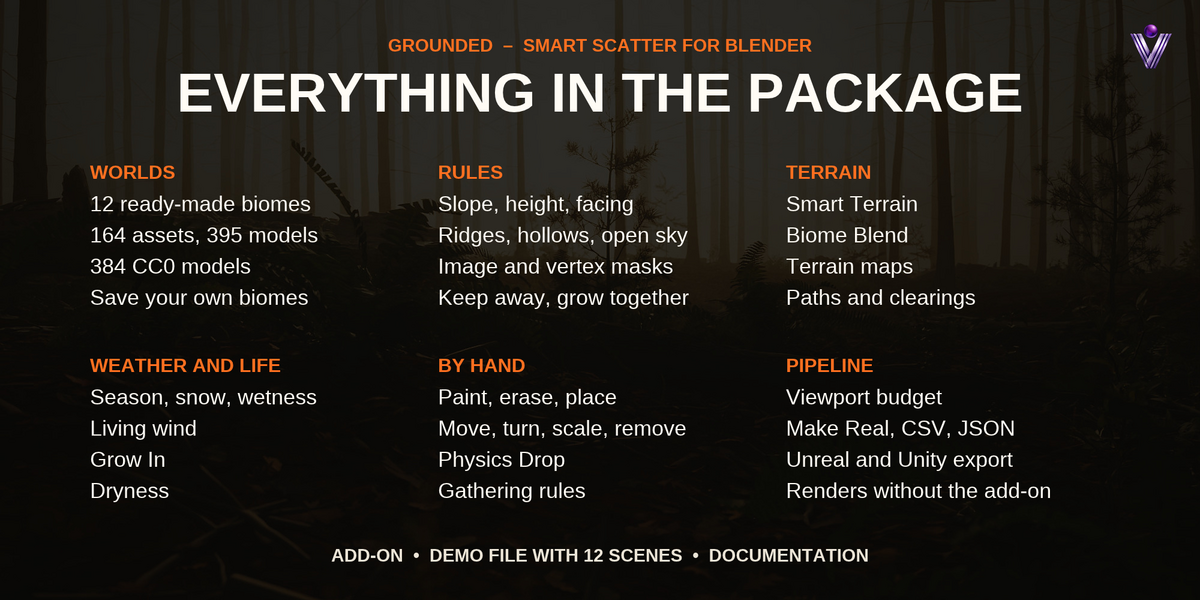
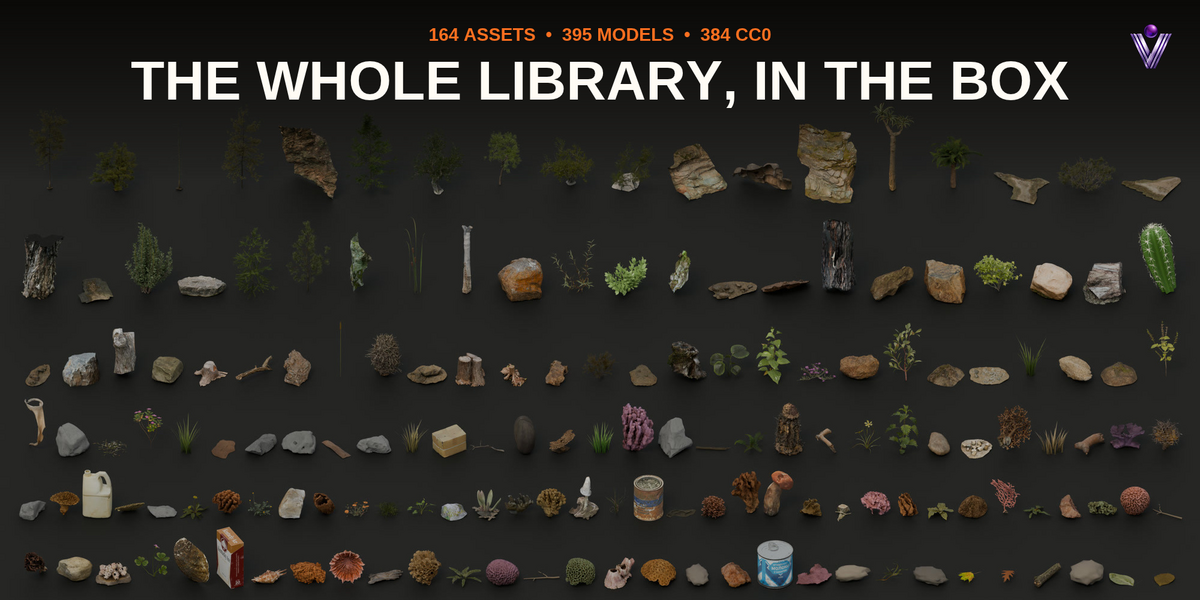
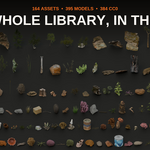
- 12 biomes built from a library of 164 assets in 395 variants (models and scans from Poly Haven, ambientCG, BlendSwap and Smithsonian Open Access, and our own)
- Hand edits of single instances, Physics Drop, terrain tools, seasons and weather
- Save your own scatters as biomes, bake them to real meshes or export them to game engines
Installation
- Download
grounded-<version>.zipfrom your Superhive library. Do not unzip it. - In Blender: Edit › Preferences › Get Extensions › ⌄ (top right) › Install from Disk… and pick the zip.
- Open the sidebar in the 3D viewport (N) and click the Grounded tab.
To update, install the new zip the same way. Files made with an older version are upgraded when you open them; your settings are kept.
Quick start
A ready-made biome
- Select your ground (any mesh).
- In the Grounded tab, click the biome picture and choose a biome.
- Click Add Biome.
Your own assets
- Select the objects you want to scatter, then select the ground last (it becomes active).
- Click Scatter Selected for one layer, or Auto Ecosystem to let Grounded sort them.
The scattered objects move into a hidden Grounded Assets collection, so they don't render at their original place. Their own rotation and scale are kept; their origin lands on the surface.
Layers
Every scatter is a layer: an object in the Grounded collection with a Geometry Nodes modifier. The list in the sidebar shows all layers of the scene.
- Click a layer to select it and see its settings.
- The eye and camera icons hide a layer in the viewport or in renders.
- – removes the active layer (its assets stay in Grounded Assets).
- ⟳ counts the instances each layer shows in the viewport.
The gear in the panel header switches between simple and advanced settings.
Group (advanced, end of the Layer panel) gives a layer a group name. The eye next to it shows or hides every layer with that name in the viewport, so trees or everything small can go out of the way in one click. Renders don't change and the list keeps its order.
Copying a layer: select it and press Shift + D. The copy starts out with the strokes and hand-placed instances of the original. The first paint stroke, placed instance or hand edit on either layer gives it its own copy of them, so the other layer doesn't change.
Asset mix
Layer › Asset Mix lists the assets of the layer with a weight each. Weight 2 is picked twice as often as weight 1; weight 0 is never picked. When you add, remove or rename assets later, the panel asks you to Update. A weight belongs to the asset object, so an asset used in two layers has the same weight in both.
Pick sets how assets are chosen. Random mixes them evenly. Patches groups them in natural patches of one asset, Patch Size wide, for drifts of one flower or stands of one tree. Weights still set each asset's share of the ground; the more patches fit on the surface, the closer the shares come to the weights. By Scale gives big instances the big assets and small instances the small ones, so the largest rocks are never the smallest model scaled up; weights set where the size border falls. By ID Map reads the brightness of the layer's Color ID Map (or of an image picked here): dark ground gets the first asset of the list, bright ground the last. Both need the assets directly in the collection; sub-collections are picked at random.
Layer settings
| Setting | What it does |
|---|---|
| Role | Tree, shrub, ground cover, rock, litter or custom. Used to link layers of an ecosystem |
| Surface / Assets | The object scattered on, and the collection scattered |
| Density / m² | Instances per square meter |
| Spacing | Smallest distance between two instances (advanced) |
| Extra Surfaces | A collection of more objects to scatter on, e.g. terrain tiles (advanced) |
| Only Material | Scatter only on the faces of the surface that use one material (advanced) |
| Seed / New Layout | A different random layout |
| Scale Min / Max | Random size range |
| Align to Surface | 0 = grow straight up, 1 = follow the ground |
| Random Rotation, Random Tilt | Turn around the up axis, lean away from upright (advanced) |
| Random Height | Stretches some instances taller, others shorter (advanced) |
| Random Flip | Mirrors half of the instances, so one model looks like two (advanced) |
| Rotation Snap | Instances turn only in steps of this angle around the up axis, for tiles, crates and planks. 0 = off (advanced) |
| Random Stretch | Each axis gets its own random size, from half to double at 1. Comes on top of Random Height (advanced) |
| Edge Shrink | Instances get smaller where rules fade out, for natural borders (advanced) |
| Dryness | How many plants turn yellow and dry, in patches of Patch Size. Only green parts change, so flowers and bark keep their colour; every plant is a little lighter or darker than its neighbour and the undersides of leaves come out paler. Library plants have this built in; for your own plants click Add Dryness to Materials once (advanced) |
| Wind | The layer moves with the scene's wind over the timeline. Bend (how far it leans) and Flutter (quick trembling of leaves and thin stems) |
Where it grows (rules)
Rules multiply: an instance appears where every active rule allows it. Each rule has a soft edge.
- Slope: only between two slope angles (0° flat, 90° vertical).
- Height: only between two heights in world space.
- Facing: only on slopes that face one compass direction (Direction 0° = +Y, 90° = −X) within a Spread. Moss on the shady side, snow on the north faces, flowers on sunny slopes.
- Patches: breaks the layer into natural clumps. Size, Coverage and Softness.
- Bare Ground: clearings. Unlike patches they sit at the same spots on every layer that uses them, whatever its seed, so grass, ferns and shrubs leave the same ground open.
- Avoid: select objects (houses, rocks, a car) and click Use Selected. The layer keeps the given distance from them.
- Paths: select curves and click Use Selected. A lane of the given width stays clear. Tick Follow and the layer does the opposite: it grows only inside the lane, for tree lines, hedges, river rocks and flower beds. Distance is measured in 3D, so keep the curves close to the ground.
- Mask (advanced): a vertex group or an attribute of the surface, and/or an image through a UV map (bright grows, dark stays empty); optionally inverted. Paint a mask in any image editor.
- Color ID Map (advanced): one painted image, or a color attribute of the surface, drives several layers. Paint a map with one flat color per kind of ground, pick it on each layer and give each layer its Color and a Tolerance. Rock grows on the gray parts, grass on the green parts, and repainting the map moves them all. Use Copy Settings to Selected to share the map: each layer keeps its color.
- Grow With Another Layer (advanced): a soft pull towards a layer (Amount up to 1, only within Reach of it) or a soft push away from it (Amount down to -1). Nettles among the ferns, flowers in the gaps of the grass. Keep Away is a hard limit around each instance; this shapes where a whole layer prefers to grow. Pick a layer made before this one.
- Ridges (advanced): keeps the layer on convex ground such as crests and rock edges, the opposite of Hollows and Corners in Gathering. Min is how far a crest must stand above its surroundings, Blend the soft edge, Size how wide an area is compared. Invert keeps the layer off the crests instead. A denser surface gives a finer result.
- Open Sky (advanced): select roofs, tables or tree crowns and click Use Selected. The layer stays out from under them, so nothing grows indoors or on a covered terrace. Every candidate sends one ray upwards, so this rule costs more than the others: use objects with few faces and try it on a small area first. Objects below the ground don't count.
- Keep Away From Layers (advanced): stay clear of the instances of up to four other layers, measured from each of their instances and scaled with them. Auto Ecosystem and the biomes set this up for you (grass keeps clear of tree trunks and rocks). Long thin assets such as logs count along their whole length, so nothing grows through them.
Gathering
Gathering makes a layer denser in certain places, the way leaves, litter and pebbles collect in nature and in cities. Set Strength (how much denser) and pick where:
- Base of Objects: select walls, trunks or rocks and click Use Selected. The layer piles up within Reach of them.
- Hollows and Corners: concave spots of the surface, such as curbs, ditches and the foot of a slope. Depth sets how deep a hollow must be to count fully; Size how wide an area is compared (higher for large ditches, lower for fine cracks).
- Under Another Layer: around the instances of up to two layers, e.g. leaves around trunks and along fallen logs.
- Along Path Edges: on both sides of the lanes cleared by Paths.
Only in Gather Zones scatters nothing outside those places (weeds only in cracks, leaves only at walls).
Brush
Open Layer › Brush and pick a mode. In the viewport:
| Input | Action |
|---|---|
| Left mouse | Paint / erase / place |
| Ctrl + left mouse | The opposite (erase while painting) |
| [ and ] or Shift + wheel | Brush radius |
| P, E, D | Switch to paint, erase, place |
| G, R, S, X | Switch to move, rotate, scale, remove one |
| Right mouse, Esc, Enter | Done (during a drag: calls off that drag) |
| Middle mouse, wheel, numpad | Navigate as usual |
| Ctrl + S | Save the file; the brush stays on |
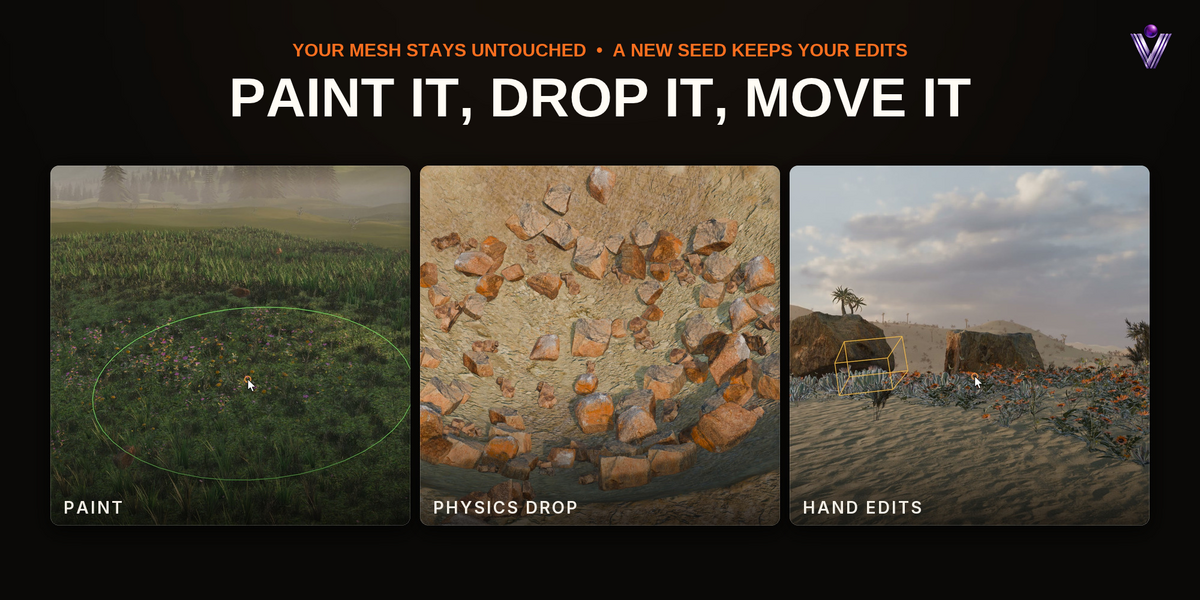
- Paint makes the layer grow where you paint. The first stroke switches the layer to Painted Only; switch it off to scatter on the whole surface again.
- Erase removes the layer where you paint, on any layer.
- Place puts single instances under the cursor, Place Spacing apart. Rules don't apply to them.
- Clear Strokes and Clear Placed remove all strokes or placed instances of the layer.
Strokes are stored in hidden helper objects (Grounded Data collection), never in your surface, so painting works on any mesh resolution and never changes your model.
Changing single instances
The second row of buttons under Layer › Brush works on one instance at a time: the one nearest the cursor within the brush circle, marked with a small ring.
- Move: drag it along the surface.
- Rotate: drag sideways to twist it around its own up axis. Hold Ctrl to tilt it instead.
- Scale: drag right to make it larger, left to make it smaller.
- Remove One: click to take it away. Ctrl + click brings back what you removed under the brush circle.
An outline shows the result during a drag; the layer updates when you let go, so this stays fast on huge layers.
You pick from what the viewport shows, and the edit holds in renders too. Under the Viewport Budget or a viewport limit a layer with Spacing can show an instance that a render doesn't have, with a close neighbour in its place: Grounded looks that up when you let go and hides the neighbour as well, so the spot you cleared is clear in the render. That look takes one full update of the layer, a moment on very dense layers.
What happens to an edited instance: it becomes a hand-placed instance that remembers its place, rotation, size and asset, and the scattered original is hidden. A new seed, density, rule or look setting leaves it exactly as you left it, and the layer changes around it. Its colour variation (brightness, Dryness) still follows the seed. Go back to the old seed and the original stays hidden, so nothing shows up twice. Clear Placed undoes every edit of the layer and brings all originals back.
Physics Drop
Physics Drop (folded panel at the end of the Grounded tab) lets instances fall and settle like real objects: rocks roll into hollows and rest against each other, bricks pile up, planks lie flat.
- Make a layer active and pick Around 3D Cursor (with a Radius) or Whole Layer.
- Click Drop. The status bar counts the steps; Esc cancels and changes nothing.
| Setting | What it does |
|---|---|
| Limit | Most instances that fall at once; those nearest the 3D cursor go first |
| Drop Height | How far above their place instances start |
| Spread | How far sideways they may start from their place |
| Steps | Length of the simulation. Raise it if Grounded reports that some need more |
| Shape | Convex Hull follows the model, Box is its bounding box |
Settled instances become hand-placed instances of the same layer, so they survive a new seed, can be changed with the brush, and Clear Placed undoes the drop. The simulation runs in a temporary scene that is removed afterwards: your own rigid body world and frame are not touched, the file keeps no simulation data, and it renders without the add-on. Instances collide with the layer's surfaces and with each other, not with other layers. Any that fall off the surface or are still in the air at the last step stay where they were, and Grounded tells you how many.
Biomes
| Biome | Layers |
|---|---|
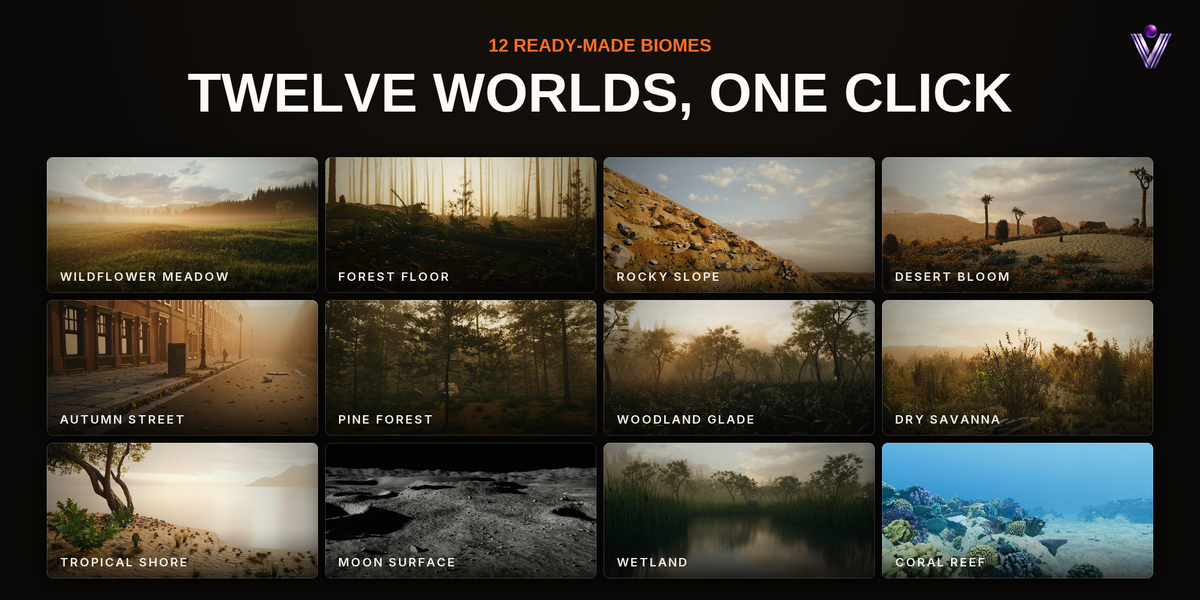
| Wildflower Meadow | Stones, grass, low grass, wildflowers, clover |
| Forest Floor | Fir trunks, fallen logs, mossy rocks and stumps, young conifers, bushes, ferns and undergrowth that clump against the logs, roots, bark, dead oak and beech leaves that pile up around trunks and logs, twigs, fallen branches. The trunks have no crowns: frame them so their tops stay out of the picture, or hide the layer and use your own trees |
| Rocky Slope | Boulders and round boulders on steep parts, rocks, dry grass, weeds, field stones, pebbles in hollows |
| Desert Bloom | Quiver trees, boulders, rooibos bushes, cacti, flowers, succulents, debris under the trees |
| Autumn Street | Maple and oak leaves piling up in gutters and at walls, litter (cans, bottles, cigarette packs), weeds in cracks. Use Gathering › Base of Objects on your walls |
| Pine Forest | Tall pines, young trees, mossy rocks, fallen trunks, stumps and roots, ferns, mushrooms, needles and bark |
| Woodland Glade | Leafy trees and bushes around a soft clearing: rocks, logs, stumps, grass, low plants, flowers, mushrooms |
| Dry Savanna | Bush trees, boulders, shrubs, dead wood, burnt stumps, gravel, dry grass and straw, spring flowers, succulents |
| Tropical Shore | Island trees, shore rocks, beach shrubs, tree ferns, stones, broad leaves, beach grass, shells and pebbles, coco de mer |
| Moon Surface | Scanned lunar boulders, rocks and fine gravel gathered around craters |
| Wetland | Wet mossy rocks, logs, bushes, cattails in the shallows, wet grass on soft banks, water plants, flowers, driftwood |
| Coral Reef | Reef rocks, massive, table, branching and plate corals, sponges, sea fans, shells and rubble, scanned from real museum specimens |
Biomes are ordinary layers: change anything you like. Density in the redo panel (bottom left after Add Biome) scales the whole biome. Biome assets are appended to your file once and reused.
Your own biomes
Set up layers on a surface the way you like them, make one of them active and click Bake and Share › Save as Biome. Grounded saves the settings of every layer on that surface, the asset mix and the assets themselves. The biome then shows up in the biome picker (after the built-in ones) in every file. Rules that point at objects of one scene (Avoid, Paths, Base of Objects) and vertex group masks are not saved; layer links are rebuilt by role.
Saved biomes live in Grounded's user folder (Open Biome Folder): one .json recipe and one
.blend with the assets and their textures (packed) each. Copy both files to share a biome with
another computer. Saving under an existing name replaces that biome; the dialog warns you. To delete
a saved biome, pick it and click the trash icon next to it.
Auto Ecosystem
Auto Ecosystem sorts the selected objects by name and size into trees, shrubs, ground cover, rocks and litter, and builds one layer per kind:
- Density and spacing follow the size of the assets.
- Smaller layers keep clear of larger ones (grass around trunks and rocks, bushes around trees).
- Litter gathers under trees and in hollows.
- Very large surfaces get a lower density, so a layer stays under about two million instances.
Names help: oak, pine, bush, grass, fern, rock, stump, leaf, twig, pebble and similar words are recognized. Change a layer's Role any time.
Terrain Maps
The folded Terrain Maps panel reads the real shape of your ground, so a scatter can follow the land. Everything here works on the active mesh, or on the surface of the active layer.
All three tools are a bake: they measure the surface once and write vertex groups, and the layers read those through their normal Mask rule. So scenes render without the add-on, but nothing follows along: run the tool again after editing the terrain. Modifiers that keep the vertex count (Displace, Wave) are measured; ones that change it (Subdivision) can't be, so apply those first. Grounded warns you when it had to measure the mesh without them. The vertices must be in the mesh itself: a TerrainLab terrain makes its whole mesh in modifiers, so these tools stay off until you turn a copy of it into a mesh (Object › Apply › Visual Geometry to Mesh).
Bake Terrain Maps
Writes five vertex groups from the surface, in world space. It takes a few seconds on a terrain of a million vertices.
| Vertex group | What it holds |
|---|---|
| Terrain Water | Where rain would collect. Each vertex hands its water to its lower neighbours; what flows through it, on a log scale, becomes the weight, so 1 is the biggest river. Hollows fill up and spill over, so a line doesn't end at a dip, and ponds count as wet; a crater too deep to fill keeps its water at the bottom |
| Terrain Curvature Convex | Crests: how far the ground stands above the land around it |
| Terrain Curvature Concave | Hollows and valley floors |
| Terrain Slope | 0 is level, 1 is vertical |
| Terrain Height | 0 at the lowest point, 1 at the highest |
Pick one under Where It Grows › Mask › Vertex Group of any layer, with Invert for the opposite. Baking again replaces the groups and every layer that reads them follows; paint you added to these groups is replaced too.
Smart Terrain
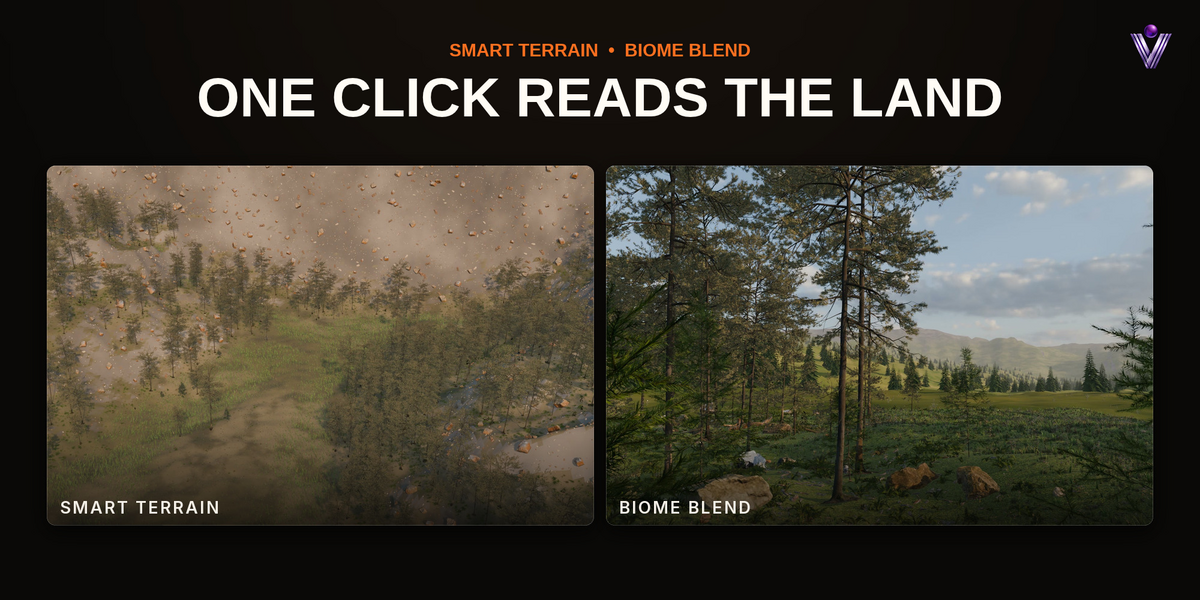
One click: bakes the maps and adds library layers that follow the land.
- Water: reeds, tall grass and flowers along the water lines, on gentle ground.
- Slopes: forest with ferns.
- Flats: grass.
- Rocks: boulders and stones on sharp crests and steep ground. A broad, rounded hilltop stays green, and a slope rule keeps rocks off flat ground even on a coarse mesh.
Set Density and switch zones on or off before you click. A zone the land doesn't have gets no layers. Each zone is a vertex group of its own (Terrain Zone Water and so on) that its layers use as their mask; the zones fade into each other and don't overlap. The result is plain layers, so tune or delete them as usual. Clicking again adds another set of layers.
Density follows the size of the surface: the layers of one role (say, all the grass, reeds and ferns) share that role's instance limit, so a 2 km terrain stays under about two million ground plants, 20,000 trees and 100,000 rocks however high you set Density.
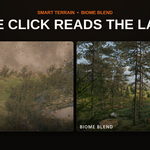
Biome Blend
Lets two biomes or two sets of layers thin into each other, so a forest fades into a meadow instead of stopping at a line.
- Biomes adds the two biomes you pick as Side A and Side B. Layers uses layers of this surface: mark each one A or B in the list.
- Choose what the edge follows: a Direction across the surface (which way side A moves into side B, with Position to shift it), a Curve (seen from above; side A is on its left, or inside a closed curve, and open ends carry on past the surface), or a Painted vertex group (side A where you painted).
- Soft Edge is the width of the fading zone, Noise how far the edge wanders. Click Blend.
After a blend of biomes the panel moves to Layers with the new layers marked, so you can change the edge and click Blend again without adding them twice.
Grounded writes one vertex group, Terrain Blend: side A's layers read it as their mask, side B's read it inverted. A layer that already has a mask keeps it, inverted or not: it gets its own group, Terrain Blend: layer name, with the two multiplied, and blending again starts over from its original mask. That goes for vertex groups and for attributes, also ones that only modifiers write. A mask with no value per vertex of the mesh (on faces, or behind a modifier that changes the vertex count) can't be multiplied: that layer stays as it was, without the blend, and Grounded names it in a warning. A blend of other layers gets the next name (Terrain Blend 2) and leaves this one alone, and a group of your own with one of these names is never written over.
Performance
Grounded keeps the viewport fast and gives renders everything.
- Viewport Budget (on by default, 400,000): the most instances the viewport shows, shared between the layers. Renders always get the full density.
- Camera View Only: skip what the scene camera can't see, with a margin and a zone around the camera kept for shadows. Needs a perspective camera.
- Viewport Distance (advanced): shows nothing farther than this from the scene camera, with a soft edge, and hands the freed budget to what is close. Keep Near Camera in the fine-tuning box is the least it can be. Viewport only: renders, Make Real and exports always get everything.
- Thin Far Away: fewer instances far from the camera.
- Show As: Models, Boxes (each model as its bounding box: fast, and you still see sizes) or Points (fastest). Renders always show the models.
- Also in Renders: applies culling and thinning to final renders too. Saves memory on huge scenes; objects outside the frame then cast no shadows or reflections.
- Fine-tune (advanced, for the active layer): Cull Margin is the extra room around the frame, Keep Near Camera the zone that always stays, Thin Start and Thin End the distances where thinning begins and is strongest.
Camera markers on the timeline work with all of this: layers follow the camera the markers pick, in the viewport and in renders. A small helper object, Grounded Camera Follow, reads the active camera for such scenes; it is plain Geometry Nodes, and scenes without camera markers don't have it.
Measured on a 1 km × 1 km terrain with the Wildflower Meadow biome (5 layers), Blender 5.2, Ryzen 7 3700X, RTX 4060. Times are for updating every layer in the viewport.
| Setup | Instances | Update |
|---|---|---|
| Everything (what the render gets) | 5,030,869 | 6.9 s |
| Viewport budget 400,000 (default) | 332,611 | 0.8 s |
| Budget + camera view only | 312,618 | 0.5 s |
| Budget + camera view + Points | 312,618 | 0.5 s |
| No budget, Thin Far Away 0.8 | 1,200,417 | 1.2 s |
Rules that are off cost nothing, so a layer pays only for what it uses. The rest of a viewport update is Blender preparing the instances for drawing. In Material Preview at 2400 × 1350, one slider takes 1.1 s with 333,000 instances and 0.23 s with a budget of 60,000, and moving the camera with Camera View Only on takes 1.3 s. A lower budget is the best help while you tune a scene.
The first Add Biome of a session, until the full picture stands in Material Preview:
| Biome | Instances | Read from disk | Layers and update | First frame | Materials and first samples | Total |
|---|---|---|---|---|---|---|
| Moon Surface | 165,670 | 0.1 s | 0.3 s | 0.9 s | 2.4 s | 4.2 s |
| Wildflower Meadow | 332,611 | 0.15 s | 0.8 s | 1.3 s | 5.8 s | 9.3 s |
| Pine Forest | 171,845 | 0.3 s | 0.5 s | 4.2 s | 19 s | 28 s |
Most of that wait is Blender compiling the materials the first time they appear. The asset library takes about 800 MB on disk, twice the size of a compressed file, so that Add Biome reads only the assets it needs; the download stays under 400 MB.
Arrangement
Layer › Arrangement (advanced) changes the way points are laid out.
- Layout: Scatter is the normal random layout. Rows lays straight rows over the whole surface, for fields, orchards and lawn stripes: Spacing is the distance inside a row, Row Distance the distance between rows and Angle their direction. Along Curves puts rows on selected curves, for fences, vineyards and roadside trees; Rows in the Curves box sets how many run side by side, Row Distance apart, so 2 lines both sides of a road. Jitter shifts instances out of the perfect line, Missing leaves out that share of them. Density doesn't count in these layouts. Instances point along their row with local X, so a fence panel follows its line; lower Random Rotation to 0 for that. Points fall straight down onto the surface and every rule still applies. On a huge surface the grid stops at about 8 million points whatever the spacing. Saved biomes keep the layout but not the curves: pick them again.
- Clumps: every point becomes a parent with children around it, for tussocks, reeds and mushroom rings. Density keeps counting instances, so a layer keeps its total when you switch clumps on. Count is the number of instances in a clump, Reach its radius, and Falloff pulls the children towards the centre (0 spreads them evenly). Tilt leans the rim outwards, or inwards with a negative angle, and Shrink makes the rim smaller. Children sit on the surface and every rule applies to them one by one. Spacing keeps the parents apart.
Direction
Layer › Direction (advanced) sets which way instances point.
- Face Camera: every instance turns around the up axis so its front looks at the scene camera, for flat cards far away. The front is the side a model shows in the front view (it looks along −Y). Works in renders without the add-on and follows camera switches; the viewport view itself doesn't count, only the camera.
- Flow: instances turn to follow a direction, with their local X axis (the long axis of a log) along it. Downslope follows the slope downhill, for fallen logs, gravel and debris. Flow Map reads a direction from an image or a color attribute: red is X, green is Y, 0.5 means none, as in the usual flow maps. Set the image to Non-Color. Spread adds a random turn. Flat ground and neutral parts of a map keep the normal random turn. Face Camera goes first when both are on.
- Lean Away: select objects (a rock, a character) and click Use Selected. Instances within Reach tilt away from them, up to Angle right next to the object, and Shrink makes them smaller there. The layer follows when the objects move, so grass parts around a walking character.
Wind
Biomes and Auto Ecosystem switch wind on for shrubs and ground cover (and dry leaves); play the timeline to see it. One wind blows through the whole scene, so every layer moves together. Trunks stand still: on library trees only the leaves sway, and the Wind switch of the layer turns that on and off. Your own trees keep Bend at 0, raise it if you want the whole tree to lean. Set the wind under Wind in the sidebar:
- Direction: where the wind blows to (0° = +Y, 90° = −X). Everything leans that way.
- Speed: how fast the gusts travel across the ground and how quickly leaves flutter.
- Gust Size: the size of the patches a gust moves at once; you see them sweep over a meadow.
- Gustiness: 0 = a steady breeze, 1 = strong gusts with calm spells between them.
Each layer keeps its own Bend and Flutter (Layer panel), so bushes move less than grass. Wind animates through a driver on the layer, which works without the add-on and without Auto Run Python Scripts.
Season
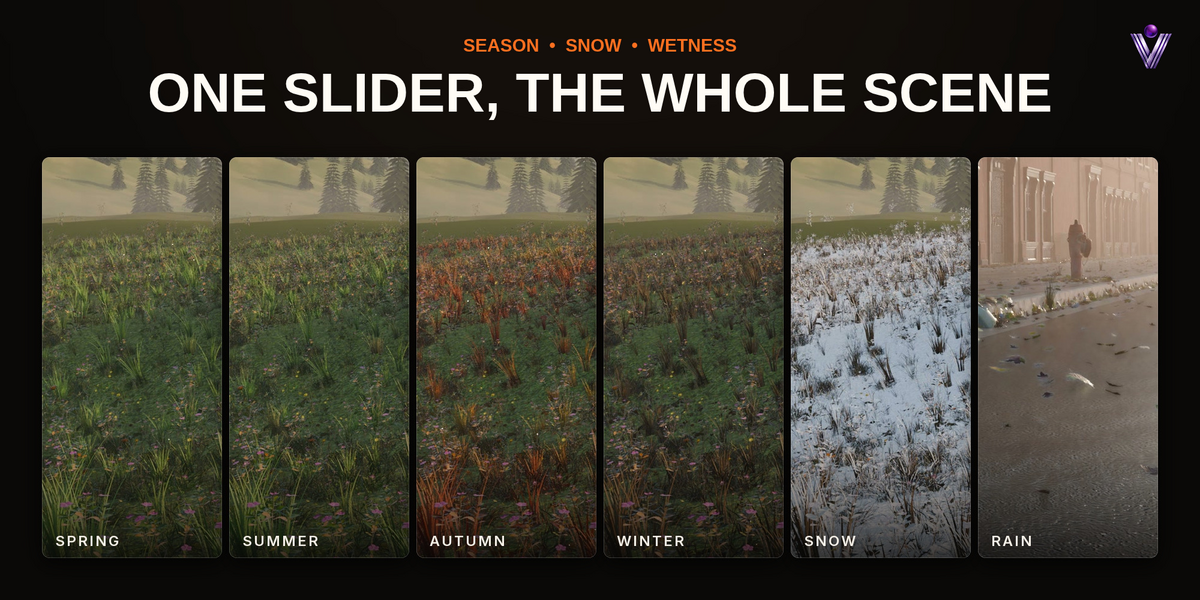
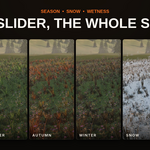
Season and Weather › Season sets the time of year for the whole scene: 0 spring, 0.33 summer, 0.66 autumn, 1 winter. Summer leaves plants as they are. Spring brightens greens and freshens them. Autumn turns plants yellow, orange and red, in patches of about 10 m with every plant a little off its neighbours, and on the way from summer they turn one after the other. Winter turns them brown. Only green parts of a texture change, so flowers, bark and rocks stay as they are. Materials named after conifers (fir, pine, spruce, cedar, cypress) stay green in autumn and winter; for other evergreens set Evergreen to 1 on the Grounded Age node of the material.
Library plants have this built in. For your own plants click Add Season to Materials once; it is the same button as Add Dryness to Materials. Winter changes the colour only: plants keep their leaves and their density.
Snow and wetness
Two more sliders in the same panel, for the whole scene:
- Snow covers what faces up with white, on plants, rocks and the ground, whatever way an instance is turned. A little snow lies in flecks; more covers the flat parts, then climbs steeper faces. Undersides stay clear.
- Wetness darkens surfaces and makes them glossy, the look after rain. It is strongest near the ground and fades over the first 2.5 m of an asset, so a tree crown stays only a little wet. The ground itself is wet all over.
Library assets have this built in. For your own assets, make a layer active and click Add Weather to Materials: it covers the layer's assets and its surface. Run it once per layer, and again after adding assets.
Season, Snow and Wetness are custom properties of the scene (grounded_season, grounded_snow,
grounded_wetness) that the materials read by themselves, in Cycles and EEVEE. Each scene of a
file has its own, and at their defaults (0.33, 0, 0) nothing changes. To animate one, move its
slider once, then hover over it and press I. No Python runs at render time, so keyframes render
without the add-on, on a render farm too. For a scene without the add-on, set the properties under
Scene › Custom Properties.
Grow In
Grow In (advanced, Layer panel) makes instances scale up from zero over the timeline, for reveals in films and turntables. Tick it in the panel header.
- Start Frame: where growing begins.
- Duration: how many frames one instance takes.
- Random Delay: each instance waits up to this many frames.
- Wave Frames: a wave runs outwards and needs this many frames to cross the surface. 0 means no wave.
- Wave Origin: an object the wave starts from. Empty means the centre of the surface.
Other layers keep treating a growing layer as full grown, so grass doesn't jump around a tree that is still small. A small helper object, Grounded Clock, hands the frame to the growing layers: it is plain Geometry Nodes, so scenes render without the add-on, and layers that don't grow never recalculate on a frame change. Make Real and Export Transforms take the current frame: go to a frame after the growth ends first. Saved biomes leave Grow In off.
Bake and share
- Make Real: turns the active layer into one real mesh at full render density (the layer is hidden, not deleted). For sculpting, exporting to other apps or freezing a final layout. Large layers make heavy meshes; Grounded asks before baking more than 150,000 instances.
- Export Transforms: writes every instance (layer, asset name, position, rotation in degrees, scale) to a CSV file, for game engines and custom pipelines. Hidden layers are exported too.
-
JSON (next to Export Transforms): the same data as a JSON file, sorted by layer:
{"layers": [{"name": ..., "instances": [{"asset", "location", "rotation", "scale"}]}]}, in meters with Z up and rotation as XYZ Euler angles in degrees. - Copy Settings to Selected: select other layers, then the source layer last. Rules, look and gathering are copied; surfaces, assets, seeds and brush strokes stay. Masks and the material filter are copied only between layers on the same surface.
-
Blend Ground: makes the ground react to what lies on it. Grounded counts the Litter layers
of the active layer's surface around each vertex and stores that in the mesh attribute
grounded_cover; a small node group, Grounded Ground Blend, goes in front of the Principled BSDF of the surface's materials and turns the ground into damp humus under the leaves, with bare soil between the drifts. Change Cover Color and Strength on that node, or plug in a texture. It is a bake: run it again after changing the layers. A denser surface gives a finer result (one vertex every 25 cm works well).
Scatter from the Asset Browser
Open an Asset Browser in any area and select assets there, objects or collections, from any library or from Current File. No dragging: in the sidebar, under Assets and Game Engines, or by right-clicking the assets:
- New Layer (Scatter as New Layer in the menu) makes a layer on the active surface: the active mesh, or the surface of the active layer. Density and spacing follow the size of the assets, as with Scatter Selected.
- Add to Layer (Add to Active Layer) adds them to the active layer's asset mix.
Assets from a library are appended to your file once and reused after that. A collection asset scatters as one model. Assets of the current file stay where they are. Whatever can't be scattered (materials, node groups, worlds, lights, an asset whose file is missing) is named in a message; the rest is still used.
Game engine export
Export for Unreal and Export for Unity (under Assets and Game Engines) write a folder named Grounded_Unreal or Grounded_Unity into the folder you pick, for every layer of the scene at full render density, or only the active layer with Active Layer Only. Hidden layers count. Export the surface yourself: TerrainLab has its own game export.
If that folder already holds an export, Grounded asks before it replaces anything. Replacing
overwrites the table, the script and the meshes, and deletes the meshes the last export wrote that
this one doesn't need (with Unity's .meta file next to them). Other FBX files in Meshes are
yours: they stay, and a warning names them.
| In the folder | What it is |
|---|---|
Meshes/*.fbx |
Each asset once, with its modifiers, its own rotation and scale applied, textures embedded |
Meshes/*_Mirrored.fbx |
With Random Flip: the same asset mirrored, because engines would show a mirrored instance inside out |
transforms.csv |
One row per instance: layer, mesh, location, rotation, scale in the engine's axes and units |
grounded_import.py (Unreal) |
Editor script that imports the meshes and places the instances |
Editor/GroundedImporter.cs (Unity) |
Editor script that places the instances |
| Blender | Unreal | Unity | |
|---|---|---|---|
| Axes | Z up, right-handed | Z up, left-handed | Y up, left-handed |
| A point (x, y, z) | (x, -y, z) | (-x, z, -y) | |
| Units | scene units | centimeters | meters |
| Rotation in the table |
roll_deg, pitch_deg, yaw_deg, Unreal's FRotator (roll about X first, then pitch about Y, then yaw about Z) |
Quaternion qx, qy, qz, qw
|
Scene unit scale is respected, so a scene with 1 unit = 1 cm exports at its true size.
Unreal: enable the Python Editor Script Plugin, open the level, then
Tools › Execute Python Script and pick grounded_import.py. Meshes go to /Game/Grounded;
each layer becomes one actor with one Hierarchical Instanced Static Mesh component per mesh.
Running it again adds new actors.
Unity: copy the folder into Assets, select it in the Project window, then
Tools › Grounded › Import Scatter. Unity has no ready instanced component, so each instance
becomes an object that shares its mesh and materials, with GPU Instancing on. That suits up to
about 100,000 instances; above 200,000 the script asks first. For denser layers lower the density
or draw transforms.csv with your own instancer. Keep one copy of the script in a project; it
works for every export folder.
The scripts are written for Unreal Engine 5.3 and later and for Unity 2022.3 LTS and Unity 6.
They have not been run inside those engines yet. What has been tested in Blender: the axis,
unit and rotation math round trip, the FBX settings, and every vertex rebuilt from the written
files against the real scatter. If a script fails on your engine version, the FBX files and
transforms.csv are complete on their own.
Instances are written as they stand on the current frame, wind included. Materials arrive as the engine reads them from FBX: expect to rebuild leaf and bark materials there.
Voyde add-ons
Grounded recognizes Voyde Procedural's other add-ons, by the add-on or by what it left in the scene. The Voyde Add-ons panel shows up only then. The buttons work on the selected layers, or on all layers when none is selected. Nothing is linked for good: the results are ordinary Grounded settings, saved in your file, and nothing else is needed to render them.
- TerrainLab: Use Terrain makes the terrain the surface of the layers, on land faces only, and keeps them off water and shores. Without a layer it selects the terrain, ready for a biome. Near Water, Channels (erosion channels) and Sediment do the same with that mask of the terrain instead, above the sea level if the terrain has a sea (they also switch the Height rule on for that). Only the masks your terrain has are offered.
- AtmosLab: Match Fog Wind copies the fog's wind direction, and its speed so gusts travel as fast as the fog patches. Click again after changing the fog. Sky and mood settings have nothing to match in Grounded, so they are left alone.
- Cityform: Keep Off Roads and Buildings adds the road sheet, bridges, Far City and a light copy of the block outlines to the layers' Avoid rule; your own Avoid objects stay. Click again after rebuilding the city. Parks are left open, but on a grid city the road sheet lies under the whole city, so there the Avoid rule clears the parks too: take City Roads out of the Avoid collection to scatter inside. Distances are measured in 3D: raise Avoid Distance if your ground lies far above or below the city.
Rendering without the add-on
Every setting lives in the layer's Geometry Nodes modifier, and the node group is saved in your file. Send the .blend to a render farm or a colleague: it renders the same without Grounded. To share hand-made assets, keep them in the file (they are, in Grounded Assets).
No Python runs during a render, not even with the add-on installed. Camera culling, thinning and Face Camera follow camera markers through Geometry Nodes, and wind, Grow In, seasons and weather work the same way. Set the markers while Grounded is on, so the layers get their camera helper; markers added later on a computer without Grounded switch the camera, but layers don't follow.
Known limits
- Make Real keeps the shape of a layer, not its per-plant colour: plants come out a little darker and dry patches are lost.
- Camera culling ignores lens shift and skips orthographic and panoramic cameras.
- Asset weights work for objects directly in the asset collection; sub-collections are picked with equal chance.
- Hand-edited instances remember their asset by its place in the asset list. Adding or removing assets of the layer can change which asset they show.
- Hand-edited instances stay where they are when the surface moves or deforms, and the hidden originals come back there.
- When the Viewport Budget thins a very dense layer, the viewport shows a lighter layout than the render, so hand edits can only pick what it shows. Switch the budget off to reach the others.
- With Camera View Only, Viewport Distance or Thin Far Away, the viewport skips Spacing where it would remove under 2.5% of the points. Renders always apply it.
Credits and license
The add-on code is GPL-3.0-or-later. The library's models and scans are CC0: from
Poly Haven, ambientCG,
BlendSwap and
Smithsonian Open Access. BlendSwap licenses are as declared by
the uploader. The grass tufts, pebbles and twigs are generated by Voyde Procedural and ship under
the GPL. Every asset, its authors and its source are listed in library/CREDITS.md in the add-on
folder.
Support: through your Superhive library or https://voydeprocedural.com.
Changelog
1.0.0: first release.
- 12 biomes: Wildflower Meadow, Forest Floor, Rocky Slope, Desert Bloom, Autumn Street, Pine Forest, Woodland Glade, Dry Savanna, Tropical Shore, Moon Surface, Wetland and Coral Reef.
- A library of 164 assets in 395 variants, from Poly Haven, ambientCG, BlendSwap, Smithsonian Open Access and our own.
- Scatter Selected, Auto Ecosystem, your own saved biomes, Asset Mix with weights, patches, pick by scale or by ID map, and layer groups.
- Rules: Slope, Height, Facing, Patches, Bare Ground, Avoid, Paths and Follow, Mask, Color ID Map, Grow With Another Layer, Ridges, Open Sky and Keep Away From Layers.
- Gathering: at the base of objects, in hollows and corners, under other layers, along path edges.
- Brush: paint, erase and place.
- Hand edits: move, rotate, scale or remove one instance; edits survive a new seed and hold in renders.
- Physics Drop: instances fall and settle, then stay as hand-placed instances.
- Terrain tools: Bake Terrain Maps, Smart Terrain and Biome Blend.
- Exchange: scatter from the Asset Browser, Export for Unreal, Export for Unity, Export Transforms (CSV and JSON), Make Real and Copy Settings to Selected.
- Season, snow and wetness; Dryness; Blend Ground; live wind; Grow In.
- Arrangement: rows, rows along curves and clumps. Direction: Face Camera, Flow and Lean Away. Look: Rotation Snap, Random Height, Random Stretch, Random Flip and Edge Shrink.
- Performance: Viewport Budget, Camera View Only, Viewport Distance, Thin Far Away, Show As, Also in Renders, and rules that cost nothing while they are off.
- One-click setup with TerrainLab, AtmosLab and Cityform.
- Scenes render without the add-on, camera markers included.
Have questions about this product?
Login to message
| Blender Extension Compatible | Yes |
| Published | about 1 hour ago |
| Blender Version | 5.0 - 5.2 |
| Extension Type | Add-on |
| Render Engine Used | Cycles, Eevee |
| License | GPL |
Discover more products like this
biome environment procedural vegetation landscape scatter scattering foliage terrain geometry nodes grass rocks