 JB FX


Impact Animator
Fast secondary motion for Blender.
Impact Animator helps you quickly add Recoil, Bounce, Vibration, and Camera Shake without manually building every secondary-motion keyframe.
The workflow is intentionally simple:
Select → Choose Effect → Adjust → Add Impact
Quick Start
1. Install Impact Animator
Install the downloaded ZIP through Blender:
Edit → Preferences → Get Extensions → Install from Disk
Select the Impact Animator ZIP.
After installation, open:
3D Viewport → N Panel → Impact
2. Choose Your Impact Frame
Move the Blender timeline playhead to the exact frame where the impact should happen.
Impact Animator automatically uses the current frame as the impact frame.
No additional frame setup is required.
3. Select an Effect
Choose one of the four main effects:
↗ Recoil
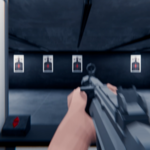
Creates a quick backwards or directional reaction followed by recovery.
Great for:
Weapons
Punch reactions
Mechanical movement
Props
Sudden force
∩ Bounce
Creates a quick impact followed by a natural settling bounce.
Great for:
Landing objects
Dropped props
Heavy impacts
Cartoon-style motion
Objects hitting surfaces
〰 Vibration
Creates rapid secondary movement that gradually settles.
Great for:
Machinery
Engines
Phones
Signs
Props after impact
Mechanical animation
🎥 Camera Shake
Adds a controlled camera shake around the selected impact frame.
Great for:
Explosions
Punches
Gunshots
Heavy landings
Vehicle movement
Action shots
4. Adjust the Motion
Impact Animator keeps the controls intentionally focused.
Strength
Controls how powerful the effect feels.
Increase it for a stronger impact.
Decrease it for subtle secondary motion.
Speed
Controls how quickly the reaction happens.
Higher values feel sharper and more energetic.
Lower values feel heavier and slower.
Duration
Controls how long the secondary movement continues before settling.
Direction
Available where directional motion is useful, such as Recoil and Bounce.
Choose the direction the object should react.
Feel Presets
Use the Feel presets to quickly change the character of the impact.
Subtle
Small, restrained secondary motion.
Useful for realistic animation and gentle reactions.
Normal
Balanced general-purpose motion.
A good starting point for most situations.
Heavy
Stronger movement with a more powerful reaction.
Useful for crashes, heavy props, hard hits, and action shots.
The preset automatically handles additional motion characteristics behind the scenes so you do not need extra technical controls.
Add Impact
When everything looks right, press:
Add Impact
Impact Animator creates the effect at the current timeline frame.
The animation is added as a separate secondary-motion layer so your existing animation can remain intact.
Impact Instances
Every created effect appears in the Impact Instances section.
This makes it possible to have several impacts throughout the same shot.
For example:
Frame 30 — Recoil
Frame 75 — Bounce
Frame 110 — Vibration
Each impact remains individually manageable.
Eye Icon — Original / Impact Preview
Each Impact instance has an Eye icon.
Turn the eye off to temporarily hide that Impact effect.
Turn it back on to restore it.
This makes it easy to compare:
Original Animation ↔ Impact Animation
without deleting anything.
Update
Select an Impact instance, change its settings, and press:
Update
The existing Impact will be rebuilt using the new settings.
Move Here
Want the impact to happen at another frame?
Move the playhead to the new frame and choose:
Move Here
The Impact and its associated timeline marker move together.
Duplicate Here
Move the playhead to another frame and choose:
Duplicate Here
A copy of the selected Impact is created at the new frame.
Useful for:
Repeated hits
Footsteps
Gunfire
Machinery
Repeated landings
Rhythmic animation
Copy to Selected
Impact settings can also be copied to other selected objects.
Create the Impact once, select additional objects, then choose:
Copy to Selected
This is useful when several objects need a similar reaction.
Automatic Timeline Markers
Every Impact automatically creates a Blender timeline marker.
Example:
IA | Recoil
IA | Bounce
IA | Vibration
Markers make it easy to identify important impact moments in longer scenes.
Moving or deleting an editable Impact also updates its corresponding marker.
Camera Reaction
For Recoil, Bounce, and Vibration effects, you can optionally enable:
Camera Reaction
This automatically creates a short synchronized camera bump at the same moment as the main impact.
It is useful when you want the camera to react to:
A heavy object landing
A gun firing
A punch
A crash
A strong mechanical hit
An explosion
Camera Reaction is designed as a quick automatic effect.
For full camera-shake control, use the dedicated Camera Shake effect instead.
Important
If you enable or disable Camera Reaction on an Impact that already exists, press:
Update
to rebuild the instance.
Recoil on Pose Bones
Recoil can also be applied directly to rig controls.
Enter:
Pose Mode
Select the desired control bone and use Recoil normally.
Impact Animator automatically detects the selected Pose Bone.
This is useful for:
Hands
Weapon controls
Heads
Upper-body controls
Mechanical rigs
Character reactions
Bounce and Vibration remain object-focused to keep the workflow predictable and simple.
Bake / Finalize
When you are completely happy with an Impact, choose:
Bake / Finalize
This converts the secondary motion into regular Blender animation data.
Use this when:
Preparing the animation for export
Sending the scene to another artist
Finalizing a shot
Removing the editable Impact Animator setup
Important
Baking is intended as the final stage.
Keep the Impact editable until you are happy with the result.
Delete
Delete removes only the selected Impact instance.
Other Impact effects remain untouched.
Remove All
Use Remove All when you want to remove the editable Impact Animator effects from the current setup.
Use this carefully when working with several Impact instances.
Recommended Workflow
For most animation shots:
1. Animate the main action
2. Move to the impact frame
3. Select the affected object
4. Choose Recoil, Bounce, Vibration, or Camera Shake
5. Adjust Strength, Speed, and Duration
6. Choose a Feel preset
7. Enable Camera Reaction if needed
8. Add Impact
9. Preview using the Eye icon
10. Bake / Finalize only when the shot is complete
Tips
Start with Normal
The Normal preset is designed as the best general starting point.
Strength is usually the first control you need
If the motion feels weak:
Increase Strength
If it feels exaggerated:
Reduce Strength
Use short durations for sharp impacts
Punches, gunshots, hard stops, and quick camera bumps usually feel better with shorter durations.
Use longer durations for heavy motion
Large objects and slower secondary movement can benefit from longer settling times.
Combine effects when necessary
A shot can contain multiple Impact instances.
For example:
Recoil + Camera Reaction
or
Bounce + Vibration
can create a richer result while keeping each effect separately editable.
What Impact Animator Is Designed For
Impact Animator is especially useful for:
Character animation
Prop animation
Product animation
Action scenes
Camera animation
Mechanical animation
Motion graphics
Previsualization
Cinematic shots
The Idea Behind Impact Animator
Secondary motion can make a simple animation feel significantly more convincing.
But animating every recoil, bounce, shake, vibration, and settling movement manually takes time.
Impact Animator turns that process into:
Choose → Adjust → Impact.
No complicated physics setup.
No huge control panels.
No unnecessary technical parameters.
Just fast, editable secondary motion when your animation needs a little more punch.
Have questions about this product?
Login to message
| Blender Extension Compatible | Yes |
| Published | about 2 months ago |
| Blender Version | 4.2 - 5.2 |
| Extension Type | Add-on |
| Render Engine Used | Cycles, Eevee |
| License | GPL |

Discover more products like this
Recoil Armature camera animated camera animation big impact 3d-camera camera shake 3D camera tools vibration