Iris: Addon for Blender
 Egret Studios LLC



User Documentation v1.0
What is Iris?
Iris is a powerful Blender addon that transforms Blender into a professional 3D presentation tool. Create stunning slide presentations with 3D models, animations, text, and images - then present them live or export as high-quality renders and PDFs.
Perfect for:
- Product presentations - Showcase 3D products from multiple angles
- Architecture visualization - Present building designs slide by slide
- Portfolio presentations - Display your 3D work professionally
- Client pitches - Impress clients with interactive 3D presentations
- Education - Teach concepts using 3D models and visualizations
Installation
-
Download the
irisaddon folder - Open Blender 4.5 or later
- Go to
Edit > Preferences > Add-ons - Click
Install...and select the iris folder - Enable the addon by checking the box next to "Iris - Presentation Slides for Blender"
- The addon panel appears in the 3D Viewport sidebar (press
Nto open) - Look for the "Iris" tab
Quick Start Guide
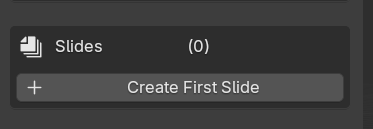
Step 1: Create Your First Slide
- Open the Iris panel in the 3D Viewport sidebar (press
N) - Click "Create First Slide"
- A new slide is created with its own camera and collection
Step 2: Add Content
With a slide selected, add content:
- Add Text - Creates 3D text objects
- Add Image - Import images as planes
- Add Shape - Add cubes, spheres, cylinders, etc.
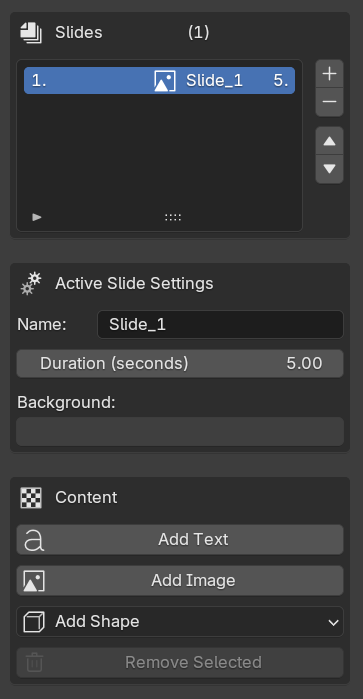
All content is automatically organized in the slide's collection.
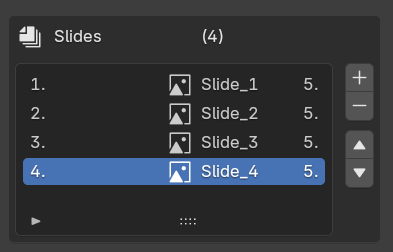
Step 3: Create More Slides
- Click the
+button to add more slides - Each slide has its own:
- Camera view
- Object collection
- Background color.
- Duration setting.
Step 3: Present Your Slides
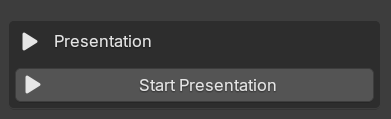
- Click "Start Presentation"
- Use arrow keys to navigate:
- → Next slide
- ← Previous slide
- ESC Exit presentation
- Enable Auto Advance for automatic slide progression
🎨 Interface Overview
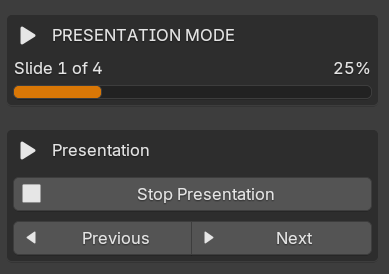
Presentation Controls
- Start Presentation - Enter Fullscreen presentation mode
- Stop Presentation - Exit presentation mode
- Previous/Next - Manual slide navigation (also available in presentation mode)
Slide Manager
-
+- Add new slide -
-- Remove selected slide - ↑ ↓ - Reorder slides
- Slide List - Click any slide to switch to it
Active Slide Settings
- Name - Rename the current slide
- Duration - Set duration for auto-advance (in seconds)
- Background - Choose slide background color
Content Tools
- Add Text - Insert 3D text with emission material
- Add Image - Import image files as textured planes
- Add Shape - Add 3D primitives (Cube, Sphere, Cylinder, Cone, Torus, Plane)
- Remove Selected - Delete the currently selected object
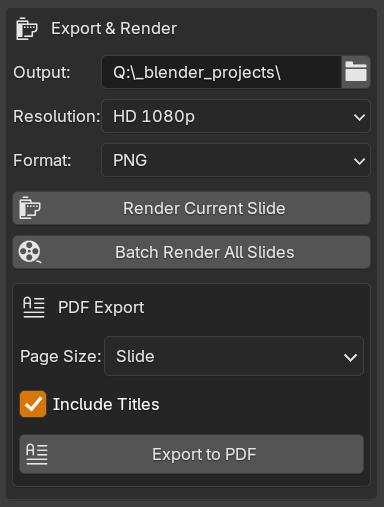
Export & Render
- Output Path - Where to save rendered slides
- Resolution - Choose from presets (HD 1080p, 4K, Instagram, YouTube, etc.)
- Format - Select image format (JPEG, PNG, OpenEXR)
- Render Current Slide - Render just the active slide
- Batch Render All Slides - Automatically render all slides
PDF Export
- Page Size - Choose A4, Letter, or Slide (16:9)
- Include Titles - Add slide names to PDF pages
- Export to PDF - Create PDF from rendered slides
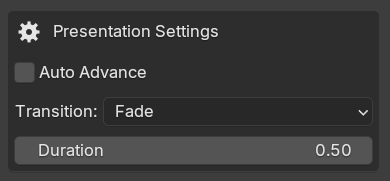
Presentation Settings
- Auto Advance - Automatically progress through slides
- Transition - Choose transition effect (None, Fade, Slide Left/Right)
- Duration - Transition animation length.
📖 Detailed Features
Slide Management
Creating Slides: Each slide is an independent scene setup with:
- Dedicated camera
- Isolated collection for objects
- Custom background color
- Configurable duration
Organizing Slides:
- Drag slides to reorder (use ↑ ↓ buttons)
- Rename slides for easy identification
- Delete unused slides (removes all content)
Switching Between Slides:
- Click any slide in the list to view it
- Camera automatically switches
- Only that slide's content is visible
Content Creation
Text Objects:
- Automatically centered and scaled
- Emission material for visibility
- Editable in Edit Mode (Tab key)
Images:
- Maintains aspect ratio
- Emission shader for proper display
- Supports PNG, JPEG, and common formats
3D Shapes:
- Random colored materials
- Ready to customize
- Scale, rotate, move as needed
Best Practices:
- Keep slides organized with clear names
- Use consistent styling across slides
- Position objects for optimal camera view
Live Presentation Mode
Starting a Presentation:
- Create at least one slide with content
- Click "Start Presentation"
- Viewport goes fullscreen (if supported)
- Overlays and UI elements hidden
Navigation:
- Right Arrow (→) - Next slide
- Left Arrow (←) - Previous slide
- ESC - Exit presentation
Auto-Advance:
- Enable "Auto Advance" before starting
- Set duration for each slide
- Presentation automatically progresses
- Manual navigation still works
- Timer resets on manual advance
Presentation Features:
- Clean fullscreen view
- Progress indicator in sidebar
- Smooth camera switching
- Background color transitions
Rendering Slides
Render Setup:
- Save your .blend file (required for relative paths)
- Set Output Path (where images will be saved)
- Choose Resolution preset
- Select Image Format (JPEG recommended for PDF export)
Render Current Slide:
- Renders just the active slide
- Quick preview of single slide
- Uses current render settings
Batch Render All Slides:
- Automatically renders every slide in sequence
- Shows progress in console
- Files named:
Slide_01_SlideName.jpg,Slide_02_..., etc. - Can take several minutes depending on scene complexity
Resolution Presets:
- HD 1080p (1920x1080) - Standard full HD
- HD 720p (1280x720) - HD ready
- 4K UHD (3840x2160) - Ultra high definition
- Square 1080 (1080x1080) - Square format
- Instagram (1080x1350) - Instagram 4:5 ratio
- YouTube (1920x1080) - YouTube standard
Image Formats:
- JPEG - Compressed, smaller files (recommended for PDF)
- PNG - Lossless, transparency support
- OpenEXR - HDR, professional workflows
PDF Export
Workflow:
- Batch Render All Slides first (as JPEG format)
- Click "Export to PDF"
- Choose save location and filename
- PDF is created from rendered images
Important Notes:
- PDF export requires pre-rendered images
- Works best with JPEG format
- PNG support is limited
- Always render before exporting PDF
PDF Settings:
-
Page Size:
- A4 - Standard document size (landscape)
- Letter - US letter size (landscape)
- Slide - 16:9 presentation format
- Include Titles - Adds slide names to PDF pages
PDF Output:
- One page per slide
- High-quality embedded images
- Viewable on any device
- Perfect for sharing presentations
💡 Tips & Best Practices
Workflow Tips
- Save Often: Always save your .blend file before rendering
- Test First: Render current slide before batch rendering all
- Use JPEG: For PDF export, always use JPEG format
- Organize Content: Keep related objects in their slide's collection
- Preview Slides: Click slides to preview before presenting
Performance Tips
- Optimize Geometry: Use low-poly models when possible
- Limit Lights: 2-3 lights per slide is usually enough
- Reduce Resolution: Test with 720p, render final at 1080p/4K
- Close Other Apps: Free up RAM for rendering
Presentation Tips
- Practice Navigation: Test arrow keys before presenting
- Set Durations: Adjust auto-advance timing for content
- Use Backgrounds: Match background colors to your theme
- Test Fullscreen: Ensure fullscreen works before important presentations
Content Creation Tips
- Text Visibility: Use emission materials for bright text
- Image Quality: Use high-resolution images
- Camera Position: Adjust camera for each slide's content
- Lighting: Add lights to each slide's collection
🔧 Troubleshooting
Common Issues
"No slides to present"
- Solution: Create at least one slide with the
+button
"Output directory doesn't exist"
- Solution: Save your .blend file first, or use an absolute path
"No JPEG images found" (PDF Export)
- Solution:
- Set Format to JPEG
- Batch Render All Slides first
- Then Export to PDF
Presentation won't start
- Check if you have at least one slide created
- Ensure 3D viewport is active
Images not showing in slides
- Verify image file path is correct
- Check that image format is supported
- Try re-adding the image
PDF has blank pages
- Solution:
- Use JPEG format only
- Re-render all slides
- Try exporting again
Render path shows red warning
- Solution: Save your .blend file first (required for // paths)
ESC crashes Blender
- This has been fixed in v1.0 - reinstall the addon
Getting Help
Before Contacting Support:
- Check this documentation
- Verify Blender version (4.5+)
- Try reloading the addon
- Check the system console for error messages
Contact Support:
- Email: [email protected] or Inbox via Superhive.
- Include:
- Your Blender version
- Description of the issue
- Steps to reproduce
- Any error messages from console
⌨️ Keyboard Shortcuts
Presentation Mode
- → (Right Arrow) - Next slide
- ← (Left Arrow) - Previous slide
- ESC - Exit presentation
Blender Shortcuts (Still Available)
- N - Toggle sidebar
- Tab - Edit text objects
- G - Move objects
- R - Rotate objects
- S - Scale objects
System Requirements
- Blender: 4.5.0 or later
- OS: Windows, macOS, or Linux
- RAM: 8GB minimum, 16GB recommended
- Storage: Space for rendered images
Example Workflows
Product Presentation Workflow
-
Create slides for each view:
- Slide 1: Front view
- Slide 2: Side view
- Slide 3: Detail close-up
- Slide 4: Features breakdown
-
Add content to each slide:
- Position camera for optimal view
- Add text labels
- Set background colors
-
Render and export:
- Batch render all at 4K
- Export to PDF for clients
Architecture Visualization Workflow
-
Create slides:
- Exterior day view
- Exterior night view
- Interior living room
- Interior kitchen
- Floor plan
-
Present live:
- Enable auto-advance
- Set 8-10 second duration per slide
- Present to client in Blender
Portfolio Showcase Workflow
- One project per slide
- Add title text to each
- Render at HD 1080p
- Export to PDF
- Share on social media or send to clients
- Egret.
Have questions about this product?
Login to message
| Blender Extension Compatible | Yes |
| Sales | 10+ |
| Published | 12 months ago |
| Blender Version | 4.5 |
| Extension Type | Add-on |
| Render Engine Used | Cycles, Eevee |
| License | GPL |

Discover more products like this
PDF bcon canva for blender PowerPoint batch render collection manager addon