Koo Fruit Engine: Banana
 Koo Fruit Engine


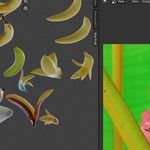
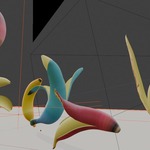
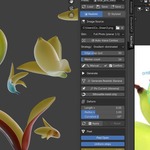
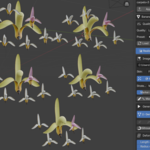
Pro tip — does using more markers give better results?
Counterintuitively, fewer markers usually produce a cleaner banana than many.
If you're trying to match a specific shape (or wrapping the engine onto a non-banana
subject — a cucumber, a portrait, anything elongated), reduce the silhouette polygon
density. The 10 anatomical markers are usually enough to define the shape skeleton;
the 38 silhouette markers refine outline. Many noisy markers over-fit and lock the
shape into the photo's exact noisy pixels. A useful rule of thumb: 10 anatomical
markers + 5 to 10 silhouette markers covers 90% of shapes cleanly.
What do the 10 anatomical markers mean?
The 10 anatomical markers define the banana's structural anatomy. Auto-trace
places them automatically; manually adjusting them changes the generated mesh's shape
directly. (1) Stem — the stem-end tip. The X-low endpoint of the central axis. (2)
StemW up / StemW down — width boundary on either side of the stem cap. (3) Neck — the
narrowing point where the stem cap transitions into the main body. (4) Thick up /
Thick down — the two width boundary points at the banana's widest cross-section. (5)
StigW up / StigW down — width boundary on either side of the stigma cap. (6) Stigma —
the stigma-end tip (flower scar). Moving Stem or Stigma changes the length and axis;
moving Thick changes body radius; moving StemW or StigW changes cap width; moving
Neck changes taper sharpness. The remaining 38 markers form the silhouette polygon
for outline refinement.
Auto-trace got the contour almost right but a few markers need nudging. How do I move them manually?
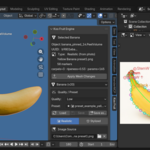
After Auto-trace Contour runs, the photo overlay on the right shows all 48
markers as colored circles. To move a marker manually: 1) Enable the Manual Trace
toggle in the Image Source section (pencil icon next to Confirm). 2) Hover over the
marker on the photo overlay; the cursor changes to a grab icon. 3) Click and drag the
marker to its correct position. 4) Release to lock. 5) Repeat for any markers that
need adjustment. When done, toggle Confirm to lock the corrected markers, then click
Generate Realistic Banana to rebuild the mesh with the adjusted silhouette.
How does the photo-to-3D workflow work step by step?
1) Switch to the Realistic tab. 2) Image Source: click the folder icon and
load a banana photo (png, jpg, webp). The photo appears on the right side with
markers overlaid. 3) Click Auto-trace Contour — the bundled u2netp ONNX model runs in
1-2 seconds and extracts the silhouette, dropping 48 markers (4 anatomical: Stem,
Stigma, StemW, StigW + 44 silhouette polygon, plus Neck and Thick reference points).
4) Review markers, toggle Confirm to lock. 5) Click Generate Realistic Banana — a
procedural 3D banana matching the photo's outline, color, and curvature appears in
about 4 seconds (Low quality). The photo skin is wrapped onto the peel automatically.
How do I use presets?
The Quality / Preset section has a dropdown listing built-in presets
(preset_example_cavendish, preset_example_yellow, preset_example_aged,
preset_example_pink, etc.). Select one and click Load — every slider on the panel
jumps to that preset's values. The mesh is not rebuilt; click Apply Mesh Changes on
the active banana to materialize the new values, or click Generate to build a fresh
banana in a new slot. Save stores the current panel state as a new named preset; Save
as creates a renamed copy. Preset files persist across Blender sessions.
What is mathematically grounded about it?
Every parameter has a documented mathematical or biological basis. Peel curl
uses Euler-Bernoulli beam-bending physics. Stem packing follows constant-radius
constraint at the natural neck transition. Aging models 13 biochemical state
variables (chlorophyll, carotenoids, anthocyanin, polyphenol oxidase, etc.) via ODE
integration. No magic numbers — every constant traces back to a paper or measurement.
How does the Shift+D cluster work? Are duplicates really independent?
Yes. The instant you click a Shift+D copy, the addon auto-renames it
(banana_pinned_N.*) and detaches its mesh and material datablocks. Color, skin,
deform, and Apply Mesh Changes affect only the active banana. Verified up to 40
bananas in a single scene without crosstalk.
What if auto-trace fails on my photo?
Two fallbacks. (1) Manually place the 48 markers by dragging them on the
photo overlay. (2) Try the bundled preset banana from any tab (Stylized → Generate
Stylized) without a photo. Auto-trace works best with a contrasting background;
high-contrast natural backgrounds (table, cloth, wood) usually give clean
silhouettes.
Can I use the bananas commercially?
Yes. The extension is GPL-3.0-or-later. Any output mesh, render, or animation
is yours to use in commercial work without royalties. The GPL license only applies
to the source code of the extension itself if you redistribute it.
Which Blender versions are supported?
Blender 4.2 LTS through 5.0+. Tested on Windows 5.0.1 and macOS Apple Silicon
5.0.1. Newer versions likely work but are not officially tested yet.
Do I need to install Python packages (Pillow, onnxruntime) myself?
No. All required wheels are bundled in the extension. Blender 4.2+
automatically installs the right wheel for your platform (Windows, macOS Intel, macOS
Apple Silicon, Linux) when you install the .zip. No pip install, no internet at
runtime.
$9.99
Have questions about this product?
Login to message
| Blender Extension Compatible | Yes |
| Published | 4 months ago |
| Blender Version | 4.2 - 5.0 |
| Extension Type | Add-on |
| Render Engine Used | Cycles, Eevee |
| License | GPL |
Discover more products like this
mathematical parametric Banana procedural Generator animated addon organic plant photo workflow