 Cgi Lab
Installation and complete working guide
Install, open, orient yourself
This edition is written for La Candelaria Pro 6.23.2. Blender 5.2.0 is the declared minimum; the documented workflows were checked on Windows with Blender 5.2.1 LTS. Other operating systems and later releases need their own compatibility check.
1. Extract the documentation ZIP to a writable local folder. The addon installer is a separate download: La_Candelaria_Pro-6.23.2-Extension.zip. Do not try to install the documentation ZIP.
2. Save your work. Disable any older La Candelaria Pro in Preferences > Add-ons. Open Edit > Preferences > Get Extensions, choose Install from Disk from the menu, select the extension ZIP and enable it. Save Preferences and restart Blender.
3. In the 3D Viewport, switch to Object Mode, press N and open the Candelaria Pro tab. Click Create Colonial House to place a house at the 3D Cursor.
4. The interface follows Blender's language. Use Preferences > Interface > Translation to choose English. Proper names and existing object names keep their original spelling.
Upgrading from the traditional addon: Do not enable both installations together. If you used an Alternative library, record its path before disabling the old addon and enter it in the extension preferences. Leave the path empty to use the bundled library. Existing scene files retain their geometry and settings. The previous installer remains available in the version history for rollback.
The three practice files
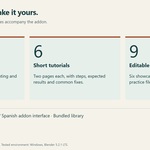
- 01_Start.blend: One house. Use it for your first edits and a three-house row.
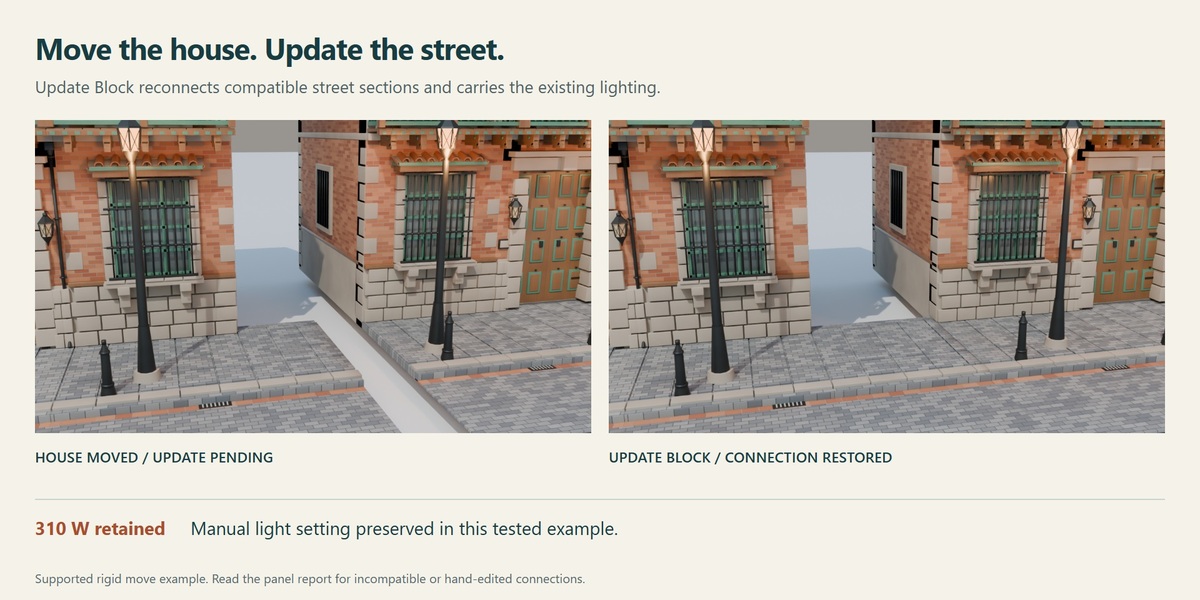
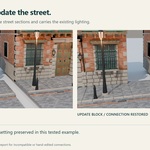
- 02_Update_Challenge.blend: The centre house is already moved 1 m. Street and poles need Update Block. A test light is set to 310 W.
- 03_Full_Workflow_Result.blend: A finished street with surface detail, lights and a hidden editable mesh copy.
Navigation and saving: NumPad 0 enters or leaves camera view. Home frames the scene. Save your experiments in My_Work with File > Save As. Each scene is self-contained; the addon is needed to use its editing controls.
Know what your next click changes
The active object is Blender's last-selected object. It is distinct from the full selection. Most house controls affect that one building; batch tools explicitly act on the selection.
- Main controls / Architecture: Active procedural house: width, floors, entrance and building form.
- Materials / Variation: Active house. Assigning a new palette is deliberate; random seeds do not choose a new palette.
- Edit Selection: Selected compatible houses. Palette actions respect the Materials lock.
- Block Layout: Copy the active house; arrange selected houses around the active anchor.
- Continuous Street: Create or update connections belonging to the selected houses.
- Street Lighting: Selected source houses, or sources resolved from their generated poles and lights.
- Group Holiday Decorations: The explicit Apply to setting: active, selection or Candelaria collection.
- Scene and Atmosphere: The scene world, Candelaria rig and managed materials. Wet/Dry is not a per-house dampness slider.
A dependable order of work
Shape one house > repeat > connect > place lights > refine finishes > frame > render > save. Use Lightweight Preview while arranging. Switch it off when judging fine surface detail in Material Preview or Rendered view.
Grey controls are usually contextual: Check Object Mode, the active house, its ownership and the prerequisites shown in the panel. A balcony needs an upper floor; an L-shaped wing disables slope-related controls while retaining their saved values.
Shape the house and its entrance
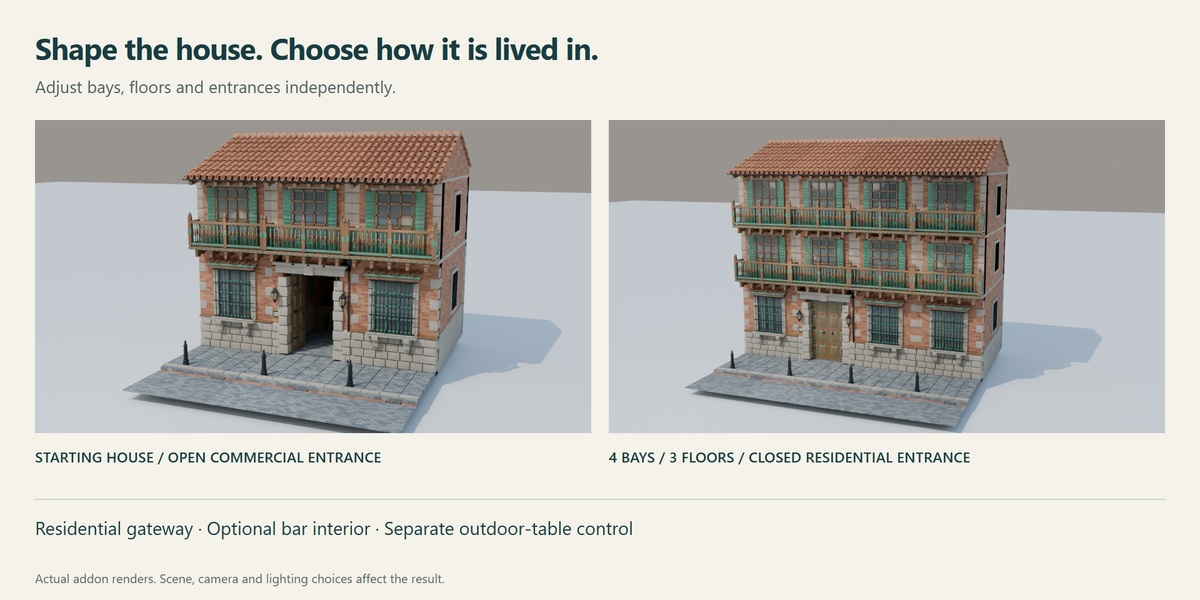
- Façade Bays / Floors: Add architectural modules rather than stretching windows. A standard bay is 3.2 m at object scale 1.
- Gateway: Choose the entrance bay. The visible numbering starts at 1.
- Closed gateway: Under Architecture > Entrance. Controls the two main entrance leaves.
- Bar interior and sign: Independent of whether the gateway is open. Disable it for a residence.
- Outdoor tables: Under Decoration. Separate from the bar switch; available on level sidewalks.
Three useful combinations: Residence: closed gateway, bar off. Open residential passage: gateway open, bar off. Open business: gateway open, bar on. New houses start residential; older scenes may keep their previous entrance state.
These controls apply to the main house gateway. They do not operate the separate chapel, inserted door modules or upper-floor balcony doors.
Balconies, courtyards and an L-wing
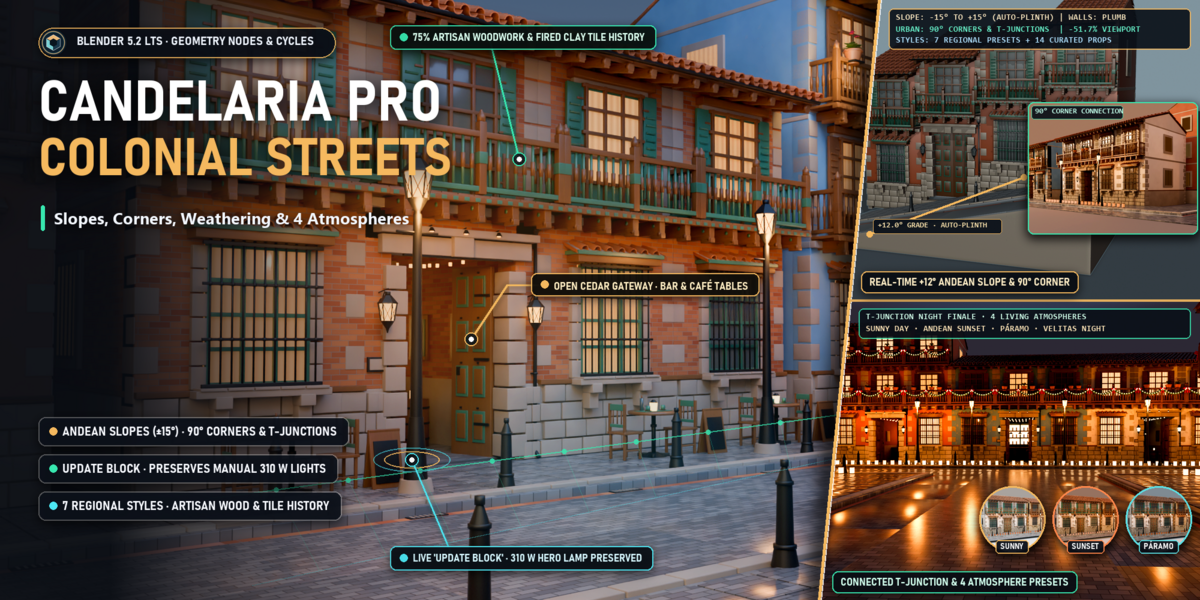
Architecture contains Balcony, Enclosed balcony, Stone arcade, Corner detail, Interior courtyard, L-shaped wing, Wing bays, Sidewalk and Roadway, and Slope.
1. Use at least two floors for a balcony. Enable Balcony before choosing an enclosed balcony.
2. Enable L-shaped wing for a complete side wing. Adjust Wing bays; the range is 3-10 and includes the two bays that form the junction.
3. Keep the L-wing on level ground. It uses an open balcony and a frontage of at least two bays. Slope, courtyard, corner detail and enclosed-balcony choices are retained while unavailable; disable the wing to restore them.
Two different kinds of corner: Corner detail is an architectural module. Connect 90° Corner joins the pavement of two separate street ends. Neither is the same control as the complete L-shaped wing.
On a straight frontage, Slope produces stepped building bays and a ramped street. It does not conform the base to an arbitrary terrain mesh. Inspect the terrain contact in your own scene.
Palettes and repeatable variation
Choose a style in the main panel, then decide what to apply: Architecture, Materials and/or Decoration. Click Apply to Building. To recolour an established silhouette, leave only Materials enabled.
- Plaza Mayor: White walls, stone arcades and an enclosed balcony.
- Christmas and Velitas: A festive architectural and decorative starting point.
- Bogotá · Bar E’to: Brick and green woodwork.
- Republican-era Candelaria: Indigo blue and cedar.
- Villa de Leyva: White limewash, olive green and stone.
- Barichara: Ochre walls and yellow stone.
- Cartagena: Terracotta tones, cedar and coral stone.
Separate the amount from the pattern
In Variation, Vegetation has Density and Seed; Materials has Tone variation and Seed; Windows has Lit and Seed. Quantities set how much appears. Seeds rearrange a repeatable pattern without changing the architecture.
New Variation changes only unlocked seeds. A lock protects its category from that action; it does not make the manual controls read-only. Window lighting is probabilistic, and the atmosphere also controls its brightness.
Art-direct several houses: Use Edit Selection > Apply Palette for a uniform finish, Shuffle Palettes for a seeded mix, or Vary Selection for new unlocked patterns. Seven style presets contain six distinct material palettes. Batch palette changes respect the Materials lock.
Plants, props and everyday life
Decoration controls Planters and flowers, Christmas garlands, Outdoor tables, and Lanterns and candles. Everyday/Festive changes the active house's holiday decorations; it does not redesign the architecture.
Place vegetation intentionally
1. Use an upper floor with Balcony enabled. Turn on Decoration > Planters and flowers.
2. In Variation > Vegetation, adjust Density and Seed. Lock the category once you like its distribution.
3. Turn off Lightweight Preview to inspect the detailed geranium leaves, flowers and fern fronds. Renders and addon-created mesh copies use the complete foliage.
Why a control may be unavailable: Planters and garlands need a balcony. Tables and candles need Sidewalk and Roadway. Tables are hidden on slopes, with their setting retained. Lower density can make a composition calmer without removing the plant system.
Build a plaza with separate objects
In Module Library, choose a module and click Insert at 3D Cursor. Try El Chorro Chapel, Plaza fountain, Colonial bench, Café table and chairs, or Planters and flowers. F9 opens the last operation's options, including an independent mesh when available.
Open Asset Browser opens the visual library. Select Candelaria Pro in its library selector. The panel offers 14 module shortcuts; the Asset Browser exposes 59 public assets. These are different views of the included library.
Props are independent set dressing: Manually inserted modules do not automatically follow a moved house or Update Block. Check their positions after changing the street. For older stock plants, use Decoration > Update Scene Plants; custom geometry is preserved.
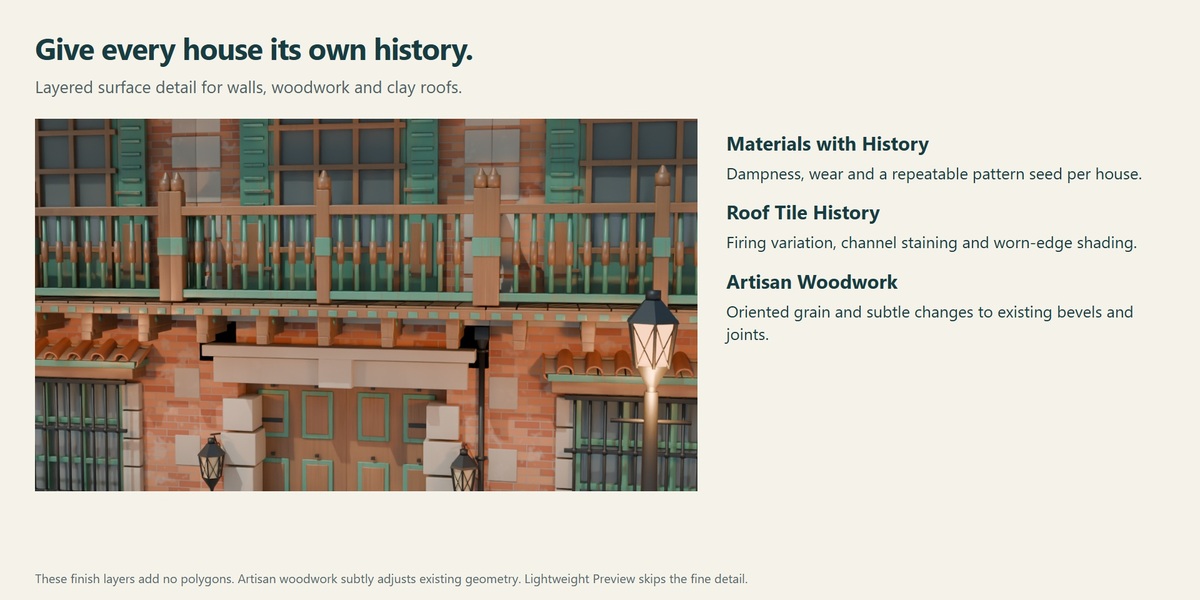
Give materials a history
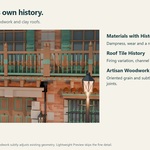
Select one house. In Materials > Materials with History, enable the effect or choose Restored, Lived-in or Aged. The presets retain the palette, architecture and pattern seed.
- Dampness: Moisture staining, especially near the base. Ground dampness follows the street slope.
- Surface wear: Aged surface character through colour, roughness and subtle bump.
- Pattern seed: Changes the repeatable distribution on this house.
- Enable on this house: Compare the finish on and off without choosing a new palette.
Inspect in the right view: Disable Lightweight Preview and use Material Preview or Rendered. Solid shading is useful for form, but cannot show the full shader result. Render and Create Mesh Copy retain the effect.
The layer supports stock walls, plinths, entrance surrounds and woodwork. It adds no polygons and is not a leakage simulation. External shaders and custom output connections keep their own finish. For an older house, use Prepare Material History first.
Roof tiles and artisan woodwork
Roof tiles: tone, moisture and worn edges
1. Enable Materials > Materials with History > Enable on this house. This master switch must be on.
2. Under Roof tiles, enable Tile history and adjust Firing variation.
3. Use the Dampness, Surface wear and Pattern seed controls above for the same house. Set dampness and wear to zero to isolate firing variation.
Tile history adds colour, roughness and bump around overlaps, channels and edges. It keeps the existing geometry and UVs. It does not create broken tiles, a rain simulation or new moss geometry. History presets keep the tile switch and firing variation.
Artisan Woodwork: subtle, per-piece character
1. In Materials > Artisan Woodwork, enable Enable on this house.
2. Set Craft intensity. Start at 0.5, inspect a close view, then increase only if the shot benefits.
3. Use the Materials seed in Variation to change the repeatable pattern. Compare with intensity zero or the effect disabled.
Grain follows rails, posts, gateway leaves and balusters. Existing bevels and joints gain small irregularities, about 1.5 mm maximum at full intensity in the original module scale. Cedar and green woodwork are supported; Materials with History can remain active.
Lightweight does not mean identical shading: Both detail layers are bypassed in Lightweight Preview. They add no polygons, but artisan woodwork subtly moves existing geometry. Full-quality evaluation and memory still have a cost; performance depends on the scene.
Older scenes may show Prepare tile detail or Prepare Artisan Woodwork. Prepare missing entrance controls first, then prepare the finish. Preparation preserves the initial appearance; enable the effect afterwards.
Repeat, arrange and keep control
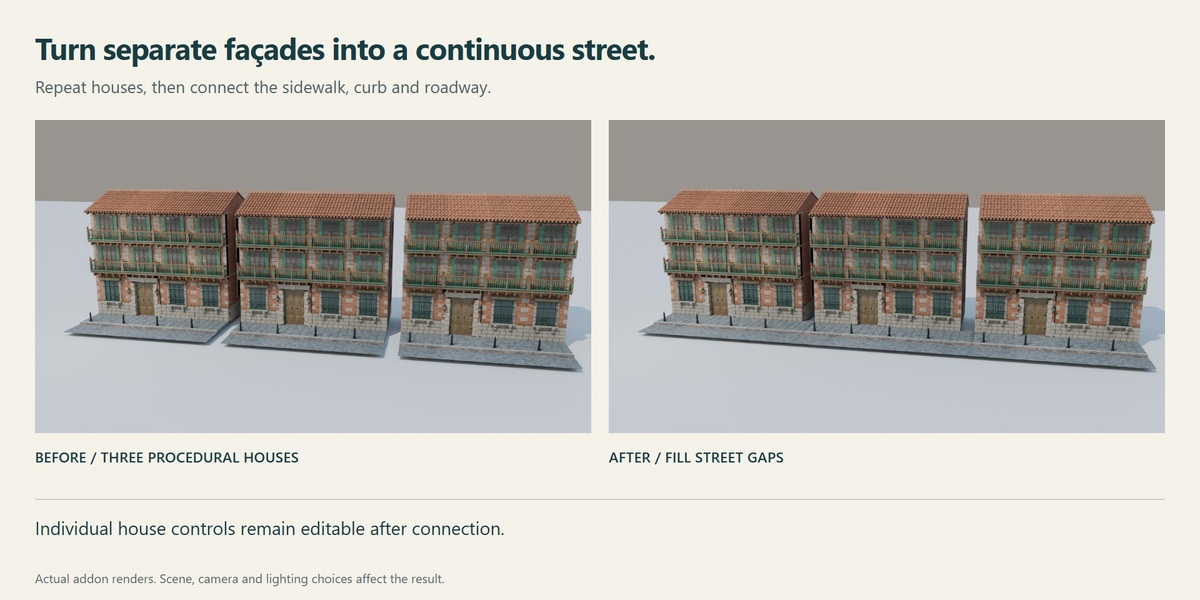
1. Select the source house and open Block Layout. Choose Direction, Spacing and New copies. New copies excludes the original.
2. Click Create Copies. The original and copies are selected; the last copy becomes active. Each house keeps its own controls.
3. For a new arrangement, select the houses and make the one that must stay put active. Click Align and Space. The active building is the fixed anchor.
- Direction: Right/Left follow local X; Front/Back follow local Y, projected on the ground.
- Spacing: Clearance between complete bounds, including roof, sidewalk and decoration. Not distance between origins.
- Vary copies / Seed: Change unlocked patterns while retaining architecture, palette, quantities and preview quality.
Keep transformations simple: Copies take the current state without animation, parenting or constraints. Arrangement preserves rotation and height; it does not turn façades to face each other. Frame Selection changes the working view and preserves camera transforms.
Connect and update the street
1. For a straight row, enable Architecture > Sidewalk and Roadway. Use aligned, straight, static frontages with matching rotation and scale.
2. Select two or more neighbouring houses. Choose Block Layout > Continuous Street > Fill Street Gaps. The new pieces extend the paving between their ends.
3. Move a connected house along the row. Keep it selected and click Update Block. The panel shows which connections and lighting groups need attention.
Choose the update that matches the edit: A house move: Update Block preserves the existing connections, façade light settings and supported direct light edits. A width or scale change on a lit façade: use Street Lighting > Update Positions first, then update the street. A new lighting design: use Apply Lighting Only deliberately.
Sloped neighbours must continue the same grade, so their Z positions matter. A gap can span up to 32 architectural bays. Repeating Fill Street Gaps does not duplicate existing sections; touching sidewalks are treated as contiguous.
Overlaps, incompatible geometry or hand-edited connections may block reconstruction. Read the reported cause and preserve your custom mesh before deciding to rebuild it. Manually placed props still need a placement check.
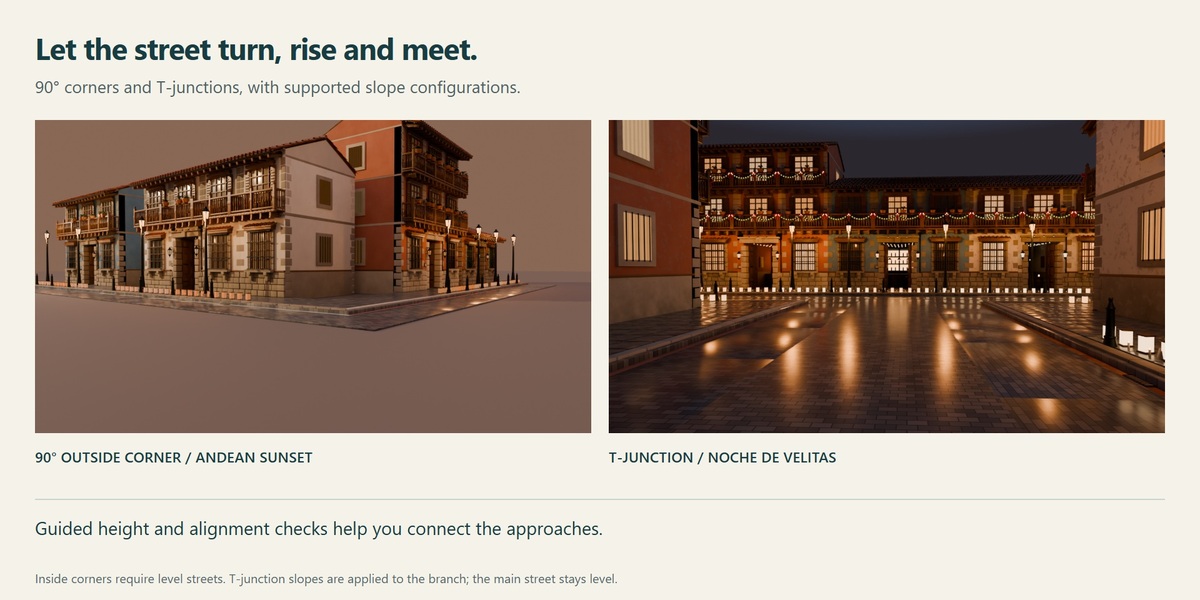
Connect a 90° corner
1. Use two straight terminal houses with Sidewalk and Roadway enabled. Orient the street axes at exactly 90°. Match sidewalk width and vertical scale.
2. Select only those two houses. In Block Layout > Continuous Street, read the preview and correct any overlap or height warning.
3. Click Connect 90° Corner. Inspect the sidewalk, curb, gutter and roadway. Each side keeps the material from its own frontage.
- Outside corner: Façades face outwards. Leave room to reach the meeting point, within four bays per end. One or both streets may slope; a level landing joins their approaches.
- Inside corner: Façades face into a concave L. Both streets must be level and at the same height. Terminal paving is trimmed for the miter. Each house supports one inside corner.
For slopes, read the landing Z and the indicated arrival/departure directions. If an approach would exceed 45°, or touching ends have different heights, follow the proposed Z or run adjustment. After moving a house, use Update Block.
Recover the original inside pavement: Select the inside-corner object or one of its houses and use Remove Inside Corner. Hand-edited connection meshes are protected when an update would need to reshape them.
Make a T-junction
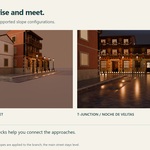
1. Align two main-street houses facing the same direction. Set both slopes to 0° and match their height. Leave a gap between their façades.
2. Place a third, straight house behind that opening. Rotate its street to 90° so the sidewalk end faces the junction. The branch can rise or descend.
3. Select exactly the three houses. Read the Continuous Street preview: branch, opening and available roadway clearance. Click Connect T-Junction when the configuration is valid.
At standard scale, the façade opening is 11.30-25.60 m and the branch end can be set back up to 12.80 m. Match sidewalk width, vertical scale and paving module. The preview gives position-specific corrections when the branch is misaligned.
Keep the mouth clear: A straight street section or generated pole can obstruct the opening. Resolve the named obstruction first. The mouth remains level; the approach distributes the height difference toward the branch. Both main houses remain level.
Change branch Slope and Z together while watching the approach. If the angle would exceed 45°, increase the available run or follow the Z correction. Use Update Block after changes. Remove T-Junction restores the opening; preserve hand-edited meshes before removing them.
Public lighting without losing settings
Select houses or their generated poles/lights and open Street Lighting. The panel resolves each façade as a group. An unrelated light or a manually inserted streetlight module is not a managed distribution.
- Create Poles with These Settings: Creating the first distribution. Requires Sidewalk and Roadway.
- Replace with These Settings: Intentionally replacing both layout and lighting using every value in the panel.
- Update Positions: Updating existing groups using each façade's saved settings. Does not add lights to an unlit house.
- Read Active Settings: Loading the active source's stored values into the panel. Reading does not apply them.
- Apply Lighting Only: Changing power, temperature, radius or on/off for all selected source façades, without moving poles.
- Remove from Selection: Removing managed lighting for the selected source groups.
A useful starting point
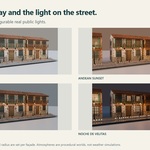
Try Spacing 6 m, Edge setback 0.95 m, Power 180 W, Temperature 3000 K, Light radius 0.13 m and Lights on. These are artistic starting values, not an exposure guarantee. Inspect the result in your renderer.
The addon creates real POINT lights with shadows. Temperature is approximate; there are no IES profiles or photometric certification. Streetlights work independently of the atmosphere. Zero power switches off both the light and its lantern glow.
Protect an approved lighting design: Read saved values before applying a new design. Apply Lighting Only replaces manual light adjustments. Update Positions protects detected manual edits and reports skipped groups. A rigid Update Block move can carry existing lights while retaining their edits.
Distribution is explicit, not live terrain following. It targets the main frontage, uses vertical poles and supports static upright houses with positive scale. The L-wing does not gain an automatic second row; junctions and arbitrary curves are not lighting routes.
Atmosphere, cameras and the final shot
1. Open Scene and Atmosphere and click Set Up Lights and Cameras. Existing addon camera framing is retained.
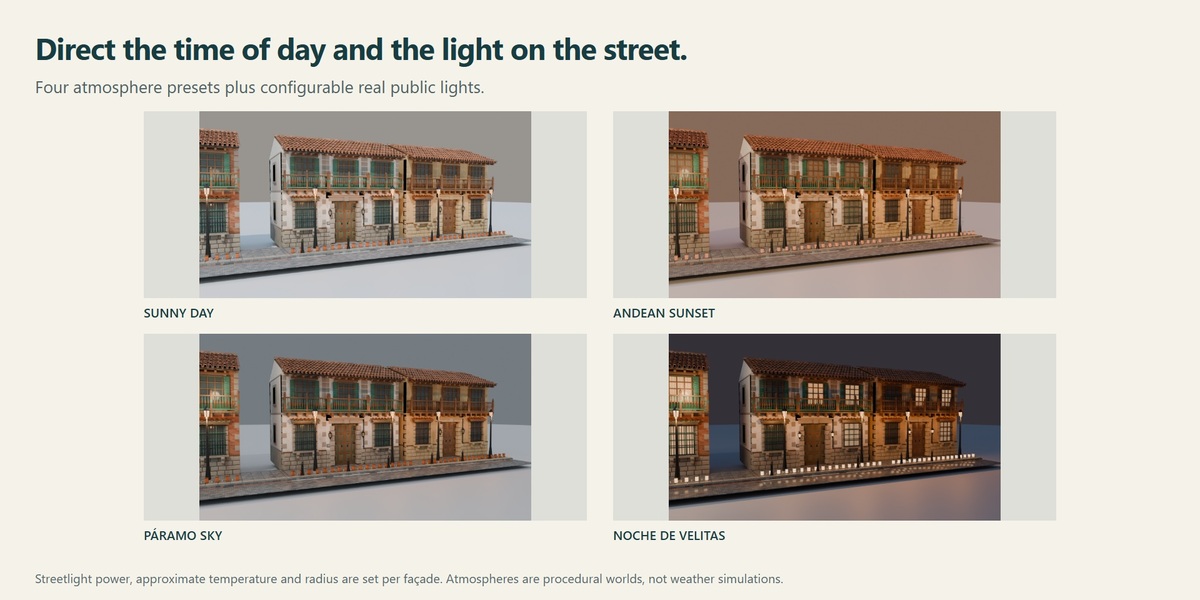
2. Choose Sunny day, Andean sunset, Noche de Velitas or Páramo sky, then click Apply Atmosphere. Check the scene in Rendered view or with F12.
3. Choose Front view, Three-quarter view, Block overview, Façade detail or Courtyard. Click Look Through Camera. Use Reframe Cameras only when you want the five addon cameras recalculated for the new scene bounds.
Reframing is an intentional edit: Reframe Cameras changes the addon cameras' positions, rotations and lenses. Custom cameras outside the rig are preserved. In the practice scenes, use NumPad 0 to view their supplied active camera without changing it.
Restore Previous Environment recovers the state from before the first applied atmosphere. User lights outside the Candelaria rig are preserved. Wet/Dry affects managed paving and roof materials across the scene; use Materials with History for per-house dampness.
Worlds are procedural environments, not photographic HDRIs. Páramo sky does not create rain particles or puddle geometry. Set your own render engine, resolution and sampling; the addon does not promise a render-time target.
Work light, deliver full detail
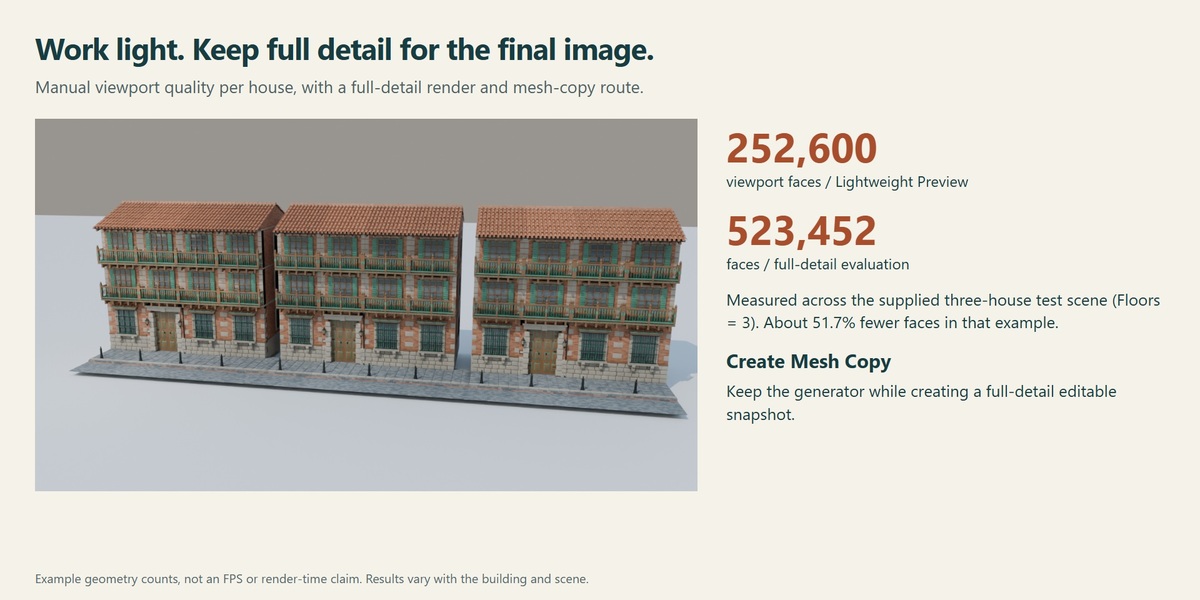
- Lightweight Preview: Simpler viewport sources and bypassed finish detail for the active house. Manual per-building control, not distance-based LOD.
- Edit Selection > Lightweight Preview / Full: Apply the viewport choice to selected compatible houses.
- F12 render: The full-detail addon route, even with Lightweight Preview enabled.
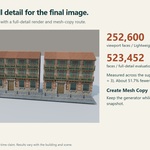
- Geometry > Measure Current View: Faces, triangles and a local evaluation measurement for the active viewport state. Not FPS or render duration.
- Editable Copy > Create Mesh Copy: Full-detail evaluated geometry with materials, while keeping the procedural source.
1. Select the procedural house. In Editable Copy, leave Hide original on and Move along X at 0 to avoid overlapping visible versions.
2. Click Create Mesh Copy. The source is hidden and the copy is selected. Use Edit Mode for mesh work, then return to Object Mode.
3. With the copy active, click Return to Procedural House in the main panel. The source returns and the copy is hidden. Save both if you need that hand-finished alternative.
A mesh copy is a snapshot: Edits to the mesh are not written back into procedural parameters. Returning to the generator does not merge the edits. Keep the version you need and export the appropriate object deliberately.
Creating a mesh copy is not an FBX export or an automatic Unreal/Unity material conversion. External exporters may read viewport geometry: export the full-detail copy, or disable Lightweight Preview before exporting the generator. Procedural shaders may need baking or adaptation.
Geometry measurements expire after relevant changes and do not persist across reopening. Measure again after editing controls, internal nodes or source meshes.
Open an older project safely
Installing an updated addon does not rewrite existing .blend files. Save a project copy first, then prepare only the missing features on the intended house or scene. Read each operation's report.
- Current house controls: Update House in the main panel for a compatible legacy generator.
- Residential entrance controls: Architecture > Entrance > Enable Entrance Controls. Do this before preparing artisan woodwork.
- New foliage: Decoration > Geraniums and ferns > Update Scene Plants.
- Per-house weathering: Materials > Materials with History > Prepare Material History.
- Tile history: Materials > Materials with History > Roof tiles > Prepare tile detail.
- Artisan woodwork: Materials > Artisan Woodwork > Prepare Artisan Woodwork.
- Reversed café chalkboards: Decoration > Café chalkboards > Fix Signs in Scene.
- Separated lantern and pole: Street Lighting > Repair Streetlight Mounts.
Preparation and activation are separate: Surface preparation keeps the existing appearance. Enable the effect afterwards. Stock resources are handled conservatively; edited meshes, incompatible shaders or data shared with another scene can be skipped and reported.
Library and scene ownership
The installer includes its library. Leave Alternative library empty in addon preferences unless you intentionally provide another compatible library. Complete template resources persist after save/reopen in 6.23.2.
For a file affected by an older incomplete cache, creating a house, inserting a module or using Update House can recover the bundled resources. A house shared from another scene may be read-only here: edit it in its owning scene, or create an independent house in the destination scene.
Troubleshooting and a useful handoff
- No house controls: Object Mode; select the procedural house, not a generated pole or mesh copy. Return to Procedural House when appropriate.
- Finish or foliage looks unchanged: Turn off Lightweight Preview and use Material Preview or Rendered. Check the effect switch and the assigned stock material.
- Tile controls are grey: Enable the master Materials with History switch, then Tile history.
- Street will not connect: Check straight frontage, matching axes/scale, height, sidewalk module and the specific preview message.
- Poles keep old values: Typing panel values does not apply them. Choose the deliberate action: lighting only, positions, or replacement.
- A custom light change disappeared: Apply Lighting Only and Replace with These Settings intentionally apply panel values. Use saved-setting updates when preserving differences.
- Dark or bright windows: Check Variation > Windows > Lit and the atmosphere. Day/Páramo suppress emission; sunset reduces it; night enables it.
- An older heading remains: The current panel and preferences show 6.23.2. Install the supplied addon ZIP and restart Blender. If an older heading remains, check Preferences for another installed copy.
When reporting a problem
Include the addon and Blender versions, operating system, renderer, the active house, the exact action and its message. Add the smallest shareable .blend and a screenshot showing the selected object and panel. Note whether Lightweight Preview was enabled and whether the file was migrated.
Save a reproducible result: Before handoff, save a new filename, reopen it and check the active camera, procedural controls and important lights. Keep custom mesh edits in their own copy. Include external images if your additions introduced them.
This manual describes the 6.23.2 implementation and supplied examples. It does not certify every GPU, operating system, later Blender version or external renderer. The addon builds editable architectural sets; it does not automatically generate arbitrary road networks, parcels or complete game-ready assets.
Have questions about this product?
Login to message
| Blender Extension Compatible | Yes |
| Published | about 12 hours ago |
| Blender Version | 5.2 |
| Extension Type | Add-on |
| Render Engine Used | Cycles |
| License | GPL |
Discover more products like this
streets colonial environment geometry nodes architecture procedural