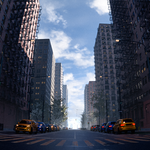
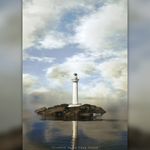
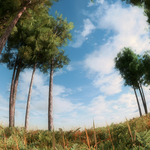
Lazy Cloud : Instant Sky Generation
Lazy Cloud User Manual
Blender Procedural Cloud Generation Tool - Complete Guide
📋 Table of Contents
- 1. Add-on Overview
- 2. Installation & Enable
- 3. Basic Workflow
- 4. Main Panels & Features
- 5. Rendering & Volume Settings (Auto)
- 6. Common Issues & Troubleshooting
- 7. Best Practices
1. Add-on Overview
☁️ What is Lazy Cloud?
Lazy Cloud is a Blender tool for quickly importing and adjusting cloud assets. Its core purpose is to make cloud scene setup templated and one-click. It provides:
- Fast cloud Collection selection and import from Assets Library thumbnails
- Automatic cleanup of old LC_ cloud Collections to keep the scene clean
- Quick cloud transform controls (position, rotation, uniform scale, reset)
- Centralized management for Cycles / EEVEE volume parameters
- One-click application of recommended rendering settings (Auto)
📋 System Requirements
- Add-on Name: Lazy Cloud
- Author: MeiU
- Add-on Version: 2.0.1
- Minimum Blender Version: 3.4.1
- Panel Location: View3D → N Panel → Lazy Cloud
2. Installation & Enable
Install the Add-on
Enable the Add-on
Search for Lazy Cloud in the Add-ons list and enable it.
Verify Asset Path
The add-on reads from Assets Library inside the add-on folder. Make sure it contains category folders, thumbnails (png/jpg), and Assets.blend.
3. Basic Workflow
Select Category and Thumbnail
In the Lazy Cloud main panel, choose a category (including ALL), then pick the cloud asset from thumbnails.
Click ADD to Import Cloud
The add-on loads the matching Collection from Assets.blend. If other LC_ Collections exist, it removes older ones automatically.
Adjust in Tools → Cloud Control
You can directly adjust visible LC_ objects using Location Z / Rotation / Uniform Scale, and use Reset Transform for one-click reset.
Click Auto When Needed
When settings deviate from recommended values, a red Auto button appears in Tools. Click it to apply recommended parameters automatically.
4. Main Panels & Features
🧩 Main Panel (Lazy Cloud)
- Category Dropdown: Switch by Assets Library subfolder or use ALL view
- Thumbnail Browser: Navigate previous / next thumbnail
- ADD: Import cloud Collection with optional automatic World replacement
- X: Remove all LC_ cloud Collections
🛠️ Tools Panel
Cloud Control
- Controls the first visible LC_ object (position, rotation, scale)
- Reset Transform restores defaults (location z=100, zero rotation, scale reset)
Settings
- World Nodes: Automatically applies Sky_World_001 / Sky_World_002 on import
- Camera Settings: Quick Clip End adjustment synced to all cameras
- Volume Settings: Shows matching volume controls for Cycles/EEVEE
🎨 Cloud Effects Panel
- Reads LC_MAT_ shader group nodes from LC_ objects
- Lets you expand categories and edit shader inputs directly
- Ideal for fast cloud look refinement (density, detail, color, etc.)
🔗 MeiU Info Panel
- Built-in quick links: Discord / Twitter X / Website
- Quick access to Documentation
5. Rendering & Volume Settings (Auto)
⚙️ Auto Button Logic
Auto detects your current render engine and applies matching recommended values:
- Cycles: Clip End + Volume Bounces + Fast GI (if supported)
- EEVEE: Clip End + recommended volumetric shadow / sampling / TAA settings
- Other engines: Applies at least the recommended Clip End value
📌 Recommended Value Highlights
- Clip End: 100000 (prevents clipping in large cloud scenes)
- Cycles Volume Bounces: 8
- EEVEE Volumetric Samples: 10 (version-dependent)
- EEVEE TAA Samples: 64
6. Common Issues & Troubleshooting
❌ Issue: Nothing imports after clicking ADD
Check:
- A category and thumbnail are selected
-
Assets Library/Assets.blendexists - Thumbnail filename (without extension) matches the Collection name
❌ Issue: Volume settings are not visible
Check:
- A visible LC_ cloud object exists in the scene
- The render engine is Cycles or EEVEE
- Advanced EEVEE volume options are available in your Blender version
❌ Issue: Scene is laggy or noisy
Suggestion:
- Start with Auto to apply balanced recommended values
- Lower EEVEE volume samples or reduce material volume intensity
- Keep only necessary LC_ objects and shader variations
7. Best Practices
💡 Recommended Workflow
- Select cloud category and asset, then click ADD
- Adjust overall position and scale in Cloud Control
- Apply recommended render parameters with Auto
- Fine-tune material nodes in Cloud Effects
- Finalize lighting and post-processing after look approval
⚠️ Note
Volumetric rendering performance varies significantly by hardware and Blender version. Start from Auto, then fine-tune sampling and shadow settings for your best quality-performance balance.
-
$12
Full Content.
-
$60
Full Content. (Supports up to 10 seats) / 50%off
Have questions about this product?
Login to message