Lens Lab
 Blender Procedural


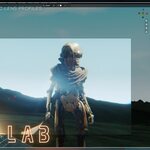
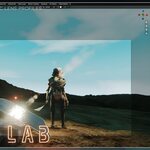
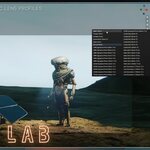
Lens Lab Documentation
Lens Lab is a cinematic camera and lens-profile system for Blender. It lets you create a new camera or apply professionally prepared lens settings to an existing camera with one click.
1. Installation
- Download the Lens Lab ZIP file.
- Open Blender.
- Go to Edit → Preferences → Add-ons.
- Open the add-on menu and choose Install from Disk.
- Select the downloaded Lens Lab ZIP file.
- Enable Lens Lab from the add-on list.
Do not extract the ZIP file before installing it.
2. Opening Lens Lab
- Open the 3D Viewport.
- Press N to open the Sidebar.
- Find and open the Lens Lab panel.
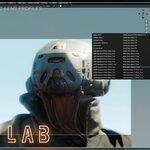
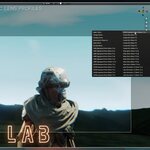
The panel contains the lens-profile browser, profile information, camera creation tools, and depth-of-field controls.
3. Quick Start
- Choose a lens from the Profiles menu.
- Review the lens properties displayed below the profile.
- Click Create New Camera to create a new camera, or select an existing camera.
- Click Apply to Selected Camera to apply the profile.
- Use the Depth of Field section to set a Focus Object or Focus Distance.
4. Profiles
Use the Profiles menu at the top of the panel to browse the included lens profiles.
Lens Lab includes more than 50 profiles covering different focal lengths and visual styles, including:
- Clean and modern lenses
- Cinematic lenses
- Vintage lenses
- Wide-angle lenses
- Portrait lenses
- Telephoto lenses
- Anamorphic lenses
When you select a profile, the values displayed in the panel update to show the characteristics of that lens.
5. Profile Properties
Focal Length
Controls the camera’s field of view and perspective. Lower values produce a wider view, while higher values create a narrower and more compressed image.
Sensor Width
Defines the width of the simulated camera sensor. Sensor Width works together with Focal Length to determine the final field of view.
Bloom
Controls the glow produced around bright areas and highlights. Higher values create a softer and more cinematic highlight response.
F Stop
Controls the aperture and depth of field. Lower values create stronger background blur, while higher values keep more of the scene in focus.
Aperture Blades
Controls the shape of out-of-focus highlights and bokeh. The number of blades changes the appearance of bright blurred areas.
Dispersion
Controls color separation around the edges of the image. This simulates chromatic aberration found in physical lenses.
Distortion
Controls the optical bending of the image. Depending on the selected profile, it can create barrel or pincushion distortion.
Anamorphic Ratio
Controls the anamorphic character of the camera. Higher ratios create stretched bokeh and a more pronounced anamorphic appearance.
Profile
Displays the lens profile associated with the current settings.
6. Create New Camera
Click Create New Camera to generate a new camera using the currently selected lens profile.
- Choose a lens from the Profiles menu.
- Click Create New Camera.
- Lens Lab creates the camera and prepares it with the selected lens settings.
This is the fastest option when starting a new shot or adding another cinematic camera to the scene.
7. Apply to Selected Camera
Use Apply to Selected Camera when you want to apply a Lens Lab profile to a camera that already exists in your scene.
- Select an existing camera in the 3D Viewport or Outliner.
- Choose the required profile from the Profiles menu.
- Click Apply to Selected Camera.
Lens Lab updates the selected camera using the focal length, sensor width, aperture, anamorphic ratio, and optical characteristics of the chosen profile.
Important: The selected object must be a camera.
8. Depth of Field
Open the Depth of Field section to control which part of the image appears sharp.
Focus Object
Use Focus Object to select an object that the camera should keep in focus.
- Click the eyedropper beside Focus Object.
- Select an object from the scene.
- The camera will use that object as its focus target.
This is useful for characters, products, vehicles, or animated subjects.
Focus Distance
Use Focus Distance when you want to set the focus manually.
The value represents the distance between the camera and the focus plane. Adjust it until the required subject appears sharp.
If a Focus Object is assigned, the camera uses that object instead of the manual Focus Distance.
9. Using Different Profiles on Multiple Cameras
Every camera in the scene can use a different Lens Lab profile.
- Select the first camera.
- Choose a profile and click Apply to Selected Camera.
- Select another camera.
- Choose a different profile and apply it.
This allows you to use a wide lens for an establishing shot, a cinematic 50mm lens for a medium shot, and a portrait or telephoto lens for close-ups.
10. Recommended Workflow
- Decide what type of shot you want to create.
- Choose a suitable profile from the Profiles menu.
- Create a new camera or apply the profile to an existing camera.
- Position the camera.
- Assign a Focus Object or adjust the Focus Distance.
- Preview the result in Camera View.
- Render normally with Eevee or Cycles.
Have questions about this product?
Login to message
| Blender Extension Compatible | Yes |
| Sales | 10+ |
| Dev Fund Contributor | |
| Published | about 2 months ago |
| Blender Version | 5.0 - 5.2 |
| Extension Type | Add-on |
| Render Engine Used | Cycles, Eevee |
| License | GPL |
Discover more products like this
bokeh lens distortion cinematic lens simulation camera anamorphic chromatic aberration lens camera effects camera presets depth of field