Lightbox - Lighting Made Simple
 Jonas Noell

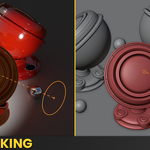
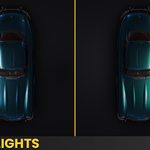
LIGHTBOX Installation & User Guide
Learn how to install, set up, and get the most out of LIGHTBOX in Blender 4 & 5.
Open this guide in a separate window Recommended for a wider, easier to read layout.
 System Requirements
- Blender: 4.2+ (fully compatible with Blender 5)
- Render Engine: EEVEE and Cycles supported. Cycles recommended for the full feature set. EEVEE cannot display node setups on lights, so Procedural Softbox, Textured Lights and the Light Splitter need Cycles. LightBox shows a warning when EEVEE is active.
- Light Preview: Works with Area and Spot Lights. The preview is rendered outside your scene, so it works in any render engine.
- Operating System: Windows, macOS and Linux
Two versions: LightBox is the complete toolset and everything on this page refers to it. LightBox Lite focuses on the interactive Light Preview and leaves out the extended lighting tools. If you are on Lite, some panels and widgets described here will not be present.
 Download & Installation
Step 1 – Download: After purchase, download the lightbox.zip file.
Step 2 – Install:
- Open Blender.
- Drag the lightbox.zip file into the Blender window.
- Go to Edit → Preferences → Add-ons.
- Make sure that "LightBox" is activated.
 Important: Do NOT unzip the file before installation. Blender installs the .zip directly
 After Installation
Watch the introduction video for a full walkthrough of all features, controls, and the recommended workflow.
This video covers all features including Light Preview, Procedural Softbox, Light Linking, Presets, and more.
 First Steps
- Check that LightBox is enabled in Edit → Preferences → Add-ons. Panel and shortcuts only work when the checkbox is ticked.
- Press N in the 3D Viewport to open the Sidebar and switch to the LightBox tab.
- Press Shift + Q in the viewport and pick a light type from the pie menu. The light is created where your mouse is pointing.
- The widgets appear next to the light preview in the viewport. Drag them, or use their shortcuts.
- Use Quick Settings in the panel to adjust color, power and light type instantly.
- Open the Presets from the preset button at the top of the panel. Pick one to apply a ready-made light, or save your current light as a new preset.
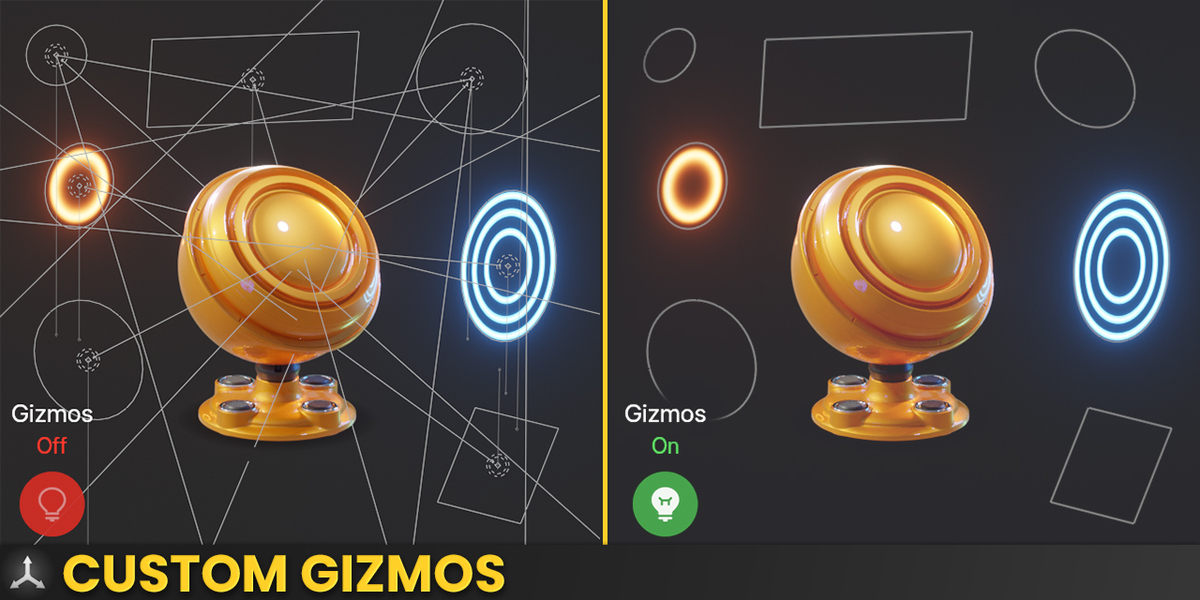
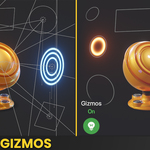
Gizmo toggle: three modes, switched with Tab or the round widget in the viewport corner. Off,
Off,  Auto (visible while a light is selected, the everyday mode),
  On (always visible).
 Panel Overview
Where to find the panel
- 3D Viewport Sidebar: press N and open the LightBox tab.
- Light Properties: select a light and open the Properties editor, Light data tab.
- Both locations and the sidebar tab name can be changed in Preferences → Add-ons → LightBox.
The top bar
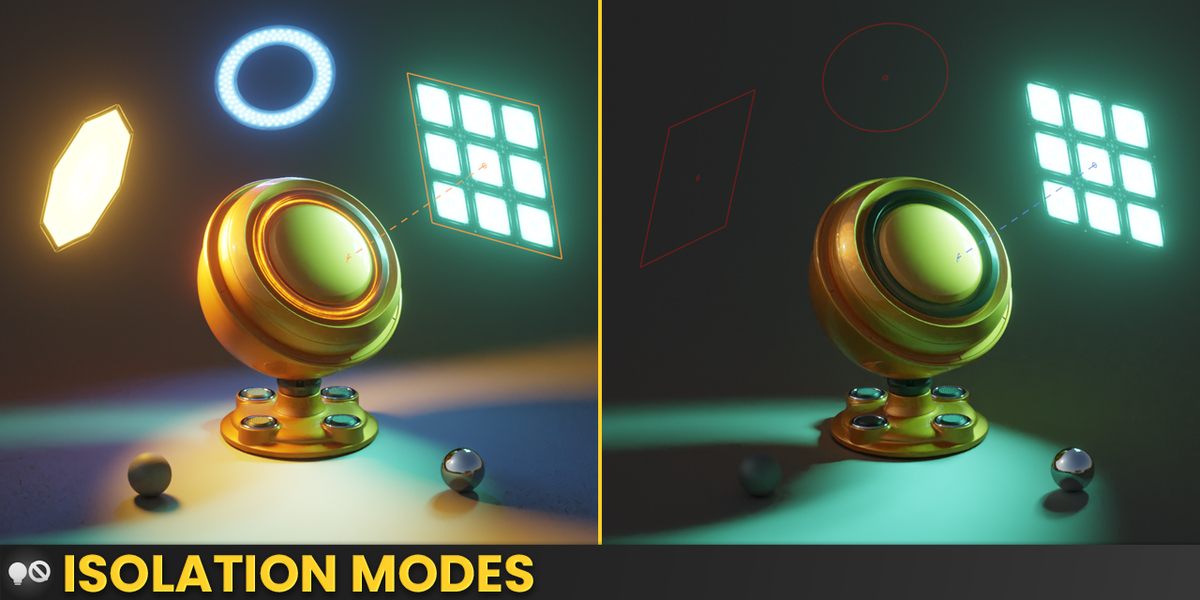
Directly under the preview sits the top bar. It holds the light selector and the two isolation buttons.

The dropdown in the middle lists every light in the scene, so you can switch lights without hunting for them in the viewport or the outliner. You can also rename the active light directly here. The field doubles as a state readout: a soloed light is marked SOLO, a light that is switched off turns red.
| Cycle lights |
Page Up Page Down |
Steps to the previous or next visible light in the scene and selects it, so you can walk through a lighting setup without touching the dropdown or the outliner. | |
 |
Light toggle | Click | Switches the active light off. The button turns red  and the light is marked red in the viewport as well. Click again to bring it back. and the light is marked red in the viewport as well. Click again to bring it back. |
 |
Light solo | Shift + Click | Solos the light, which switches off every other light in the scene. Shift + Click again, or soloing another light, restores the rig. |
 |
World toggle | Click | Disables the world shader  , which removes the environment lighting and all reflections coming from it. Useful for judging what your own lights actually contribute. , which removes the environment lighting and all reflections coming from it. Useful for judging what your own lights actually contribute. |
 |
World solo | Shift + Click | Solos the world, so every light in the scene is switched off instead and only the environment remains. |
Combine them: solo a light and switch the world off to see a single light with no environment at all. That is the fastest way to understand what one light in a rig is really doing.
The main panel
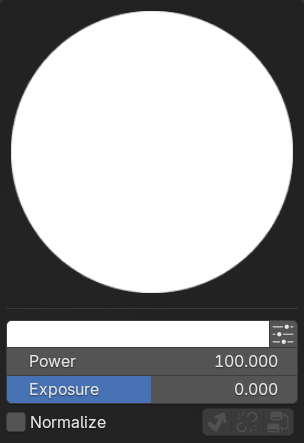
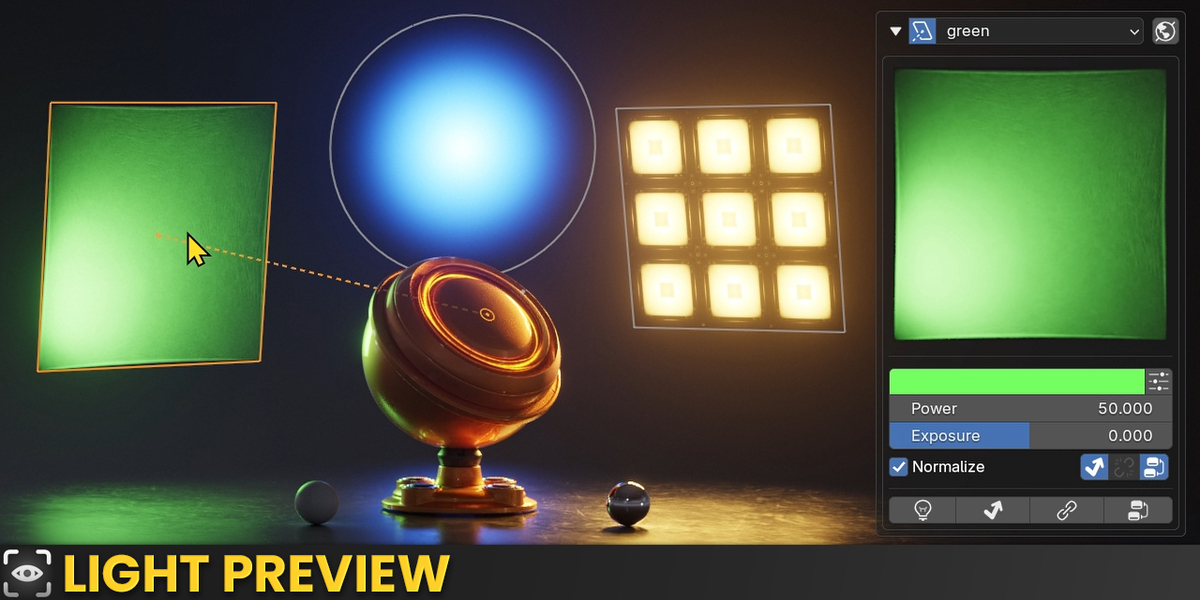
The preview sits at the top of the main panel and shows the light you are working on. It is a real one to one representation: whatever the light emits, including textures, softbox patterns and custom node setups, is what you see here, even when the light itself is off screen or hidden from the camera.
| Color | The light color. The small button on the right of the swatch opens the color adjustment, see below. |
| Power | The raw light output in Watts, the same value Blender uses. |
| Exposure | Works in stops on top of Power. Usually the more comfortable way to balance a rig, since every step up doubles the brightness. |
| Normalize | Keeps the output independent of the light size, so scaling a softbox changes the softness of the shadows but not the brightness in the scene. |
If the preview and the light in your viewport look slightly different, check your compositor. Glow and other post effects change the light in the scene but not the preview.
Color adjustment
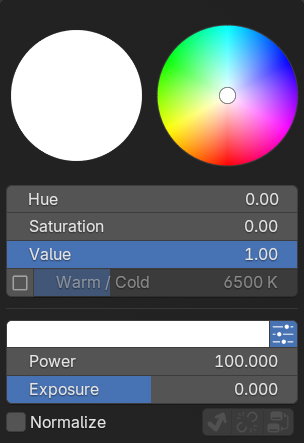
The small button next to the color swatch opens the color adjustment, with a color wheel and four controls.
| Hue | Shifts the color around the wheel, for example from neutral towards warm or towards blue. |
| Saturation | How strong the color is. Pull it back for a subtle tint instead of a fully colored light. |
| Value | The brightness of the color itself, independent of Power and Exposure. |
| Warm / Cold | Sets the color by temperature in Kelvin instead of by hue. The faster way to work when you think in daylight and tungsten rather than in RGB. Enable it with the checkbox on the left. |
The three feature toggles
At the bottom right of the main panel sit three small buttons, one for the Light Splitter, one for Light Linking and one for the Nodes. They are status display and switch in one, so you can see from the main panel whether a light carries any of these without opening the tabs. Each button has its own state. The examples below show all three in the same state for clarity, but in practice a light can have active nodes while the Light Splitter sits unused.
 |
Not in use | The light does not use this feature. Nothing is set up, so there is nothing to switch off. |
 |
Active | The feature is set up and active on this light. The Light Splitter lights up as soon as a multiplier is not exactly 1, Light Linking as soon as the light has a linking collection, and Nodes as soon as the light uses a node setup. |
 |
Switched off | The feature is set up but temporarily switched off. Your settings are kept, they simply do not affect the render. Click the button again to bring them back. |
Before and after: because these toggles keep your settings, they are the quickest way to compare. Switch the nodes off to see the light as a plain white surface, or bypass the Light Splitter to check how the light looks physically accurate, then click again to go back.
The four main tabs

 |
Light Settings | Light type, shape, size, transform, focus point, orbit, orbit space, distance and shadow settings. Everything the viewport widgets do, as exact numbers you can type in and keyframe. |
 |
Ray Visibility | Camera, Diffuse, Glossy, Transmission and Volume Scatter contribution of the light, as on/off switches and as continuous multipliers. Powered by the Light Splitter, Cycles only. |
 |
Light Linking | Choose which objects this light is allowed to illuminate, and which objects it casts shadows from. |
 |
Nodes | Procedural Softbox, Textured Lights and the controls of any custom node group on the light. This tab only appears when the light actually uses a node setup. |
Clicking the tab that is already open closes it again, so the panel collapses back to the compact Quick Settings view.
 Gizmo Toggle
LightBox brings its own gizmos to the viewport, a much cleaner replacement for Blender’s native light gizmos. The gizmo toggle decides when they are used, and carries a few viewport settings that make lighting easier to judge. It sits as a round icon in the corner of the viewport.
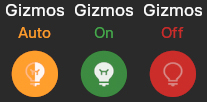
Three gizmo modes
|
Off | No gizmos. Blender behaves as usual, all LightBox shortcuts stay out of the way. |
|
Auto | The gizmos follow your selection: visible while a light is selected, gone when it is not. The recommended everyday mode. |
|
On | The gizmos stay visible permanently, no matter what is selected. |
Switch modes with Tab or by clicking the round widget in the viewport corner. A short tap flips between Off and Auto, holding it down goes straight to On. The shortcut only fires when exactly one light is selected, so Blender’s Edit Mode toggle is never blocked.
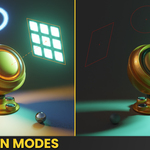
Toggle Submodes
The round icon in the viewport corner shows the current gizmo mode. Left click cycles Off → Auto → On, Right click fans out three viewport settings:


|
Hide Distractions | Clears grid floor, axes, 3D cursor, annotations, text, relationship lines, origins, wireframes and Blender's own light gizmos, so you can judge the lighting itself. What gets hidden is set in the preferences, separately for gizmos On and gizmos Off. |


|
Dark Mode | Darkens the viewport background so subtle light falloff and reflections become readable. |


|
Selection Mode | All Objects selects normally. Lights Only makes clicks and box-selects ignore geometry, so you never grab the model by accident while lighting. The box-select frame tells you which mode you are in: yellow for Lights Only, blue for All Objects. |
These three settings stay active whether the gizmos are on or off. With the gizmos off, LightBox still applies Hide Distractions, Dark Mode and the selection mode to Blender's own gizmos.
Mode feedback: whenever the gizmo mode changes, the viewport border flashes a color. Green means the LightBox gizmos are active, red means Blender's native gizmos are in use. A quick glance tells you which mode you are in.
 Widgets

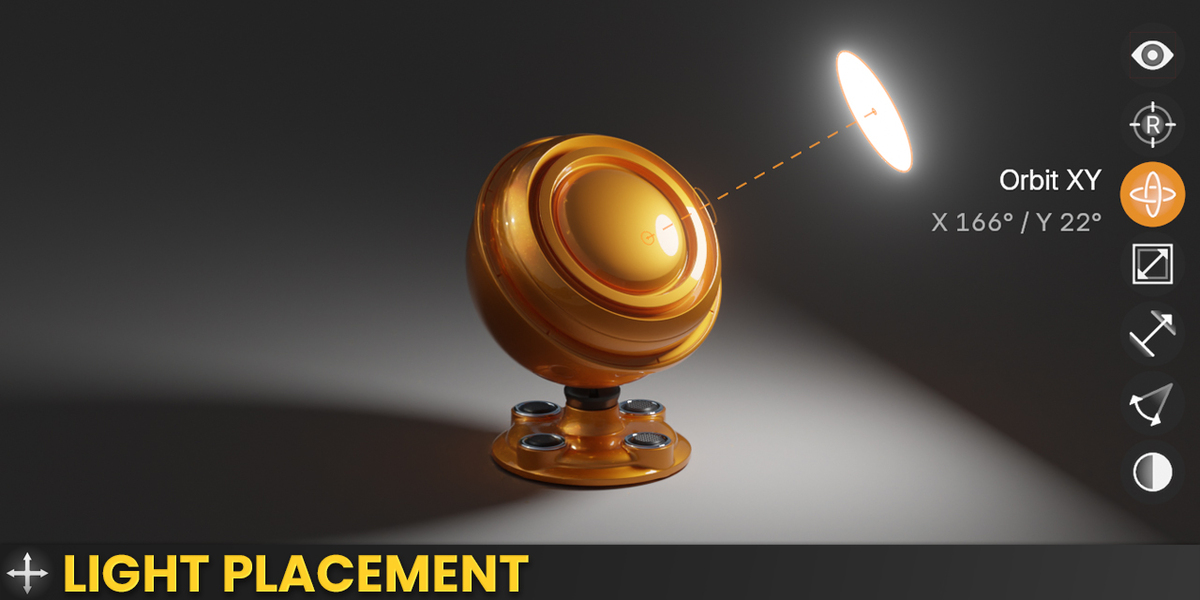
The widgets are the drag handles that appear in the viewport next to the light you are working on. Every one of them is also a keyboard shortcut, so you can place and shape a light without ever touching the panel.
They stack vertically next to the light. Widgets that do not apply to the current light type are hidden, so a Point light never shows a Spot Blend widget. Drag a widget directly, or use its shortcut.
| Left click | Drag a widget to adjust its value directly. |
| Right click | Fans out the modes of a widget, so you can pick Orbit X, Focus Diffuse, Spot Blend and so on. |
| Ctrl + Left click | Drag the stack to move all widgets to another spot in the viewport. |
| Key | Action | What it does | Light types | |
|---|---|---|---|---|
 |
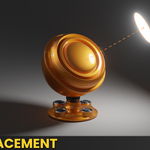
F | Focus | Sets the point the light aims at and orbits around. Press F, then click on the object. The light re-aims and repositions itself in one go. For a mode, press F, then the mode key, then click: FD is one gesture for "place this light by diffuse". Modes
 F + R Reflection (default) puts the light where it produces a highlight at the clicked point, seen from the current camera angle. F + R Reflection (default) puts the light where it produces a highlight at the clicked point, seen from the current camera angle. F + D Diffuse places the light along the surface normal at the clicked point, for maximum diffuse brightness. F + D Diffuse places the light along the surface normal at the clicked point, for maximum diffuse brightness. F + O Origin sets the focus point to the object origin. The light keeps its position and only re-aims. F + O Origin sets the focus point to the object origin. The light keeps its position and only re-aims. F + C Center sets the focus point to the bounding box center. Better when the origin sits off to the side. F + C Center sets the focus point to the bounding box center. Better when the origin sits off to the side.In Origin and Center mode the object under the mouse is highlighted while you hold the button, so you can see which object you are about to pick. |
All |
 |
R | Orbit | Swings the light around its focus point while it keeps aiming at it. Horizontal mouse movement is azimuth, vertical is elevation. Add an axis key to constrain the orbit. Modes
R All (default) free orbit, azimuth and elevation at the same time. R + X Orbit X azimuth only, the light circles the subject at a constant height. R + X Orbit X azimuth only, the light circles the subject at a constant height. R + Y Orbit Y elevation only, raises and lowers the light on a fixed arc. R + Y Orbit Y elevation only, raises and lowers the light on a fixed arc. R + Z Orbit Z (Roll) spins the light around its own axis, landscape to portrait without moving it. R + Z Orbit Z (Roll) spins the light around its own axis, landscape to portrait without moving it. |
All |
 |
S | Size / Radius | Resizes the emitting surface, which is what controls shadow softness. On Point and Spot lights the same key drives the light radius. On Area lights an axis key constrains the scale. Modes
S All (default) uniform scale, the shape stays proportional. S + X Scale X width only, for stretching a softbox into a strip light. S + X Scale X width only, for stretching a softbox into a strip light. S + Y Scale Y height only. S + Y Scale Y height only. |
Area, Point, Spot |
 |
D | Distance | Slides the light closer to or further from its focus point along the line between them, without changing the angle. The current distance is shown at the top of the viewport while you drag. | All |
 |
A | Spread / Angle | Beam spread of an area light, or the angular diameter of a sun. Narrow spread behaves like a grid or honeycomb on a softbox. On Spot lights the same key drives the cone. This widget has no axis constraints, so the key always adjusts whichever mode the widget is currently set to. Right-click the widget to switch between them. Modes
A Spot Size (default) the cone angle of the spot. A Blend how soft the cone edge falls off. Zero is a hard cut, higher values a feathered pool of light. A Blend how soft the cone edge falls off. Zero is a hard cut, higher values a feathered pool of light. |
Area, Sun, Spot |
 |
B | Brightness | Drags the light power up and down directly in the viewport. | All |
 |
V | Camera Visibility | Toggles whether the light itself is visible to the camera. Hide it to keep the softbox out of frame while it still lights the scene. | All |
While an interaction is running
Once you press a transform key, LightBox stays in that mode until you confirm or cancel. This works the same way as Blender's own Grab and Rotate.
| Left click | Confirm and place. |
| F R S D A B | Pressing the key of the interaction you started again also confirms it. For example, press R to start orbiting and R again to stop. |
| Esc or Right click | Cancel. The light snaps back to exactly where it was before you started. |
| X Y Z | Constrain to one axis mid-drag, just like Blender's G → X. Press the same axis key again to release the constraint. The light continues smoothly from where it currently is, it does not jump. The constraint is temporary: the next time you press the key, the widget is back in its normal mode. |
Keyboard shortcuts
Good to know: the widget shortcuts only take over while the LightBox gizmos are visible and a light is active. With the gizmos off, R and S still do exactly what Blender always did. LightBox never permanently occupies a key.
Rebinding shortcuts
Every shortcut in this guide can be changed or switched off. Open Edit → Preferences → Add-ons → LightBox and expand the Shortcuts section. Each entry has a checkbox to disable it and a capture field where you press the new key combination.
Light Settings
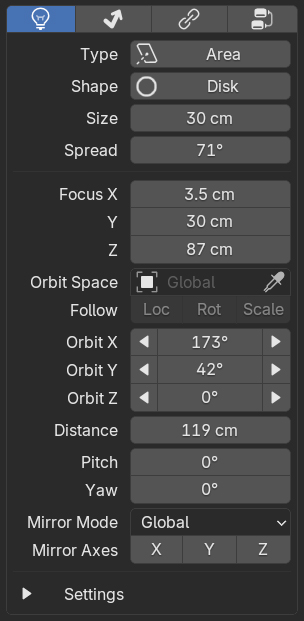
The widgets are the fast way to place a light. The Light Settings tab is the precise way: the same values as exact numbers, plus a few things the viewport cannot offer. Every field here can be keyframed like any other property, so an orbiting key light is a single pair of keys on Orbit X.
| Type / Shape | The light type and its shape. You can turn an area light into a spot here, or switch a rectangle into a disk. |
| Size / Spread | The size of the emitting surface in real units, which is what controls shadow softness, and the beam spread in degrees. |
| Focus X / Y / Z | The point the light aims at and orbits around, as world coordinates. |
| Orbit Space / Follow | The object the light orbits around instead of the world axis, and how closely it is tied to it. See below. |
| Orbit X / Y / Z | Azimuth, elevation and roll around the focus point. The arrows next to each value step the light in 45 degree increments, which is a quick way to build a standard three point rig. |
| Distance | How far the light sits from its focus point, along the line between them. |
| Pitch / Yaw | Aims the light away from its focus point. Useful for fine tuning, but at anything other than zero the light no longer points exactly at the focus point, so leave them at zero unless you want that. |
| Mirror Mode / Axes | Flips the light to the other side, across a global axis or across its focus point. See below. |
| Settings | A collapsible section at the bottom with the remaining light settings, such as shadows. |
Orbit Space
By default a light orbits around the world axis. If the subject sits at an angle, that is awkward to control. Pick an object as the Orbit Space and the light circles that object's local axis instead. The object flashes when you pick it, and the viewport header tells you that the local axis is in use.
Once an orbit space is set, three follow options decide how closely the light is tied to that object: Follow Location makes the light travel with it, Follow Rotation makes it turn with it, and Follow Scale makes it scale with it. They can be toggled on and off at any time.
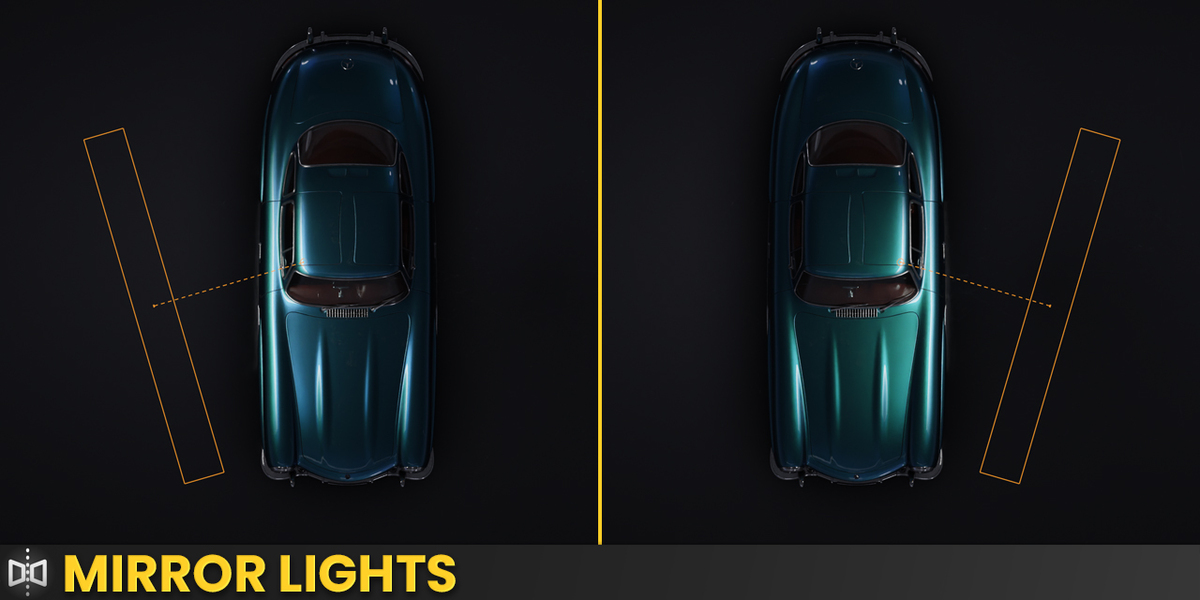
Mirror
Mirror flips a light to the other side, either across a global axis or across its focus point. The values in the panel stay as they are, only a mirror toggle is added, so the light keeps following the settings you dialed in.
Symmetrical rigs: duplicate a light with Shift + D, mirror the copy across the axis you need, then select both lights and hold Alt while moving them. Both lights move as a mirrored pair, so a symmetrical setup stays symmetrical while you keep refining it.
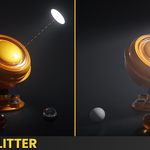
Light Splitter
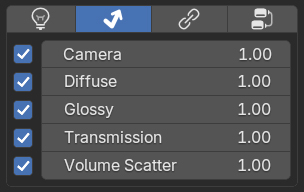
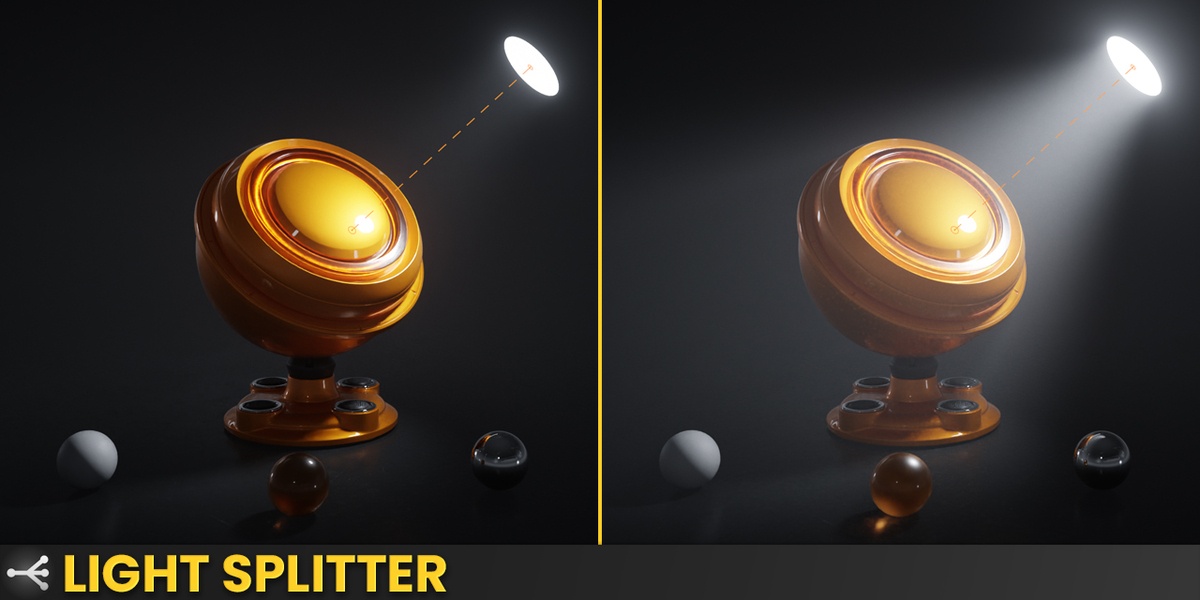
The Light Splitter lives in the Ray Visibility tab and lets you art direct a single light. Switching ray components on and off is something Cycles can do natively. The multipliers are not, and that is the part that makes this tab useful. Each component has a checkbox to switch it off entirely, and a multiplier next to it.
| Camera | How bright the light itself appears to the camera. Boost it to make a visible softbox read stronger in frame without changing the lighting. The on/off part of this is the same as the Visibility widget in the viewport. |
| Diffuse | The diffuse contribution. Raise it for more fill on surfaces without lifting the specular highlights. |
| Glossy | The specular contribution. Dial it down on a light that blows out a glossy surface, or up for a stronger highlight while the rest stays put. |
| Transmission | Affects transmissive shaders only, so glass and liquids can be lit separately from everything else. |
| Volume Scatter | How strongly the light shows up in fog and volumes. Push this to 50x or 100x for a strong visible beam while the actual lighting in the scene stays exactly as it was. |
Active indicator: as soon as any multiplier is not exactly 1, a small button appears at the top of the panel, so you can see from any tab that the light is not physically accurate any more. Clicking it bypasses the Light Splitter temporarily and resets everything to its original values, clicking again brings your settings back. Setting a multiplier back to 1 returns that component to physically accurate behaviour.
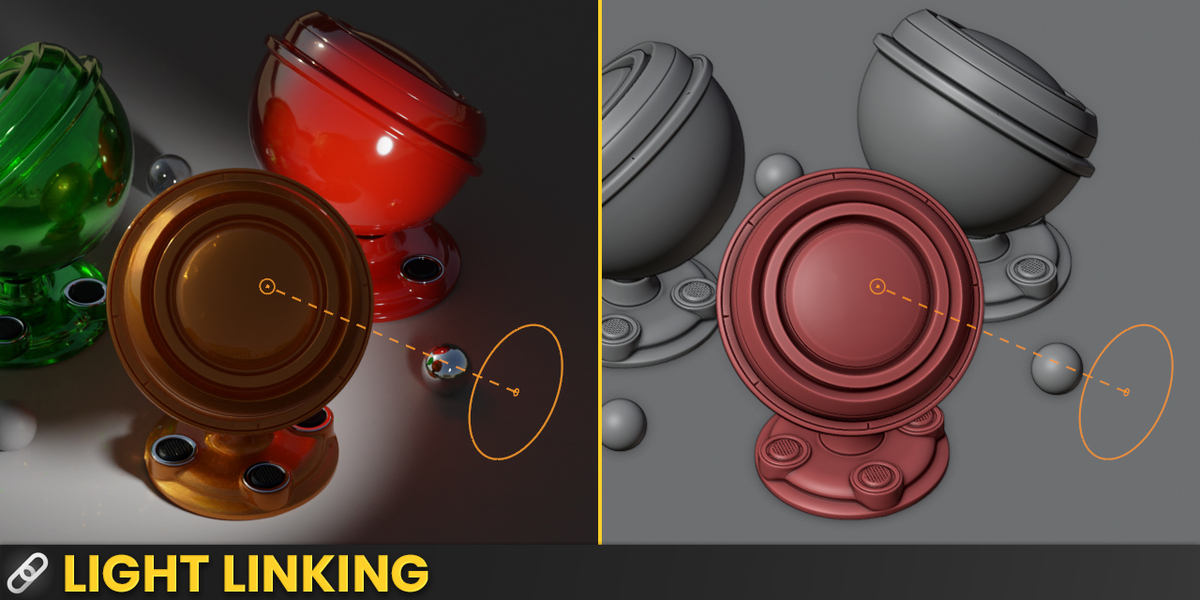
Light Linking
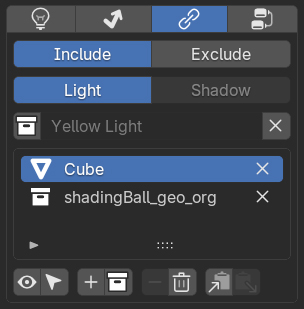
Light linking exists in Blender, but managing it through collections is slow and hard to read. The Linking tab does the same job from the panel, and adds a preview mode so you can actually see what is linked. The list shows the linking collection of the active light, with its objects and collections, and the row of buttons underneath adds, removes, selects, copies and pastes them.
Modes
| Include | The light only illuminates the objects in the collection. |
| Exclude | The light illuminates everything except the objects in the collection. |
| Light | The link controls whether the light reaches the object. |
| Shadow | The link controls whether the object casts a shadow from this light. Shift + Click selects Light and Shadow at once. |
Excluding light but keeping shadow gives you an object that still blocks the light without being lit by it. The other way round gives a lit object that casts no shadow.
The collection field
 |
New collection | Creates a light linking collection for the active light. It takes the name of the light, and while it is empty the light keeps illuminating everything. |
 |
Name field | Picks an existing collection, so several lights can share one object list, and renames it. |
| Number badge | Appears when more than one light uses the collection and says how many. Click it to give the active light its own copy, named after the light. | |
 |
X | Removes the collection from this light. The light illuminates everything again. |
The button row
 |
Preview | Toggles the preview mode, see below. While it is active the button turns blue  . . |
 |
Select | Selects every object of the collection in the viewport. |
 |
Add object | Adds the current viewport selection, a single object or several at once. |
 |
Add collection | Adds a whole collection in one go, the fast way to catch every part of a complex object. |
 |
Remove | Removes the entry that is highlighted in the list, or the objects that are selected in the viewport. |
 |
Clear | Empties the whole collection at once. |
 |
Copy | Copies the object list of this light. |
 |
Paste | Pastes it into another light. Each light keeps its own Include or Exclude setting. |
Preview mode
With a lot of objects it gets hard to tell what is actually linked. Preview mode stops the render, switches the viewport to solid shading and color codes every object: green for included, red for excluded, grey for objects with no link to this light. You can see at a glance which small parts of a model are still missing, add them, then switch preview mode off to go straight back to your render view.
Softbox, Textures & Nodes
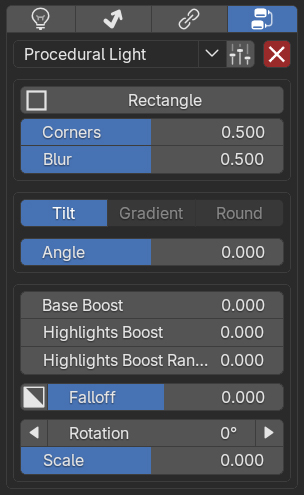
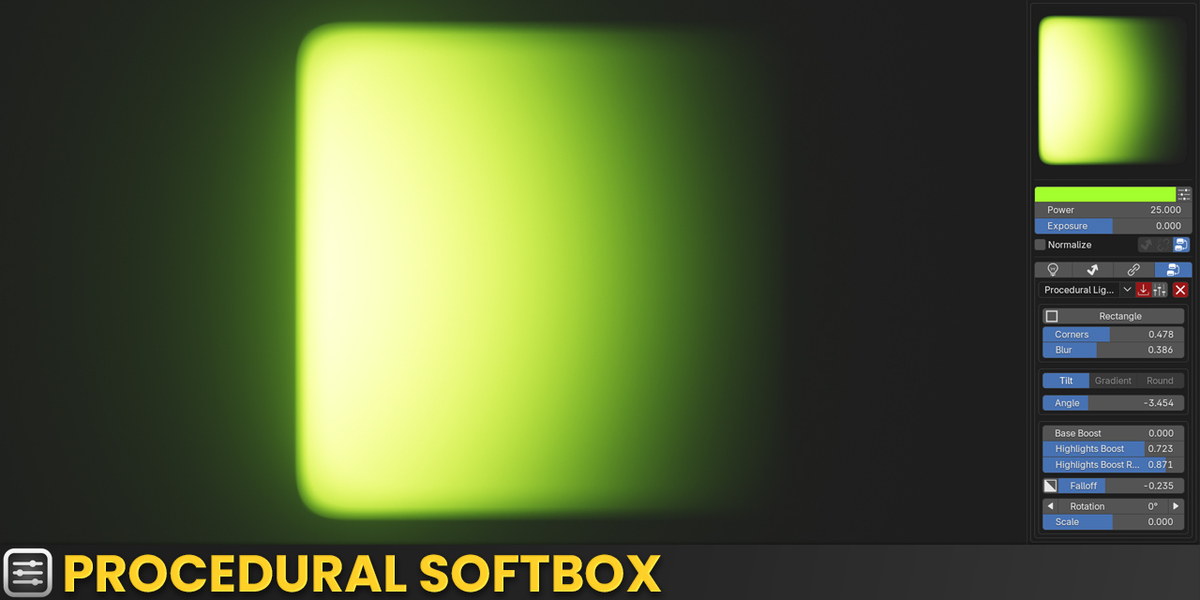
A default Blender area light is a uniformly lit surface, which looks flat and does not read as a real studio light. The Nodes tab replaces that with a proper light surface, and everything is controlled from the panel. You never have to open the shader editor.
Getting started
Open the Nodes tab and use the preset bar at the top. You can pick a ready-made preset, or start from one of the two base setups: Procedural Light or Texture Light. See the Presets section for the whole preset system.
Procedural Light
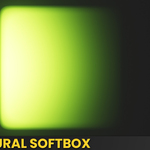
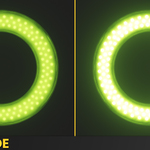
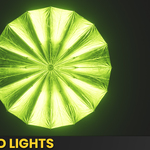
Start with the shape: Rectangle, Octabox or Circle. A rectangle has two corner parameters to go from sharp cornered to fully rounded, the other shapes have a blur slider for a crisp or soft edge. On top of the shape you build the brightness distribution with three modes:
| Tilt | A directional falloff across the light. The angle slider pushes the brightness towards one side, which is how a real softbox behaves when it is not lit dead center. |
| Gradient | A band across the light, symmetric or one sided. Sharp controls how hard the edge is, Fade softens the ends of the band. |
| Round | A circular hotspot. Roundness goes from a perfect circle to a soft box shape, and the highlight can be softened for an omni style light. |
Each mode has its own rotation (free, plus buttons for 90 degree steps), scale, falloff for more or less contrast, and an invert button.
Combining modes: clicking a tab switches to that mode. Shift + Click a tab to add it to the active ones instead, and the modes are multiplied together. Active tabs are highlighted blue. Shift + Click again removes a mode. All three can run at the same time, which gives very complex light surfaces, but it also gets harder to predict.
Texture Light
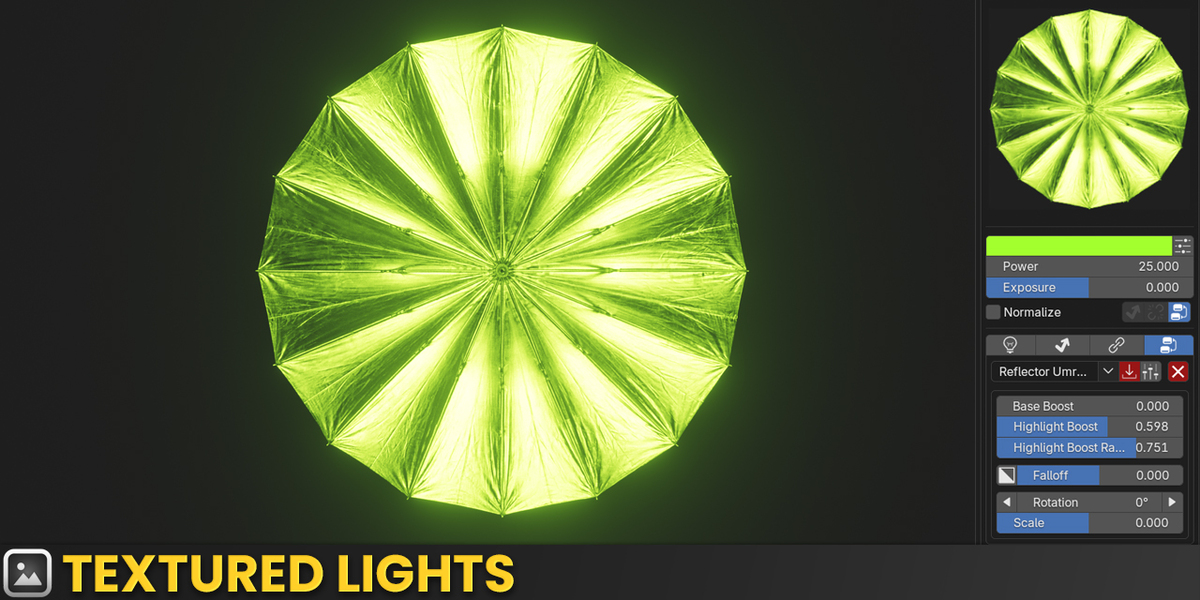
Load any image as the light surface, then adjust rotation, scale, falloff and invert. Two things are worth knowing:
- Use black and white textures. The image is multiplied with the light color, so a texture that already has color baked in mixes with it. Set the light color to white if you want the texture color untouched.
- JPEGs are fine. A normal 8 bit image has no dynamic range, which is why it lights the scene flatly. The Boost controls fix that, see below.
Boost: low dynamic range into high dynamic range
| Boost Base | Lifts the dark parts of the light so they are no longer fully black. Useful when a pattern has detail you still want to see contributing. |
| Boost Highlight | Pushes the bright parts far beyond white, which is what creates real hotspots and burnt out highlights. |
| Boost Range | Defines how much of the light counts as highlight, so you control how wide the bright area is. |
Highlight boost only becomes visible once you raise the range. Together the three sliders turn any flat JPEG into a light with a real dynamic range, which gives noticeably better reflections.
Custom node groups
LightBox can display almost any node group. Connect a group to the light output in the shader editor and its inputs appear as controls in the Nodes tab, so you build the setup once and then drive it from the panel. Several groups can be combined, for example through a Mix Color node, and each one gets its own section in the panel that can be collapsed and renamed. Renaming the node group also renames the section in the panel.
Whatever you connect, the Light Preview shows it one to one, so you can build a light without ever having it visible in the viewport.
EEVEE note: EEVEE cannot display node setups on lights. The Light Preview is rendered separately and will still show the correct light, but your scene will not, so use Cycles for softbox, textured and node based lights. LightBox warns you when EEVEE is active.
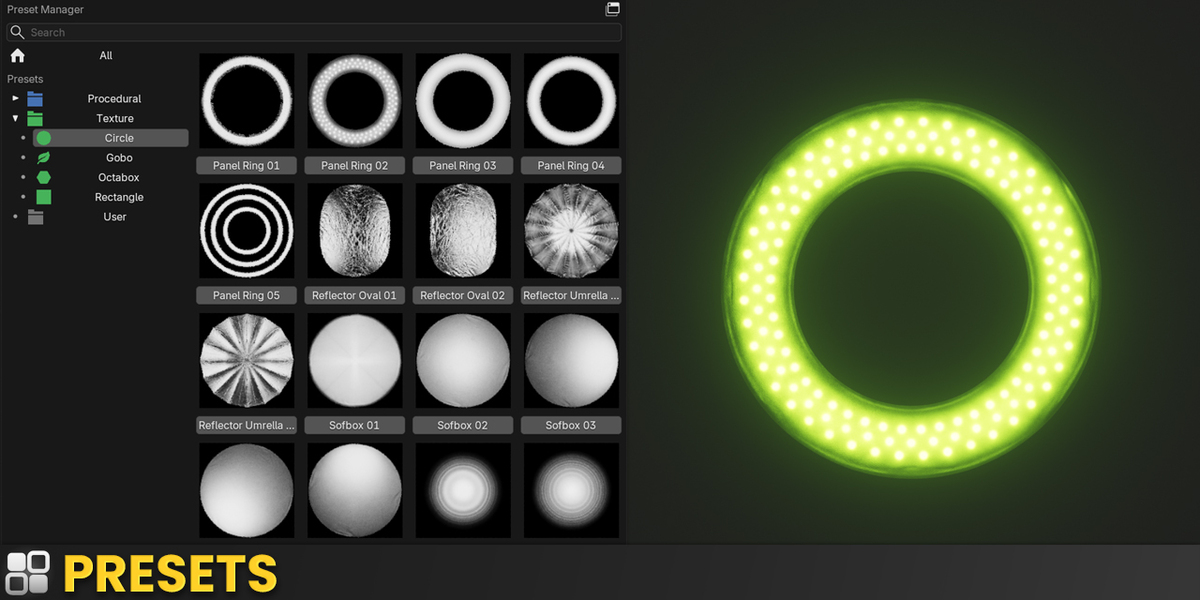
Presets
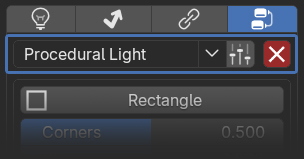
LightBox ships with over 130 ready-made light setups, and you can save your own. The preset bar sits at the top of the Nodes tab and is where you load, manage and store them.
A preset stores the node setup of the light, nothing else. Color, power, exposure, size and shape live in the main panel and are never overwritten by loading a preset, so you can try a different light surface without losing the light you have already balanced.
The preset bar
| Preset dropdown | Shows the setup the light currently uses and loads another one. This is the quick way, without opening a browser window. | |
 |
Preset Manager | Opens the browser with thumbnails, see below. |
 |
Remove | Removes all node groups from the light for good and leaves a plain light behind. To switch them off only temporarily, use the nodes toggle in the main panel instead. |
The preset dropdown
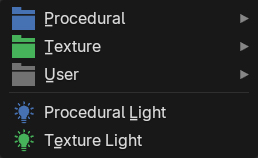
The dropdown holds three folders and the two base setups:
| Procedural | Presets built from the procedural light, sorted by shape. |
| Texture | Presets built from image textures, including gobos. |
| User | Everything you saved yourself, with your own subfolders. Empty until you save your first preset. |
| Procedural Light Texture Light |
The two blank base setups. Start here when you want to build a light from scratch rather than from a preset. |
The Preset Manager
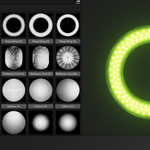
The manager shows every preset as a rendered thumbnail, which is far easier to judge than a list of names. The tree on the left holds the same categories as the dropdown, All at the top shows everything at once, and the arrows at the bottom page through long categories.
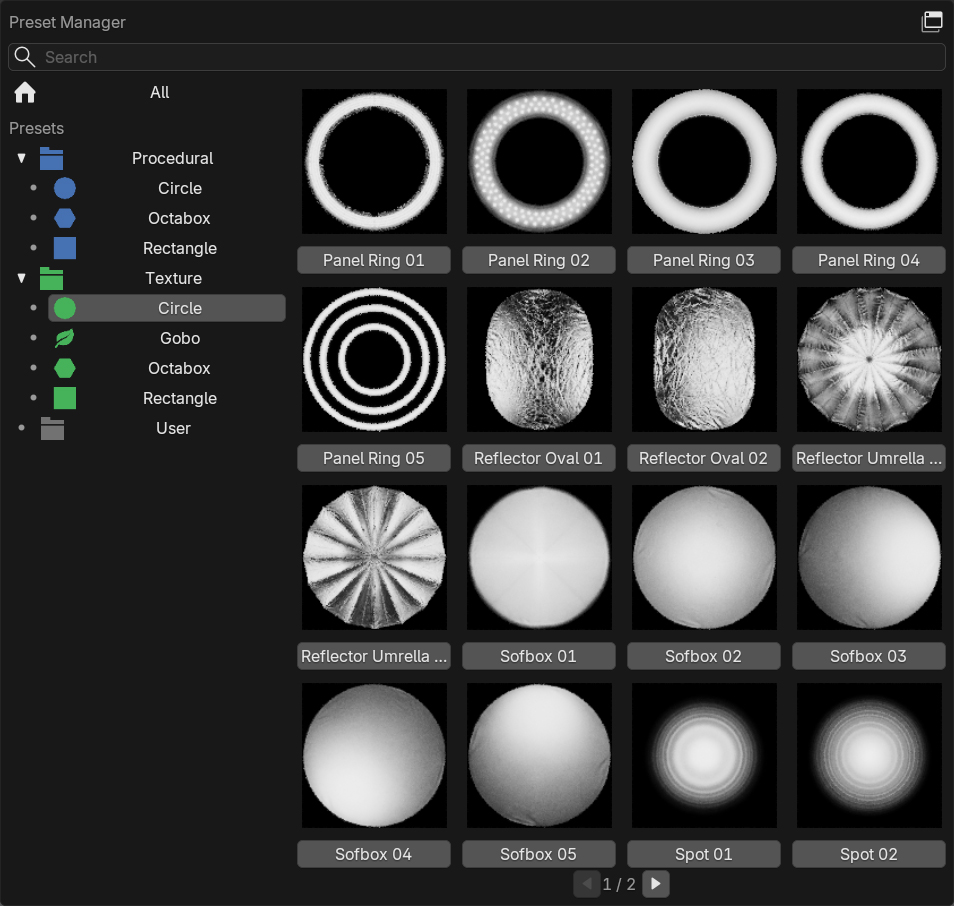
| Search | Filters across all categories as you type. Searching for a partial name is enough, so sp finds both the spot presets and anything else that matches. | |
 |
Detach | The manager normally opens as a popup, which closes as soon as you click somewhere else. This button opens it as a real window instead, which stays open and can be resized, maximized and moved to a second monitor. |
Saving your own presets
Once a light looks the way you want, save it so you can reuse it in other projects. Saving asks for a name and a target folder, either the user folder itself or a subfolder inside it. A thumbnail is rendered for you, so your own presets look exactly like the ones that ship with LightBox.
- Saving under the name of an existing preset overwrites it. Pick a new name to create a second version instead.
- As soon as you change a loaded preset, its name is marked as edited. That way you always know whether you are looking at the original or at your own variation.
- Presets in the user folder can be renamed, moved into subfolders and deleted from the manager.
 Tips & Best Practices
- Build your rig with Shift+Q, then refine with R and D. Adding a light where the mouse points and orbiting it into place is far quicker than typing coordinates.
- Use Focus Reflection for anything glossy. Click the spot on the product where you want the highlight and the light lands in the right place on the first try.
- Turn on Lights Only selection mode while lighting. Clicks stop grabbing the model, and box-select only ever collects lights.
- Hide Distractions plus Dark Mode is the fastest way to judge falloff and reflections without leaving the viewport.
- Walk through your rig with Page Up / Page Down and solo each light with Isolation Mode to understand its individual contribution.
- The Light Preview window shows texture and softbox changes in real time, with no need to keep the light in frame.
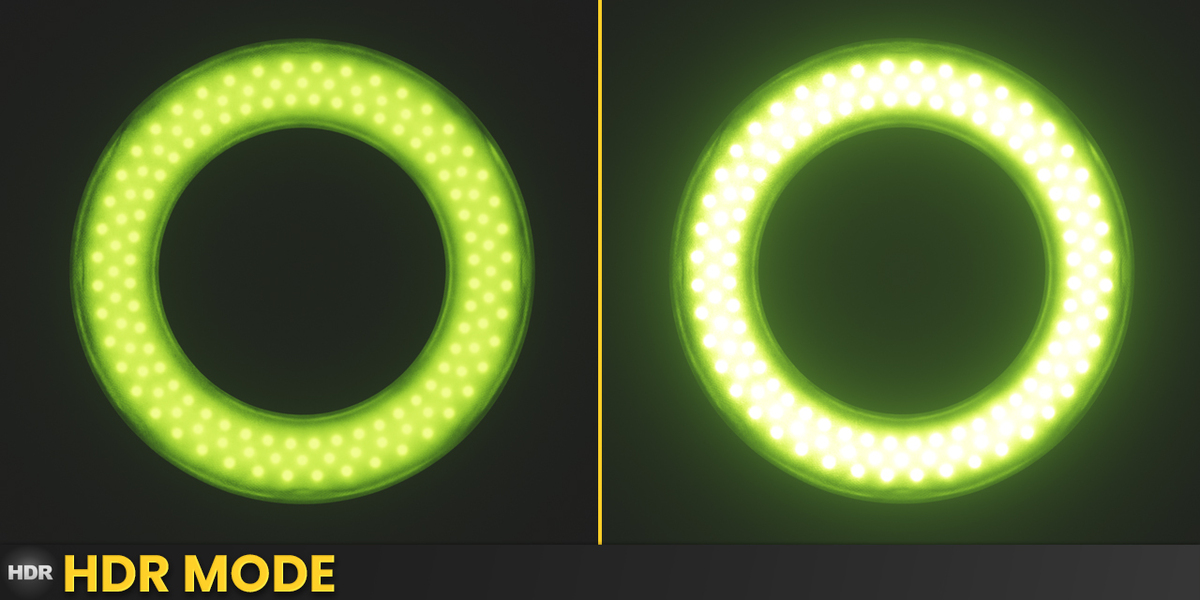
- Use Procedural Softbox with HDR Mode for photorealistic softbox reflections without any external textures.
- Mirror lights across an axis once the key light sits right. The mirrored light keeps following, so a symmetrical setup stays symmetrical.
- Use Light Linking to isolate lighting per object, great for product shots and character lighting.
- Solo a light and the world shader together when you want to judge one light completely on its own, with no environment lighting in the way.
- Use Orbit Space when a subject sits at an angle. Pick the object and the light circles its local axis instead of the world axis, which is far easier to control than fighting the global rotation.
- Push Volume Scatter in the Light Splitter instead of raising the light power when you want a visible fog beam. The lighting on your subject stays exactly where you had it.
- Any plain black and white JPEG works as a light texture. The Boost controls give it the dynamic range it is missing, so you do not need real HDR files.
- Switch to Cycles for the full feature set, especially Light Splitter and textured lights.
 Troubleshooting
-
LightBox Tab Not Visible After Install?
Open Edit → Preferences → Add-ons, search for "LightBox" and ensure the checkbox is enabled. Restart Blender if the sidebar tab still doesn't appear. -
Pressing R Rotates the Object Instead of Orbiting the Light?
The LightBox gizmos are off, or no light is active. LightBox deliberately passes the key straight through to Blender in that case. Press Tab with a single light selected, or click the widget in the viewport corner, to bring the gizmos back. -
Tab Doesn't Toggle the Gizmos?
The shortcut only fires when exactly one light object is selected. With anything else selected, Tab stays Blender's Edit Mode toggle. -
A Shortcut Conflicts With Another Add-on?
Open Preferences → Add-ons → LightBox → Shortcuts. Every shortcut can be rebound to a different key or switched off individually. -
A Button Is Missing From the Overlay?
Buttons hide themselves when they do not apply to the current light type. Spot Size only exists on spot lights, Size only on area lights, Spread only on area and sun lights. The bar closes the gap so there are no empty slots. -
Light Preview Not Updating?
The preview works with Area and Spot Lights only, and it is rendered outside your scene, so it does not depend on your render engine. If the preview and your viewport disagree, two things are usually responsible: compositor effects such as glow change the light in the scene but not the preview, and EEVEE cannot display node setups on lights at all, so the preview shows the correct light while the scene does not. -
Textured Lights or Softbox Not Working in EEVEE?
EEVEE cannot display node setups on lights. Switch to Cycles to use Procedural Softbox, Textured Lights, custom node groups and the Boost controls. LightBox shows a warning while EEVEE is active. -
Light Splitter Controls Greyed Out?
Light Splitter is Cycles-only. Switch your render engine to Cycles to access the diffuse, glossy, transmission and volume scatter controls. -
A Light Linking Change Affects Two Lights at Once?
Both lights share the same light linking collection, shown by the small number next to it. Click that number to give the current light its own copy, then link it separately. -
The Nodes Tab Is Not There?
The tab only appears once the light actually uses a node setup. Add a procedural or textured light, or a preset, and the tab shows up. -
A Feature Described Here Is Missing?
Check which version you have. LightBox Lite covers the Light Preview and leaves out the extended tools, which are part of the full LightBox.
 Updates & Support
Updates & bug fixes are free.
Need help? Reach out anytime.
Email Support- Free updates
- EEVEE & Cycles
- 130+ presets
-
$30
The full feature set and 130+ light presets
-
$15
Realtime light preview only
 Included
Includes 12 months of
- Support from Jonas Noell
- Product updates
Extend this product’s Support Period +12 months: 25% of product price
Have questions before purchasing?
Login to message
| Blender Extension Compatible | Yes |
| Dev Fund Contributor | |
| Published | about 8 hours ago |
| Blender Version | 4.2 - 5.2 |
| Extension Type | Add-on |
| Render Engine Used | Cycles, Eevee |
| License | GPL |

Discover more products like this
softbox product lighting blender lighting Lighting cinematic-lighting gobo lighting light-addon Lighting presets Area Light Studio Lighting light-linking procedural-lighting