 X W Z
X W Z



📚 Documentation
Complete guide to using the Lottie Animation Exporter for Blender. Learn everything from basic setup to advanced optimization techniques.
🚀 Quick Start Guide
⚡ 5-Minute Setup
Get up and running in minutes with our streamlined installation process.
- Download and install the addon
- Configure basic export settings
- Export your first Lottie animation
🎯 First Export
Step-by-step guide to creating your first Lottie animation from Blender.
- Scene preparation checklist
- Essential export settings
- Quality optimization tips
📖 Learning Path
Structured learning approach from beginner to advanced techniques.
- Basic concepts and workflow
- Advanced optimization methods
- Professional best practices
🖥️ Interface Overview
📱 Addon Panel Layout
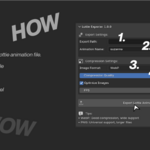
Export Settings
- Output Path: Where files are saved
- Animation Name: Base filename
- Frame Range: Start/end frames
- Resolution: Output dimensions
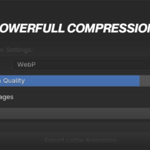
Image Options
- Format: PNG or WebP
- Quality: Compression level
- Optimization: File size reduction
- Color Depth: Bit depth settings
Animation Controls
- Frame Rate: Animation FPS
- Loop Settings: Playback options
- Duration: Total animation time
- Easing: Motion curves
Export Actions
- Preview: Test export settings
- Export: Generate Lottie file
- Batch: Multiple animations
- Validate: Check compatibility
⚙️ Settings Reference
🔧 Advanced Features
🔄 Batch Processing
Export multiple animations in a single operation.
- Queue multiple scenes for export
- Different settings per animation
- Progress tracking and logging
- Automatic file organization
- Error handling and recovery
📜 Custom Scripting
Extend functionality with Python scripts.
- Pre/post export hooks
- Custom naming conventions
- Automated scene preparation
- Integration with other tools
- Custom optimization algorithms
✨ Quality Optimization
Advanced techniques for optimal output quality.
- Intelligent frame reduction
- Color palette optimization
- Motion blur compensation
- Automatic LOD generation
- Compression artifact reduction
💼 Workflow Examples
🌐 Web Animation Workflow
Step 1: Scene Setup
- Create simple geometry
- Add basic materials
- Set up lighting
- Position camera
Step 2: Animation
- Create keyframes
- Set 2-3 second duration
- Use smooth transitions
- Test timing
Step 3: Export Settings
- WebP format
- 80% quality
- 30 FPS
- 1080p resolution
Step 4: Optimization
- Enable compression
- Review file size
- Test in browser
- Adjust if needed
📱 Mobile App Workflow
Preparation
- Design for small screens
- Use bold, simple shapes
- High contrast colors
- Clear focal points
Export Configuration
- PNG format for compatibility
- 24 FPS for smooth motion
- 720p resolution
- Enable optimization
Testing
- Test on actual devices
- Check performance impact
- Verify file size limits
- Validate across platforms
Implementation
- Integrate with app framework
- Set up proper caching
- Configure loading states
- Monitor performance
🔍 Troubleshooting
⚠️ Common Issues
Export fails silently
Check output path permissions and available disk space.
Large file sizes
Reduce resolution, FPS, or enable compression.
Animation not playing
Verify frame range settings and keyframes.
🐌 Performance Issues
Slow export times
Reduce scene complexity or use GPU acceleration.
Memory errors
Lower resolution or split long animations.
Blender crashes
Update Blender and check system requirements.
🎨 Quality Issues
Poor image quality
Increase compression quality or use PNG format.
Jerky animation
Increase frame rate or improve keyframe timing.
Color banding
Use higher bit depth or adjust lighting setup.
Need More Help?
Check out our other resources and tools:
Made with ❤️ for the Blender community
Have questions about this product?
Login to message
| Blender Extension Compatible | Yes |
| Sales | 10+ |
| Rating | 1 ratings |
| Dev Fund Contributor | |
| Published | about 1 year ago |
| Blender Version | 4.2 - 5.0 |
| Extension Type | Add-on |
| Render Engine Used | Arnold, Blender-Internal, Blender-Game-Engine, Cycles, Eevee, Freestyle, Luxrender, Mental-Ray, Octane, Vray, Yafaray |
| License | GPL |