 Schirmer Labs
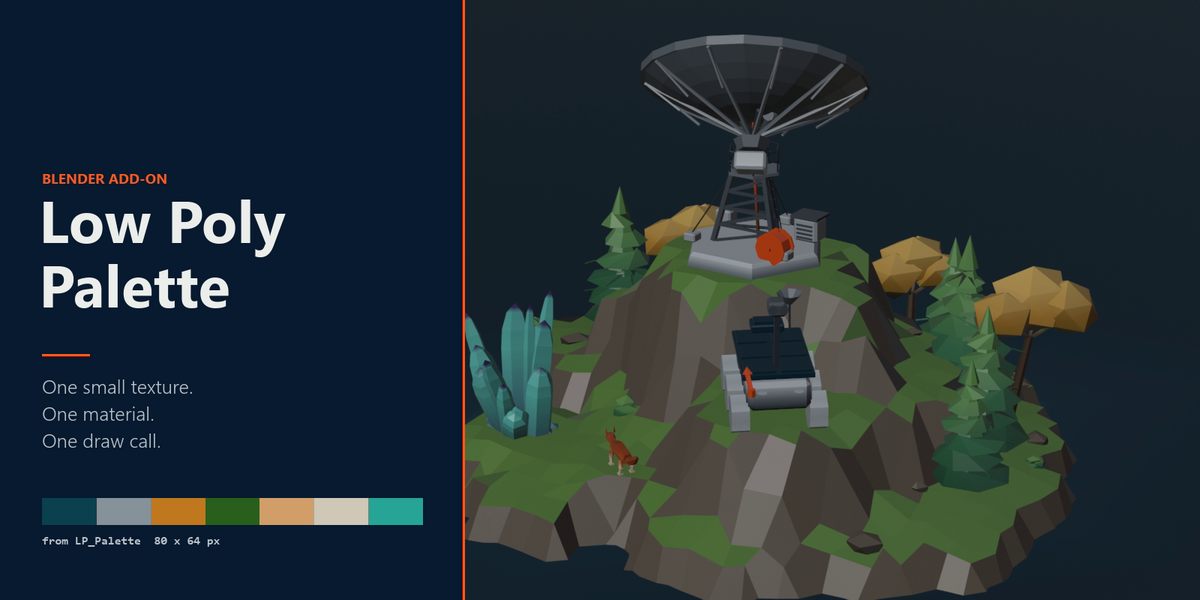
Low Poly Palette paints low poly assets by pointing their faces at a tiny shared texture. Not a material per colour — one small image of flat colour strips, and a UV per face that lands on the right one. One material, one draw call, and a whole scene that recolours without a single face being repainted.

A low poly asset does not need a material per colour. It needs one small texture of flat colour strips and a UV per face that lands on the right one. That is all Low Poly Palette does, and it does it from the N panel without asking you to open a UV editor.
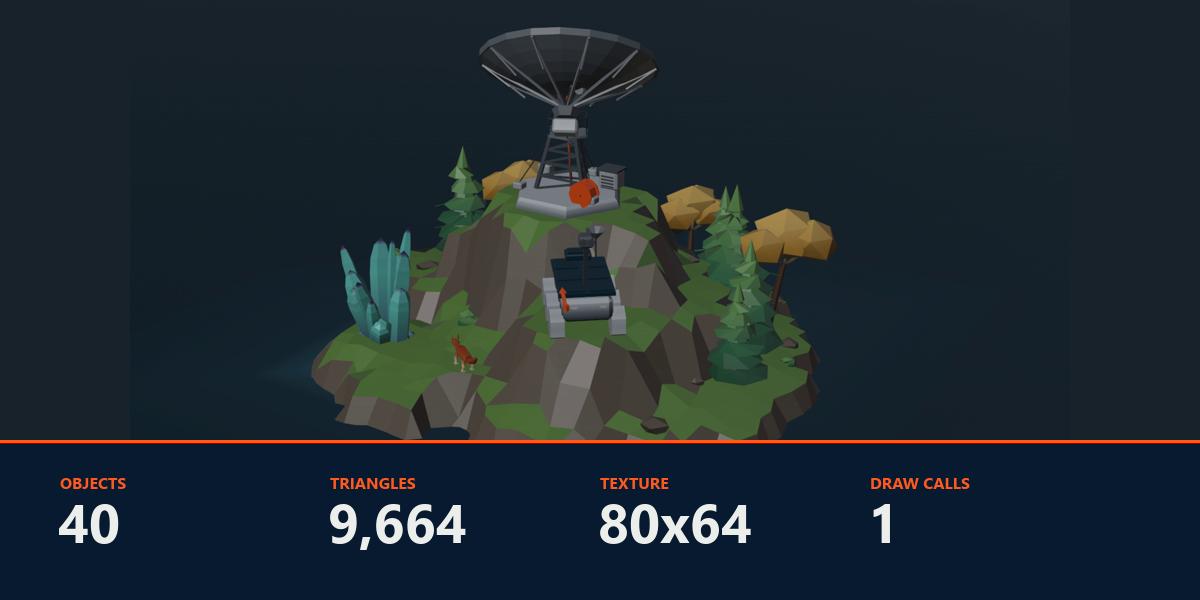
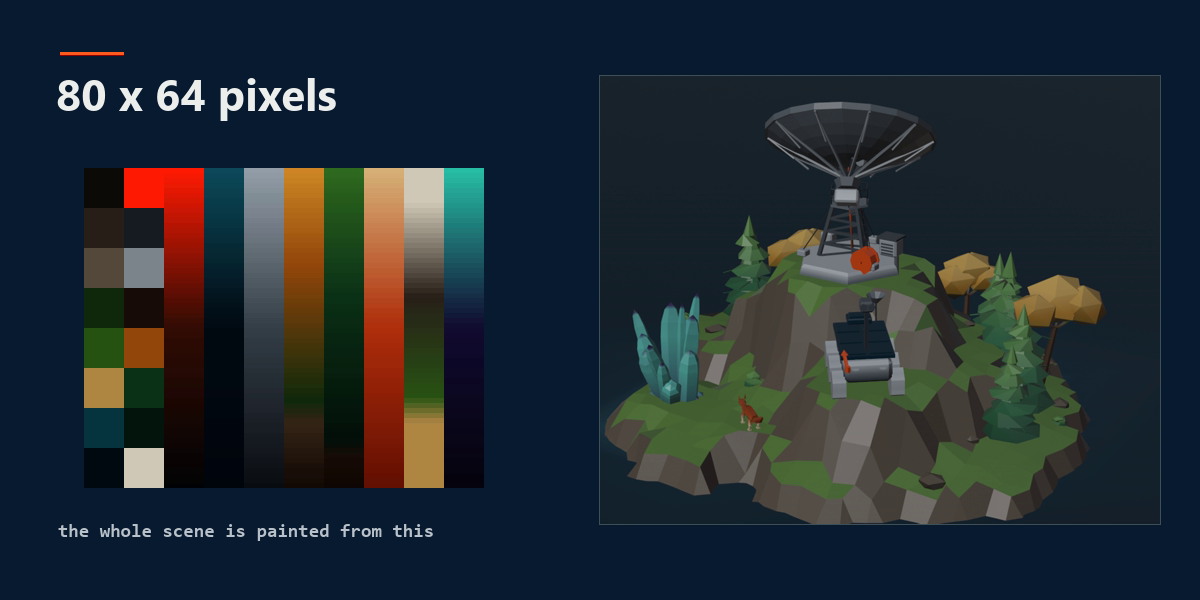
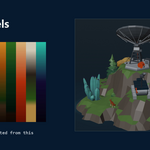
The island above is forty objects — a radio telescope, a rover, eight trees, a crystal cluster, seventeen scattered rocks and bushes, a fox, the terrain and the sea. Together they are 9,664 triangles, one material, one draw call, and one 80 × 64 pixel PNG. Those numbers are the add-on’s own Export Check reading, not an estimate.
 That is the entire texture every picture on this page is painted with.
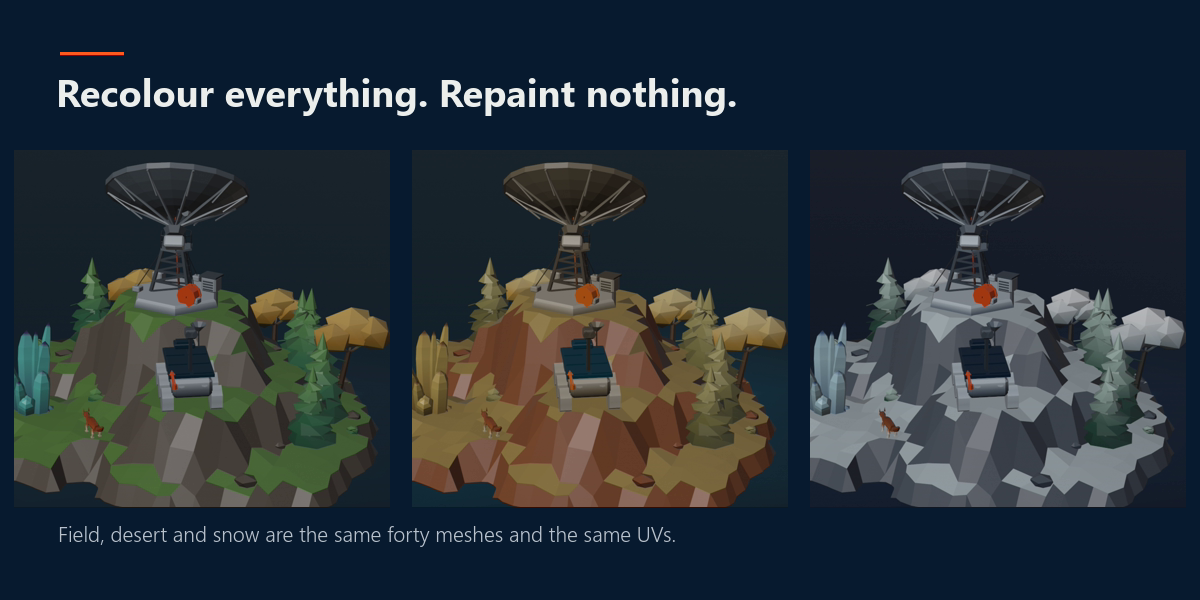
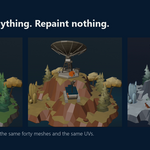
Three climates, one set of UVs

 |  |  |
| Field, desert and snow are the same forty meshes. Nothing was added, moved or repainted between them. | ||
The palette is rebuilt and every face follows, because every face already points at a cell rather than carrying a colour of its own. The slope split that puts grass on the plateaus and rock down the walls is still the same split in the desert — only what its two cells hold has changed. The vertex group that lightens the pine tips now frosts them.
This is the part that matters in production. Art direction changes, and a palette swap is a text field, not a day of rework. Save a colour set as a Variant to flip between them, or into the Library so every file on your machine can reach it.
Paint by what the shape already is
You do not pick faces. You tell the add-on what question to ask the mesh.
Paint By Slope
 One operator and one angle. Faces that point up get one colour, everything steeper gets another — grass on the top, rock down the sides. Sweeping the angle is the whole of art-directing a terrain.
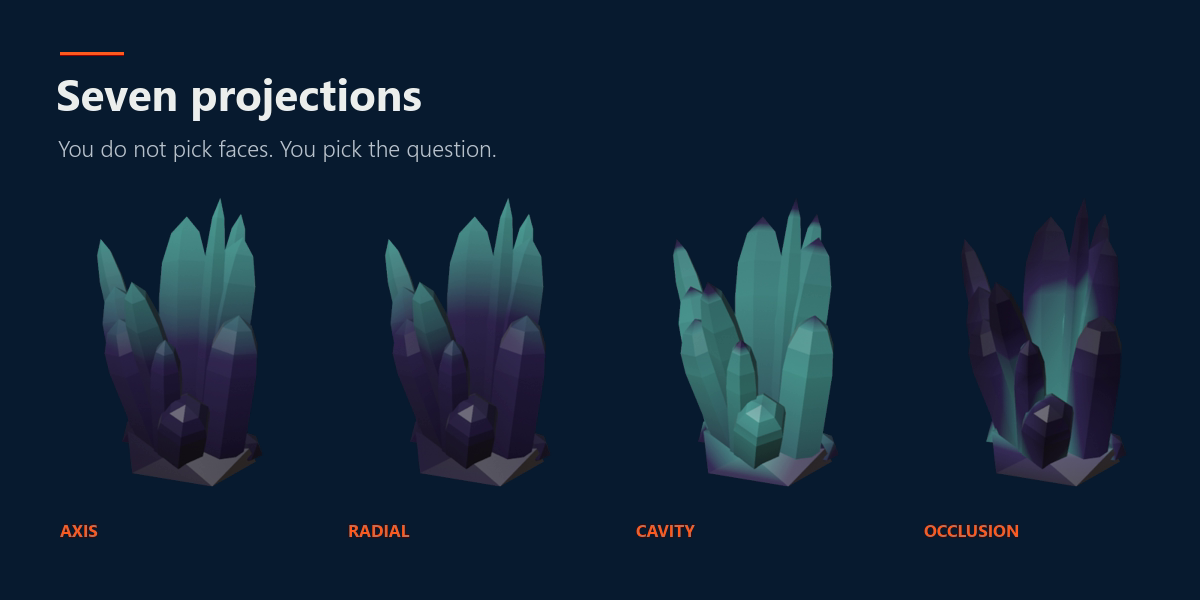
Seven projections
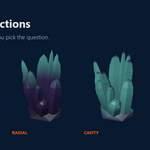
 The same crystal cluster, the same strip, four different questions.
A gradient strip mapped across the faces by View, Axis, Radial, Curve, Cavity, Occlusion or Vertex Group.
- Axis — along X, Y or Z. Snow lines, rust rising from the ground.
- Radial — distance from the 3D cursor. The shallows around the island are one Radial projection off the island’s centre.
- Curve — position along a curve. Pick one, or sketch it in the viewport with Draw Shape and it becomes the path.
- Cavity — the creases and ridges of the mesh itself. Dirt down in the crevices, wear up on the edges. The telescope’s lattice tower is this.
- Occlusion — how shut in each point is, measured by casting rays over its hemisphere. The dish is dark in the bowl and bright at the rim because the bowl is genuinely more enclosed, not because anybody selected those faces.
- Vertex Group — for when none of the automatic ones is what you meant. The fox is pale underneath because a weight says so.
- View — along the current viewport direction.
Auto Fit stretches the ramp across the selection, or turn it off and set the range by hand so separate assets match.
View, the seventh
 The island is not moving: every frame is projected from a viewpoint one step further around it and then looked at from the same fixed angle, so what sweeps across is the ramp and not the camera.
View maps along the direction you are looking, so it is the one mode that needs a viewport open.
Draw Shape
 The rough stroke above was read as a circle of 32 points, and that curve is what the projection then ran along.
Drag a rough line, circle or rectangle over the viewport. The stroke snaps to the clean shape, the shape becomes a curve you can move, rotate and scale, and that curve is what Curve projection runs along.
Steps
 Projected once; after that only the strip is rebuilt, so the terrain bands without a single UV moving.
Building the palette
Give it one colour and Add Harmony finds the rest. Hue only: the saturation and brightness you picked stay where they are. From #2F7E86:
| Complementary | #2F7E86 #86372F |
| Analogous | #2F7E86 #2F8662 #2F5286 |
| Triadic | #2F7E86 #862F7E #7E862F |
| Split complement | #2F7E86 #862F52 #86622F |
| Tetradic | #2F7E86 #622F86 #86372F #52862F |
Shades derives darker and lighter versions of every colour, and they follow the main colours automatically. A sixteen cell palette becomes 48, 80 or 112 cells at one, two or three levels. Sand at three levels:
#776A4D #978662 #B8A377 #D8C08C #DEC99D #E4D3AF #EADCC0
 Random Fill gives each connected part its own flat colour, which is how a field of rocks stops looking like one rock repeated.
In Blender

Everything lives in one sidebar tab in the 3D viewport: the palette as a grid of swatches, the gradient strips with their ramps, the projection settings, the clean-up tools and the export check.
- The strip tool — the palette panel is a grid of buttons; the strip tool is the same grid from the other side, drawn on the texture in the image editor. Click a strip to make it active, drag a gradient’s stops with the handles, and the texture rebuilds as you drag.
- The pie menu — Ctrl Shift P in the viewport, or right mouse button with the strip tool. UV Snap, Project From View, Radial Snap, Along Axis, Gradient Path, Random Fill, Draw Shape, Add Gradient.
- Variants — a row per saved colour set, and the row is the switch. One click recolours every face painted from that palette.
- Library — twelve palettes ship with the add-on, and Save To Library puts yours beside them, where every file can reach it.
 The same palette from the other side — drawn straight on the texture, with the active gradient’s stops on handles.
Clean-up that pays for itself
Dissolve Planar merges faces that already lie in the same plane. On the terraced terrain of the demo island that is most of them, and the silhouette does not move:
1156 faces, 1225 verts → 330 faces, 561 verts
Not one palette cell changed. Snap To Grid quantises vertex positions for a blockier silhouette, Weld merges vertices closer than a distance to clean up imported geometry, and Triangulate makes the viewport match the engine.
The models on this page
 |  |
| Hard surface and organic, because they fail differently. The lattice tower and the rover’s rocker bogie are what Cavity and Occlusion have something to read; the trees and the fox are where an automatic mode is wrong and a painted weight is right. | |
 |  |
| Every facet is one somebody chose. Nothing here was decimated. | |
Setting up
New Palette creates a palette and sets the texture layout it lives in. The defaults are eight strips of eight cells with two strips reserved for flat colour — sixteen flat colours and six gradient strips in a texture 64 pixels tall.
Strips are fixed on purpose. Adding colours or gradients later never moves a UV that is already painted, so you can widen the texture halfway through a project and nothing you painted last week changes.
| Setting | Default | Range | What it is |
|---|---|---|---|
| Strips | 8 | 1–64 | Total strips in the texture |
| Flat Strips | 2 | 0–64 | Strips reserved for one block of flat colours |
| Cells per Strip | 8 | 1–64 | Flat colour cells in each reserved strip |
| Strip Length | 64 | 8–2048 | Texture height, and how finely a gradient is sampled |
| Strip px | 8 | 2–64 | Pixel width of each strip |
| Shades | 0 | 0–3 | Darker and lighter versions derived from every colour |
| Filter | Smooth | Smooth / Stepped | Texture interpolation — Stepped makes gradients band |
Keep Strip px above 1 so texture filtering cannot bleed between strips.
Building a palette
- Add Color — append a colour, copying the active one.
- Remove Color — colours after it shift down one cell, so faces painted with them change colour.
- Load Hex Colors — build the palette from a list of hex, as pasted from a palette site. Any separator works.
- Copy Hex — put the whole palette on the clipboard as hex. That is the whole of moving a palette to another file.
- Add Harmony — append the colours that go with the active one: Complementary, Analogous, Triadic, Split Complementary or Tetradic.
- From Materials — build the palette out of the materials already on the selection and repaint the faces onto it. Colours that match to the same hex become one cell. This is how an existing asset comes across.
- Merge Into Active — fold another palette into this one and move every face using it across. Two palettes on one asset are two materials and two draw calls; this is how they become one.
- Shades derives darker and lighter versions of every colour. They follow the main colours automatically, so editing a colour updates its shades.
Twelve palettes ship with the add-on. Save To Library writes yours into the library on disk, where every file can reach it; Save Variant remembers a colour set inside this file, and applying one repaints nothing.
Painting
- Apply Color — snap the UVs of the selected faces onto the active flat cell. In object mode the whole mesh is assigned.
- Paint By Slope — faces that point up get one colour, the rest another.
- Random Fill — give each connected part a random flat colour.
- Select Unpainted — select the faces whose UVs are not sitting on a cell. Geometry out of an extrude, a subdivide or a boolean lands on whatever cell its UVs happened to fall on; this finds it.
- Project Gradient — map the active gradient strip across the target faces using the chosen projection.
- Hex To Gradient — rebuild the active gradient’s ramp from a hex list.
- Draw Shape — sketch a line, circle or rectangle in the viewport. The rough stroke snaps to the clean shape and becomes the projection path, ready to move, rotate and scale.
- Strip tool — pick strips straight off the texture in the image editor, drag the active gradient’s stops, right click for the strip actions. Ctrl Shift P opens the pie menu in the 3D viewport.
Clean-up
- Flat Shade — turn off smooth shading on the target faces.
- Snap To Grid — quantize vertex positions for a blocky silhouette.
- Weld — merge vertices closer than a distance; cleans up imported geometry.
- Dissolve Planar — dissolve edges between near-coplanar faces. Drops poly count without changing the silhouette or the palette.
- Triangulate — so the viewport matches the engine.
Material texture

An optional second texture on the same UVs holds roughness, metallic and emission per colour. Nothing has to be painted twice — the faces already point at the right cell. Emit Boost sets what a full Emit is worth as emission strength.
Above: the lattice tower set to metal, the crystal strip to 0.40 emission and the accent cell to 0.65. It is the only picture in this listing not rendered flat, because a flat renderer shows none of it.
Assets that came from somewhere else
Three operators for geometry that was not built this way.
 |  |
| From Materials · six materials and six draw calls down to one of each · the picture unchanged. That the two images look identical is the result. | |
- From Materials — build the palette out of the materials the selection already has and repaint the faces onto it. Colours that round to the same hex become one cell.
-
Merge Into Active — two palettes on one asset are two materials and two draw calls. This folds one into the other and walks its faces across. On the demo island Export Check goes from
2 materials = 2 draw callsto1 material = 1 draw call, and nothing is repainted: a colour already in the target palette keeps the cell it had. - Select Unpainted — geometry from an extrude, a subdivide or a boolean lands on whatever cell its UVs happen to fall in. Cutting a sphere out of the demo terrain left 109 faces on the deep water colour halfway up a hillside — a colour nobody picked and nobody would spot in a list. This selects them.
 The crater, the 109 faces the operator found, and the result. The orange is Blender’s own edit-mode selection, not a palette colour.
Getting it out
-
Save Texture — write the texture next to the
.blendand pack it. Generated images live in memory only, so an FBX or OBJ export otherwise points at a file that was never written. Run this before exporting. - Bake To Vertex Colors — read the texture at every painted UV and write it into a colour attribute, for engines that would rather have vertex colours. On the demo island the image can then be deleted and all forty material slots cleared, and the colours are still there. Gradients come across one sample per corner, which is the only place the two drift apart.
- Export Check — count what an export of the selection actually holds: triangles, how many materials it costs in draw calls, faces sitting on no cell, and whether the texture exists as a file yet. Reads only.
The demo scene on this page reports:
40 objects 5656 verts 9664 tris1 material = 1 draw callLP_Palette is on disk
Specifications
| Version | 0.21.1 |
| Blender Support | 4.2 LTS and newer, through 5.x. One universal package. |
| Installation | Installs as an extension — drag the .zip into Blender, or Edit ▸ Preferences ▸ Add-ons ▸ Install from Disk. |
| Interface | N panel in the 3D viewport, a tool in the image editor, and a pie menu on Ctrl Shift P. |
| Projections | View, Axis, Radial, Curve, Cavity, Occlusion, Vertex Group. |
| Output | One PNG palette texture plus an optional material texture, or baked colour attributes for engines that prefer vertex colours. |
| Included | Twelve palettes in the library, plus a Variant and Library system for your own. |
| Dependencies | None. No internet, nothing to compile. |
| Licence | GPL-3.0-or-later. |
Every picture on this page was made with the add-on’s own operators on un-retouched geometry, and the numbers quoted — triangle counts, draw calls, face counts, poly reductions — are its own Export Check and operator output, not estimates. Rendered flat in Blender, with the one exception noted under Material texture.
AI disclosure. This add-on was developed with the help of AI coding assistants. The design, the approach and every released change were decided, reviewed and tested by me before shipping, against an automated test suite that runs on every release.
