Matcolex Pro - Your Digital Toolbox For Materials
 Semangat Pagi Studio


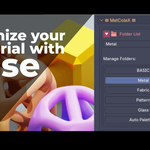
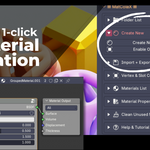
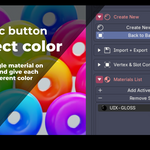
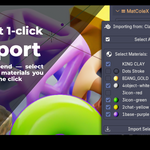
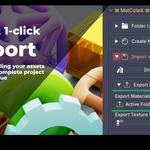
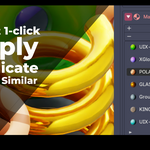
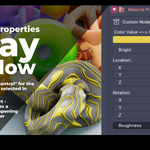


Welcome! This guide will show you how to use the MatColeX-Pro addon. We'll keep things simple, using everyday examples to help you become a master of material management.
What is MatColeX-Pro?
Think of MatColeX-Pro as a digital toolbox for your Blender materials.
In a normal Blender project, your materials can get messy. They might be scattered across different objects or lost in old files. MatColeX-Pro gives you one clean panel to collect, organize, and re-use any material you want, whenever you want.
How Does This Help Me? (Especially for Beginners)
Blender can be tough, especially when managing materials. Here are the common problems MatColeX-Pro solves:
case 1: "I made the perfect material, but how do I use it in a new project?"
Solution: MatColeX lets you save that material into a "Folder." You can then export that folder (or all your folders) into a single .blend or .zip file. You can then import it into any new project in seconds.
case 2: "My project is a mess! I have 50 materials, but I'm only using 10."
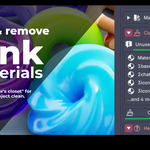
Solution: The "Utilities" panel finds all the "orphan" (unused) materials. One click on the "Purge" button, and all that junk is gone, making your file smaller and cleaner.
case 3: "I have 20 objects, and I need to apply the 'Red Metal' material to all of them."
Solution: Don't do it one by one! With MatColeX, you can find your "Red Metal" in the list and click the "Select by Material" button. It will instantly select every object in your scene using that material. Or, you can select all 20 objects and click the "Apply" button once.
case 4: "I need to make 50 different colored versions of one material."
Solution: Use the "Toggle Object Color" tool. This magic button links the material's color to the object's color. You can then use one single material on 50 objects and give each object a different color. It's incredibly efficient.
Where Can I Get It?
You can get the MatColeX-Pro addon from the following link:
[Your Gumroad/Blender Market Link Here]
The User Interface: Your File Cabinet
You can find the MatColeX-Pro panel in two places:
1. Main Panel: In the 3D Viewport, press the 'N' key to open the sidebar. Click the "☰ MatColeX ☰" tab.
2. Quick Menu: Right-click in the 3D Viewport. You will see a "☰ MatColeX Quick Tools ☰" menu for fast operations.
The main panel is organized into collapsible sections, just like the drawers in a file cabinet. Click the triangle (►) next to any name to open or close it.
Let's walk through each section from top to bottom.
1. Folder List
Analogy: This is where you create and label the "drawers" of your file cabinet.
Purpose: To create categories for your materials (e.g., "Wood," "Metal," "Fabrics," "Sci-Fi").
How to Use:
+ (Add) Button: Creates a new, empty folder.
- (Remove) Button: Deletes the currently selected folder.
Folder Name: Click on a folder's name in the list to open it. You can rename it by editing the text box at the top.
▲ / ▼ (Arrows): Moves the selected folder up or down in the list.
2. Materials
Analogy: This is what's inside the drawer you just opened. It's the list of all materials you've saved in this folder.
Purpose: To add, remove, and apply your saved materials.
How to Use:
Add Active Material: This is the most important button.
1. Select an object in your scene that has the material you want to save.
2. Click this button.
3. A copy of that material is now saved in your MatColeX folder!
Remove Selected: Removes the material you've highlighted in the list below.
The Material List: This shows all materials in the folder. Each item has three small buttons:
✓ (Apply): Applies this material to your currently selected object(s). (See "Material Slot Control" below for more power).
`` (Duplicate): Instantly creates a copy of this material and adds it to the list.
`` (Select by Material): Finds and selects every object in your entire scene that is currently using this material.
3. Material Slot Control
Analogy: Think of your object as a doll. The "slots" are the different parts you can paint: "Hair," "Shirt," "Pants." This panel shows you all the "paint slots" on the object you have selected.
Purpose: To choose exactly where a material should be applied.
How to Use:
Select an object. This panel will fill up with that object's material slots.
You will see a list like "Slot 0: Body," "Slot 1: Windows."
Click on a slot in this list to make it the active one.
Now, when you go back to the "Materials" list and click the ✓ (Apply) button, the material will be applied only to that specific slot you selected.
4. Material Tools
Analogy: This is your workbench, filled with powerful tools for creating and sharing materials.
This section is split into two sub-panels:
Create & Import
Create New Material: A huge time-saver. This creates a new material, adds a Principled BSDF, and automatically groups it (like pressing Ctrl+G). This makes it instantly ready for you to create custom inputs and sliders.
Toggle Object Color: A "magic" button. It connects your material's "Base Color" to the object's "Object Color" property. (You can find this in the orange "Object Properties" tab). This is the tool you use to make an army of different-colored robots all sharing one material.
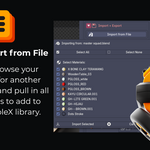
Import from File: Lets you browse your computer for another .blend file and pull in all its materials to add to your MatColeX library.
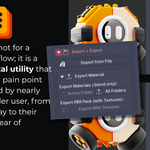
Export Material
Export Active Folder / All Folders: Saves your collections as a new .blend file. This is the perfect way to back up your materials or move them to a new computer.
Export All as .zip Pack: This is a "pro" feature. It doesn't just save the materials; it also finds every single texture image (.jpg, .png, etc.) used by those materials, copies them into a "textures" folder, and packs everything into a single, clean .zip file. This is perfect for selling your assets or sharing a complete project with a colleague.
5. Material Properties
Analogy: This is a "remote control" for the material you have selected in your list.
Purpose: To make quick edits to a material without opening the complex Shader Editor.
How to Use:
Select a material from your "Materials" list.
This panel will automatically show you its most important settings.
If it's a simple Principled BSDF, you'll see sliders for "Metallic," "Roughness," etc.
If it's a Custom Node Group (like the one you made with "Create New Material"), you will see all of your custom inputs (e.g., "Dirt Amount," "Glow Strength") right here!
If "Object Color" is active, this panel will even show the Object's color, so you can change it instantly.
6. Utilities
Analogy: This is the "janitor's closet" for keeping your project clean.
Purpose: To find and remove "junk" materials.
How to Use:
The panel shows a list of "Unused Materials" (materials that exist in your file but are not being used by any object).
Purge Unused Materials: Click this button to safely delete all of them at once. It's a great way to clean up your file before saving.
7. Help & Tutorial
Purpose: To give you quick access to video tutorials and documentation (like this guide!).
-
$19
Single-user license. Unlimited use on commercial and personal projects.
-
$25
Single-user license ✚ Fast Color Grading✚Vertex Group & Slot Control✚ 10 Custom Node READY Materials ✚ Unlimited use on commercial and personal projects.
Have questions about this product?
Login to message
| Blender Extension Compatible | Yes |
| Dev Fund Contributor | |
| Published | 11 months ago |
| Blender Version | 4.3 - 5.0 |
| Extension Type | Add-on |
| Render Engine Used | Cycles, Eevee |
| License | GPL |
Discover more products like this
purge-orphan import Shader Material Export interface manage 3dviewport addon