Mr. Midiman: Music Animation Tool
 Mr. Miniman


For Blender versions 4.0-4.5 install version 1.1.4. For Blender versions 5.0+ install version 1.3.0.
Video Tutorial:
https://youtu.be/wS4g6AVoLbw?si=wIc4jGJOqSkzVHze
Quick Start Guide
Your First MIDI Animation
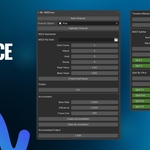
1. Open the Mr. MIDIman panel by pressing N in the 3D Viewport and clicking the "Mr. MIDIman" tab
2. Create your first channel by clicking the "New Channel" button
3. Load a MIDI file using the file browser in the MIDI path field
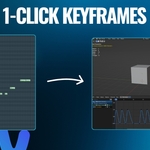
4. Keyframes will automatically be generated when the MIDI file is loaded and update in real-time when parameters are changed. If auto-update doesn't work, click "Create Keyframes" as a manual trigger
5. Press Space to play and see your Empty object's (MIDI Channel 1) Z-location animated to the MIDI notes
Your Empty object now moves up and down following the MIDI note events with an ADSR envelope shape.
Basic Workflow
Standard workflow for any MIDI animation:
1. Channel Setup: Create or select a channel object from the dropdown menu
2. MIDI Import: Browse and select your MIDI file
3. Parameter Tuning: Adjust Attack, Hold, Decay, Peak Value, and Base Value
4. Timeline Positioning: Set Start Frame for when animation should begin
5. Generate Animation: If keyframes are not auto-updated, click "Create Keyframes"
6. Driver Integration: Right-click the "Output" value in the UI → "Copy as New Driver" → Paste to target properties. Alternatively, copy all keyframes and paste them on the desired property
7. Refinement: Adjust parameters and regenerate as needed
Key Principle: Each channel is independent - you can have multiple channels with different MIDI files and settings running simultaneously. Keyframes are created on the Z-location of the selected "Channel". If Custom Curves are used, keyframes are created on the Y-location of the selected "Channel". To attach keyframes to your desired property, either copy and paste as driver, or copy and paste keyframes.
Channel Management
Creating Channels
● Click "New Channel" to create a new Empty object in the "MIDIman Channels" collection
● Each channel is automatically named "MIDI Channel 1", "MIDI Channel 2", etc.
● The newly created channel becomes automatically selected
● The addon only finds Channels within the "MIDIman Channels" collection. Do not remove the empty objects from the "MIDIman Channels" collection. In addition, the MIDIman Channels collection cannot be nested within another collection.
Switching Between Channels
● Use the dropdown menu to select different channel objects
● Only objects in the "MIDIman Channels" collection appear in the dropdown
● "Highlight Channel" button selects the current channel in the Outliner so that keyframes can be seen in the Graph Editor
Channel Settings Persistence
● Settings are automatically saved to each channel object as custom properties
● When you switch channels, your previous settings are preserved
● Settings persist across Blender sessions - save your .blend file to keep everything
Renaming Channels
● You can rename channels by renaming the empty objects in the "MIDIman Channels" collection in the Outliner.
MIDI Keyframer
Loading MIDI Files
● Click the folder icon in the MIDI File Path field
● Navigate to and select any standard MIDI file
ADSR Envelope Controls
Attack (frames): Time to reach peak value from base value
● Example: Attack=5 means 5 frames to reach full intensity
Hold (frames): Time to sustain at peak value (0 = no hold phase)
● Example: Hold=10 maintains peak value for 10 frames
Decay (frames): Time to return from peak to base value
● Example: Decay=15 fades from peak to base over 15 frames
Peak Value: Maximum value reached during note events
● Example: 1.0 for standard normalized range, 5.0 for larger movements
Base Value: Resting value between notes
● Example: 0.0 for starting from zero, 0.2 for subtle baseline
Start Frame Offset
● Controls when MIDI events begin in your timeline
● Start Frame=1 (default): MIDI note at time 0.0 seconds creates keyframes starting at frame 1
● Start Frame=50: Same MIDI note now starts at frame 50
● Affects all MIDI systems: main keyframes, splitters, pitch splits, markers, and accumulator
Understanding the Output
● Z-Location Animation: Main output appears as Z-location keyframes on your channel object
● Custom Properties: Additional outputs (splits, accumulation) appear as custom properties
● Driver Ready: Right-click any animated property → "Copy as New Driver" to connect to other objects
Custom Curve
What is Custom Curve Mode?
Custom Curve mode replaces ADSR envelopes with any animation shape you draw. Instead of generating attack-hold-decay patterns, the system pastes your hand-drawn curve at every MIDI note-on event.
Setting Up a Custom Curve
1. Enable "Use Custom Curve" toggle in the Custom Curve section
2. Manually keyframe the "Custom Curve" property starting at frame 1
○ Draw any animation shape you want in the Graph Editor: bounces, ease-ins, exponential decay, etc.
3. Set "Offset" to shift pasted instances forward/backward in time (0 = no offset)
4. Click "Create Custom Curves" to paste your template at each MIDI note
Understanding Custom Curve Output
● Y-Location Animation: Custom curve output appears as Y-location keyframes (separate from Z-location)
● Template Preservation: Your original "Custom Curve" keyframes remain untouched for reuse
● Global Mode Switch: When Use Custom Curve is ON, MIDI Splitter, Split by Pitch, and Accumulator systems automatically switch to using your custom curve instead of ADSR shapes
Managing Custom Curves
● "Clear Custom Curves" removes Y-location keyframes only
● Template curve on "Custom Curve" property is preserved
● Switch "Use Custom Curve" OFF to return to ADSR mode anytime. MIDI Splitter, Split by Pitch, and Accumulator systems will need to be manually regenerated to reflect this change.
Accumulator System
What is the Accumulator?
The accumulator integrates values over time. It continuously adds up values frame by frame based on the output of the MIDI Keyframer section. This is useful for cumulative effects that grow consistently over time.
Setting Up Accumulation
1. Base Rate: Constant amount added per frame (can be 0.0)
2. Influence: Multiplier for how much channel output affects accumulation
○ When Use Custom Curve is OFF: reads Z-location (ADSR envelope)
○ When Use Custom Curve is ON: reads Y-location (custom curve output)
3. Frame End: Last frame to calculate accumulation (1-9999 range)
4. Click "Create Accumulation" to generate keyframed values
Using Accumulated Output as Drivers
● Right-click "Accumulated Output" custom property
● Select "Copy as New Driver"
● Paste to target properties (or copy and paste keyframes to desired properties)
"Clear Accumulation" removes keyframes for the selected MIDI Channel.
**Note**: The accumulator may not work as expected if the Base Value of the MIDI Keyframer section is not zero.
Timeline Markers
Creating MIDI Markers
1. Select your channel in the dropdown
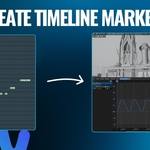
2. Click "Create Markers" in the Timeline Markers section
3. Markers appear at exact MIDI note-on timing with Start Frame offset
4. Naming: Markers are named sequentially (e.g., "MIDI Channel 1_1", "MIDI Channel 1_2")
Navigation and Reference
● Visual reference for MIDI events in the timeline
● Scrub to markers by clicking them in the timeline
● Create animations around specific musical events
Managing Markers
● "Delete Markers" removes only the current channel's markers
● Other channels' markers remain untouched
● Auto-replacement: Creating new markers automatically clears old ones for the same channel
● Channel isolation: Each channel maintains its own set of markers
MIDI Splitter
Sequential Split Distribution
How it works: Notes are distributed in round-robin fashion across numbered channels.
● Note 1 → Split 1
● Note 2 → Split 2
● Note 3 → Split 3
● Note 4 → Split 1 (cycles back)
Setup:
1. Set "Number of Splits" (2-16)
2. Ensure "Randomize Splits" is OFF
3. Click "Create Split Channels"
Best for: Predictable patterns, drum kits, sequential lighting
Random Split Distribution
How it works: Notes are randomly assigned to splits while avoiding consecutive duplicates.
Setup:
1. Set "Number of Splits" (2-16)
2. Enable "Randomize Splits"
3. Set "Random Seed"
4. Click "Create Split Channels"
Working with Split Outputs
● Split properties appear as "Split 1", "Split 2", etc. in the UI
● When Use Custom Curve is OFF: splits use ADSR settings from MIDI Keyframer section
● When Use Custom Curve is ON: splits paste your custom curve template at each note timing
● Changing ADSR settings or custom curve requires clicking "Create Split Channels" again
● Copy splits as drivers to animate different objects/materials. Or copy and paste keyframes
● "Clear Split Channels" removes all splits without affecting other systems
Split by Pitch
Pitch-Based Channel Separation
How it works: Each unique MIDI note gets its own channel based on musical pitch (maximum supported pitches: 16).
● All C4 notes → Split C4
● All F#5 notes → Split Fs5
● All A2 notes → Split A2
Output Mode:
● When Use Custom Curve is OFF: pitch splits use ADSR settings from MIDI Keyframer section
● When Use Custom Curve is ON: pitch splits paste your custom curve template at each note timing
● Changing ADSR settings or custom curve requires clicking "Create Split Channels" again
Setup:
1. Click "Create Split Channels" in the Split by Pitch section
2. System automatically analyzes your MIDI file for unique pitches
3. Creates channels for first 16 unique notes found (chronologically)
Understanding Pitch Naming
Naming Convention:
● Note Names: C, D, E, F, G, A, B
● Sharps: Cs, Ds, Fs, Gs, As (never flats)
● Octaves: MIDI note 60 = C4 (middle C)
● Examples: C4, Fs3, As5, C-1 (extreme low notes)
Note Range: MIDI 0-127 supported with proper octave notation.
Musical Applications
Perfect for:
● Organization: if creating your own custom MIDI files, instead of creating a unique MIDI file for each instrument, you can place different instruments on different pitches
● Chord visualization: Each note in a chord lights up different objects
● Instrument separation: Piano bass notes vs treble notes
Example: Piano piece with C-E-G chord creates three separate channels (Split C4, Split E4, Split G4) that can drive different colored lights.
Paste Selected Keyframes to Markers
A general-purpose utility for pasting keyframe shapes at multiple timeline markers. Completely independent of MIDIman channels; works on any object and any animated property in your scene.
How to Use
1. Open the Graph Editor and press N to show the sidebar
2. Click the "Mr. MIDIman" tab (separate from 3D Viewport panel)
3. In the Graph Editor left menu (where all animation channels are shown), click on the channel you want to work with (e.g. X-rotation).
4. Select the keyframes you want to use as a template.
5. Select the markers where you want to paste the keyframes
6. Re-select the animation channel in the Graph Editor left menu. You must select this last for it to work, otherwise the add-on won't know what animation channel you are in.
7. Click "Paste Keys to Selected Markers" button
How It Works
● First selected keyframe anchors to each marker's frame position
● Handles and interpolation are copied exactly from your selection
● Blender overwrites: if keyframes already exist at target frames, they're replaced
Example: Animate an emission shader flare once, then paste that exact animation at every marker where a drum hit occurs.
Have questions about this product?
Login to message
| Sales | 30+ |
| Dev Fund Contributor | |
| Published | about 1 year ago |
| Blender Version | 4.0 - 5.0 |
| Extension Type | N/A |
| Render Engine Used | Cycles |
| License | GPL |

Discover more products like this
vj InstantKeyframeDistribution Music tempo audio animation bpm-sync audio Visualization audiovisual midi